はじめに
AWSアカウントをまだ持っておられない方や開発環境が手元にない方でも、
簡単にWebアプリケーションの公開、CI/CDのパイプラインの構築、テスト自動化まで
体験できるワークショップです。
AWSアカウントの取得がまだの方は公式の[AWSアカウント作成の流れ]
(https://aws.amazon.com/jp/register-flow/)を参照して
アカウントを取得しておいてください。
初めての方でも上記ガイドが丁寧なため安心して進められます。
開発環境の構築
クラウドベースの統合開発環境(IDE)であるAWS Cloud9を使用します。
Cloud9上でのAWS amplify, AWS appsyncを利用する開発環境を構築していきます。
Cloud9のセットアップ
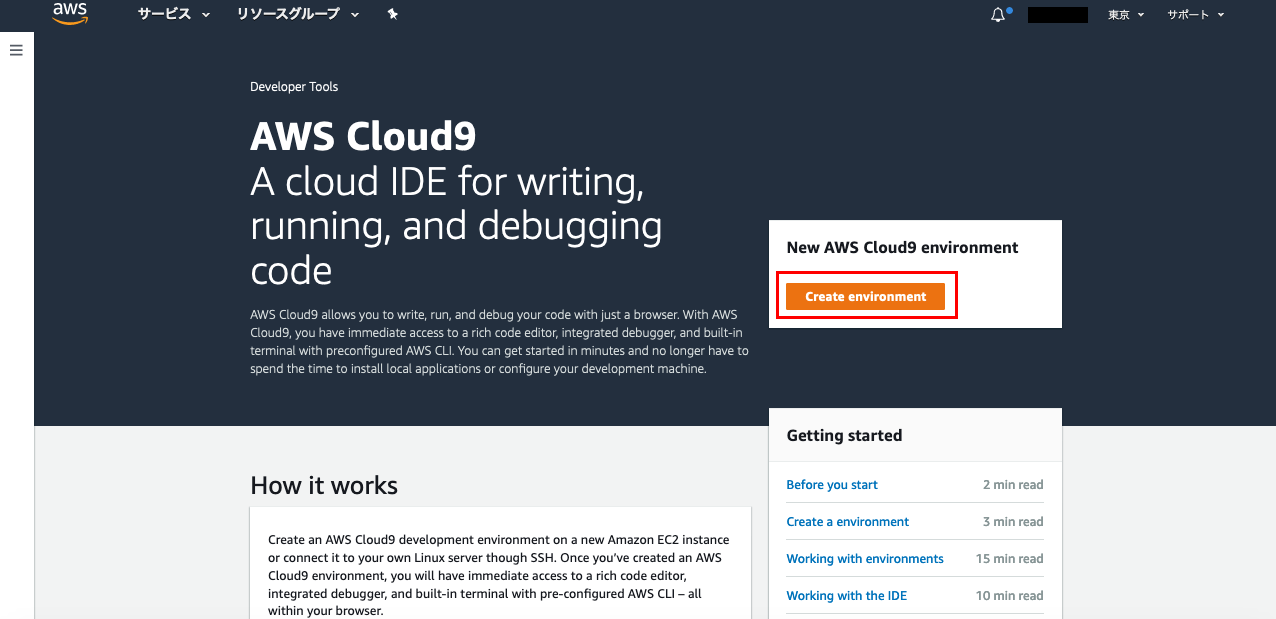
- AWS マネジメントコンソールにログインして、サービスからAWS Cloud9を選択する
- リージョンは東京

- 「Create environment」ボタンをクリックする
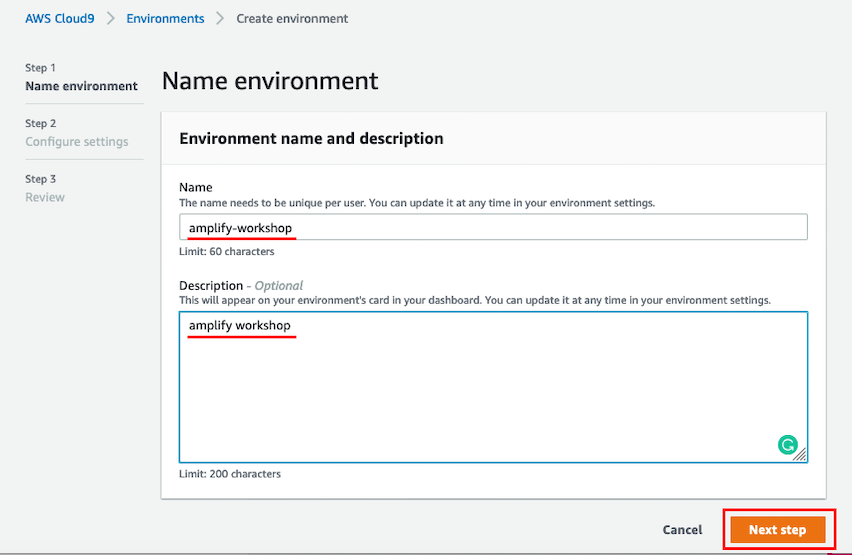
- Name environmentの項目を入力して(以下は入力例)、「Next Step」ボタンをクリックする
- Name : amplify-workshop
- Description : amplify workshop
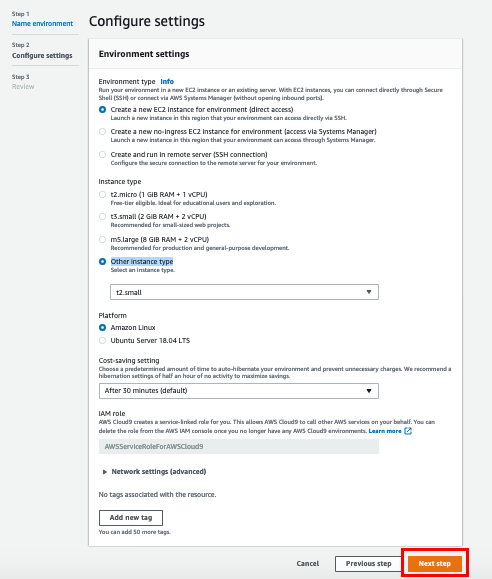
- Configure settingsの項目を入力して(以下は入力例)、「Next Step」ボタンをクリックする
- Environment type : Create a new EC2 instance for environment (direct access)
- Instance type : t2.small
- Platform : Amazon Linux
- Cost-saving setting : after 30 minutes (default)
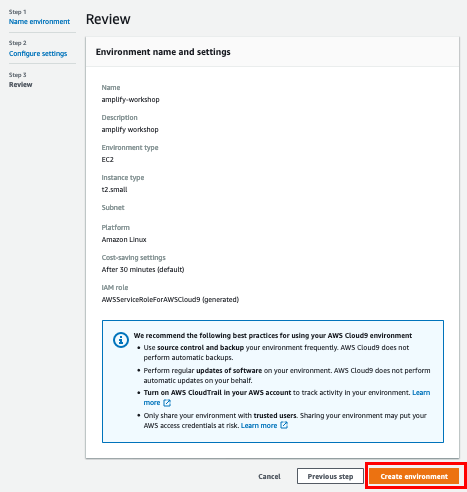
- 設定内容を確認して「Create Environment」をクリックする
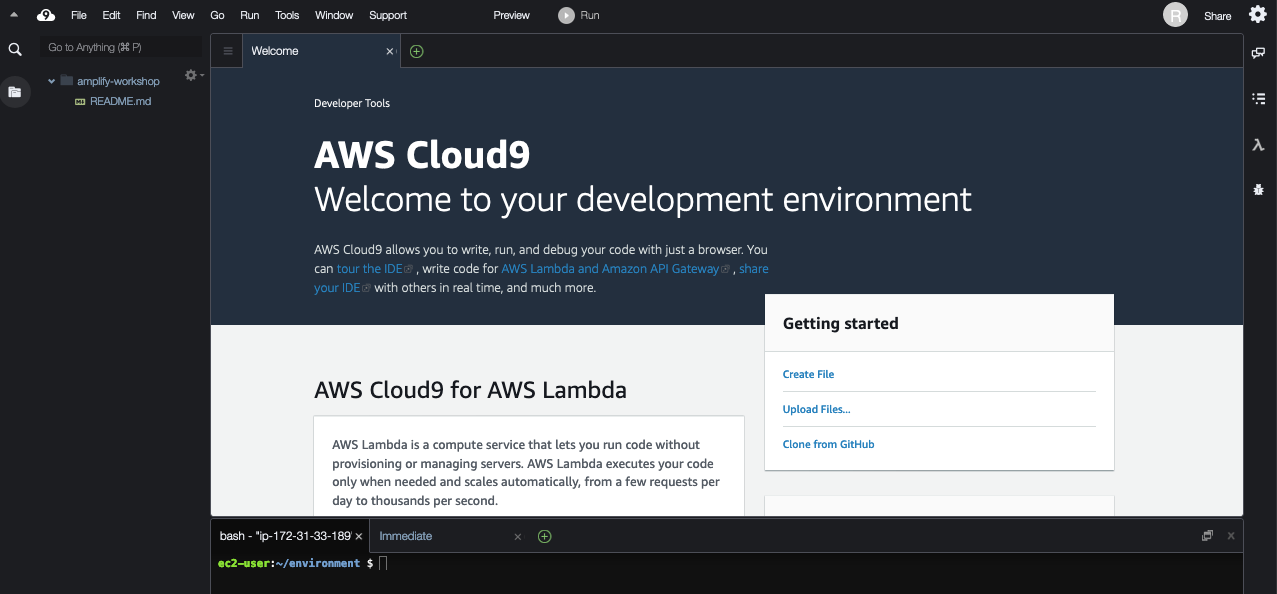
- しばらくして、次のような画面が出たら成功
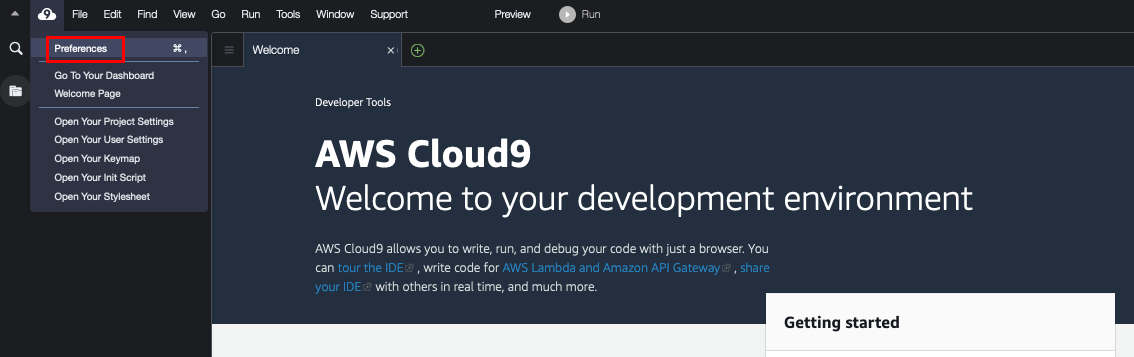
AWS 管理の一時認証情報 の無効化
Cloud9では、初回にコンソールを開くとAWS管理の一時認証情報が作成されます。
今回はAmplify CLIで発行するユーザの権限を使用するためCloud9の一時認証情報を無効化しておきます。
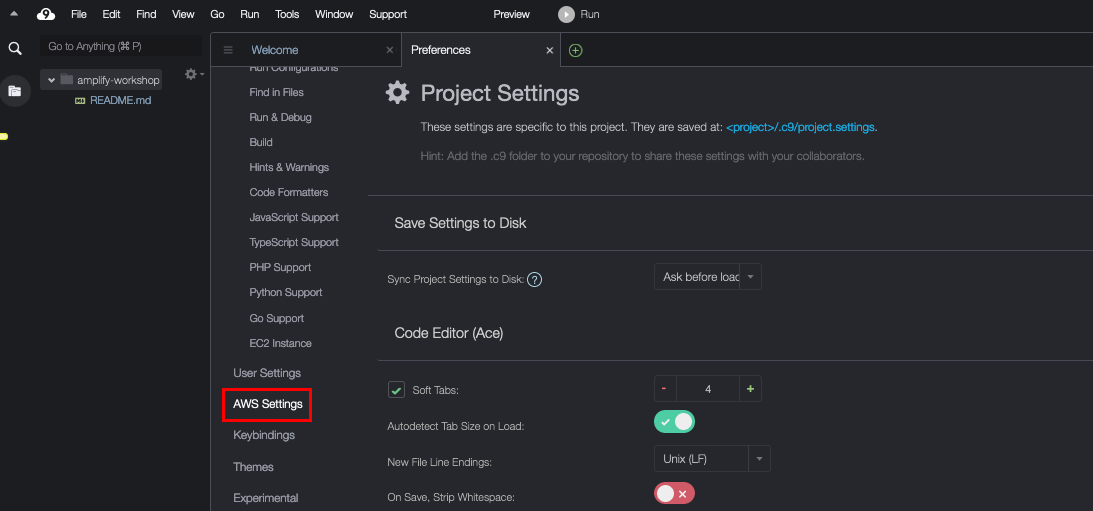
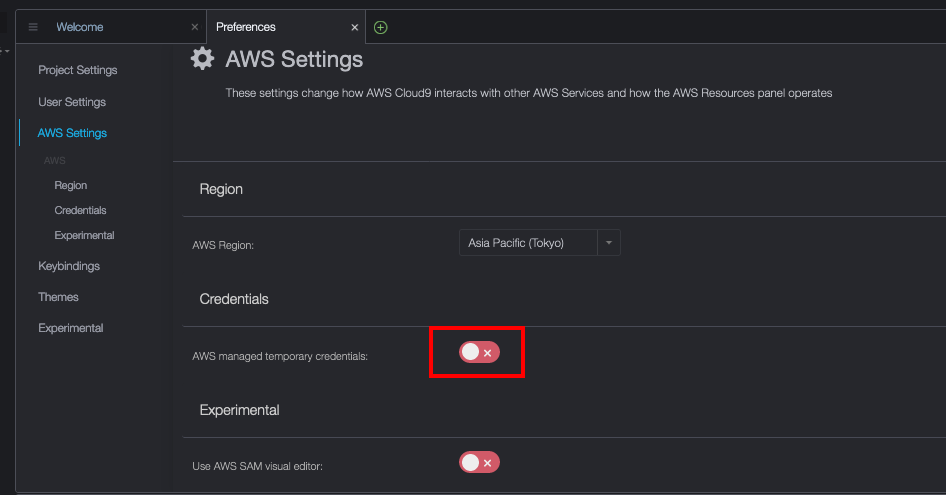
- AWS Cloud9 > Preferences > AWS SETTINGS > 「AWS managed temporary credentials:」 のトグルボタンをOffにする
開発に必要なパッケージのインストール
create-react-appのインストール
- create-react-appコマンドとは
- React.js のひな形を簡単に作れるありがたいコマンド
- React.js で本格的なアプリを作る際に必要な設定変更などのステップがこのコマンドを使用することでカットできます
- インストール
$ npm install -g create-react-app
- 確認
$ create-react-app --version
Amplify-CLIのインストール
- Amplify-CLI
- Amplify-CLIをインストールするには、Node.jsのバージョンが8.11.0以上である必要があります
- インストール
$ npm install -g @aws-amplify/cli
- 確認
$ amplify --version
開発環境
ここまでで構築した開発環境は以下のとおりです。
ec2-user:~/environment $ node -v
v10.22.0
ec2-user:~/environment $ npm -v
6.14.6
ec2-user:~/environment $ create-react-app --version
3.4.1
ec2-user:~/environment $ amplify --version
4.27.3
AWSアカウントの紐付け
ec2-user:~/environment/amplify-sns-workshop/boyaki (master) $ amplify configure
Follow these steps to set up access to your AWS account:

Sign in to your AWS administrator account:
https://console.aws.amazon.com/
Press Enter to continue

Specify the AWS Region
? region:  ap-northeast-1
Specify the username of the new IAM user:
? user name:  amplify-workshop
Complete the user creation using the AWS console
https://console.aws.amazon.com/iam/home?region=undefined#/users$new?step=final&accessKey&userNames=amplify-workshop&permissionType=policies&policies=arn:aws:iam::aws:policy%2FAdministratorAccess
Press Enter to continue

Enter the access key of the newly created user:
? accessKeyId:  *********************
? secretAccessKey:  ****************************************
This would update/create the AWS Profile in your local machine
? Profile Name:  amplify-test

Successfully set up the new user.
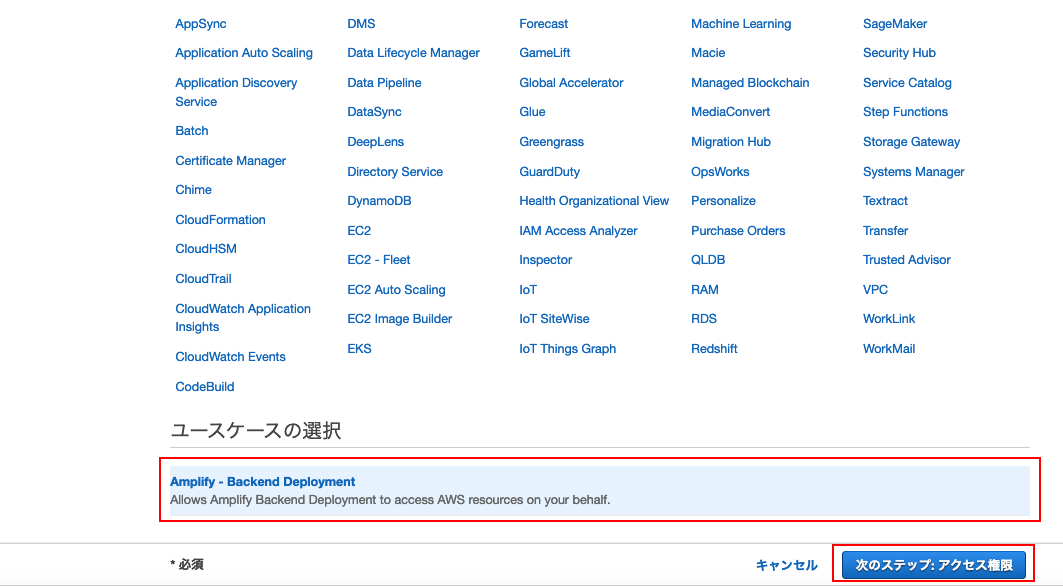
Amplify用のIAMユーザ作成
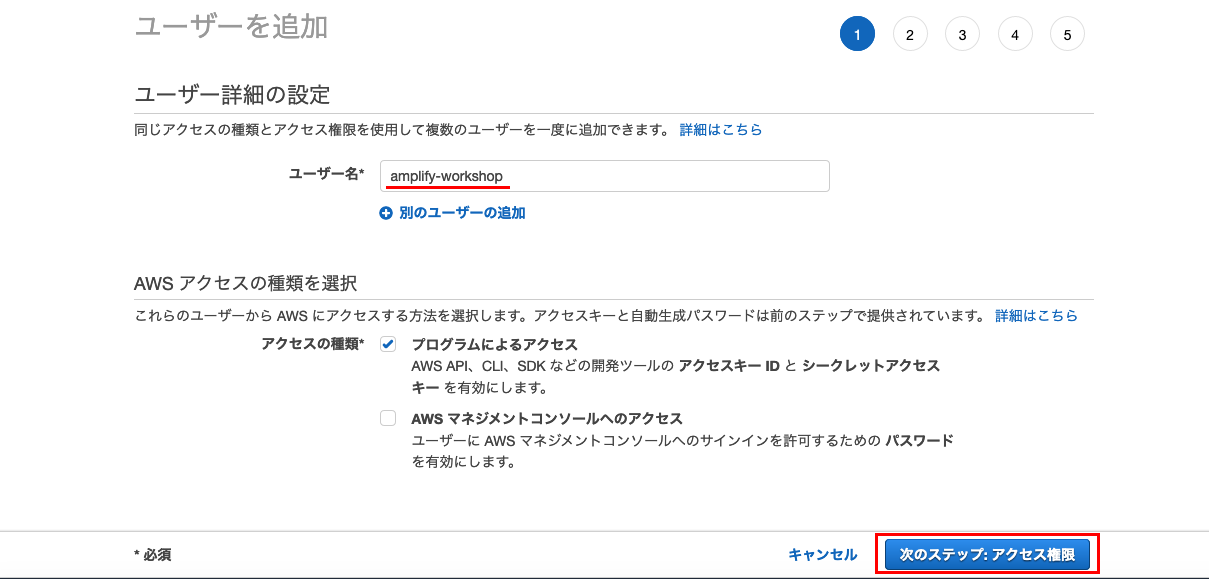
$ amplify configure を実行した際に、「Complete the user creation using the AWS console」の下に表示されるURLにブラウザでアクセスすると、IAMユーザの追加画面に遷移します。
以下のように、進めていきます。
- ユーザー詳細の設定
- ユーザー名 : ターミナルで指定したuser nameが入力されている
- ユーザー名が入力されていることを確認して「次のステップ」を選択する
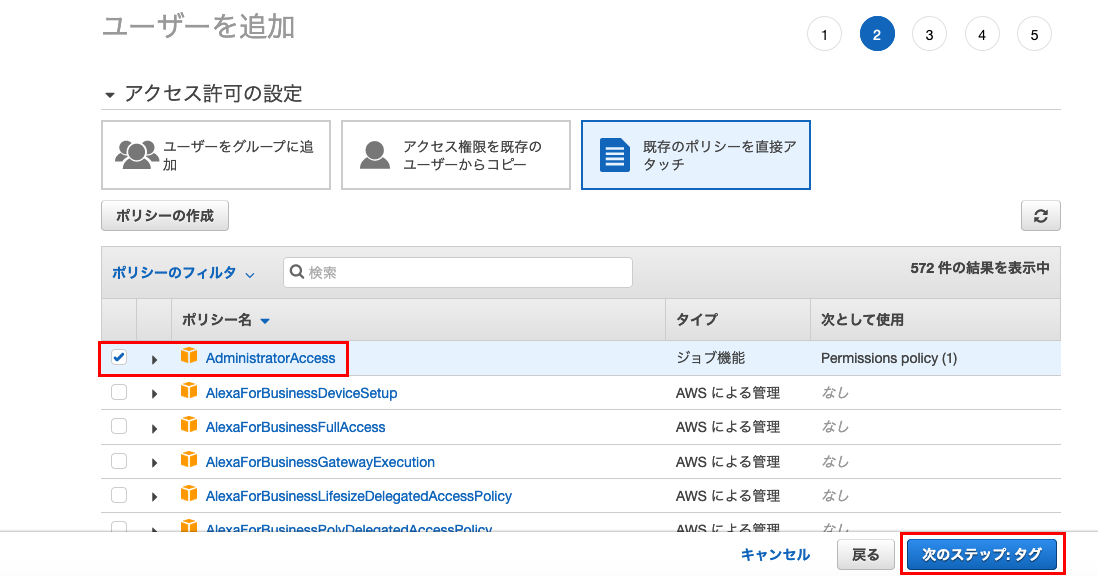
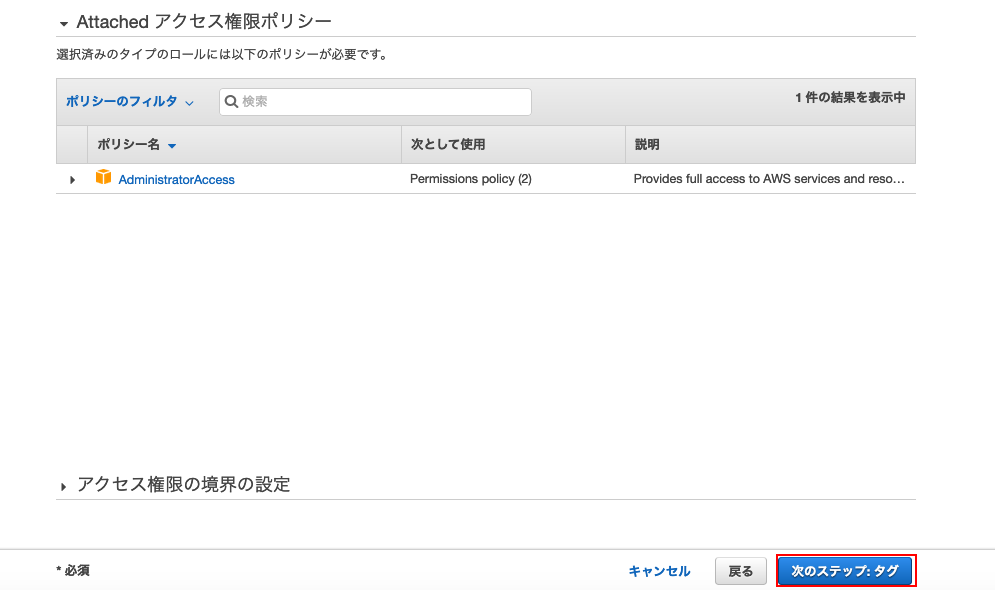
- アクセス許可の設定
- 既存ポリシー「AdministratorAccess」のポリシーが選択された状態になっているので、特に必要で無ければ「次のステップ」を選択する
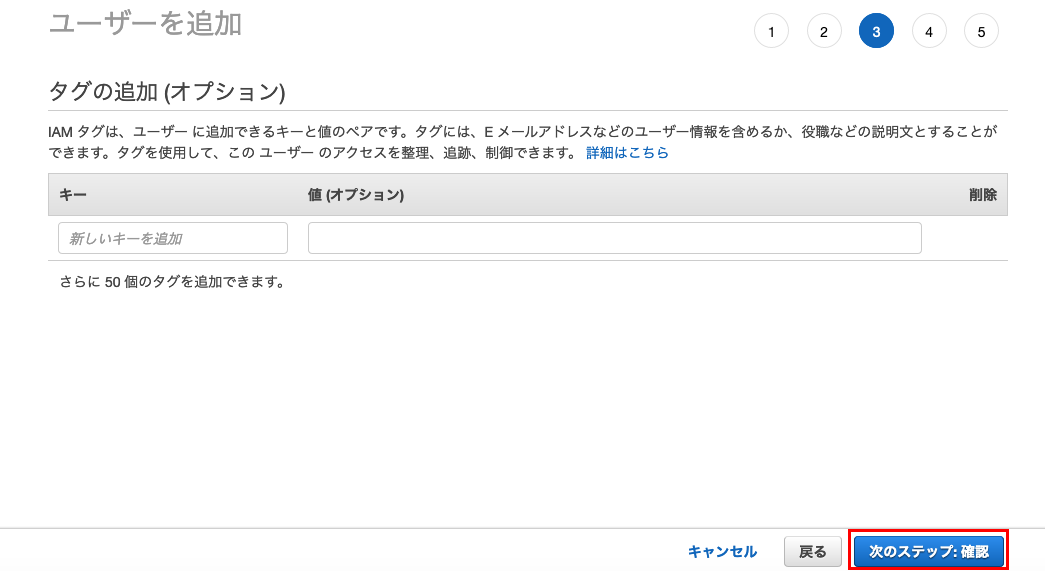
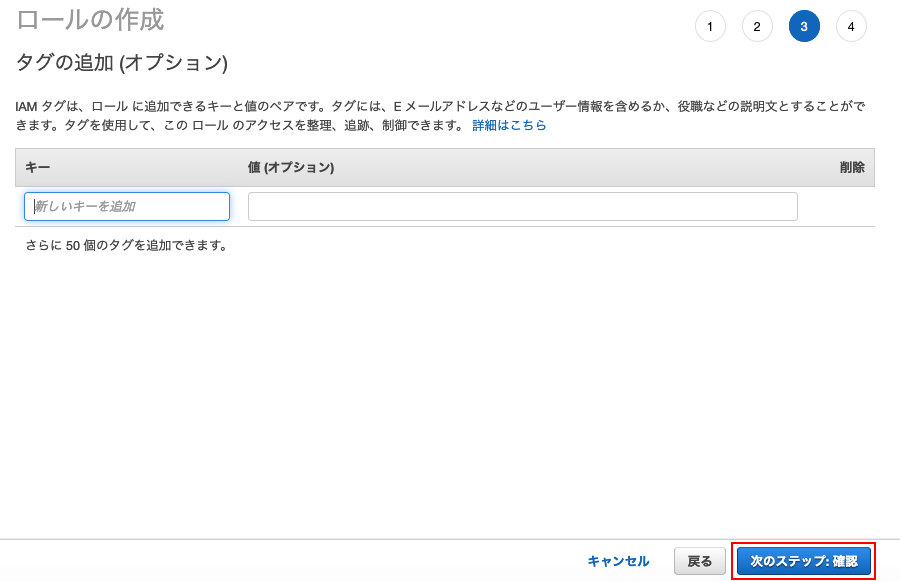
- タグの追加
- 特に必要で無ければ「次のステップ」を選択する
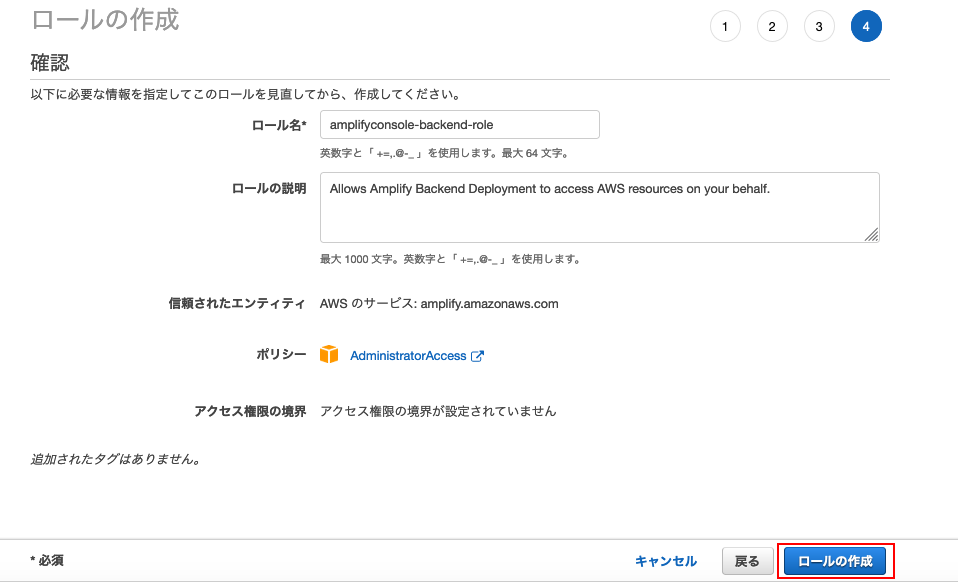
- 確認
- 「ユーザーの作成」を選択する
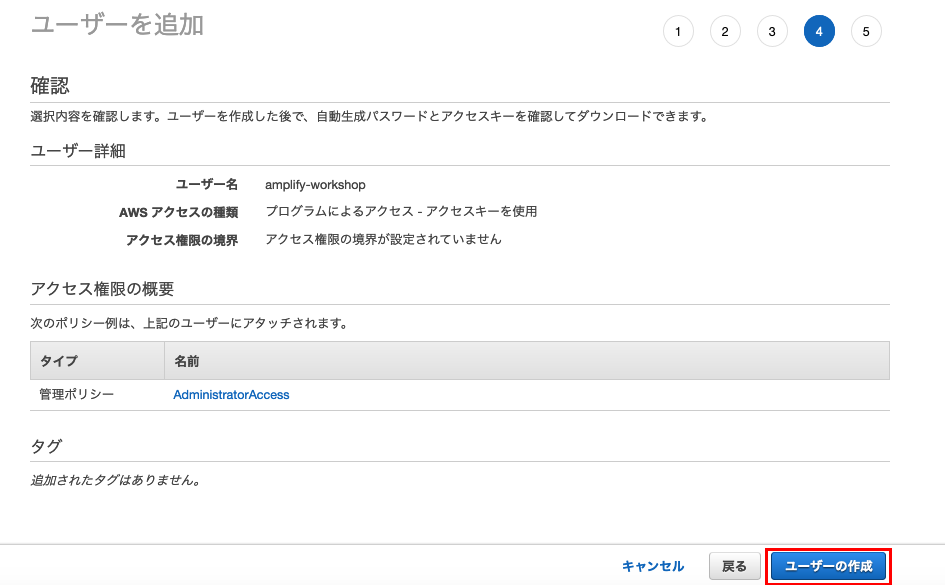

以上で、Amplify用のIAMユーザ作成が完了しました。
コンソールに戻り、accessKeyId、secretAccessKeyを入力します。
AWS Cloud9で利用しているEBSボリューム領域を拡張する
ワークショップを進める上で ./node_modules 配下が膨れていくため、
こちらの記事を参考にしてボリュームを拡張することをお勧めします。
AWS Cloud9 で利用しているEBS ボリューム領域を拡張する
新規 Reactアプリケーションの作成
作業ディレクトリの作成
ec2-user:~/environment $ mkdir amplify-sns-workshop
ec2-user:~/environment $ cd amplify-sns-workshop/
ec2-user:~/environment/amplify-sns-workshop $
Reactアプリケーションのひな形の作成
create-react-appコマンドを利用して、Reactアプリケーションのひな形を作成していきます。
以下、JavaScriptを使用する場合の手順ですが、TypeScriptを使用する場合の差分も追記しています。
(JavaScriptの場合)
ec2-user:~/environment/amplify-sns-workshop $ npx create-react-app boyaki

Creating a new React app in /home/ec2-user/environment/amplify-sns-workshop/boyaki.

Installing packages. This might take a couple of minutes.
Installing react, react-dom, and react-scripts with cra-template...


(中略)


Created git commit.

Success! Created boyaki at /home/ec2-user/environment/amplify-sns-workshop/boyaki
Inside that directory, you can run several commands:

  npm start
    Starts the development server.

  npm run build
    Bundles the app into static files for production.

  npm test
    Starts the test runner.

  npm run eject
    Removes this tool and copies build dependencies, configuration files
    and scripts into the app directory. If you do this, you can’t go back!

We suggest that you begin by typing:

  cd boyaki
  npm start

Happy hacking!
ec2-user:~/environment/amplify-sns-workshop $ cd boyaki
ec2-user:~/environment/amplify-sns-workshop/boyaki (master) $
(TypeScriptの場合)
$ create-react-app boyaki --typescript
Creating a new React app in /home/ec2-user/environment/amplify-sns-workshop-ts/boyaki.

The --typescript option has been deprecated and will be removed in a future release.
In future, please use --template typescript.

Installing packages. This might take a couple of minutes.
Installing react, react-dom, and react-scripts with cra-template-typescript...

(中略)

Created git commit.

Success! Created boyaki-ts at /home/ec2-user/environment/amplify-sns-workshop-ts/boyaki
Inside that directory, you can run several commands:

  npm start
    Starts the development server.

  npm run build
    Bundles the app into static files for production.

  npm test
    Starts the test runner.

  npm run eject
    Removes this tool and copies build dependencies, configuration files
Compiled successfully!
tsファイルが作られています。
ec2-user:~/environment/amplify-sns-workshop/boyaki (master) $ ls -l src/
total 44
-rw-rw-r-- 1 ec2-user ec2-user  564 Sep  2 00:39 App.css
-rw-rw-r-- 1 ec2-user ec2-user  280 Sep  2 00:39 App.test.tsx
-rw-rw-r-- 1 ec2-user ec2-user  556 Sep  2 00:39 App.tsx
-rw-rw-r-- 1 ec2-user ec2-user  218 Sep  2 00:46 aws-exports.js
-rw-rw-r-- 1 ec2-user ec2-user  366 Sep  2 00:39 index.css
-rw-rw-r-- 1 ec2-user ec2-user  503 Sep  2 00:39 index.tsx
-rw-rw-r-- 1 ec2-user ec2-user 2671 Sep  2 00:39 logo.svg
-rw-rw-r-- 1 ec2-user ec2-user   40 Sep  2 00:39 react-app-env.d.ts
-rw-rw-r-- 1 ec2-user ec2-user 5295 Sep  2 00:39 serviceWorker.ts
-rw-rw-r-- 1 ec2-user ec2-user  255 Sep  2 00:39 setupTests.ts
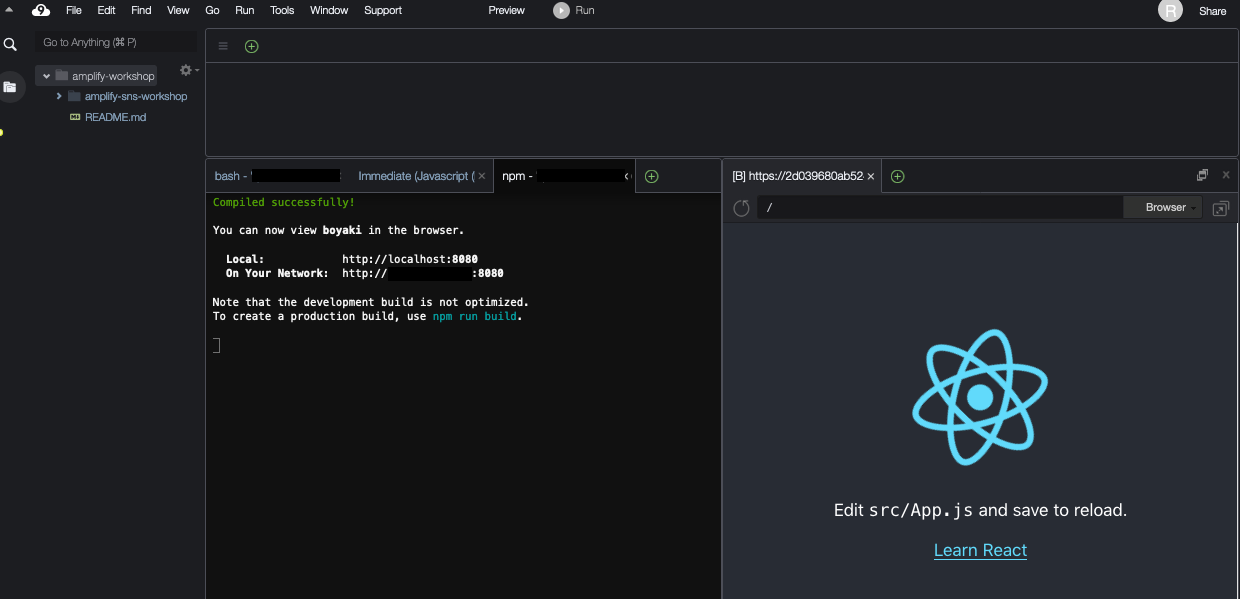
最後にReactアプリケーションのひな形ができていることを確認していきます。
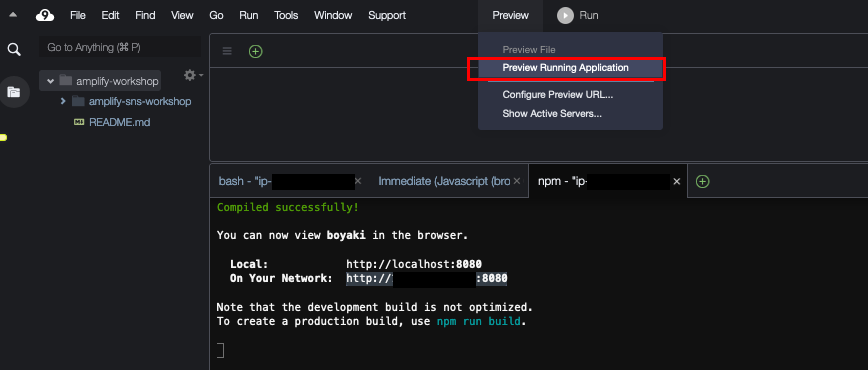
$ npm start を実行して、Cloud9のメニューの「Preview」 > 「Preview Running Application」を実行します。
以下のように表示されていたらOKです。
Amplifyの初期化
$ cd boyaki で移動したReactのプロジェクトルートディレクトリ(boyaki)のトップで $ amplify initを実行します。
これにより、AWS上にリソースを構築してAmplify用のプロジェクトを準備されます。
ec2-user:~/environment/amplify-sns-workshop/boyaki (master) $ amplify init
Note: It is recommended to run this command from the root of your app directory
? Enter a name for the project boyaki
? Enter a name for the environment production
? Choose your default editor: Vim (via Terminal, Mac OS only)
? Choose the type of app that you're building javascript
Please tell us about your project
? What javascript framework are you using react
? Source Directory Path:  src
? Distribution Directory Path: build
? Build Command:  npm run-script build
? Start Command: npm run-script start
Using default provider  awscloudformation

For more information on AWS Profiles, see:
https://docs.aws.amazon.com/cli/latest/userguide/cli-multiple-profiles.html

? Do you want to use an AWS profile? Yes
? Please choose the profile you want to use amplify-test
Adding backend environment production to AWS Amplify Console app: d1vrmb49bf11cu
⠦ Initializing project in the cloud...


(中略)


✔ Successfully created initial AWS cloud resources for deployments.
✔ Initialized provider successfully.
Initialized your environment successfully.

Your project has been successfully initialized and connected to the cloud!

Some next steps:
"amplify status" will show you what you've added already and if it's locally configured or deployed
"amplify add <category>" will allow you to add features like user login or a backend API
"amplify push" will build all your local backend resources and provision it in the cloud
"amplify console" to open the Amplify Console and view your project status
"amplify publish" will build all your local backend and frontend resources (if you have hosting category added) and provision it in the cloud

Pro tip:
Try "amplify add api" to create a backend API and then "amplify publish" to deploy everything
サンプルアプリケーションを作成
AWSの公式のチュートリアルに沿ってアプリケーションを作成していきます。
ユーザーが最大140字程度の短いテキストを投稿できる「Boyaki」というアプリケーションで以下の機能があります。
- ログイン機能
- ユーザーが自分名義でつぶやきを投稿する機能
ここで、最終目標のCypressを使ったテスト実行に最低限必要な機能(チュートリアルの3.2[認証機能]〜3.5[Post機能: Front-end])を作成していきます。
認証機能の追加
-
$ amplify add authを実行し、認証機能をアプリへ追加する
ec2-user:~/environment/amplify-sns-workshop/boyaki (master) $ amplify add auth
Using service: Cognito, provided by: awscloudformation

 The current configured provider is Amazon Cognito.

 Do you want to use the default authentication and security configuration? Default configuration
 Warning: you will not be able to edit these selections.
 How do you want users to be able to sign in? Username
 Do you want to configure advanced settings? No, I am done.
Successfully added resource boyakie06b1145 locally

Some next steps:
"amplify push" will build all your local backend resources and provision it in the cloud
"amplify publish" will build all your local backend and frontend resources (if you have hosting category added) and provision it in the cloud
-
$ amplify statusを実行し、Auth Categoryのリソースが追加されていることを確認する
ec2-user:~/environment/amplify-sns-workshop/boyaki (master) $ amplify status

Current Environment: production

| Category | Resource name  | Operation | Provider plugin   |
| -------- | -------------- | --------- | ----------------- |
| Auth     | boyakie06b1145 | Create    | awscloudformation |
-
$ amplify pushを実行してクラウドへ変更を反映する
ec2-user:~/environment/amplify-sns-workshop/boyaki (master) $ amplify push
✔ Successfully pulled backend environment production from the cloud.

Current Environment: production

| Category | Resource name  | Operation | Provider plugin   |
| -------- | -------------- | --------- | ----------------- |
| Auth     | boyakie06b1145 | Create    | awscloudformation |
? Are you sure you want to continue? Yes
⠏ Updating resources in the cloud. This may take a few minutes...


(中略)


✔ All resources are updated in the cloud
認証機能のフロントエンドへの実装
AmplifyはReactで利用可能な便利なコンポーネントをまとめたライブラリ、aws-amplify-reactが提供されています。
このアプリケーションではwithAuthenticatorコンポーネントを利用して、認証されたユーザーのみがアプリケーションを操作できるよう実装します。
- aws-amplify-reactとAmplify Frameworkをアプリケーションに追加する
$ npm install --save aws-amplify@2.2.7 aws-amplify-react@3.1.8
(JavaScriptの場合)
-
./src/App.jsファイルを以下の内容に置き換える-
withAuthenticatorを使用するとデフォルトで電話番号の入力が求められるが、signUpConfigを指定することで電話番号の入力をSkipできる
-
import React from 'react';
import Amplify from '@aws-amplify/core';
import awsmobile from './aws-exports';
import { withAuthenticator } from 'aws-amplify-react';

Amplify.configure(awsmobile);

function App() {
  return (
    <h1>
      Hello World!
    </h1>
  );
}

export default withAuthenticator(App, {
  signUpConfig: {
    hiddenDefaults: ['phone_number']
  }
});
(TypeScriptの場合)
-
./src/App.tsxファイルを以下の内容に置き換える - withAuthenticatorのところで以下のようにエラーが出るので、適当に true や null を渡す、または@ts-ignore でエラーを無視してください
- ここでは後者を選択
/home/ec2-user/environment/amplify-sns-workshop/boyaki/src/App.tsx
TypeScript error in /home/ec2-user/environment/amplify-sns-workshop/boyaki/src/App.tsx(16,39):
Argument of type '{ signUpConfig: { hiddenDefaults: string[]; }; }'
is not assignable to parameter of type 'boolean | undefined'.
  Type '{ signUpConfig: { hiddenDefaults: string[]; }; }'
is not assignable to type 'true'.
withAuthenticator(
  Comp: any,
  includeGreetings?: boolean,
  authenticatorComponents?: any[],
  federated?: any,
  theme?: any,
  signUpConfig?: {}
):
import React from 'react';
import Amplify from '@aws-amplify/core';
import awsmobile from './aws-exports';
import { withAuthenticator } from 'aws-amplify-react';

Amplify.configure(awsmobile);

function App() {
  return (
    <h1>
      Hello World!
    </h1>
  );
};

//@ts-ignore
export default withAuthenticator(App, {
 signUpConfig: {
   hiddenDefaults: ["phone_number"]
 }
});
-
$ npm startを実行して、Cloud9のメニューの「Preview」 > 「Preview Running Application」を実行して動作確認(認証画面が出る)する
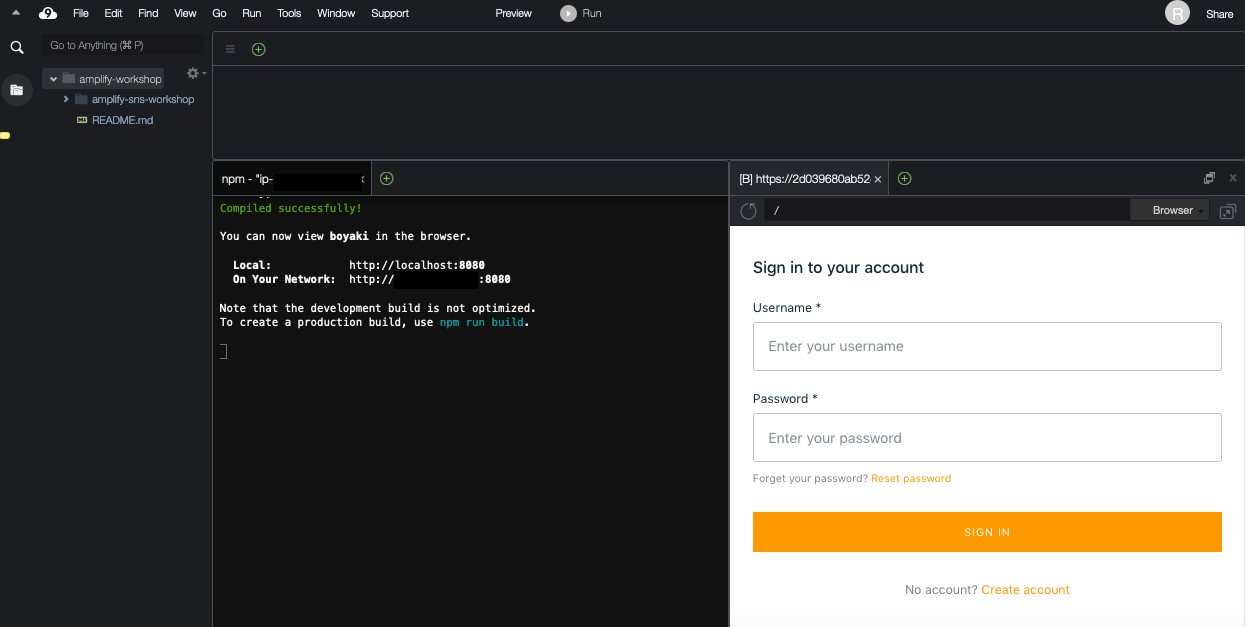
これで認証機能の実装は完了です。
「Create account」からアカウント登録してログインすると、「Hello World!」と画面に表示されます。
ログアウトのボタンがなく、ログアウトはPOST機能の追加のところで併せて実装するので、後段で認証機能の確認は行います。
バックエンド側のPOST機能の実装
認証機能が実装完了したので、次にPostを管理するGraphQL APIを作成します。
$ amplify add apiでGraphQLを選択すると、GraphQLのマネージドサービスであるAWS AppSyncがプロビジョニングされます。
-
$ amplify add apiでGraphQL APIの作成
ec2-user:~/environment/amplify-sns-workshop/boyaki (master) $ amplify add api
? Please select from one of the below mentioned services: GraphQL
? Provide API name: BoyakiGql
? Choose the default authorization type for the API Amazon Cognito User Pool
Use a Cognito user pool configured as a part of this project.
? Do you want to configure advanced settings for the GraphQL API No, I am done.
? Do you have an annotated GraphQL schema? No
? Choose a schema template: One-to-many relationship (e.g., “Blogs” with “Posts” and “Comments”)

The following types do not have '@auth' enabled. Consider using @auth with @model
         - Blog
         - Post
         - Comment
Learn more about @auth here: https://docs.amplify.aws/cli/graphql-transformer/directives#auth


GraphQL schema compiled successfully.

Edit your schema at /home/ec2-user/environment/amplify-sns-workshop/boyaki/amplify/backend/api/BoyakiGql/schema.graphql or place .graphql files in a directory at /home/ec2-user/environment/amplify-sns-workshop/boyaki/amplify/backend/api/BoyakiGql/schema
? Do you want to edit the schema now? No
Successfully added resource BoyakiGql locally

Some next steps:
"amplify push" will build all your local backend resources and provision it in the cloud
"amplify publish" will build all your local backend and frontend resources (if you have hosting category added) and provision it in the cloud
- Post(投稿)を管理するAPIを作成する
-
./amplify/backend/api/BoyakiGql/schema.graphqlを以下の内容に置き換える
-
type Post
  @model (subscriptions: { level: public })
  @auth(rules: [
    {allow: owner, ownerField:"owner", provider: userPools, operations:[read, create]}
    {allow: private, provider: userPools, operations:[read]}
	])
  @key(name: "SortByTimestamp", fields:["type", "timestamp"], queryField: "listPostsSortedByTimestamp")
  @key(name: "BySpecificOwner", fields:["owner", "timestamp"], queryField: "listPostsBySpecificOwner")
{
  type: String! # always set to 'post'. used in the SortByTimestamp GSI
  id: ID
  content: String!
  owner: String
  timestamp: AWSTimestamp!
}
バックエンド側のPOST機能の実装
- フロントの構築に必要なライブラリをインストールする
$ npm install --save @material-ui/core @material-ui/icons moment react-router react-router-dom
- TypeScriptの場合は以下もインストールしてください
- インストールしていない場合、以下のようなエラーが発生
$ npm install -D @types/react @types/react-dom @types/react-router-dom
/home/ec2-user/environment/amplify-sns-workshop/boyaki/src/App.tsx
TypeScript error in /home/ec2-user/environment/amplify-sns-workshop/boyaki/src/App.tsx(9,8):
Could not find a declaration file for module 'react-router-dom'. '/home/ec2-user/environment/amplify-sns-workshop/boyaki/node_modules/react-router-dom/index.js' implicitly has an 'any' type.
  Try `npm install @types/react-router-dom` if it exists or add a new declaration (.d.ts) file containing `declare module 'react-router-dom';
以下のようにビューを形成するファイルを作成します。
JavaScript、TypeScriptの両方のコードを載せていますので使用する言語に合わせてお使いください。
TypeScriptに対して、JavaScriptのコードをそのまま用いると、以下の'status' は型 'ThemeOptions' に存在しません。と怒られるので注意してください。
/home/ec2-user/environment/amplify-sns-workshop-ts/boyaki-ts/src/App.tsx
TypeScript error in /home/ec2-user/environment/amplify-sns-workshop-ts/boyaki-ts/src/App.tsx(48,3):
Argument of type '{ palette: { type: "dark"; primary: { main: string; contrastText: string; }; background: { default: string; paper: string; }; divider: string; }; overrides: { MuiButton: { color: string; }; }; typography: { ...; }; status: { ...; }; }'
is not assignable to parameter of type 'ThemeOptions'.
- 左側のメニュー一覧やPostやLOGOUTボタンを表示する部分
- Sidebar.js(Sidebar.tsx)
- Sidebarの役割は以下の3つ
- Logoutボタンの表示
- Global TimelineやProfileへの切り替えなど、メニュー機能
- Postの投稿
- Sidebarの役割は以下の3つ
- Sidebar.js(Sidebar.tsx)
- 右側のPost一覧を表示する部分
- メニューで選択した対象に応じていずれかを表示
- Global Timeline: すべてのユーザーのPostを表示
- AllPost.js(AllPost.tsx)
- Profile: 特定のユーザーのPostを表示
- PostsBySpecifiedUser.js(PostsBySpecifiedUser.tsx)
- Global Timeline: すべてのユーザーのPostを表示
- メニューで選択した対象に応じていずれかを表示
- どちらのPost一覧を表示するかのルーティング
- App.js(App.tsx)
App.js(App.tsx)
(JavaScriptの場合)
-
./src/App.jsをApp.jsの内容に書き換える
(TypeScriptの場合)
import React from 'react';
import './App.css';
import { withAuthenticator } from 'aws-amplify-react';
import {
  HashRouter,
  Switch,
  Route,
  Redirect,
} from 'react-router-dom';
import { makeStyles, createMuiTheme, ThemeProvider } from '@material-ui/core/styles';
import CssBaseline from '@material-ui/core/CssBaseline';
import AllPosts from './containers/AllPosts';
import PostsBySpecifiedUser from './containers/PostsBySpecifiedUser';
import Amplify from '@aws-amplify/core';
import PubSub from '@aws-amplify/pubsub'
import awsmobile from './aws-exports';

Amplify.configure(awsmobile);
PubSub.configure(awsmobile)

const drawerWidth = 240;
const theme = createMuiTheme({
  palette: {
    type: 'dark',
    primary: {
      main: '#1EA1F2',
      contrastText: "#fff",
    },
    background: {
      default: '#15202B',
      paper: '#15202B',
    },
    divider: '#37444C',
  },
  overrides: {
    MuiButton: {
      color: 'white',
    },
  },
  typography: {
    fontFamily: [
      'Arial',
    ].join(','),
  },
  status: {
    danger: 'orange',
  },
} as any);
const useStyles = makeStyles(theme => ({
  root: {
    display: 'flex',
    height: '100%',
    width: 800,
    marginLeft: 'auto',
    marginRight: 'auto',
  },
  appBar: {
    marginLeft: drawerWidth,
  },
  drawer: {
    width: drawerWidth,
    flexShrink: 0,
  },
  drawerPaper: {
    width: drawerWidth,
  },
  toolbar: theme.mixins.toolbar,
  content: {
    flexGrow: 1,
    backgroundColor: theme.palette.background.default,
    padding: theme.spacing(3),
  },
}));

function App() {
  const classes = useStyles();
  return (
    <div className={classes.root} >
      <ThemeProvider theme={theme}>
        <CssBaseline />
        <HashRouter>
          <Switch>
            <Route exact path='/' component={AllPosts} />
            <Route exact path='/global-timeline' component={AllPosts} />
            <Route exact path='/:userId' component={PostsBySpecifiedUser}/>
            <Redirect path="*" to="/" />
          </Switch>
        </HashRouter>
      </ThemeProvider>
    </div>
  );
}

//@ts-ignore
export default withAuthenticator(App, {
  signUpConfig: {
    hiddenDefaults: ['phone_number']
  }
});
Sidebar.js(Sidebar.tsx)
(JavaScriptの場合)
- ディレクトリ/ファイルを作成して、
./src/containers/Sidebar.jsをSidebar.jsの内容に書き換える
$ mkdir src/containers
$ touch src/containers/Sidebar.js
(TypeScriptの場合)
$ mkdir src/containers
$ touch src/containers/Sidebar.tsx
import React from 'react';

import { makeStyles } from '@material-ui/core/styles';
import {
  Button,
  Drawer,
  List,
  ListItem,
  ListItemText,
  TextField,
  ListItemIcon,
} from '@material-ui/core';
import {
  Person as PersonIcon,
  Public as PublicIcon,
} from '@material-ui/icons';

import API, { graphqlOperation } from '@aws-amplify/api';
import Auth from '@aws-amplify/auth';

import { createPost } from '../graphql/mutations';
import { useHistory } from 'react-router';

const drawerWidth = 340;
const MAX_POST_CONTENT_LENGTH = 140;

const useStyles = makeStyles(theme => ({
  drawer: {
    width: drawerWidth,
    flexShrink: 0,
    position: 'relative',
  },
  drawerPaper: {
    width: drawerWidth,
    position: 'relative',
  },
  toolbar: theme.mixins.toolbar,
  textField: {
    width: drawerWidth,
  },
  list: {
    // overflowWrap: 'break-word',
    width: 300,
  },
}));

export default function Sidebar({activeListItem}:any) {
  const classes = useStyles();
  const history = useHistory();

  const [value, setValue] = React.useState('');
  const [isError, setIsError] = React.useState(false);
  const [helperText, setHelperText] = React.useState('');

  const handleChange = (event:any):any => {
    setValue(event.target.value);
    if (event.target.value.length > MAX_POST_CONTENT_LENGTH) {
      setIsError(true);
      setHelperText(String(MAX_POST_CONTENT_LENGTH - event.target.value.length));
    } else {
      setIsError(false);
      setHelperText('');
    }
  };

  const onPost = async () => {
    const res = await API.graphql(graphqlOperation(createPost, { input: {
      type: 'post',
      content: value,
      timestamp: Math.floor(Date.now() / 1000),
    }}));

    console.log(res)
    setValue('');
  }

  const signOut = () => {
    Auth.signOut()
      .then(data => console.log(data))
      .catch(err => console.log(err));
  }

  return (
    <Drawer
      className={classes.drawer}
      variant="permanent"
      classes={{
        paper: classes.drawerPaper,
      }}
      anchor="left"
    >
      <div className={classes.toolbar} />
      <List>
        <ListItem
          button
          selected={activeListItem === 'global-timeline'}
          onClick={() => {
            Auth.currentAuthenticatedUser().then((user) => {
              history.push('/global-timeline');
            })
          }}
          key='global-timeline'
        >
          <ListItemIcon>
            <PublicIcon />
          </ListItemIcon>
          <ListItemText primary="Global Timeline" />
        </ListItem>
        <ListItem
          button
          selected={activeListItem === 'profile'}
          onClick={() => {
            Auth.currentAuthenticatedUser().then((user) => {
              history.push('/' + user.username);
            })
          }}
          key='profile'
        >
          <ListItemIcon>
            <PersonIcon />
          </ListItemIcon>
          <ListItemText primary="Profile" />
        </ListItem>
        <ListItem key='post-input-field'>
          <ListItemText primary={
            <TextField
              error={isError}
              helperText={helperText}
              id="post-input"
              label="Type your post!"
              multiline
              rowsMax="8"
              variant="filled"
              value={value}
              onChange={handleChange}
              fullWidth
              margin="normal"
            />
          } />
        </ListItem>
        <ListItem key='post-button'>
          <ListItemText primary={
            <Button
              variant="contained"
              color="primary"
              disabled={isError}
              onClick={onPost}
              fullWidth
            >
              Post
            </Button>
          } />
        </ListItem>
        <ListItem key='logout'>
          <ListItemText primary={
            <Button
              variant="outlined"
              onClick={signOut}
              fullWidth
            >
              Logout
            </Button>
          } />
        </ListItem>
      </List>
    </Drawer>
  )
}
AllPost.js(AllPost.tsx)
(JavaScriptの場合)
- ファイルを作成して、
./src/containers/AllPosts.jsをAllPosts.jsの内容に書き換える
$ touch src/containers/AllPosts.js
(TypeScriptの場合)
$ touch src/containers/AllPosts.tsx
import React, { useState, useEffect, useReducer } from 'react';
import API, { graphqlOperation } from '@aws-amplify/api';
import { listPostsSortedByTimestamp } from '../graphql/queries';
import { onCreatePost } from '../graphql/subscriptions';
import PostList from '../components/PostList';
import Sidebar from './Sidebar';

const SUBSCRIPTION = 'SUBSCRIPTION';
const INITIAL_QUERY = 'INITIAL_QUERY';
const ADDITIONAL_QUERY = 'ADDITIONAL_QUERY';
const reducer = (state:any, action:any) => {
  switch (action.type) {
    case INITIAL_QUERY:
      return action.posts;
    case ADDITIONAL_QUERY:
      return [...state, ...action.posts]
    case SUBSCRIPTION:
      return [action.post, ...state]
    default:
      return state;
  }
};

export default function AllPosts() {
  const [posts, dispatch] = useReducer(reducer, []);
  const [nextToken, setNextToken] = useState(null);
  const [isLoading, setIsLoading] = useState(true);

  const getPosts = async (type:any, nextToken = null) => {
    const res = await API.graphql(graphqlOperation(listPostsSortedByTimestamp, {
      type: "post",
      sortDirection: 'DESC',
      limit: 20, //default = 10
      nextToken: nextToken,
    }));
    console.log(res);
    dispatch({ type: type, posts: res.data.listPostsSortedByTimestamp.items })
    setNextToken(res.data.listPostsSortedByTimestamp.nextToken);
    setIsLoading(false);
  }

  const getAdditionalPosts = () => {
    if (nextToken === null) return; //Reached the last page
    getPosts(ADDITIONAL_QUERY, nextToken);
  }

  useEffect(() => {
    getPosts(INITIAL_QUERY);

    const subscription = API.graphql(graphqlOperation(onCreatePost)).subscribe({
      next: (msg:any) => {
        console.log('allposts subscription fired')
        const post = msg.value.data.onCreatePost;
        dispatch({ type: SUBSCRIPTION, post: post });
      }
    });
    return () => subscription.unsubscribe();
  }, []);


  return (
    <React.Fragment>
      <Sidebar
        activeListItem='global-timeline'
      />
      <PostList
        isLoading={isLoading}
        posts={posts}
        getAdditionalPosts={getAdditionalPosts}
        listHeaderTitle={'Global Timeline'}
      />
    </React.Fragment>
  )
}
PostsBySpecifiedUser.js(PostsBySpecifiedUser.tsx)
(JavaScriptの場合)
- ファイルを作成して、
./src/containers/PostsBySpecifiedUser.jsをPostsBySpecifiedUser.jsの内容に書き換える
$ touch src/containers/PostsBySpecifiedUser.js
(TypeScriptの場合)
$ touch src/containers/PostsBySpecifiedUser.tsx
import React, { useState, useEffect, useReducer } from 'react';
import API, { graphqlOperation } from '@aws-amplify/api';
import { useParams } from 'react-router';
import { listPostsBySpecificOwner } from '../graphql/queries';
import { onCreatePost } from '../graphql/subscriptions';
import PostList from '../components/PostList';
import Sidebar from './Sidebar';

const SUBSCRIPTION = 'SUBSCRIPTION';
const INITIAL_QUERY = 'INITIAL_QUERY';
const ADDITIONAL_QUERY = 'ADDITIONAL_QUERY';
const reducer = (state:any, action:any) => {
  switch (action.type) {
    case INITIAL_QUERY:
      return action.posts;
    case ADDITIONAL_QUERY:
      return [...state, ...action.posts]
    case SUBSCRIPTION:
      return [action.post, ...state]
    default:
      return state;
  }
};

export default function PostsBySpecifiedUser() {
  const { userId } = useParams();

  const [posts, dispatch] = useReducer(reducer, []);
  const [nextToken, setNextToken] = useState(null);
  const [isLoading, setIsLoading] = useState(true);

  const getPosts = async (type:any, nextToken = null) => {
    const res = await API.graphql(graphqlOperation(listPostsBySpecificOwner, {
      owner: userId,
      sortDirection: 'DESC',
      limit: 20,
      nextToken: nextToken,
    }));
    console.log(res);
    dispatch({ type: type, posts: res.data.listPostsBySpecificOwner.items })
    setNextToken(res.data.listPostsBySpecificOwner.nextToken);
    setIsLoading(false);
  }

  const getAdditionalPosts = () => {
    if (nextToken === null) return; //Reached the last page
    getPosts(ADDITIONAL_QUERY, nextToken);
  }


  useEffect(() => {
    getPosts(INITIAL_QUERY);

    const subscription = API.graphql(graphqlOperation(onCreatePost)).subscribe({
      next: (msg:any) => {
        const post = msg.value.data.onCreatePost;
        if (post.owner !== userId) return;
        dispatch({ type: SUBSCRIPTION, post: post });
      }
    });
    return () => subscription.unsubscribe();
  }, []);


  return (
    <React.Fragment>
      <Sidebar
        activeListItem='profile'
      />
      <PostList
        isLoading={isLoading}
        posts={posts}
        getAdditionalPosts={getAdditionalPosts}
        listHeaderTitle={userId}
      />
    </React.Fragment>
  )
}
PostList.js(PostList.tsx)
(JavaScriptの場合)
AllPosts.jsやPostsBySpecifiedUser.jsから渡されたPost一覧を表示するためのUIを作成していきます。
- ディレクトリ/ファイルを作成して、
./src/components/PostList.jsをPostList.jsの内容に書き換える
$ mkdir src/components
$ touch src/components/PostList.js
(TypeScriptの場合)
import React from 'react';
import { makeStyles } from '@material-ui/core/styles';
import {
  Button,
  List,
  ListItem,
  Divider,
  ListItemText,
  ListItemAvatar,
  Avatar,
  Typography,
  CircularProgress,
} from '@material-ui/core';
import { useHistory } from 'react-router';
import moment from 'moment';

const useStyles = makeStyles(theme => ({
  listRoot: {
    width: '100%',
    wordBreak: 'break-all',
    overflow: 'scroll',
    borderRight: '1px solid #37444C',
  },
  alignCenter: {
    textAlign: 'center',
  },
  loader: {
    textAlign: 'center',
    paddingTop: 20,
  },
  maxWidth: {
    width: '100%',
  },
  listHeader: {
    position: 'sticky',
    top: 0,
    zIndex: 1200,
    backgroundColor: '#15202B',
    borderBottom: '1px solid #37444C',
  },
  clickable: {
    cursor: 'pointer',
  }
}));

export default function PostList({ isLoading, posts, getAdditionalPosts, listHeaderTitle, listHeaderTitleButton }:any) {
  const classes = useStyles();
  return (
    <div className={classes.listRoot}>
      {isLoading ?
        <div className={classes.loader}>
          <CircularProgress size={25} />
        </div>
        :
        <List disablePadding>
          <ListItem
            alignItems="flex-start"
            className={classes.listHeader}
          >
            <Typography
              variant='h5'
            >
              {listHeaderTitle}
              {listHeaderTitleButton && listHeaderTitleButton}
            </Typography>
          </ListItem>
          {posts.map((post:any):any => (
            <span>
              <PostItem post={post} />
              <Divider component="li" />
            </span>
          ))}
          <ListItem
            alignItems="flex-start"
            className={classes.alignCenter}
            key='loadmore'
          >
            <ListItemText
              primary={
                <Button variant='outlined' onClick={() => getAdditionalPosts()} className={classes.maxWidth}> Read More </Button>
              }
            />
          </ListItem>
        </List>
      }
    </div>
  )
}

function PostItem({ post }:any) {
  const classes = useStyles();
  const history = useHistory();
  const now = moment();
  console.log(now)

  const calcTimestampDiff = (timestamp:any) => {
    const scales:any = ['years', 'months', 'weeks', 'days', 'hours', 'minutes', 'seconds'];

    for (let i=0; i < scales.length; i++){
      const scale = scales[i];
      const diff = moment(now).diff(timestamp * 1000, scale);
      if( diff > 0) return diff + scale.charAt(0)
    }

    return 0 + scales[scales.length - 1].charAt(0)
  }

  return (
    <ListItem alignItems='flex-start' key={post.id}>
      <ListItemAvatar>
        <div className={classes.clickable} onClick={() => history.push('/' + post.owner)}>
          <Avatar alt={post.owner} src='/' />
        </div>
      </ListItemAvatar>
      <ListItemText
        primary={
          <React.Fragment>
            {post.owner}
            <Typography
              color='textSecondary'
              display='inline'
            >
              {' ' + String.fromCharCode(183) + ' ' + calcTimestampDiff(post.timestamp)}
            </Typography>
          </React.Fragment>
        }
        secondary={
          <Typography
            color='textPrimary'
          >
            {post.content}
          </Typography>
        }
      />
    </ListItem>
  )
}
amplify pushの実行
$ amplify pushを実行すると、このアプリケーションで利用しているcreatePostなどのGraphQL Operationを行うためのコードが./src/graphql配下に書き出さしされます。
TypeScriptを使用する場合は、以下の Choose the code generation language target でtypescriptを選択してください。
ec2-user:~/environment/amplify-sns-workshop/boyaki (master) $ amplify push
✔ Successfully pulled backend environment production from the cloud.

Current Environment: production

| Category | Resource name  | Operation | Provider plugin   |
| -------- | -------------- | --------- | ----------------- |
| Api      | BoyakiGql      | Create    | awscloudformation |
| Auth     | boyakie06b1145 | No Change | awscloudformation |
? Are you sure you want to continue? Yes

GraphQL schema compiled successfully.

Edit your schema at /home/ec2-user/environment/amplify-sns-workshop/boyaki/amplify/backend/api/BoyakiGql/schema.graphql or place .graphql files in a directory at /home/ec2-user/environment/amplify-sns-workshop/boyaki/amplify/backend/api/BoyakiGql/schema
? Do you want to generate code for your newly created GraphQL API Yes
? Choose the code generation language target javascript
? Enter the file name pattern of graphql queries, mutations and subscriptions src/graphql/**/*.js
? Do you want to generate/update all possible GraphQL operations - queries, mutations and subscriptions Yes
? Enter maximum statement depth [increase from default if your schema is deeply nested] 3
⠹ Updating resources in the cloud. This may take a few minutes...


(中略)


✔ Generated GraphQL operations successfully and saved at src/graphql
✔ All resources are updated in the cloud

GraphQL endpoint: https://xxxxxxxxxxxxxxxxxxxxxxxxxx.appsync-api.ap-northeast-1.amazonaws.com/graphql
確認
アカウント登録
$ npm startをして作成した機能が作れているか確認します。
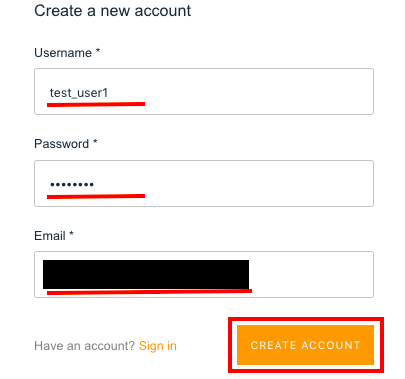
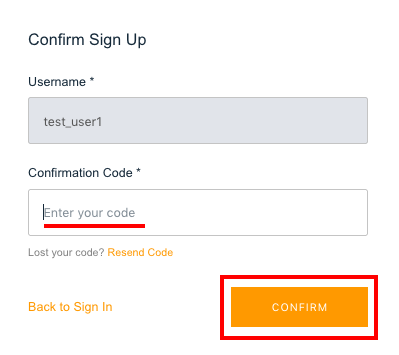
Create accountリンクから、アカウントを作成します。
以下を入力して、「CREATE ACCOUNT」ボタンをクリックして入力したEmailアドレス宛にコードが届くので入力します。
- Username : test_user1
- Password : (任意)
- Email
- 受信できるEmailアドレスを入力
test_user1, test_user2の2つのアカウントを作成しておきます。
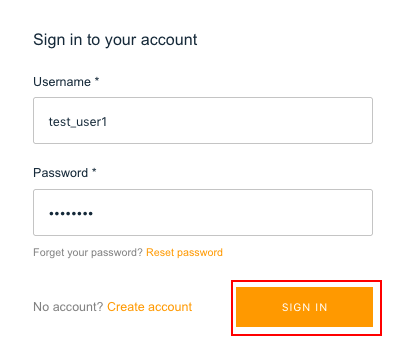
サインイン
アカウント登録時に入力したUsernameとPasswordでサインインできることを確認します。
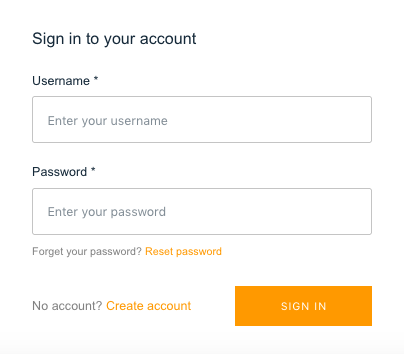
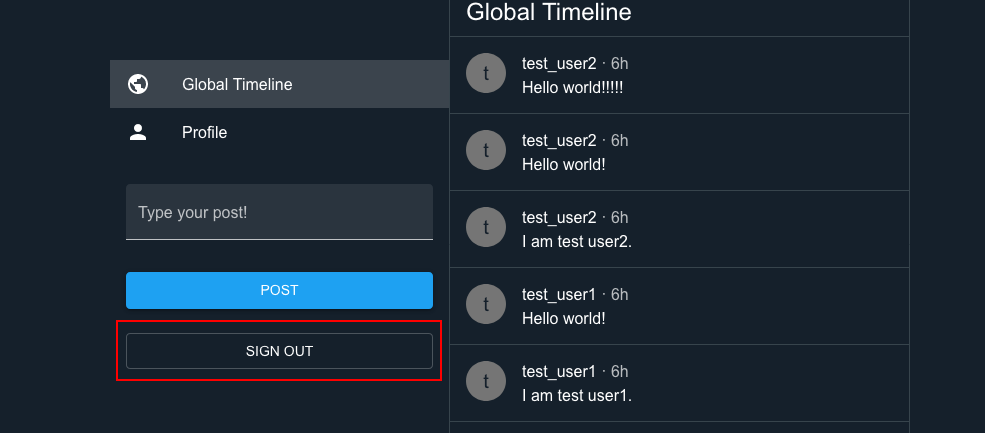
サインアウト
「LOGOUT」ボタンをクリックすると、サインイン画面が表示されることを確認します。
[「LOGOUT」ボタンをクリック後の画面]
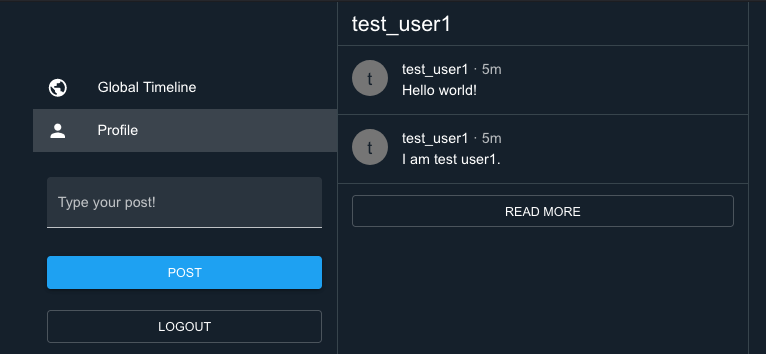
投稿
投稿できること、投稿が一覧に表示されることを確認します。
[Global Timeline]
全てのアカウント(test_user1とtest_user2)の投稿が表示されるビュー
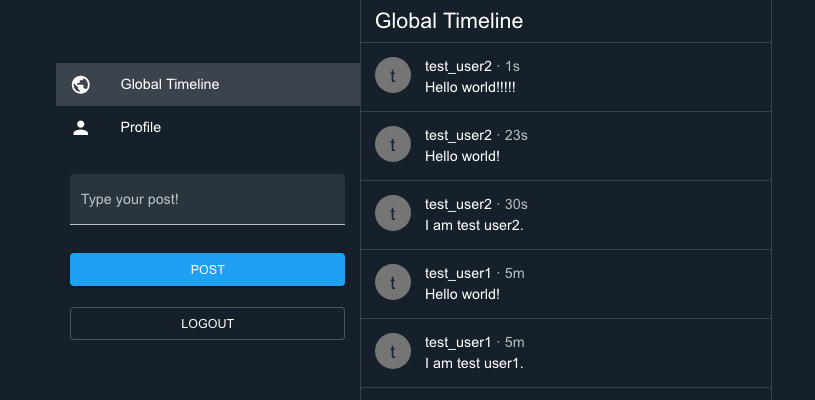
[Profile]
サインしているアカウント(test_user1)の投稿のみ表示されるビュー
アプリケーションのデプロイ
手動デプロイ
$ amplify add hosting を実行して、「Manual deployment」を選択します。
そのあと、$ amplify publishを実行して公開します。
ec2-user:~/environment/amplify-sns-workshop/boyaki (master) $ amplify add hosting
? Select the plugin module to execute Hosting with Amplify Console (Managed hosting with custom domains, Continuous deployment)
? Choose a type Manual deployment

You can now publish your app using the following command:

Command: amplify publish
ec2-user:~/environment/amplify-sns-workshop/boyaki (master) $ amplify publish
✔ Successfully pulled backend environment production from the cloud.

Current Environment: production

| Category | Resource name  | Operation | Provider plugin   |
| -------- | -------------- | --------- | ----------------- |
| Hosting  | amplifyhosting | Create    | awscloudformation |
| Auth     | boyakie06b1145 | No Change | awscloudformation |
| Api      | BoyakiGql      | No Change | awscloudformation |
? Are you sure you want to continue? Yes
⠋ Updating resources in the cloud. This may take a few minutes...


(中略)


The project was built assuming it is hosted at /.
You can control this with the homepage field in your package.json.

The build folder is ready to be deployed.
You may serve it with a static server:

  npm install -g serve
  serve -s build

Find out more about deployment here:

  bit.ly/CRA-deploy

✔ Zipping artifacts completed.
✔ Deployment complete!
https://production.xxxxxxxxxxxxxx.amplifyapp.com
「Deployment complete!」の下に表示されるURLに今度はお好きなブラウザでアクセスしてみましょう。
先程、Cloud9のPreviewで見ていたアプリケーションがブラウザからアクセスできるようになりました。
AWS Amplify Consoleからもデプロイが成功していることが確認できます。
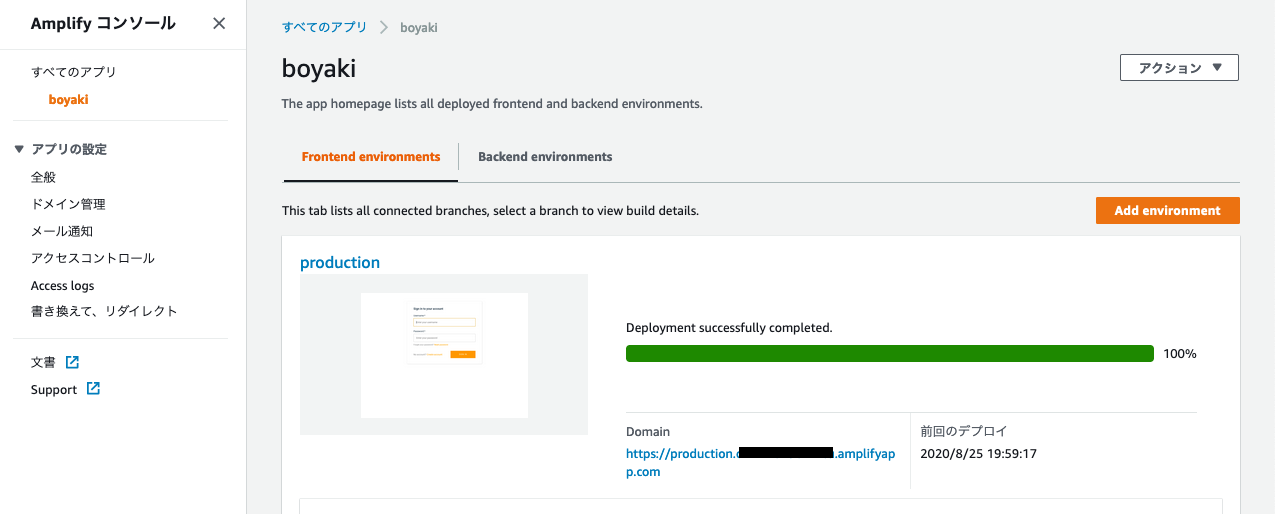
デプロイはこれで完了です。
GitHubと連携してCI/CD環境を構築する
手動でデプロイをしましたが、Githubと連携すれば毎回$ amplify publishをしなくてもGithubへのコミットをトリガーに自動でデプロイさせることができます。
Githubでソースコード管理するための設定
Githubにコードをpushするために、公開鍵・秘密鍵のペアを作成しておきます。
全てデフォルトで Enterを押して進めてください。
ec2-user:~/environment $ cd ~/.ssh
ec2-user:~/.ssh $ ssh-keygen -t rsa
Generating public/private rsa key pair.
Enter file in which to save the key (/home/ec2-user/.ssh/id_rsa):
Enter passphrase (empty for no passphrase):
Enter same passphrase again:
Your identification has been saved in /home/ec2-user/.ssh/id_rsa.
Your public key has been saved in /home/ec2-user/.ssh/id_rsa.pub.
The key fingerprint is:
(省略)
The key's randomart image is:
+---[RSA 2048]----+
|       (省略)     |
+----[SHA256]-----+
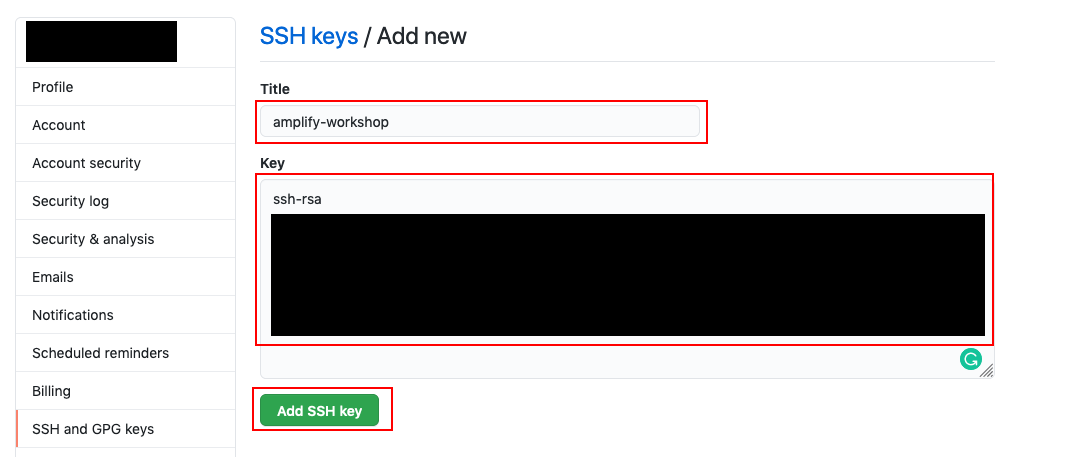
$ cat ~/.ssh/id_rsa.pub で出力されるssh-rsa ... から始まる文字列をコピーします。
https://github.com/settings/ssh/newにアクセスして、「Title」と「key」を入力して「Add SSH key」ボタンをクリックします。
- Title : amplify-workshop
- Key : コピーしたssh-rsa ... から始まる文字列
Githubのリポジトリを作成
GitHubのアカウントにログインし、画面右上の「+」ボタンから「New repository」を選択します。
以下のように入力して、「Create repository」ボタンをクリックして新規リポジトリを作成します。
- Repository name : amplify-workshop
- Description : amplify-workshop
- Repository type : private

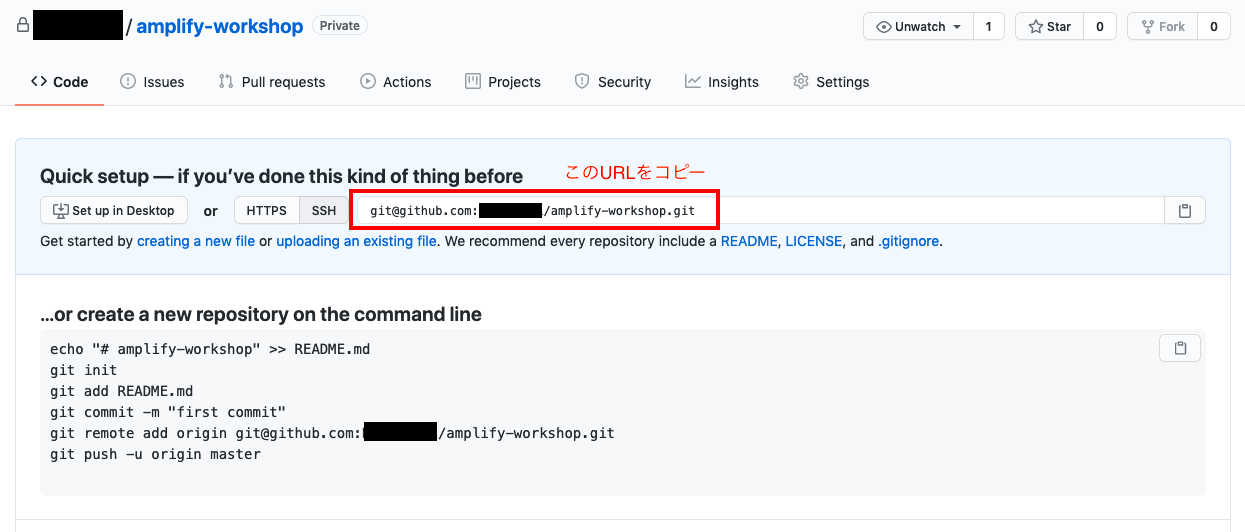
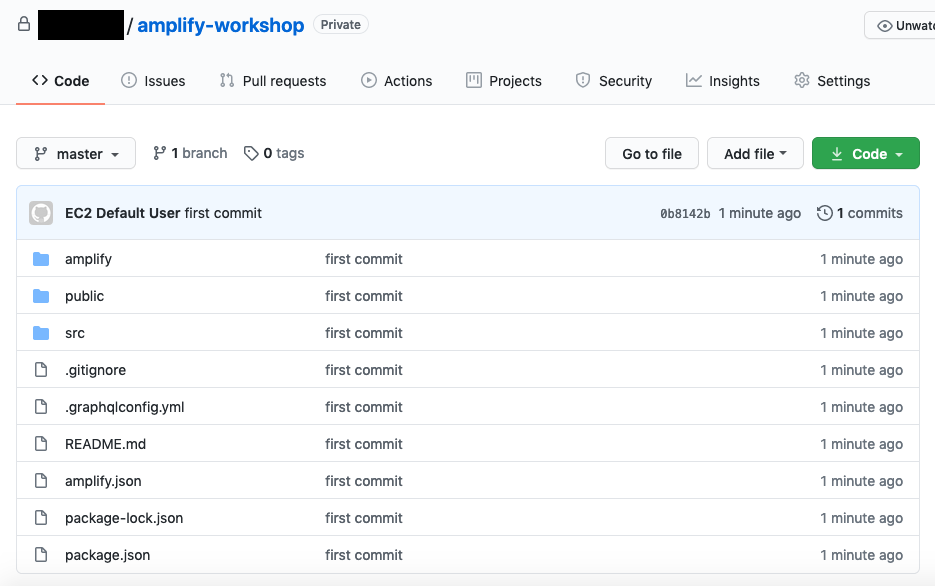
作成したリポジトリにアプリコードを追加
リポジトリが作成できたら、gitのURLをコピーします。
以下を実行します。
$ rm -rf .git
$ git init
$ git add .
$ git commit -m "first commit"
$ git remote add origin <コピーしたgitのURL>
$ git push -u origin master
GitHub のページをリロードして、ソースコードが更新されていれば push は成功です。
Amplify ConsoleとGitHubアカウントを紐付け
先程、$ amplify publishでアプリケーションをデプロイしました。
Amplify ConsoleとGitHubを連携することで、ソースコードのPushをしたタイミングで自動的にアプリケーションがデプロイされる仕組みを構築できます。
手動デプロイを設定しているため、$ amplify remove hostingで設定を削除します。
ec2-user:~/environment/amplify-sns-workshop/boyaki (master) $ amplify remove hosting

? Are you sure you want to delete the resource? This action deletes all files related to this resource from the backend directory. Yes
Successfully removed resource
$ amplify pushで反映させておきます。
ec2-user:~/environment/amplify-sns-workshop/boyaki (master) $ amplify push
✔ Successfully pulled backend environment production from the cloud.

Current Environment: production

| Category | Resource name  | Operation | Provider plugin   |
| -------- | -------------- | --------- | ----------------- |
| Hosting  | amplifyhosting | Delete    | awscloudformation |
| Auth     | boyakie06b1145 | No Change | awscloudformation |
| Api      | BoyakiGql      | No Change | awscloudformation |
? Are you sure you want to continue? Yes
⠋ Updating resources in the cloud. This may take a few minutes...

(中略)

✔ All resources are updated in the cloud
次に、Amplify ConsoleとGitHubアカウントを紐付けする設定をしていきます。
$ amplify add hostingを実行します。
ec2-user:~/environment/amplify-sns-workshop/boyaki (master) $ amplify add hosting
? Select the plugin module to execute Hosting with Amplify Console (Managed hosting with custom domains, Continuous deployment)
? Choose a type Continuous deployment (Git-based deployments)
? Continuous deployment is configured in the Amplify Console. Please hit enter once you connect your repository
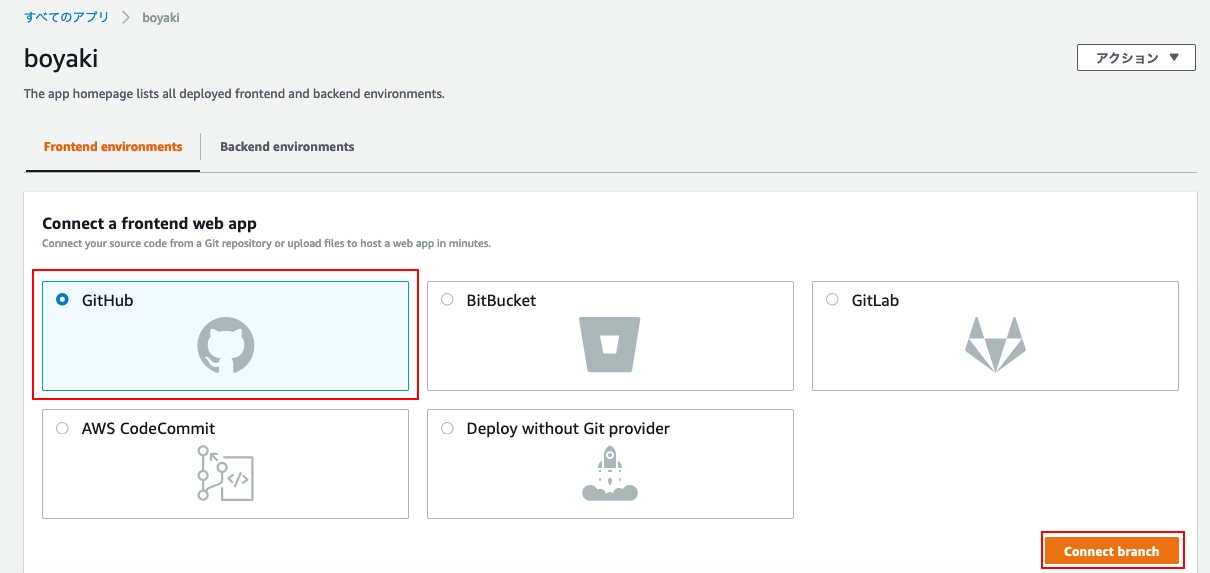
Continuous deployment is configured in the Amplify Console.と表示されたらAmplify Consoleを開いて以下のように設定していきます。
Connect a frontend web app
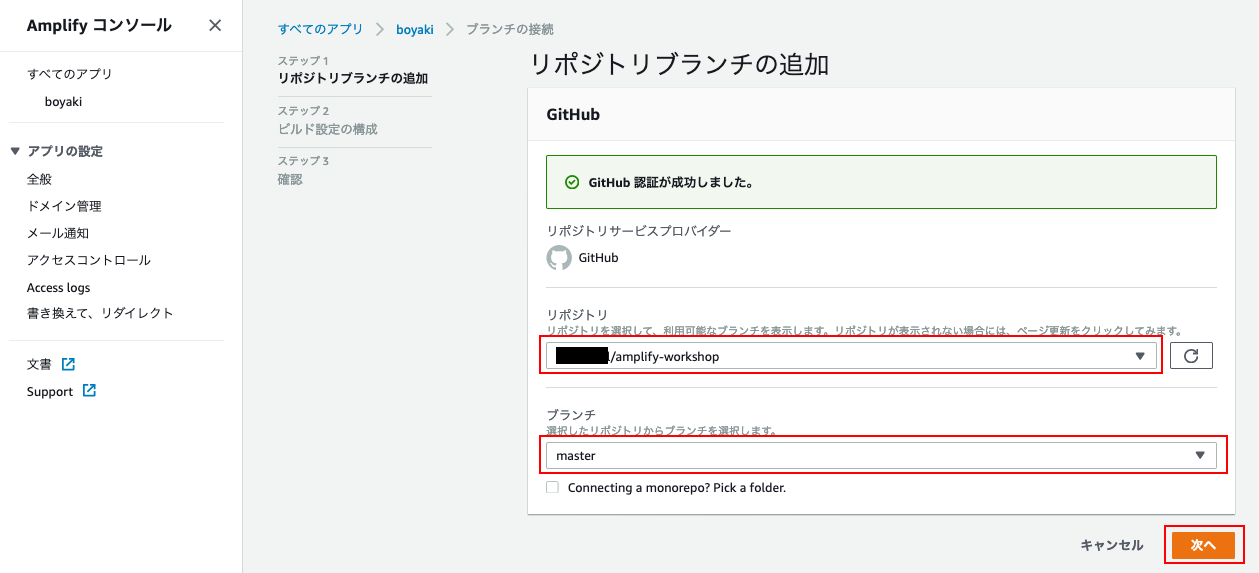
リポジトリブランチの追加
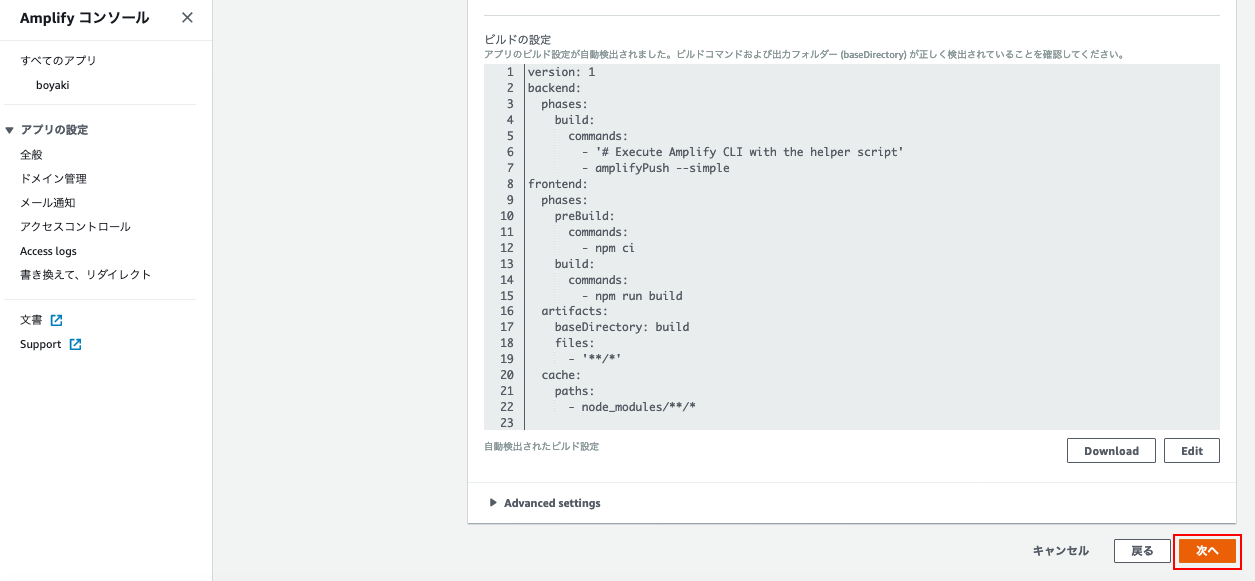
ビルド設定の構成
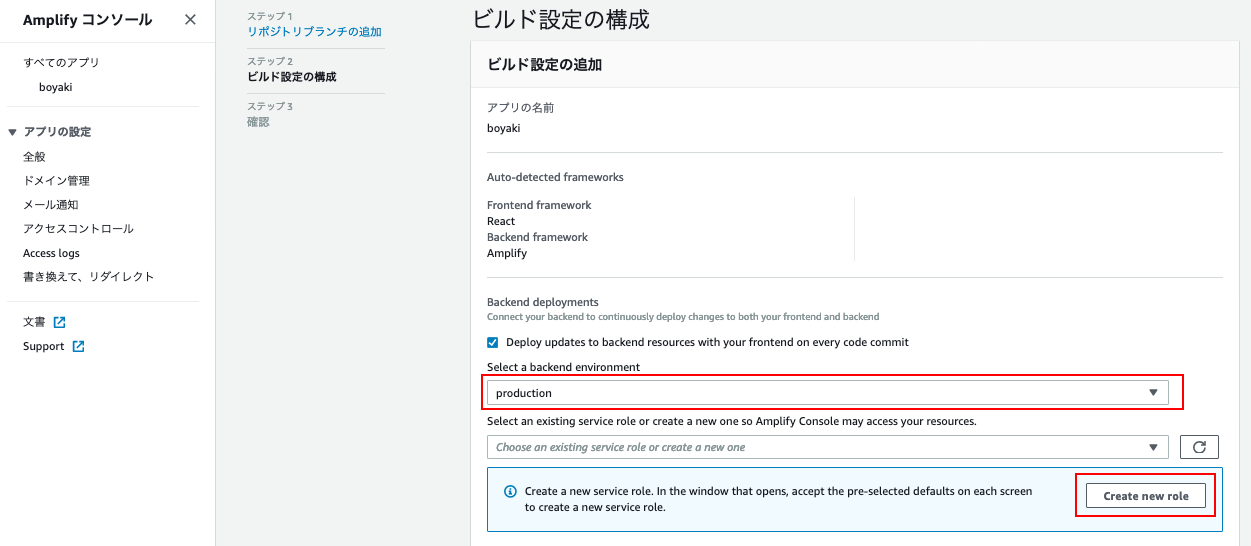
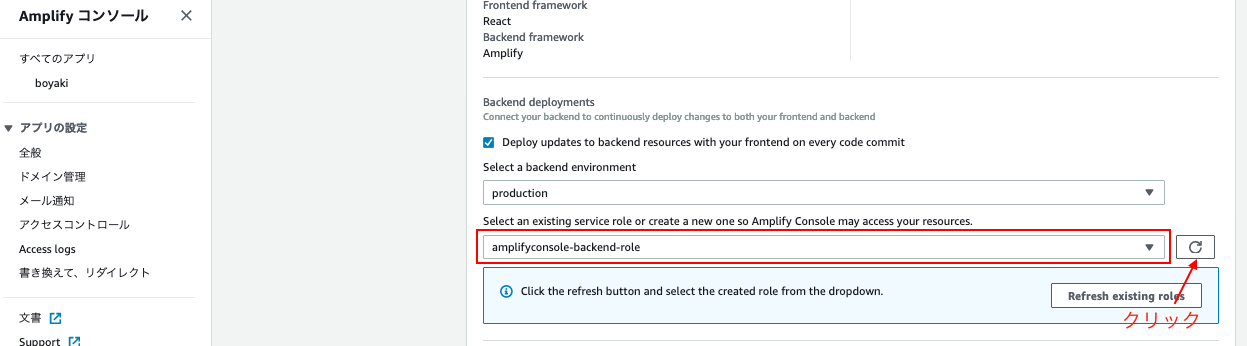
「Create new role」ボタンをクリックして新しいロールを作成します。
ロールの設定項目は全てデフォルトを選択します。
作成したロールを指定して、「次へ」をクリックします。
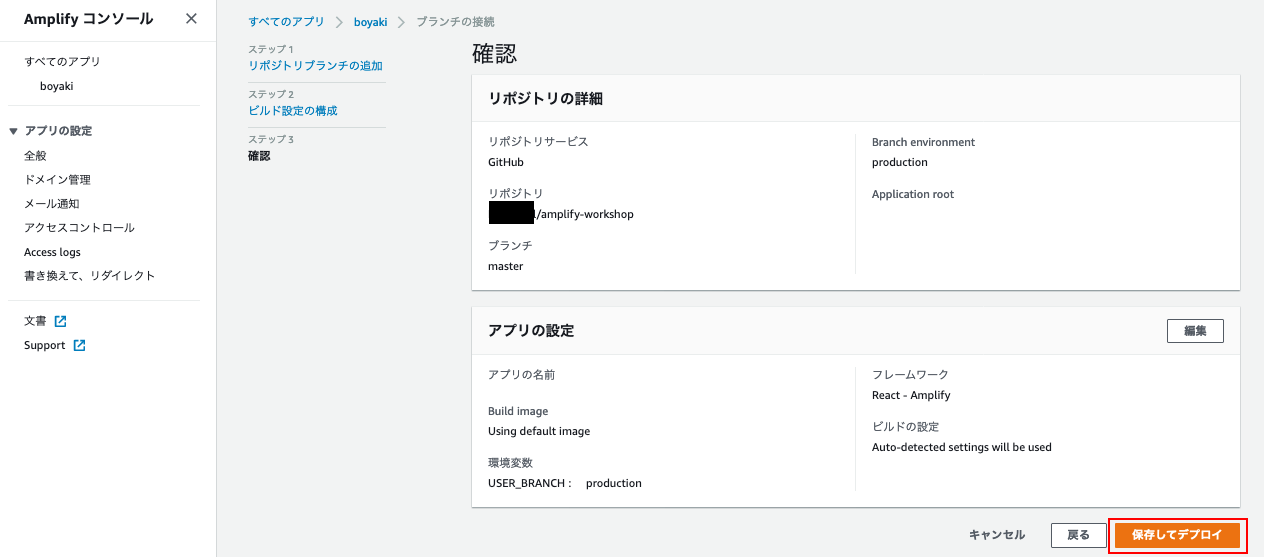
確認
表示されている項目に誤りがなければ、「保存してデプロイ」をクリックします。
プロビジョン > ビルド > デプロイ > 検証と処理が進みます。
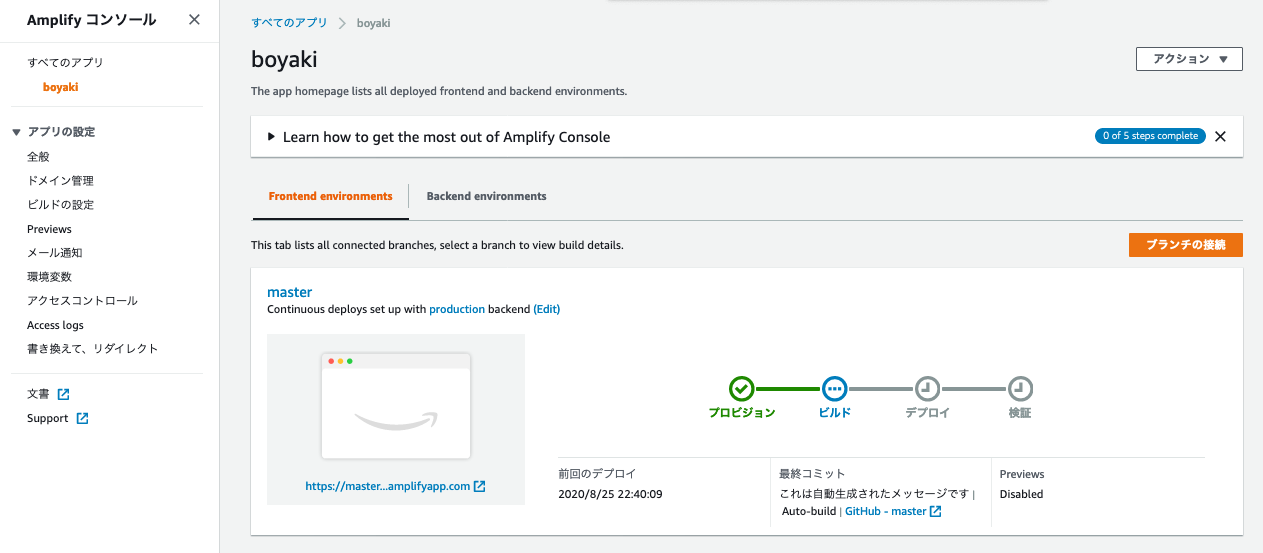
数分で検証まで終了します。All Greenです。
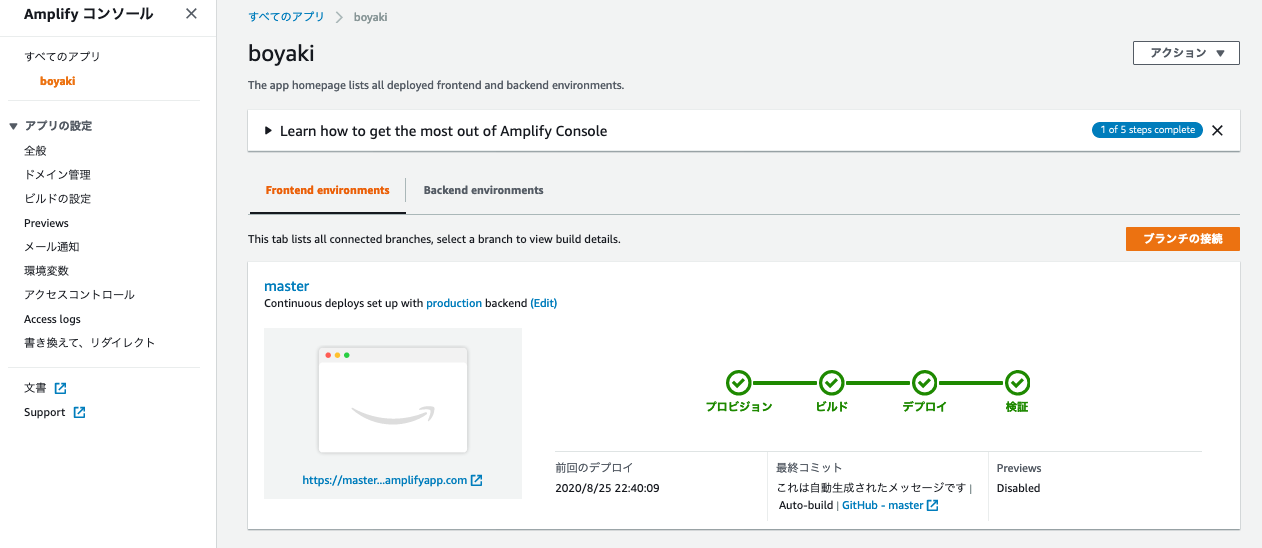
以上で、Github連携が完了です。
以下のように、ボタンのテキストを「Logout」 => 「Sign out」に変える変更をリポジトリに加えてみました。
自動でビルド、デプロイと走っていることがわかります。
ec2-user:~/environment/amplify-sns-workshop/boyaki (master) $ git diff
diff --git a/src/containers/Sidebar.js b/src/containers/Sidebar.js
index 8cac9c8..4e60e07 100644
--- a/src/containers/Sidebar.js
+++ b/src/containers/Sidebar.js
@@ -157,7 +157,7 @@ export default function Sidebar({activeListItem}) {
               onClick={signOut}
               fullWidth
             >
-              Logout
+              Sign out
             </Button>
           } />
         </ListItem>
ec2-user:~/environment/amplify-sns-workshop/boyaki (master) $ git add src/containers/Sidebar.js
ec2-user:~/environment/amplify-sns-workshop/boyaki (master) $ git commit -m "Change text for logout."
[master c8c5e85] Change text for logout.
 Committer: EC2 Default User <ec2-user@ip-172-31-33-189.ap-northeast-1.compute.internal>
Your name and email address were configured automatically based
on your username and hostname. Please check that they are accurate.
You can suppress this message by setting them explicitly:

    git config --global user.name "Your Name"
    git config --global user.email you@example.com

After doing this, you may fix the identity used for this commit with:

    git commit --amend --reset-author

 1 file changed, 1 insertion(+), 1 deletion(-)
ec2-user:~/environment/amplify-sns-workshop/boyaki (master) $ git push origin master
Enumerating objects: 9, done.
Counting objects: 100% (9/9), done.
Compressing objects: 100% (5/5), done.
Writing objects: 100% (5/5), 454 bytes | 454.00 KiB/s, done.
Total 5 (delta 4), reused 0 (delta 0)
remote: Resolving deltas: 100% (4/4), completed with 4 local objects.
To github.com:RustyNail/amplify-workshop.git
   0b8142b..c8c5e85  master -> master
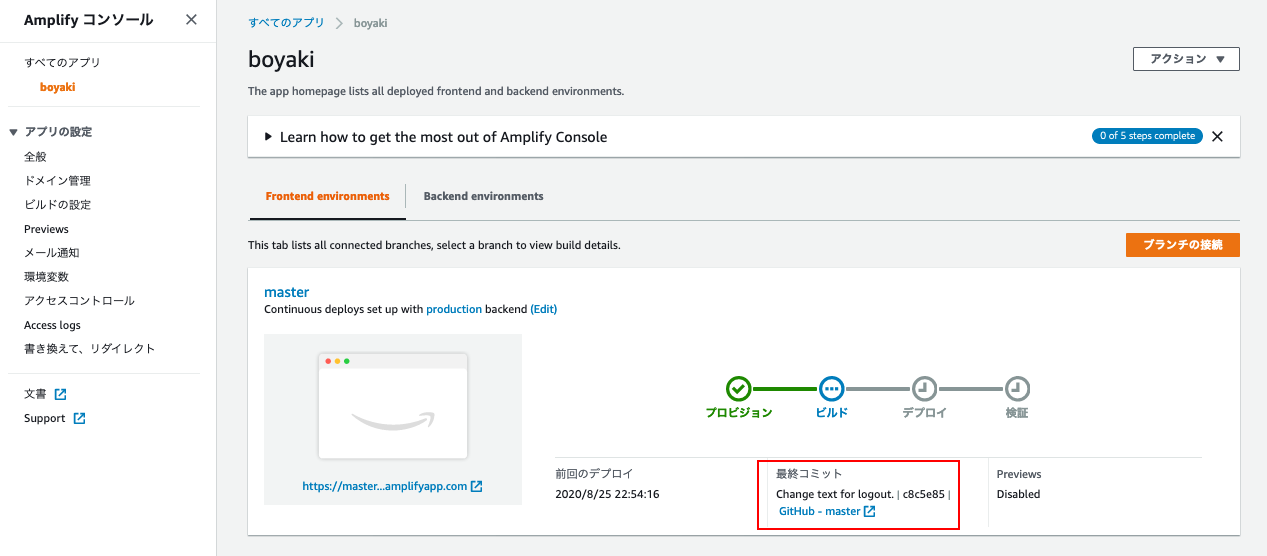
表示も「SIGN OUT」に変わっています。
Cypressと連携してE2Eテスト
AWS AmplifyはE2EテスティングフレームワークであるCypressをサポートしています。
Amplify Consoleと統合することで簡単に E2E テストを CI/CD 環境に組み込むことができます。
Cypress のインストール
$ npm install cypress mochawesome@4.1.0 mocha start-server-and-test --save-dev
テストコードの記述
テストを記述するフォルダとファイルを作成します。
$ mkdir -p cypress/integration
$ touch cypress/integration/authenticator_spec.js
$ touch cypress.json
今回のテストでは、以下のフローが正しく機能するかのテストを記述していきます。
- トップページにアクセスすると、ログイン画面を表示させる
- テスト用のユーザ ID/パスワードでログインできる
- ログイン後の画面に「Global」というテキストが表示されていることを確認する
cypress/integration/authenticator_spec.js
describe('Authenticator:', function() {
  beforeEach(function() {
    cy.visit('/');
  });

  describe('Sign In:', () => {
    it('allows a user to signin', () => {
      cy.get(selectors.usernameInput).type(
        'テスト用に作成したアカウント名'
      );
      cy.get(selectors.signInPasswordInput).type(
        'テスト用に作成したアカウントのパスワード'
      );
      cy.get(selectors.signInSignInButton)
        .contains('Sign In')
        .click();
      cy.get(selectors.root).contains('Global');
    });
  });
});
export const selectors = {
  usernameInput: '[data-test="username-input"]',
  signInPasswordInput: '[data-test="sign-in-password-input"]',
  signInSignInButton: '[data-test="sign-in-sign-in-button"]',
  root: '#root'
};
cypress.json
Cypressがテストを実行するためのサーバを指定します。
{
  "baseUrl": "http://localhost:3000"
}
Amplify ConsoleにE2Eテストの設定を追加
次に、Amplify ConsoleにE2Eテストを実行するように設定を変更します。
Amplify Console の「ビルドの設定」> 「ビルド設定の追加」から「編集」ボタンをクリックします。
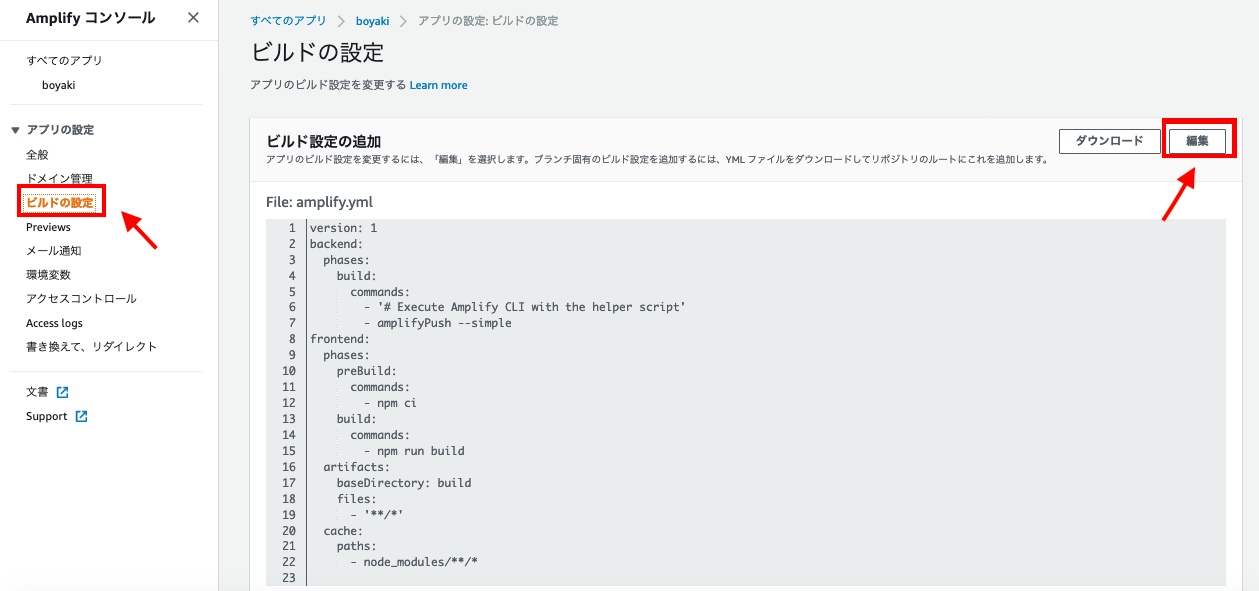
以下のように編集してtestフェーズを追加します。
version: 1
backend:
  phases:
    build:
      commands:
        - '# Execute Amplify CLI with the helper script'
        - amplifyPush --simple
frontend:
  phases:
    preBuild:
      commands:
        - npm ci
    build:
      commands:
        - npm run build
  artifacts:
    baseDirectory: build
    files:
      - '**/*'
  cache:
    paths:
      - node_modules/**/*
test:
  artifacts:
    baseDirectory: cypress
    configFilePath: "**/mochawesome.json"
    files:
      - "**/*.png"
      - "**/*.mp4"
  phases:
    preTest:
      commands:
        - yarn install
        - yarn add mocha mochawesome mochawesome-merge mochawesome-report-generator
    test:
      commands:
        - npx start-server-and-test 'yarn start' 3000 'npx cypress run --reporter mochawesome --reporter-options "reportDir=cypress/report/mochawesome-report,overwrite=false,html=false,json=true,timestamp=mmddyyyy_HHMMss"'
    postTest:
      commands:
        - npx mochawesome-merge cypress/report/mochawesome-report/mochawesome*.json > cypress/report/mochawesome.json
設定したビルド設定をダウンロードし、プロジェクトのトップディレクトリ配下に配置します。

Githubにpushして、Amplify Consoleを確認してみましょう。
$ git add .
$ git commit -m "add cypress settings"
$ git push
「テスト」が追加されています!
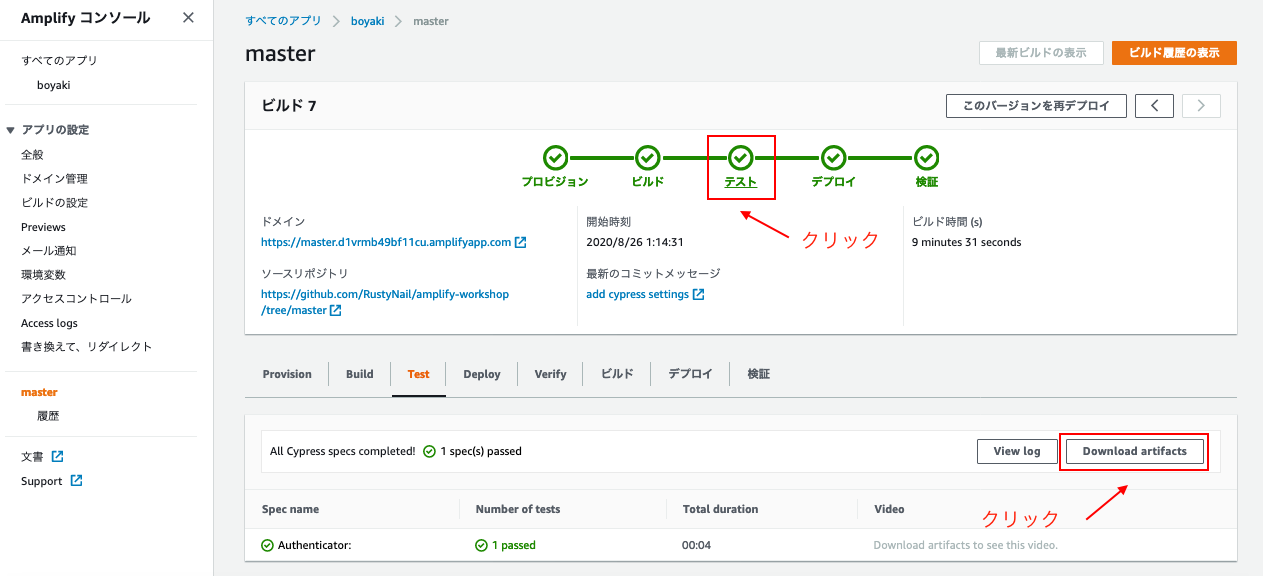
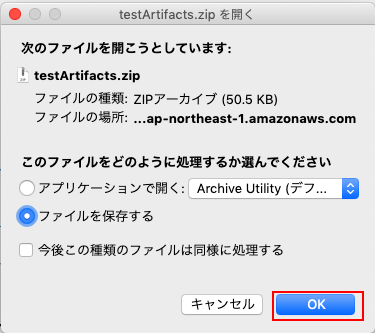
「Download artifacts」をクリックすると、テストの動画も取得できます。
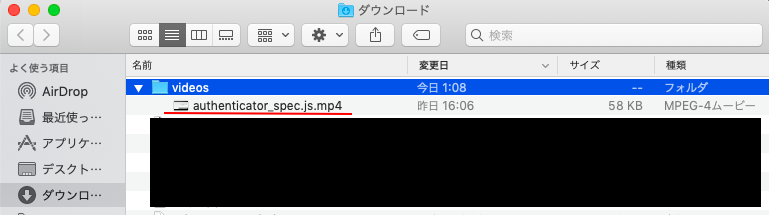
[authenticator_spec.js.mp4をgifに変換したもの]

後始末
amplifyで作成したアプリケーションを削除する際は、$amplify deleteを実行して削除をします。
これを実行するとCloudFormationで作成した成果物やAmplifyアプリなど全てが消去されます。