ゴール
- 限定公開(=プライベート)GKEクラスタを作成し、
- AI Platform Pipelinesをデプロイし、
- AI Platform Pipelinesを使える状態にする
前置き
AI Platform Pipelines は Kubeflowのパイプラインサービス・実験管理サービスである Kubeflow PipelinesのGCPマネージドサービスである。
Kubeflow自体はKubernetesをバックエンドにした機械学習てんこもりセットである。
KubeflowはKubeflow Pipelinesだけではなく、パラメータチューニングのためのKatibやデプロイのためのKF Servingなどがある。
AI Platform Pipelinesが2020年3月にβ版がリリースされたので早速試してみる。
AI Platform Pipelinesを利用できるようにするには最低限GKEクラスタが必要になる。
もちろんコンソール上でポチポチやればクラスタを自動で作成した上でPipelinesを利用できる。
この記事ではネットワーク・ノードプール・オートスケーリングに気を配った上でプライベートなGKEクラスラを作成する。そこにAI Platform Pipelinesをデプロイする。また構築にはTerraformを使う。
プロバイダの設定
GCPのリソースを構築するためにTerraformで以下の記述をする。
provider "google-beta" {
  project     = var.project_id
  region      = var.region
  zone        = var.zone
  credentials = "/Path/to/credentials.json"
}
他のリソース構築だったらgoogle-betaリソースをgoogleにしてもいい。
が、今回GKEクラスタで多くのβ機能を利用するのでgoogle-betaリソースにする。Terraformの公式によると
In short, using google-beta over google is similar to using gcloud beta over gcloud. Features that are exclusively available in google-beta are GCP features that are not yet GA, and they will be made available in google after their GA launch.
とのこと。ちなみにgoogleリソースにしてterraformを実行するとエラーになる。
ネットワークの設定
クラスラを配置するためのネットワークを設計する。
// Create Private Network.
resource "google_compute_network" "test_network" {
  name                            = "test-network"
  project                         = var.project_id
  auto_create_subnetworks         = false
  delete_default_routes_on_create = false
}
(別の記事でも書いたことをベタ貼りするが…)
auto_create_subnetworks=true にすると各リージョンに 10.128.0.0/9 の範囲から自動的にサブネットワークが生成される。
またdelete_default_routes_on_create=trueにすると、ネットワーク生成後にデフォルトのルート(0.0.0.0/0)が削除される。
ここで注意点があるが、ネットワーク周りの命名(上記でいうとtest-network)はRFCに則る必要があるのでリソース名にアンスコ( _ )を入れることが出来ない。ここぞというばかりにエラーで怒られる。Terraform上のリソース名(上記でいうと test_network )はアンスコが入っていても問題ない。
次にサブネットワークを設計する。
// Create Subnetwork.
resource "google_compute_subnetwork" "test_subnet" {
  name                     = "test-subnet"
  project                  = var.project_id
  region                   = var.region
  ip_cidr_range            = "10.20.0.0/16"
  network                  = google_compute_network.test_network.self_link
  private_ip_google_access = true

  secondary_ip_range {
    range_name    = "cluster-ip-range" // IP range for pods
    ip_cidr_range = "10.21.0.0/16"
  }

  secondary_ip_range {
    range_name    = "services-ip-range" // IP range for servivce,
    ip_cidr_range = "10.22.0.0/16"      // especially ClusterIP
  }
}
private_ip_google_access = trueにすると、外部IPを持たないVMがPrivate Google Accessを使ってGoogle APIや他サービスを利用できるようになる。今回はプライベートなクラスタを設置し、そこに内部IPだけを持つVMインスタンスを配置するのでこの設定にした。
secondary_ip_rangeのブロックを2つ作成した。セカンダリIPは、そのネットワークがプライマリIP範囲とは別に持つことが出来るIP範囲である。
後述するがクラスタのip_allocation_policyを有効にするにはpodとserviceのためにそれぞれセカンダリIP範囲を切ったほうがいいと判断し、ここで作成している。
Cloud NATの作成
これに倣って作成。ベタ貼りだけど自分ので記事なので許して欲しい…。
// Create NAT router.
resource "google_compute_router" "nat_router" {
  name    = "nat-router"
  project = var.project_id
  region  = var.region
  network = google_compute_network.network.self_link
}

// Create NAT address.
resource "google_compute_address" "nat_address" {
  name    = "nat-address"
  project = var.project_id
  region  = var.region
}

// Create NAT.
resource "google_compute_router_nat" "nat" {
  name                               = "nat"
  project                            = var.project_id
  region                             = var.region
  router                             = google_compute_router.nat_router.name
  nat_ip_allocate_option             = "AUTO_ONLY"
  source_subnetwork_ip_ranges_to_nat = "ALL_SUBNETWORKS_ALL_IP_RANGES"
}
GKEプライベートクラスターの作成
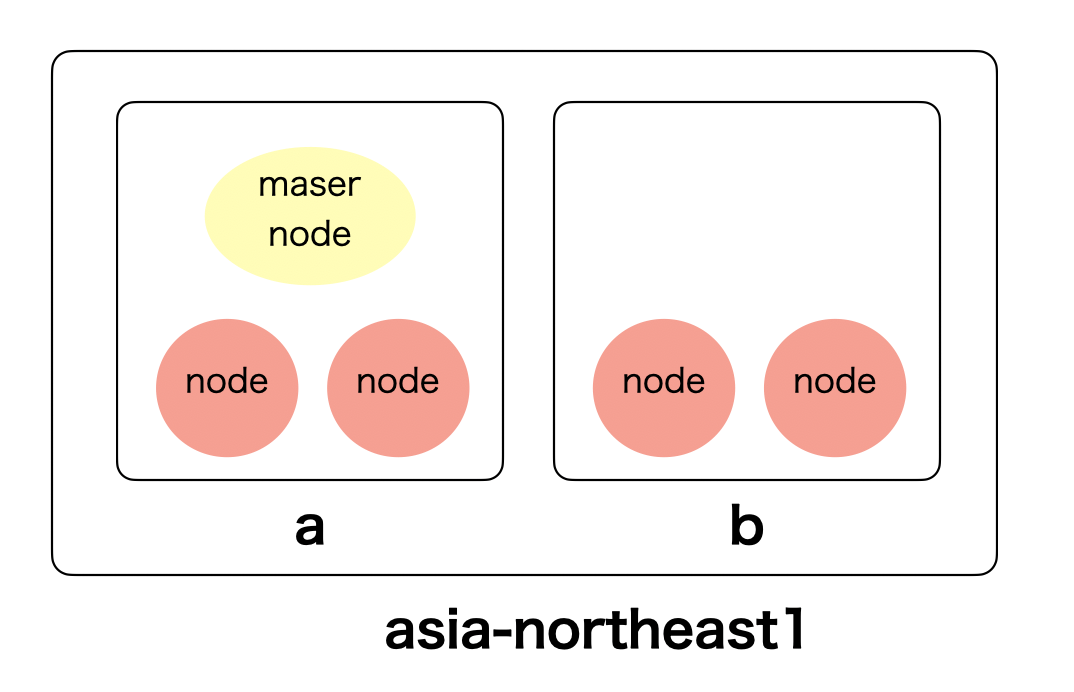
ロケーション観点でクラスターを分類すると、以下の3つになる。
- Single-zone cluster
- Multi-zonal cluster
- Regional cluster
Single-zone cluster
指定したzoneにマスターとノードを設置するクラスタ。
コストが抑えられるが可用性は保証できない。

Multi-zonal cluster
指定した複数のzone(2つ以上)にマスターとノードを設置するクラスタ。マスターノードは冗長化しない。

Regional cluster
region内のzone全てにマスターとノードを設置するクラスタ。マスターの冗長化もしているので可用性は高いが、料金もその分高くなる。

今回は Multi-zonal clusterを選択する。また上記で作成したネットワークとサブネットワークもここで指定する。
クラスタとノードプールの記述
resource "google_container_cluster" "test_cluster" {
  provider    = google-beta
  name        = "test-cluster"
  location    = "asia-northeast1-a"
  network     = "test-network"
  subnetwork  = "test-subnet"
}
次にクラスターの基本的な設定を記述する。
resource "google_container_cluster" "test_cluster" {
  // Clusters Specification

  private_cluster_config {
    enable_private_nodes    = true
    enable_private_endpoint = false // either endpoint can be able.
    master_ipv4_cidr_block  = "172.17.0.0/28"
  }

  master_authorized_networks_config {
      cidr_blocks {
        cidr_block   = var.cidr_block
        display_name = "test"
      }

  maintenance_policy {
    daily_maintenance_window {
    start_time = "18:00"
    }
  }

  release_channel {
    channel = "STABLE"
  }

  logging_service     = "logging.googleapis.com/kubernetes"
  monitoring_service  = "monitoring.googleapis.com/kubernetes"

  timeouts {
    create = "30m"
    update = "40m"
    delete = "40m"
  }
}
private_cluster_configブロックはその名前の通りプライベートクラスタにするための設定を記述する。
enable_private_endpoint = falseにするとパブリックエンドポイントが無効になる。これによってマスターの外部IPアドレスが無効になる。
また同時にmaster_authorized_networks_configでマスター承認済みネットワークの設定を行っている。これによってマスターノードはこのIP範囲からのみアクセス可能になる。
release_channelは特定のクラスタがどの自動アップデートを受け取るかを設定するもの。言い換えるとどの頻度でクラスタをアップデートするか、である。
release_channelは、 RAPID REGULAR STABLEを選択できる。RAPIDになればアップデートの頻度が最も高くなり、マイナーバージョンでの更新も行われる。STABLEだと頻度こそ低いもののリスクの多いアップグレードによるリスクを下げる。詳しくはこちら。
次にノードプール。
resource "google_container_node_pool" "np-n1-standard-4" {
  provider           = google-beta
  name               = "np-n1-standard-4"
  cluster            = google_container_cluster.test-cluster.name
  location           = "asia-northeast1-a"
  initial_node_count = 1

  autoscaling {
    min_node_count = 0
    max_node_count = 3
  }

  management {
    auto_repair   = true
    auto_upgrade  = true
  }

  node_locations = [
    "asia-northeast1-a",
    "asia-northeast1-b",
  ]

  node_config {
    disk_type        = "pd-standard"
    machine_type     = "n1-standard-4"

    min_cpu_platform = "Intel Haswell"
    preemptible      = false

    metadata = {
      disable-legacy-endpoints = true
    }

    shielded_instance_config {
      enable_secure_boot          = false
      enable_integrity_monitoring = true
    }

    workload_metadata_config {
      node_metadata = "EXPOSE"
    }

    oauth_scopes = [
      "https://www.googleapis.com/auth/cloud-platform"
    ]
  }

  upgrade_settings {
    max_surge       = 0  // no nodes are to upgrade simultaneously
    max_unavailable = 3  // three nodes are to upgrade in parallel
  }
}
基本的にはドキュメント通りに記述しているので変なことはしていないが、oauth_scopesで "https://www.googleapis.com/auth/cloud-platform" をしている。
GKEクラスタにKubeflow pipelinesをデプロイする要件として、
Check Allow access to the following Cloud APIs to grant applications that run on your GKE cluster access to Google Cloud resources. By checking this box, you are granting your cluster access to the https://www.googleapis.com/auth/cloud-platform access scope.
とある。
最終的にクラスタとノードプールのTerraformは以下になった。
resource "google_container_cluster" "test_cluster" {
  provider    = google-beta
  name        = "test-cluster"
  location    = "asia-northeast1-a"

  // Clusters Specification

  private_cluster_config {
    enable_private_nodes    = true
    enable_private_endpoint = false // either endpoint can be able.
    master_ipv4_cidr_block  = "172.17.0.0/28"
  }

  maintenance_policy {
    daily_maintenance_window {
    start_time = "18:00"
    }
  }

  release_channel {
    channel = "STABLE"
  }

  logging_service     = "logging.googleapis.com/kubernetes"
  monitoring_service  = "monitoring.googleapis.com/kubernetes"

  timeouts {
    create = "30m"
    update = "40m"
    delete = "40m"
  }

  // Nodes Specification

  enable_shielded_nodes    = true
  initial_node_count       = 1
  remove_default_node_pool = true

  node_locations = [
    "asia-northeast1-b"
  ]

  // Autoscaling

  cluster_autoscaling {
    enabled             = true
    resource_limits {
      resource_type     = "cpu"
      maximum           = 12
    }
    resource_limits {
      resource_type     = "memory"
      maximum           = 64
    }
    autoscaling_profile = "BALANCED"
  }

  vertical_pod_autoscaling {
    enabled = true
  }

  // Network and Security

  network                     = "test-network"
  subnetwork                  = "test-subnet"
  enable_intranode_visibility = true

  master_authorized_networks_config {
    cidr_blocks {
      cidr_block   = var.cidr_block
      display_name = "test"
    }
  }

  ip_allocation_policy{
    cluster_secondary_range_name  = "cluster-ip-range"
    services_secondary_range_name = "services-ip-range"
  }

  workload_identity_config {
    identity_namespace = "${var.project_id}.svc.id.goog"
  }

}

// Create 1 node pool

resource "google_container_node_pool" "np-n1-standard-4" {
  provider           = google-beta
  name               = "np-n1-standard-4"
  cluster            = google_container_cluster.wevox-ml.name
  location           = "asia-northeast1-a"
  initial_node_count = 1

  autoscaling {
    min_node_count = 0
    max_node_count = 3
  }

  management {
    auto_repair   = true
    auto_upgrade  = true
  }

  node_locations = [
    "asia-northeast1-a",
    "asia-northeast1-b",
  ]

  node_config {
    disk_type        = "pd-standard"
    machine_type     = "n1-standard-4"

    min_cpu_platform = "Intel Haswell"
    preemptible      = false

    metadata = {
      disable-legacy-endpoints = true
    }

    shielded_instance_config {
      enable_secure_boot          = false
      enable_integrity_monitoring = true
    }

    workload_metadata_config {
      node_metadata = "EXPOSE"
    }

    oauth_scopes = [
      "https://www.googleapis.com/auth/cloud-platform"
    ]
  }

  upgrade_settings {
    max_surge       = 0  // no nodes are to updgrade in simultaneously
    max_unavailable = 3  // three nodes are to upgrade in parallel
  }
}
上記をapplyしてネットワーク・NAT・クラスタを作成する。
AI Platform Pipelinesのデプロイ
ここからは簡単。さすがマネージド。
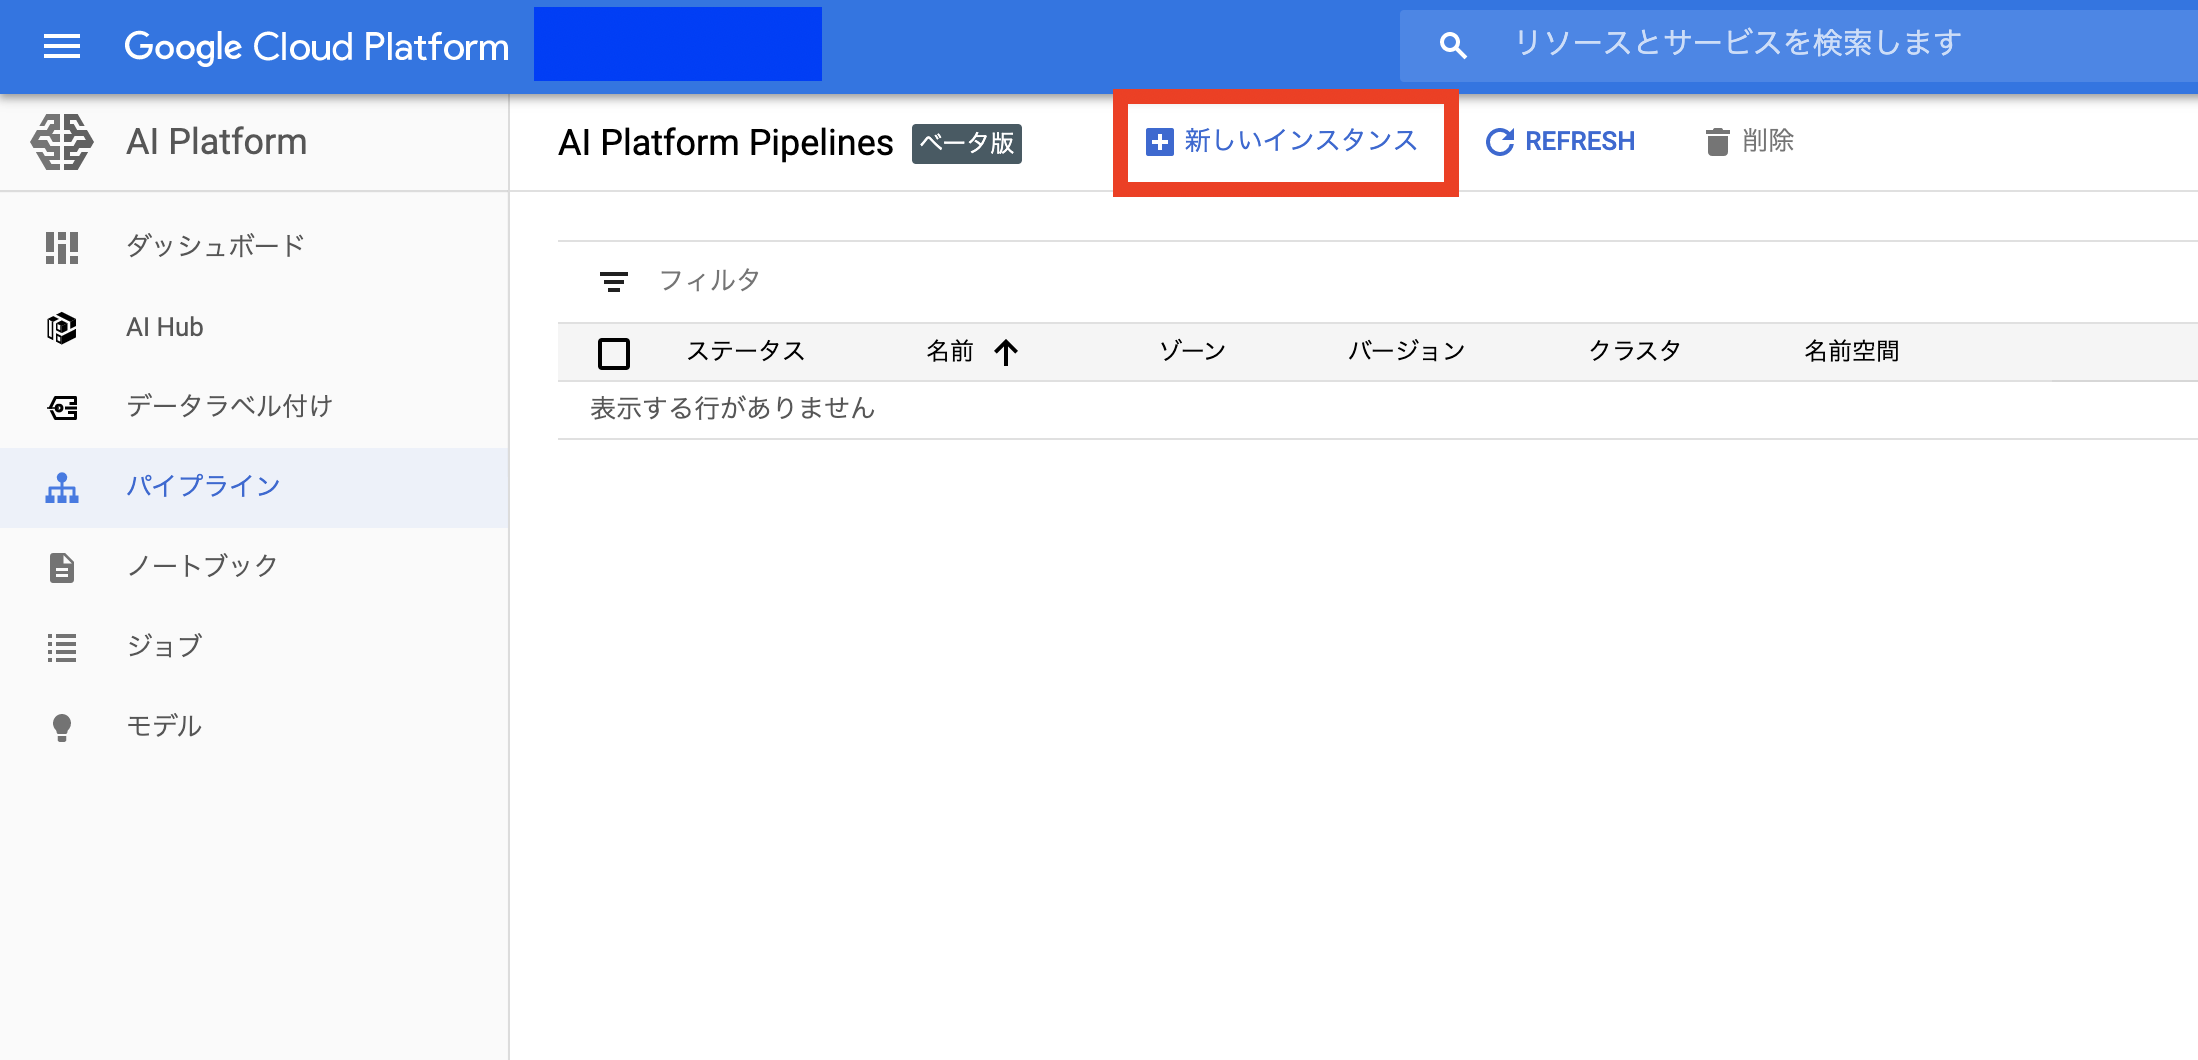
コンソールで AI Platform > パイプライン
下図のように「新しいインスタンス」をクリック。

いくつかすすめると下図の画面になる。
先程作成したクラスタが作成されているのでそのまま「デプロイ」する。(dev-clusterはtest-cluster)と読んでください。

するとインスタンスが新しく出来ているのでダッシュボードを開く。

この画面が出ていたらOK。

駆け足で書いたが、k8s、Kubeflowなど理解を必要とする範囲が広くなかなか時間がかかってしまった。
がマネージドである分kubeflow pipelinesのつらいところをうまく吸収しているようにも思える。
AI Platform Pipelinesの使い方についても今後記事にしたいと思う。