はじめに
midPointアドベントカレンダー18日目の今日は、実際にパスワード管理を試してみます。
具体的には、midPoint内部DBでのパスワードの保存形式の設定、パスワードポリシーの変更、パスワードのプロビジョニング、パスワード変更(セルフパスワードリセット)といったところです。
そもそもmidPointのパスワード管理はどんなものなの?という場合には17日目の記事「 midPointにおける「パスワード管理」 」をご確認ください。
midPoint内部DBでのパスワード保存形式の設定
midPoint内部DBでのパスワード保存形式は、共通鍵による暗号化(デフォルトの挙動)、ハッシュ化の二種類がサポートされています。
共通鍵による暗号化(デフォルト)
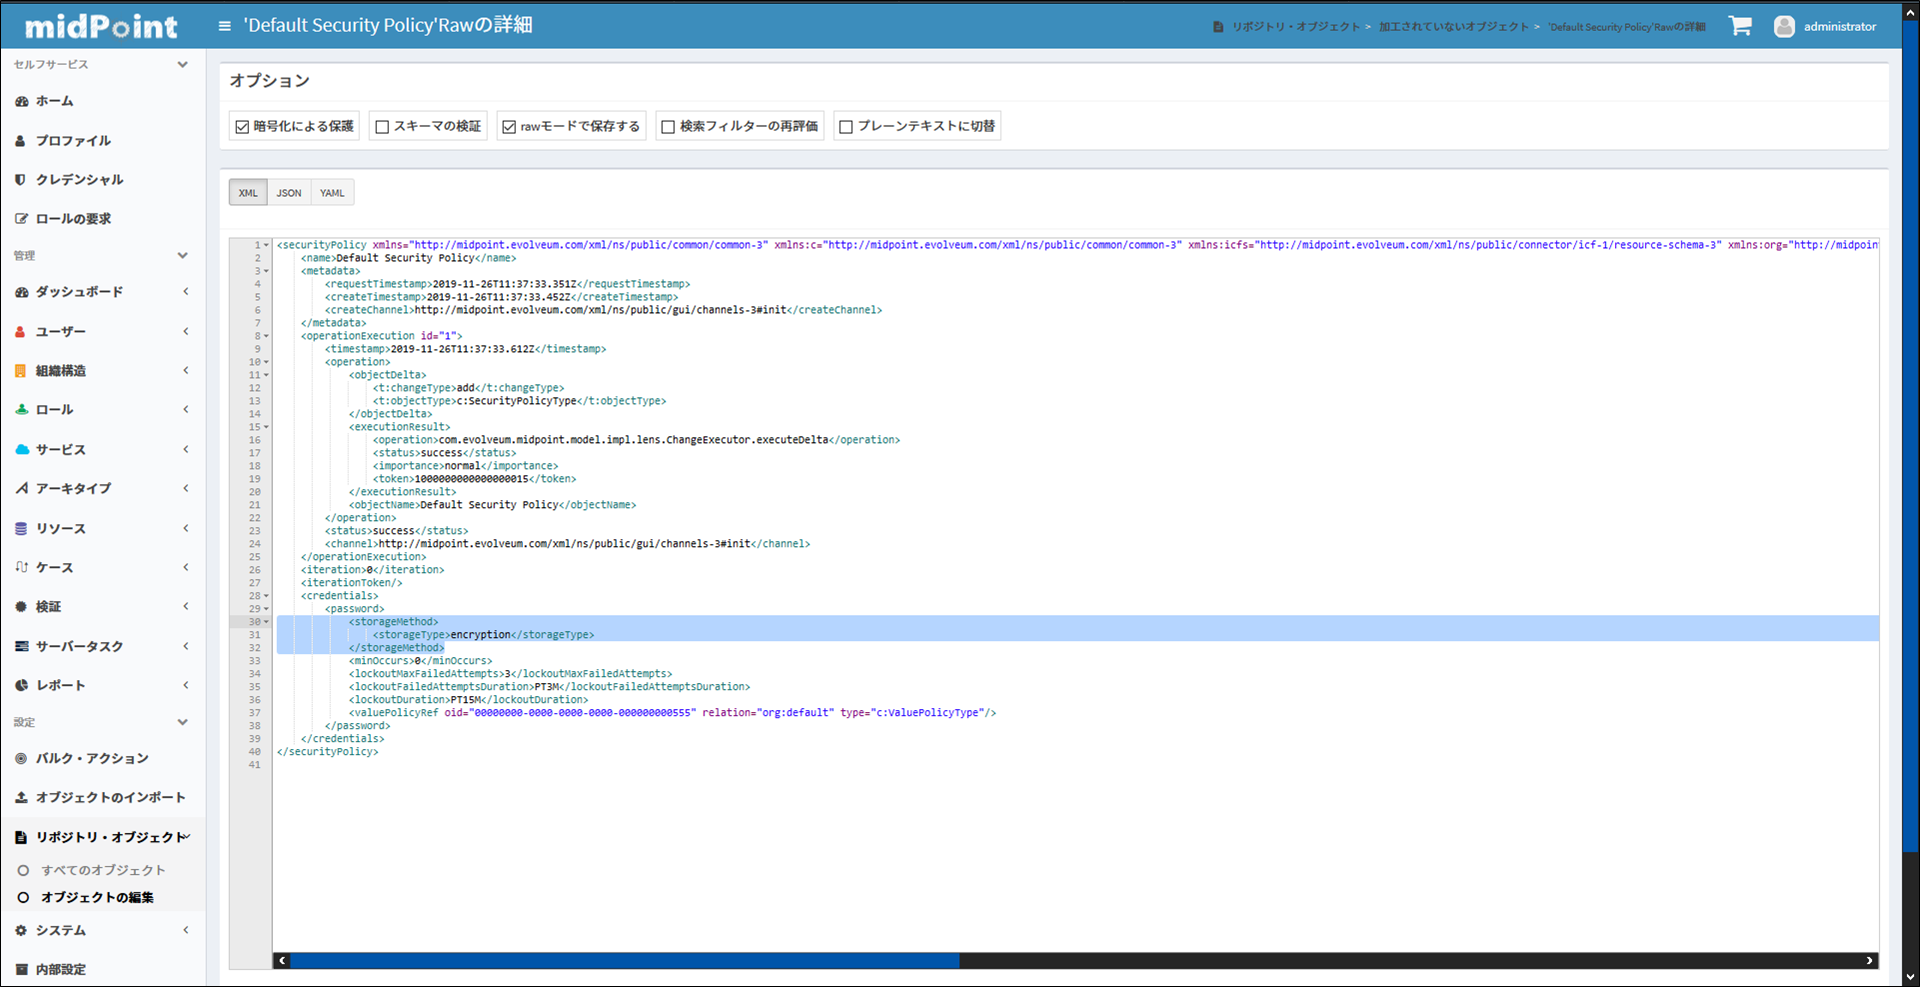
左メニューの設定 ⇒ リポジトリ・オブジェクト ⇒ すべてのオブジェクト ⇒ 画面右上のプルダウン:セキュリティー・ポリシー から設定を変更できます。
- 暗号化の場合
上記で開いたxmlのpassword要素内に以下を設定します。
(なお、デフォルトのため、明示的に記載する必要はありません)
<storageMethod>
    <storageType>encryption</storageType>
</storageMethod>
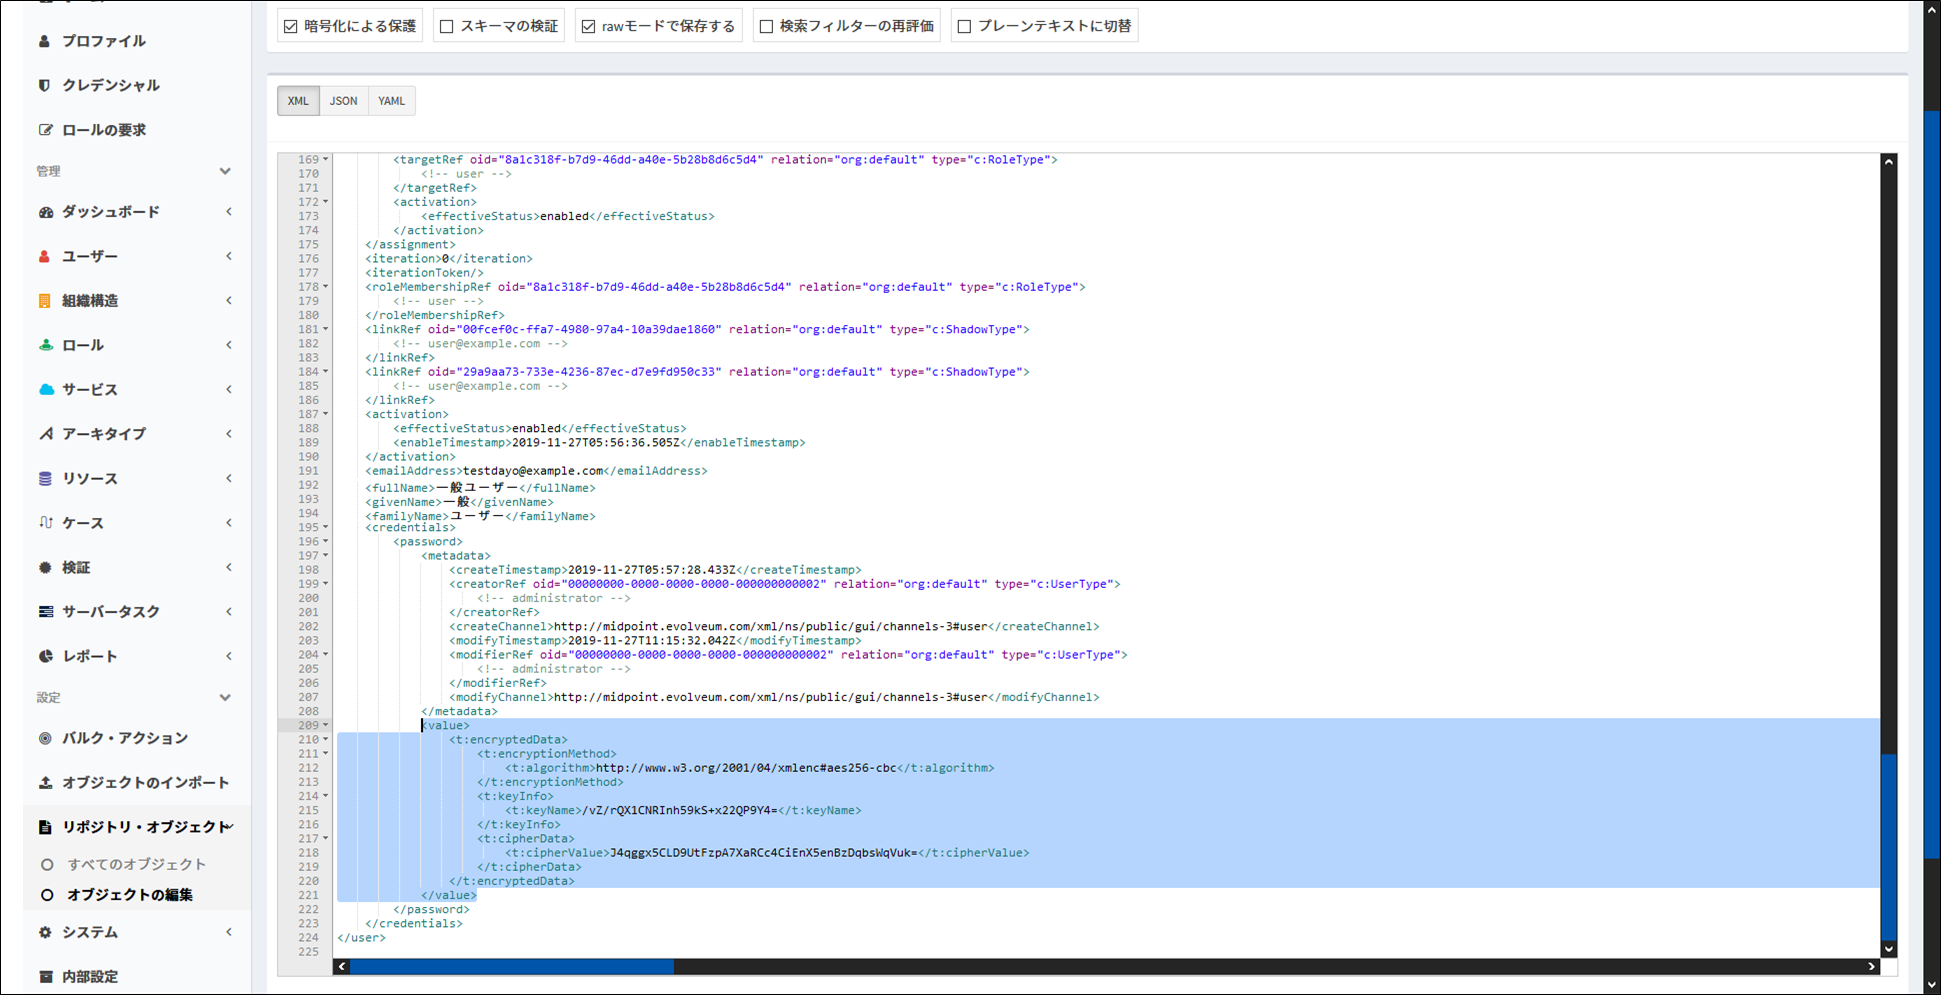
デフォルト、または上記を設定した場合、midPointが内部で保持している共通鍵(AES)によりXML暗号化され、midPoint内部DBに保存されます。
共通鍵は指定したパスのkeystoreにて保持されます。
![]() AES鍵の鍵長について
AES鍵の鍵長について
デフォルトの鍵長はインストールされているJDKにJCE拡張が入っていれば256bit、入っていなければ128bitです。
現在主流となっているOpenJDKにはAES256が含まれているため、大体の場合256bitで動くことになると思います。
ハッシュ化
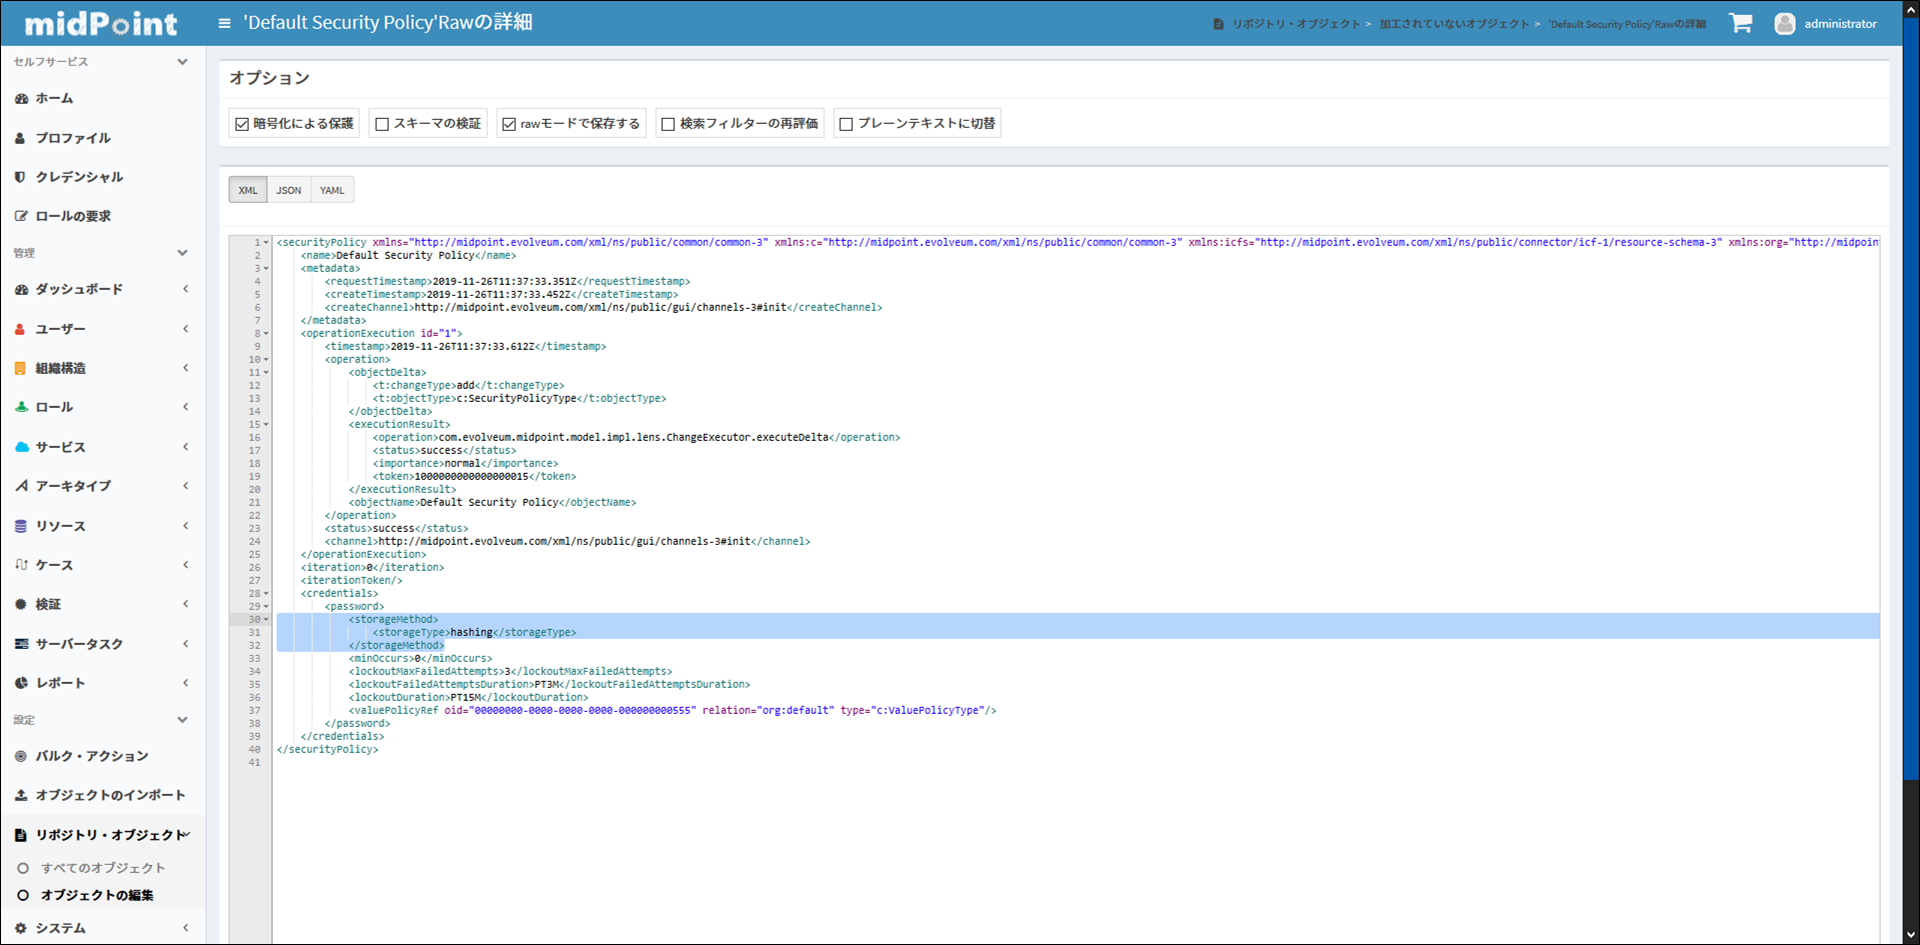
こちらも、左メニューの設定 ⇒ リポジトリ・オブジェクト ⇒ すべてのオブジェクト ⇒ 画面右上のプルダウン:セキュリティー・ポリシー から設定を変更できます。
- ハッシュ化の場合
password要素内に以下を設定します。
<storageMethod>
    <storageType>hashing</storageType>
</storageMethod>
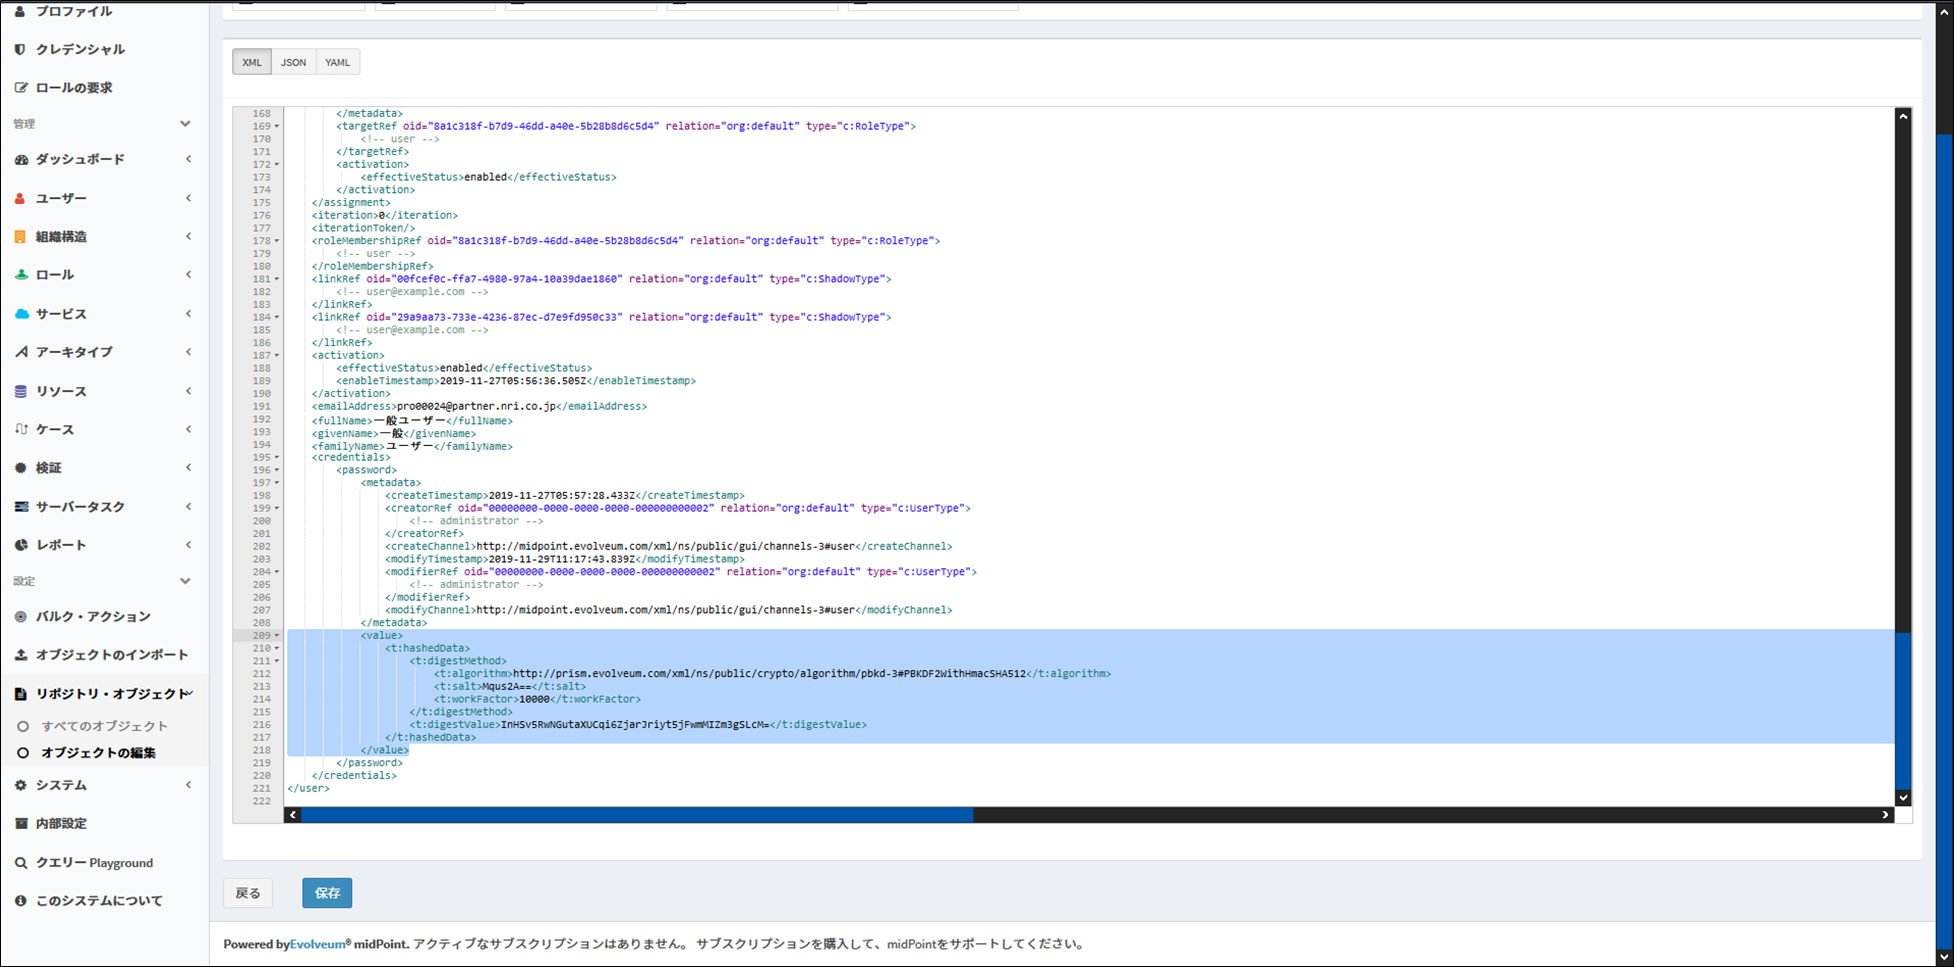
ハッシュアルゴリズムはPBKDF2Withが使用されます。
暗号化と比べ、どこにも平文を保持しないためセキュアですが、デメリットがあります。
どっちがいい?
セキュリティの観点から見ると、ハッシュ化して保存したほうがセキュアです。
しかし、パスワードを各システムに連携する際、パスワード設定時にしか平文がわからないことは大きなデメリットとなります。
例えば、後から連携システムを追加し、アカウントをプロビジョニングする際、
暗号化して保持している場合、いつでも平文に戻せるため、新たな連携システムにパスワードを伝達することが可能です。
一方、ハッシュ化して保持している場合、平文がわからないため、パスワードを伝達することが不可能となります。
上記理由により、midPoint等のIDMでは、パスワードを暗号化して保持することが一般的なようです。
![]() 第三の選択肢:パスワードを保存しない
第三の選択肢:パスワードを保存しない
midPoint上にパスワードを一切保存しない設定も実装されていますが、まだサポートされていません。
詳しくはwikiをご確認ください。
パスワードポリシーの変更
パスワードポリシーの変更は、xmlを作成し、Security Policyに追加することで変更可能です。
デフォルトはこんな感じになっています。
- デフォルト定義
| 定義 | ルール |
|---|---|
| 最小文字数 | 6文字以上 |
| 最小限のユニーク文字数 | 3種類以上 |
<?xml version="1.0" encoding="UTF-8"?>
<!--
  ~ Copyright (c) 2010-2017 Evolveum and contributors
  ~
  ~ This work is dual-licensed under the Apache License 2.0
  ~ and European Union Public License. See LICENSE file for details.
  -->
<valuePolicy oid="00000000-0000-0000-0000-000000000003"
        xmlns="http://midpoint.evolveum.com/xml/ns/public/common/common-3"
        xmlns:t="http://prism.evolveum.com/xml/ns/public/types-3"
        version="0">
    <name>
        <t:orig>Default Password Policy</t:orig>
        <t:norm>default password policy</t:norm>
    </name>
    <description>Default password policy</description>
    <stringPolicy>
        <description>Testing string policy</description>
        <limitations>
            <minLength>5</minLength>
            <!--             <maxLength>8</maxLength> -->
            <minUniqueChars>3</minUniqueChars>
            <checkAgainstDictionary>true</checkAgainstDictionary>
            <checkPattern />
            <!--             <limit> -->
            <!--                 <description>Alphas</description> -->
            <!--                 <minOccurs>1</minOccurs> -->
            <!--                 <maxOccurs>5</maxOccurs> -->
            <!--                 <mustBeFirst>false</mustBeFirst> -->
            <!--                 <characterClass> -->
            <!--                     <value>abcdefghijklmnopqrstuvwxyzABCDEFGHIJKLMNOPQRSTUVWXYZ</value> -->
            <!--                 </characterClass> -->
            <!--             </limit> -->
            <!--             <limit> -->
            <!--                 <description>Numbers</description> -->
            <!--                 <minOccurs>1</minOccurs> -->
            <!--                 <maxOccurs>5</maxOccurs> -->
            <!--                 <mustBeFirst>false</mustBeFirst> -->
            <!--                 <characterClass> -->
            <!--                     <value>1234567890</value> -->
            <!--                 </characterClass> -->
            <!--             </limit> -->
        </limitations>
    </stringPolicy>
</valuePolicy>
- デフォルトの例
| 入力文字 | 可否 |
|---|---|
| aaaabbbb | 不可 |
| 12qwa | 不可 |
| 12qwas | 可 |
| aaaaabbcc | 可 |
このパスワードルールを以下のように変更してみます。
- ルール定義
| 定義 | ルール | 変更または追加する要素 |
|---|---|---|
| 最小文字数 | 8文字以上 | minLength |
| 最大文字数 | 12文字以下 | maxLength |
| 最小限のユニーク文字数 | 5種類以上 | minUniqueChars |
| 最低一文字以上使用する文字 | 英大文字、英小文字、数字、一部の記号から1文字ずつ | 各limit
|
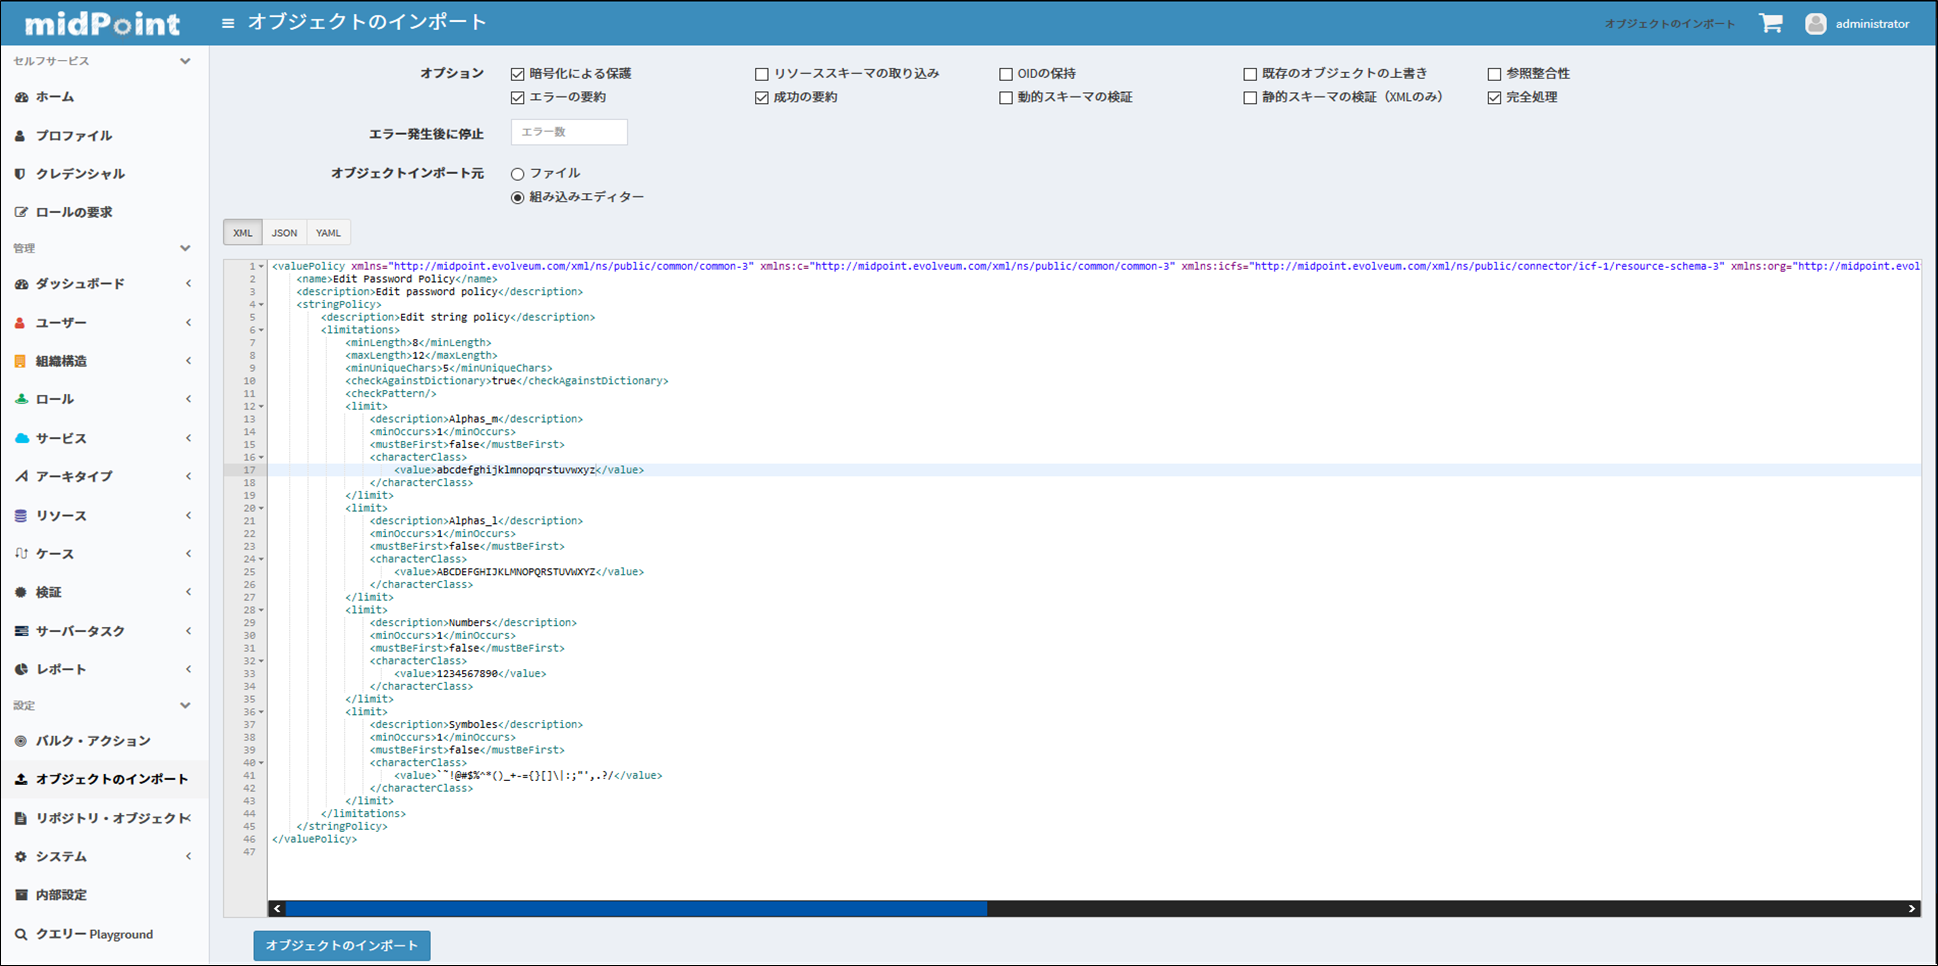
上記を満たすよう、以下のxmlファイルを作成します。
<valuePolicy xmlns="http://midpoint.evolveum.com/xml/ns/public/common/common-3" xmlns:c="http://midpoint.evolveum.com/xml/ns/public/common/common-3" xmlns:icfs="http://midpoint.evolveum.com/xml/ns/public/connector/icf-1/resource-schema-3" xmlns:org="http://midpoint.evolveum.com/xml/ns/public/common/org-3" xmlns:q="http://prism.evolveum.com/xml/ns/public/query-3" xmlns:ri="http://midpoint.evolveum.com/xml/ns/public/resource/instance-3" xmlns:t="http://prism.evolveum.com/xml/ns/public/types-3" oid="00000000-0000-0000-0000-000000000555" version="0">
    <name>Edit Password Policy</name>
    <description>Edit password policy</description>
    <stringPolicy>
        <description>Edit string policy</description>
        <limitations>
            <minLength>8</minLength>
            <maxLength>12</maxLength>
            <minUniqueChars>5</minUniqueChars>
            <checkAgainstDictionary>true</checkAgainstDictionary>
            <checkPattern/>
            <limit>
                <description>Alphas_m</description>
                <minOccurs>1</minOccurs>
                <mustBeFirst>false</mustBeFirst>
                <characterClass>
                    <value>abcdefghijklmnopqrstuvwxyz</value>
                </characterClass>
            </limit>
            <limit>
                <description>Alphas_l</description>
                <minOccurs>1</minOccurs>
                <mustBeFirst>false</mustBeFirst>
                <characterClass>
                    <value>ABCDEFGHIJKLMNOPQRSTUVWXYZ</value>
                </characterClass>
            </limit>
            <limit>
                <description>Numbers</description>
                <minOccurs>1</minOccurs>
                <mustBeFirst>false</mustBeFirst>
                <characterClass>
                    <value>1234567890</value>
                </characterClass>
            </limit>
            <limit>
                <description>Symboles</description>
                <minOccurs>1</minOccurs>
                <mustBeFirst>false</mustBeFirst>
                <characterClass>
                    <value>`˜!@#$%^*()_+-={}[]\|:;"',.?/</value>
                </characterClass>
            </limit>
        </limitations>
    </stringPolicy>
</valuePolicy>
作成したxmlを左メニューのオブジェクトのインポートからインポートします。
セキュリティポリシーに反映します。
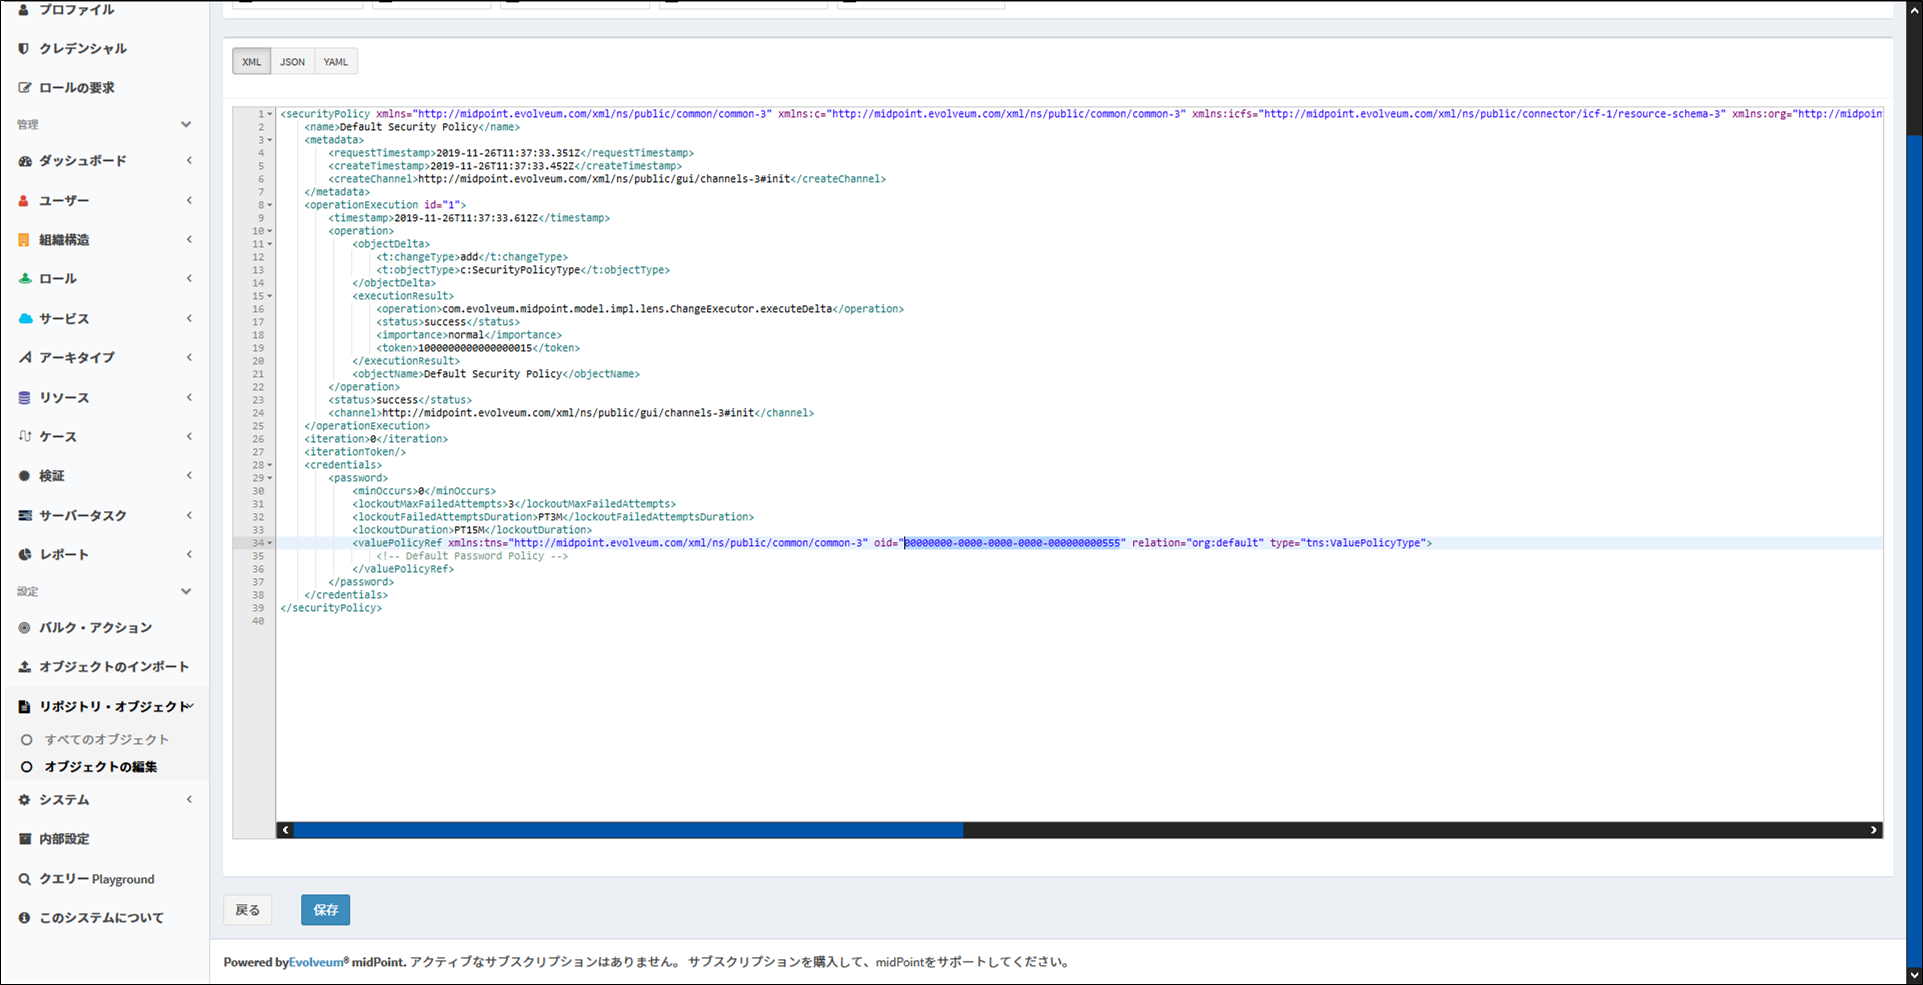
左メニューの設定 ⇒ リポジトリ・オブジェクト ⇒ すべてのオブジェクト ⇒ 画面右上のプルダウン:セキュリティー・ポリシー からxmlを開き、
password要素内のvaluePolicyref要素のoidを上記で作成したxmlのものに修正して保存します。
これで設定完了です。
- 変更後の例
| 入力文字 | 可否 | 理由 |
|---|---|---|
| 12Qw# | 不可 | 7文字以下 |
| 12qwaszX#$erdfcv | 不可 | 13文字以上 |
| 12qwaszX | 不可 | 記号が含まれていない |
| Aaaaaaa1# | 不可 | 使用文字種が4種以下 |
| 12qwaszX# | 可 |
動作確認
想定通りに設定されていることを確認するため、パスワードをmidPoint上から変更してみます。
※左メニューの設定 ⇒ ユーザー ⇒ すべてのユーザー ⇒ 変更対象のユーザから実施します。
想定通りの設定がされていることを確認できました。
パスワード同期(プロビジョニング)
パスワードも他のリソースにプロビジョニングができます。
midPoint上で一元管理できるので便利です。
また、リソース毎に設定が可能なので、例えば以下のように各連携システムのセキュリティ要件毎に個別の設定が可能です。
- 連携システムXにはユーザIDをソルトにSHA512でハッシュ化してプロビジョニング
- 連携システムYにはユーザ名(ログインID)をソルトにSHA256でハッシュ化し、3回ストレッチングしてプロビジョニング
設定
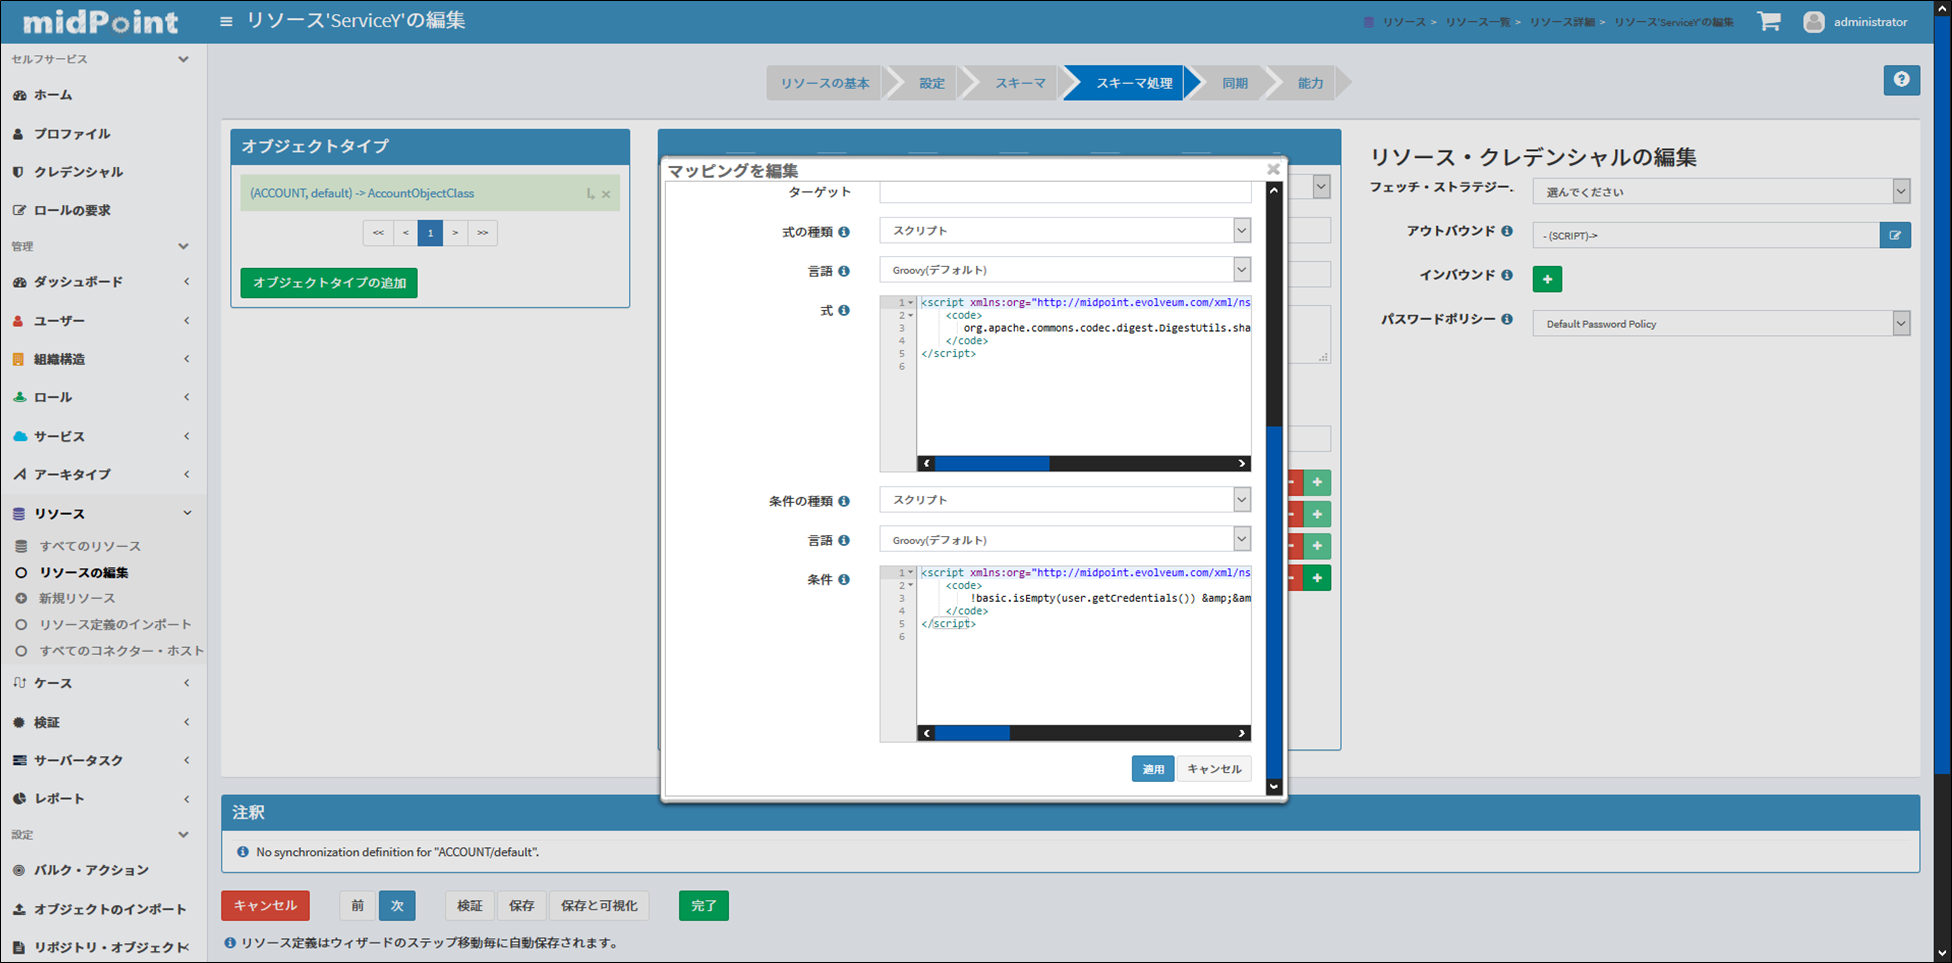
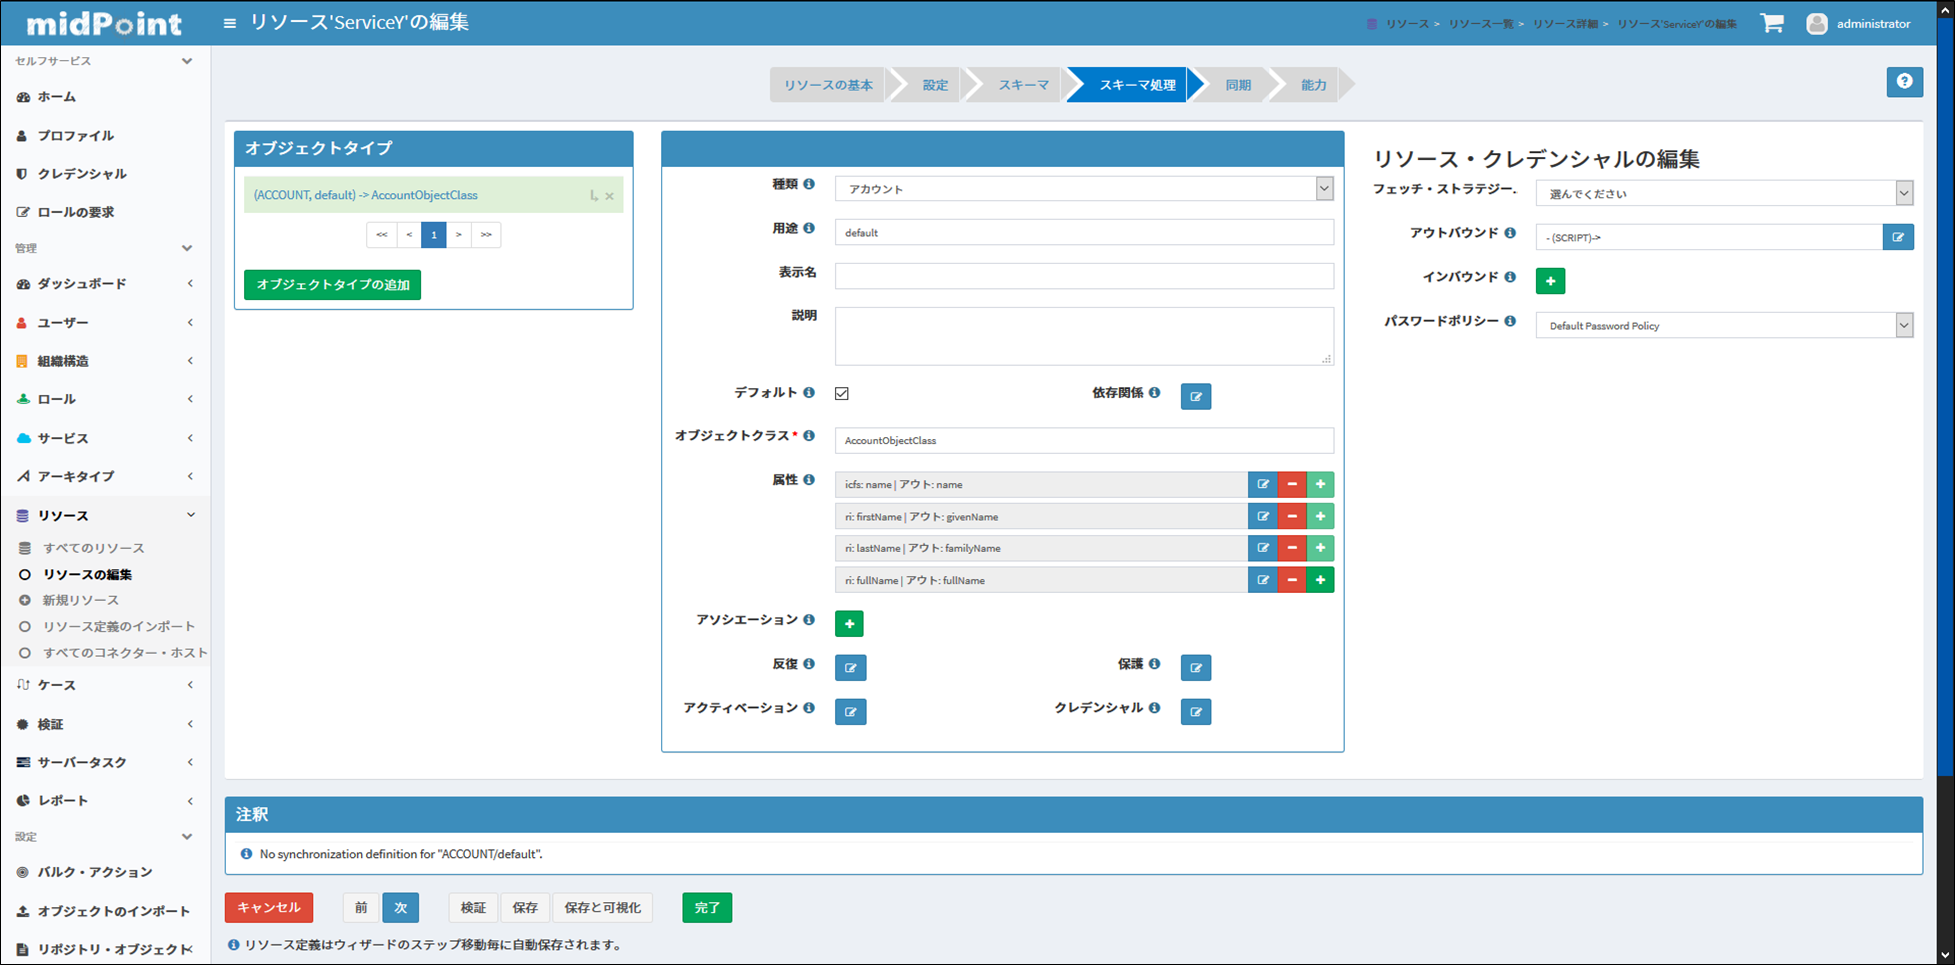
プロビジョニングするリソースを選択し、スキーマ処理のクレデンシャルを選択すると設定画面に辿り着きます。
今回の例では、midPoint⇒ストレージと単方向に更新するため、アウトバウンドマッピングのみ設定を実施します。
パスワードを暗号化して保持している場合、プロビジョニングのタイミングでmidPointは平文に戻すため、
無加工でマッピングしてしまうと平文で登録されてしまいます。
ハッシュ化して保持している場合は、midPointがハッシュ化する前にプロビジョニングするため、
こちらも同様に平文で登録されてしまいます。
回避するには、スクリプトを用いてハッシュ化するようにすればOKです。
スクリプト設定
スクリプトはアウトバウンドマッピングの設定から実施します。
今回はgroovyで作成しました。
midPointでライブラリも用意されているので、作成時はチェックしてみることをお勧めします。
例えば、以下の式ではBasicライブラリのdecrypt関数を使用して暗号文を平文へ戻しています。
ライブラリの詳細はWikiのこちらのページをご確認ください。
- 式(UserNameをソルトにSHA256でハッシュ化)
<script xmlns:org="http://midpoint.evolveum.com/xml/ns/public/common/org-3">
    <code>
       org.apache.commons.codec.digest.DigestUtils.sha256Hex((user.getName().toString() + basic.decrypt(user.getCredentials().getPassword().getValue())))
    </code>
</script>
- 条件(nullチェック)
xmlに記載するため、一部記号はエスケープが必要になります。
<script xmlns:org="http://midpoint.evolveum.com/xml/ns/public/common/org-3">
<code>
!basic.isEmpty(user.getCredentials()) && !basic.isEmpty(user.getCredentials().getPassword()) && !basic.isEmpty(user.getCredentials().getPassword().getValue())
</code>
</script>
![]() 注意
注意
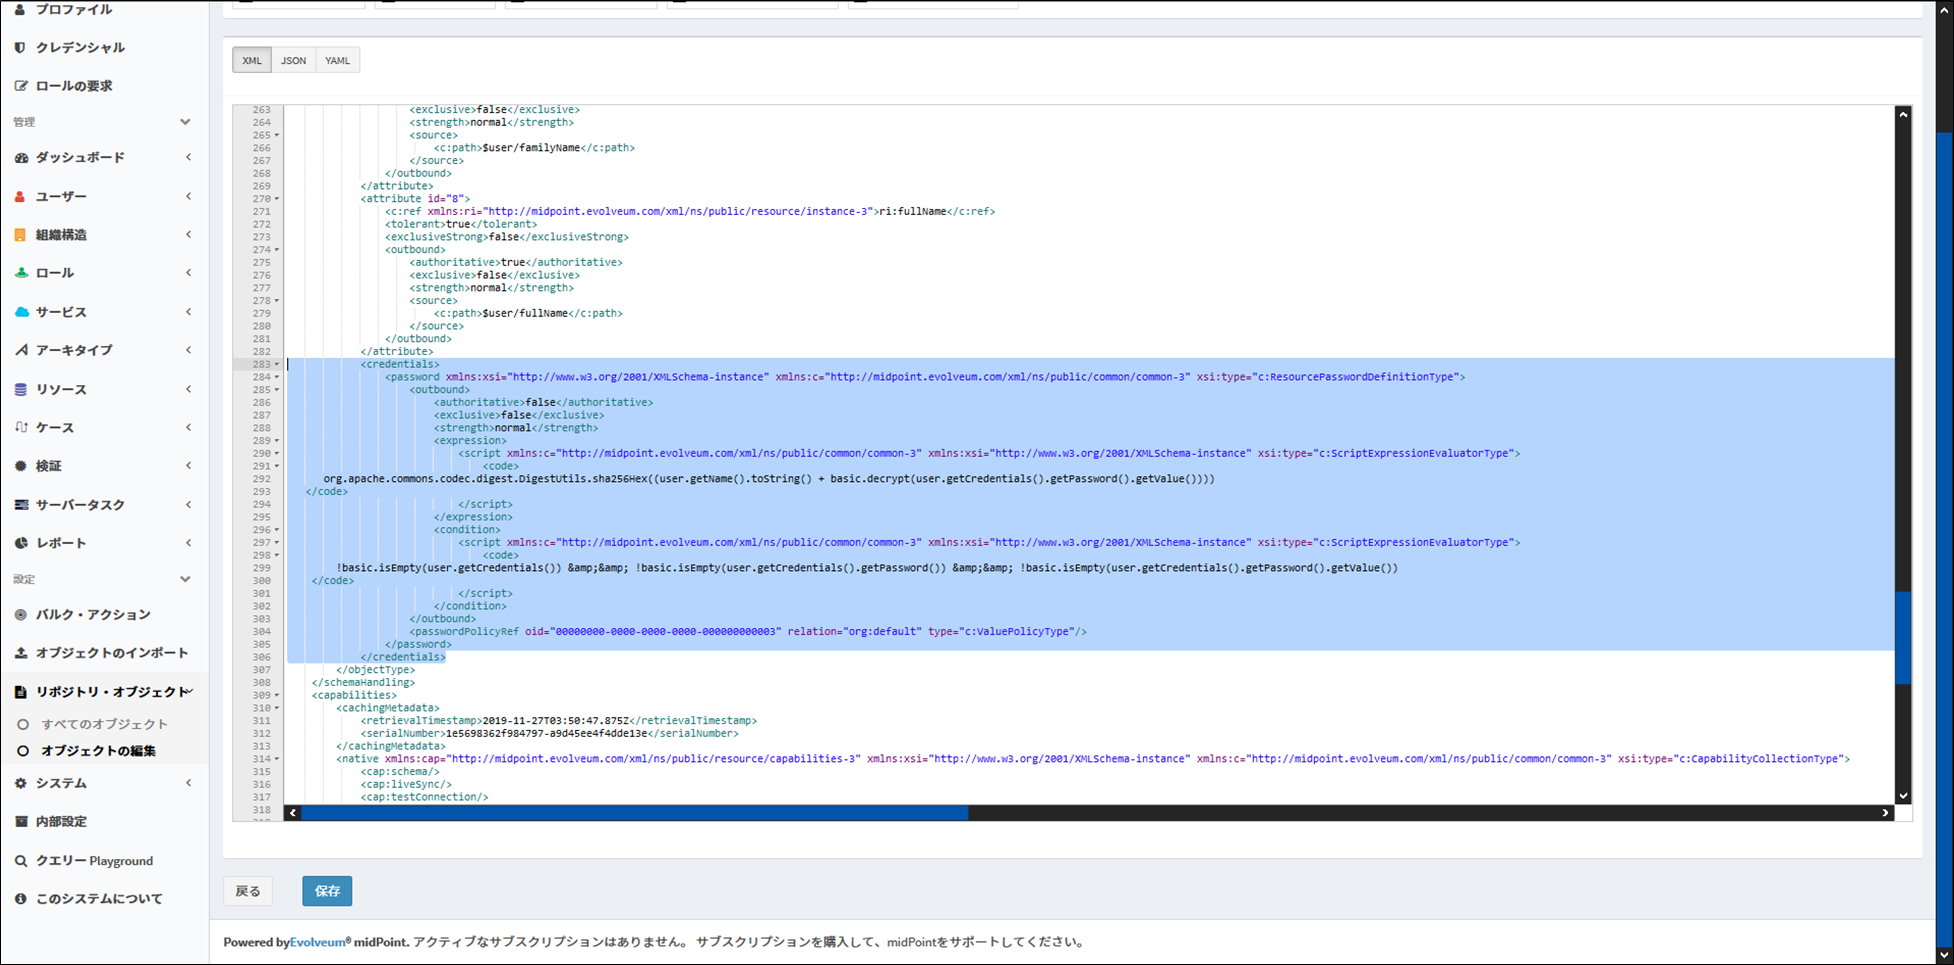
GUI上で保存に失敗する場合がありますが、リソースをxmlから直接修正することで設定可能です。
上記設定の場合、以下をobjectType要素内に投入します。
<credentials>
<password xmlns:xsi="http://www.w3.org/2001/XMLSchema-instance" xmlns:c="http://midpoint.evolveum.com/xml/ns/public/common/common-3" xsi:type="c:ResourcePasswordDefinitionType">
<outbound>
<authoritative>false</authoritative>
<exclusive>false</exclusive>
<strength>normal</strength>
<expression>
<script xmlns:c="http://midpoint.evolveum.com/xml/ns/public/common/common-3" xmlns:xsi="http://www.w3.org/2001/XMLSchema-instance" xsi:type="c:ScriptExpressionEvaluatorType">
<code>
org.apache.commons.codec.digest.DigestUtils.sha256Hex((user.getName().toString() + basic.decrypt(user.getCredentials().getPassword().getValue())))
</code>
</script>
</expression>
<condition>
<script xmlns:c="http://midpoint.evolveum.com/xml/ns/public/common/common-3" xmlns:xsi="http://www.w3.org/2001/XMLSchema-instance" xsi:type="c:ScriptExpressionEvaluatorType">
<code>
!basic.isEmpty(user.getCredentials()) && !basic.isEmpty(user.getCredentials().getPassword()) && !basic.isEmpty(user.getCredentials().getPassword().getValue())
</code>
</script>
</condition>
</outbound>
<passwordPolicyRef oid="00000000-0000-0000-0000-000000000003" relation="org:default" type="c:ValuePolicyType"/>
</password>
</credentials>
動作確認
マッピング設定が完了したので、midPoint上からパスワードを変更します。
Nameがuser@example.comのユーザに対し、パスワード12qwaszX#を設定しました。
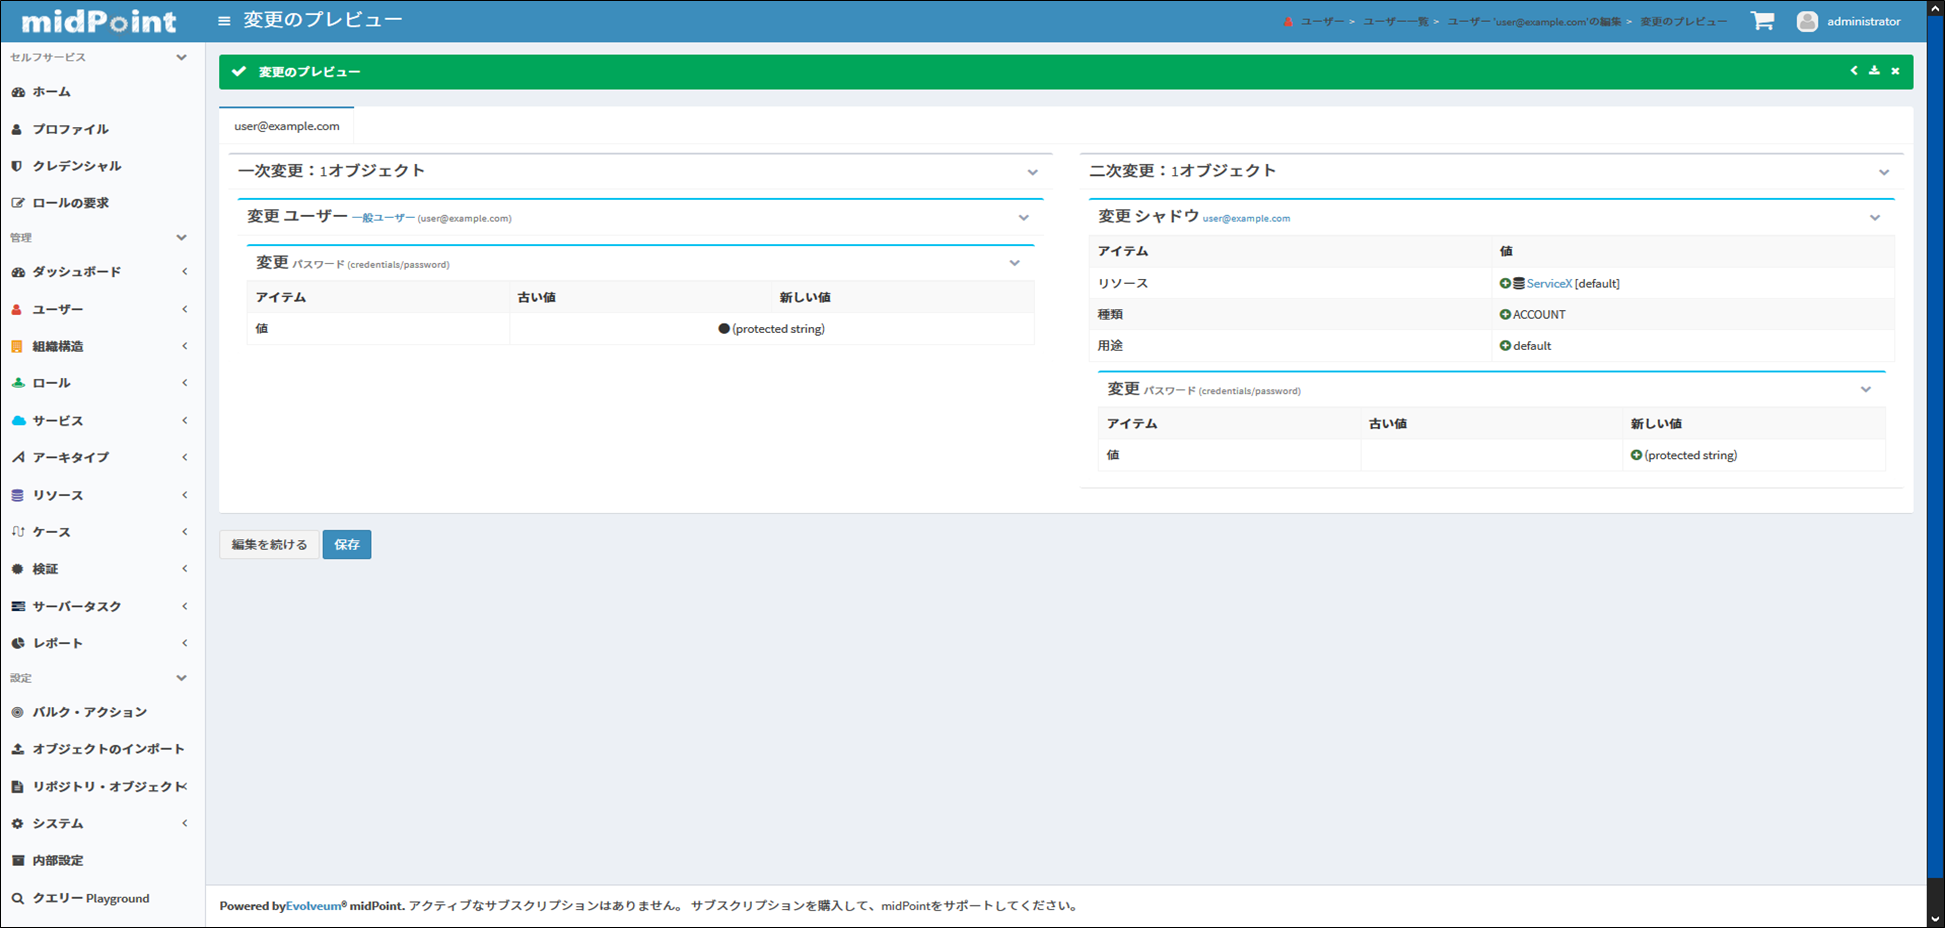
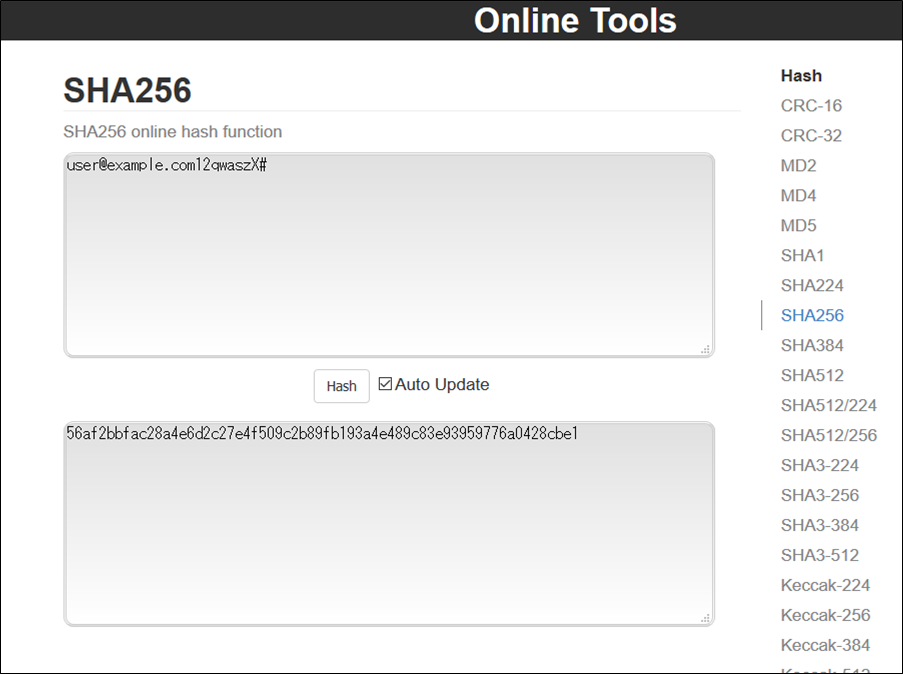
プロビジョニングされたハッシュ値を確認します。
ハッシュ値は56af2bbfac28a4e6d2c27e4f509c2b89fb193a4e489c83e93959776a0428cbe1となりました。

Web上のツールを使用しても同じ値が出力されます。
パスワード変更(セルフサービスパスワードリセット)
メールを利用したパスワードリセットがサポートされています。
デフォルトでは利用不可能のため、まずは設定を変更します。
各設定の詳細はwikiをご確認ください。
なお、メールを送信するにはSMTPサーバの構築及びmidPointへの設定が必要ですが、ここでは省略します。
midPointへのSMTPの設定はwikiをご確認ください。
設定
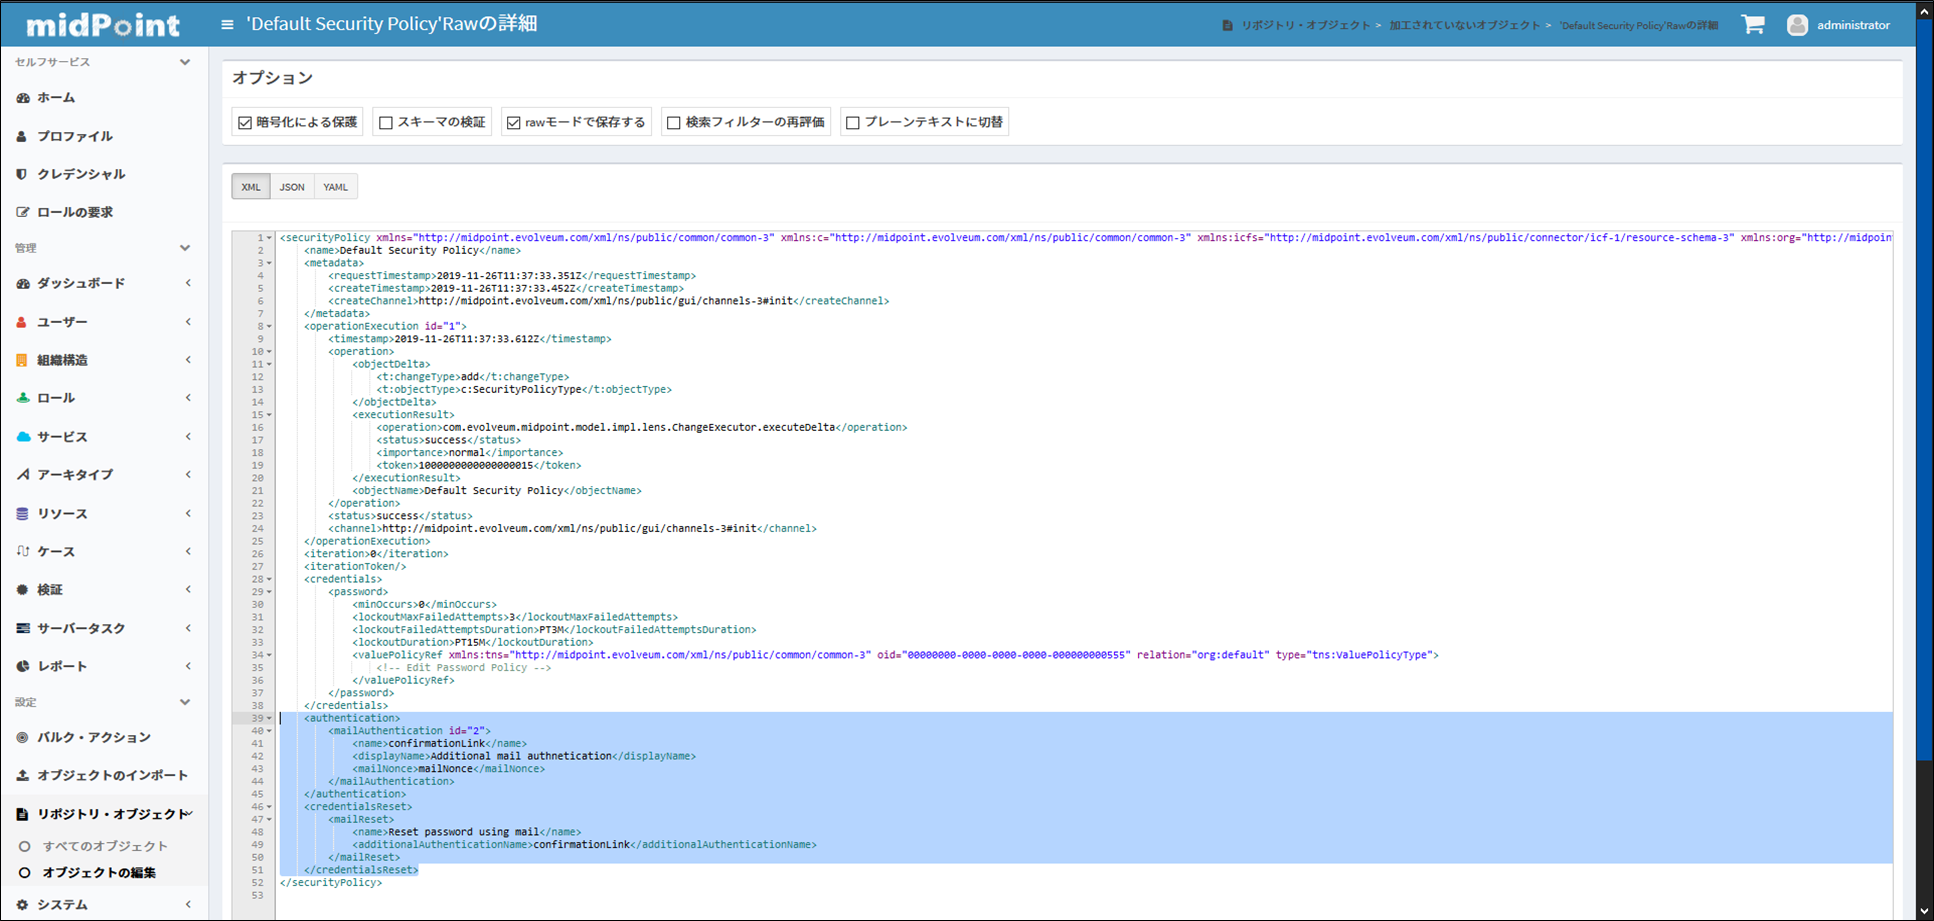
再びセキュリティーポリシーを編集します。
以下をsecurityPolicy要素内に追加します。
※左メニューの設定 ⇒ リポジトリ・オブジェクト ⇒ すべてのオブジェクト ⇒ 画面右上のプルダウン:セキュリティー・ポリシー
    <authentication>
        <mailAuthentication>
            <name>confirmationLink</name>
            <displayName>Additional mail authnetication</displayName>
            <mailNonce>mailNonce</mailNonce>
        </mailAuthentication>
    </authentication>
    <credentialsReset>
        <mailReset>
            <name>Reset password using mail</name>
            <additionalAuthenticationName>confirmationLink</additionalAuthenticationName>
        </mailReset>
    </credentialsReset>
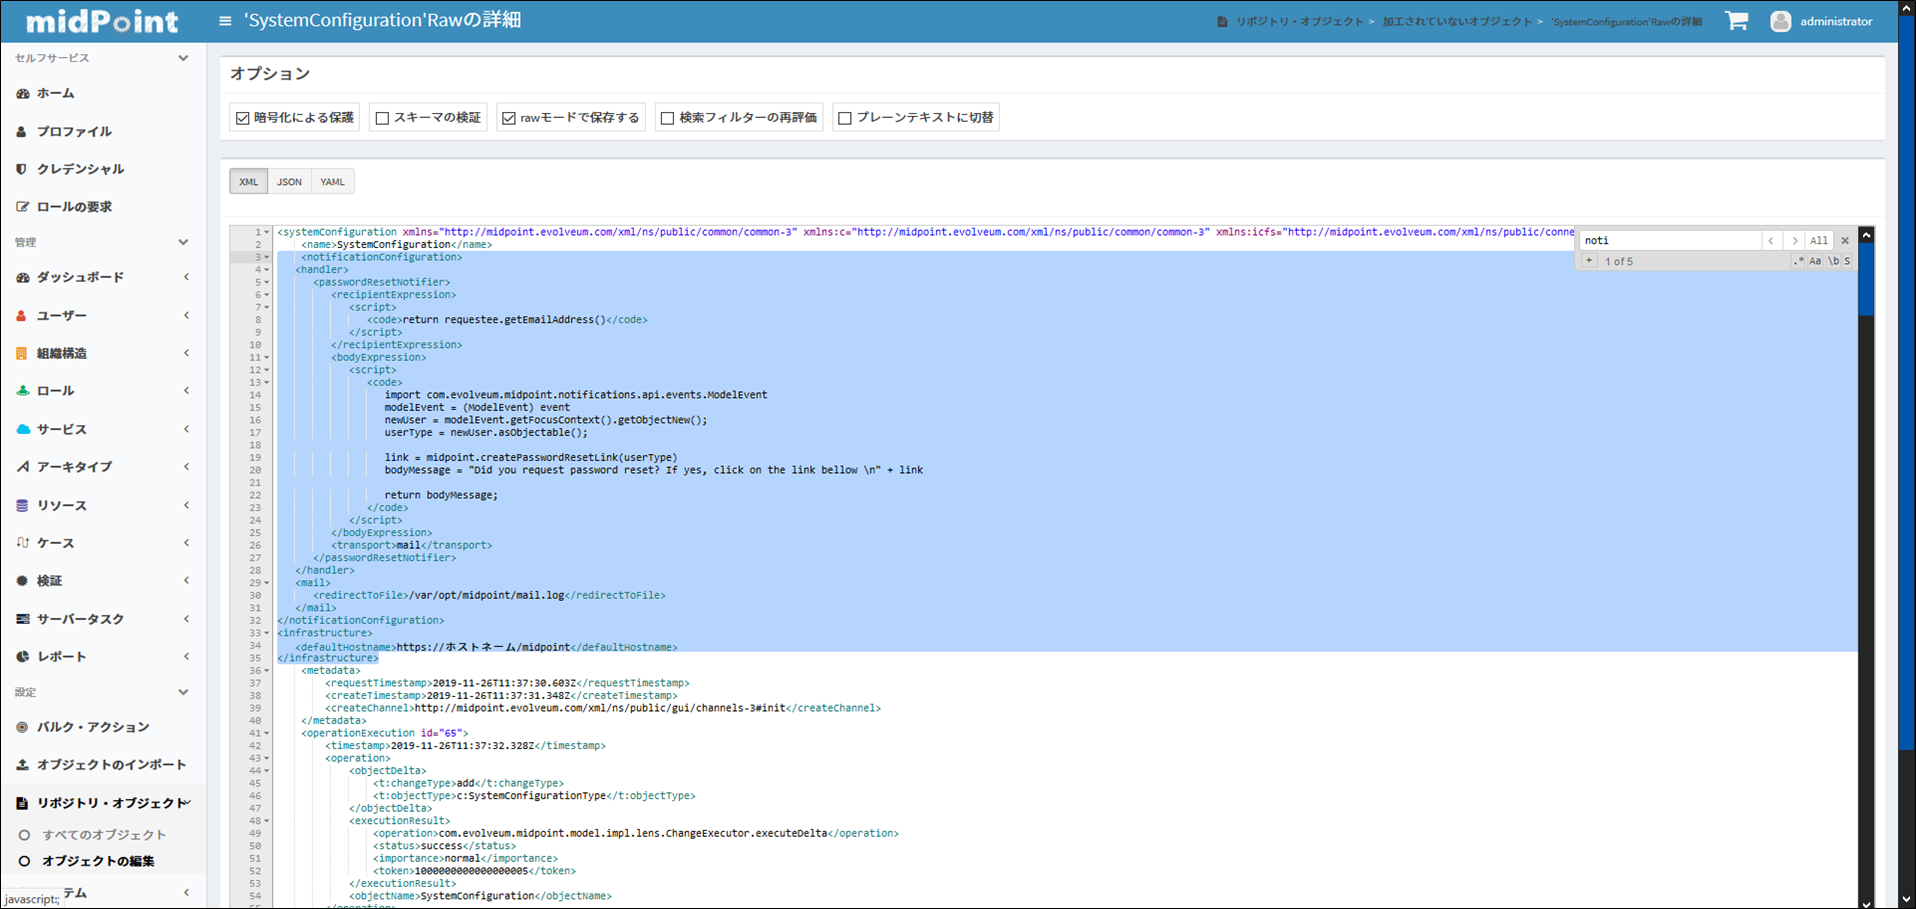
次に、以下をシステム設定のsystemConfiguration要素内に追加します。
※左メニューの設定 ⇒ リポジトリ・オブジェクト ⇒ すべてのオブジェクト ⇒ 画面右上のプルダウン:システム設定
<notificationConfiguration>
	<handler>
		<passwordResetNotifier>
			<recipientExpression>
				<script>
					<code>return requestee.getEmailAddress()</code>
				</script>
			</recipientExpression>
			<bodyExpression>
				<script>
					<code>
						import com.evolveum.midpoint.notifications.api.events.ModelEvent
						modelEvent = (ModelEvent) event
						newUser = modelEvent.getFocusContext().getObjectNew();
						userType = newUser.asObjectable();

						link = midpoint.createPasswordResetLink(userType)
						bodyMessage = "Did you request password reset? If yes, click on the link bellow \n" + link

						return bodyMessage;
					</code>
				</script>
			</bodyExpression>
			<transport>mail</transport>
		</passwordResetNotifier>
	</handler>
	<mail>
		<redirectToFile>/var/opt/midpoint/mail.log</redirectToFile>
	</mail>
</notificationConfiguration>
<infrastructure>
	<defaultHostname>https://ホストネーム/midpoint</defaultHostname>
</infrastructure>
動作確認
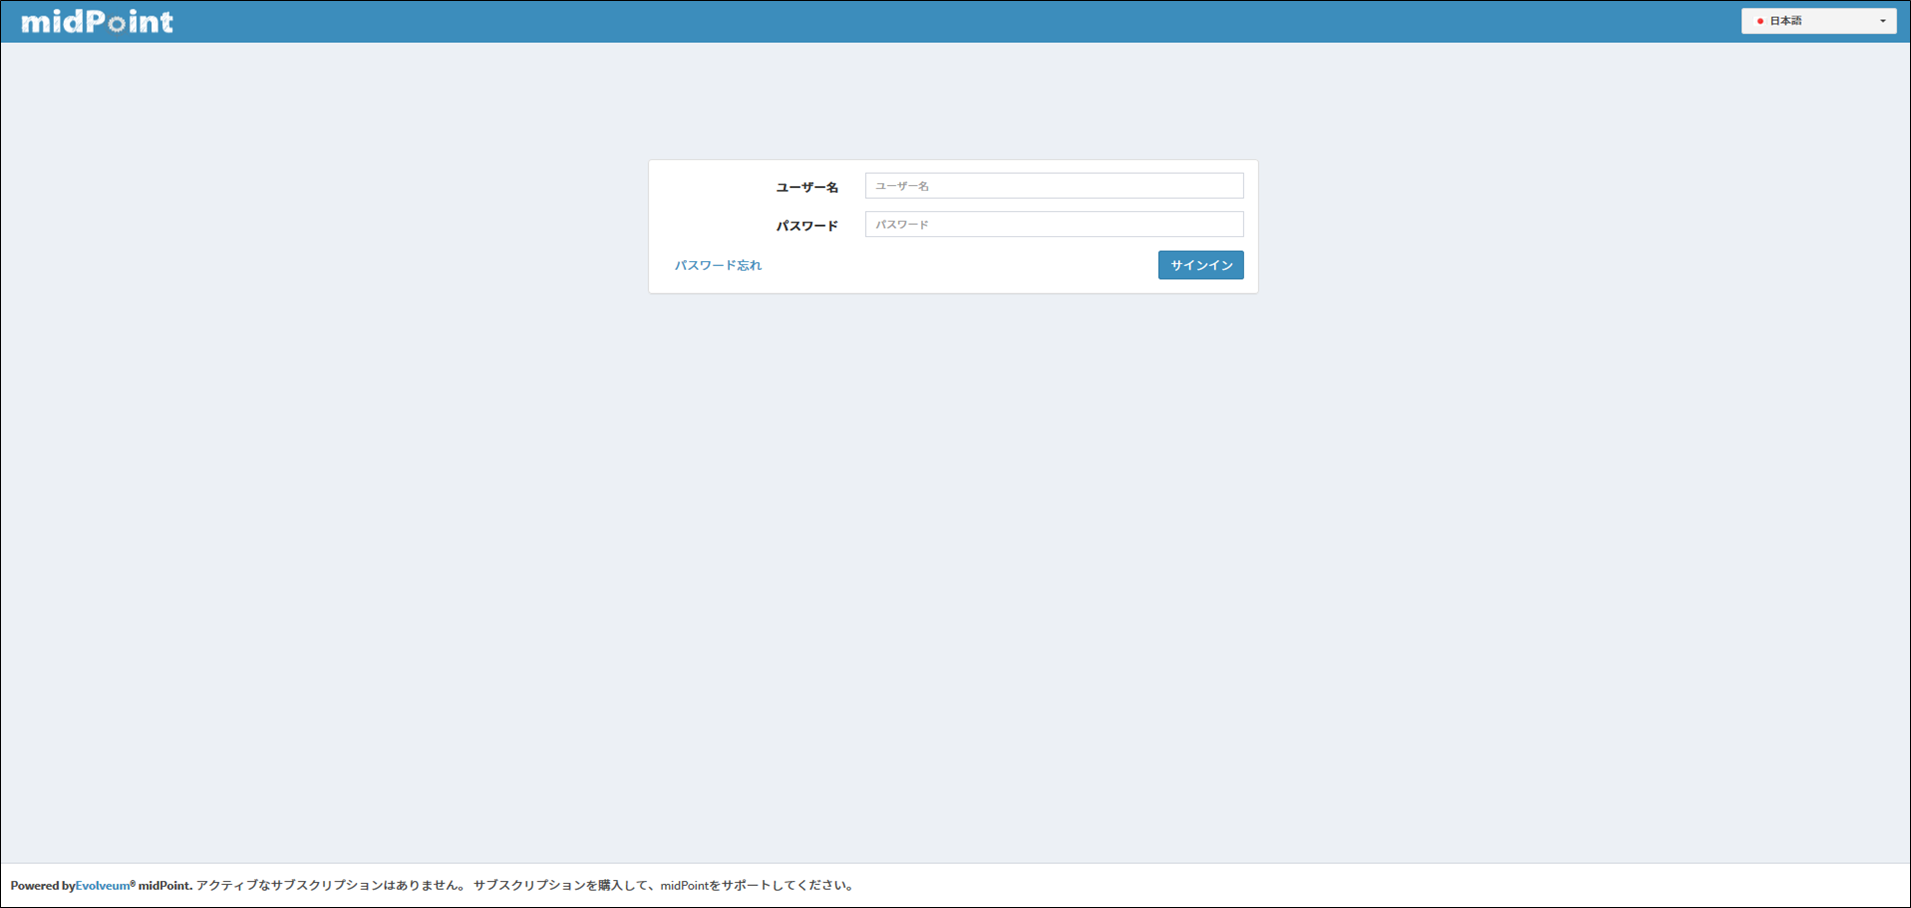
midPointのログイン画面の左下のパスワード忘れを選択します。
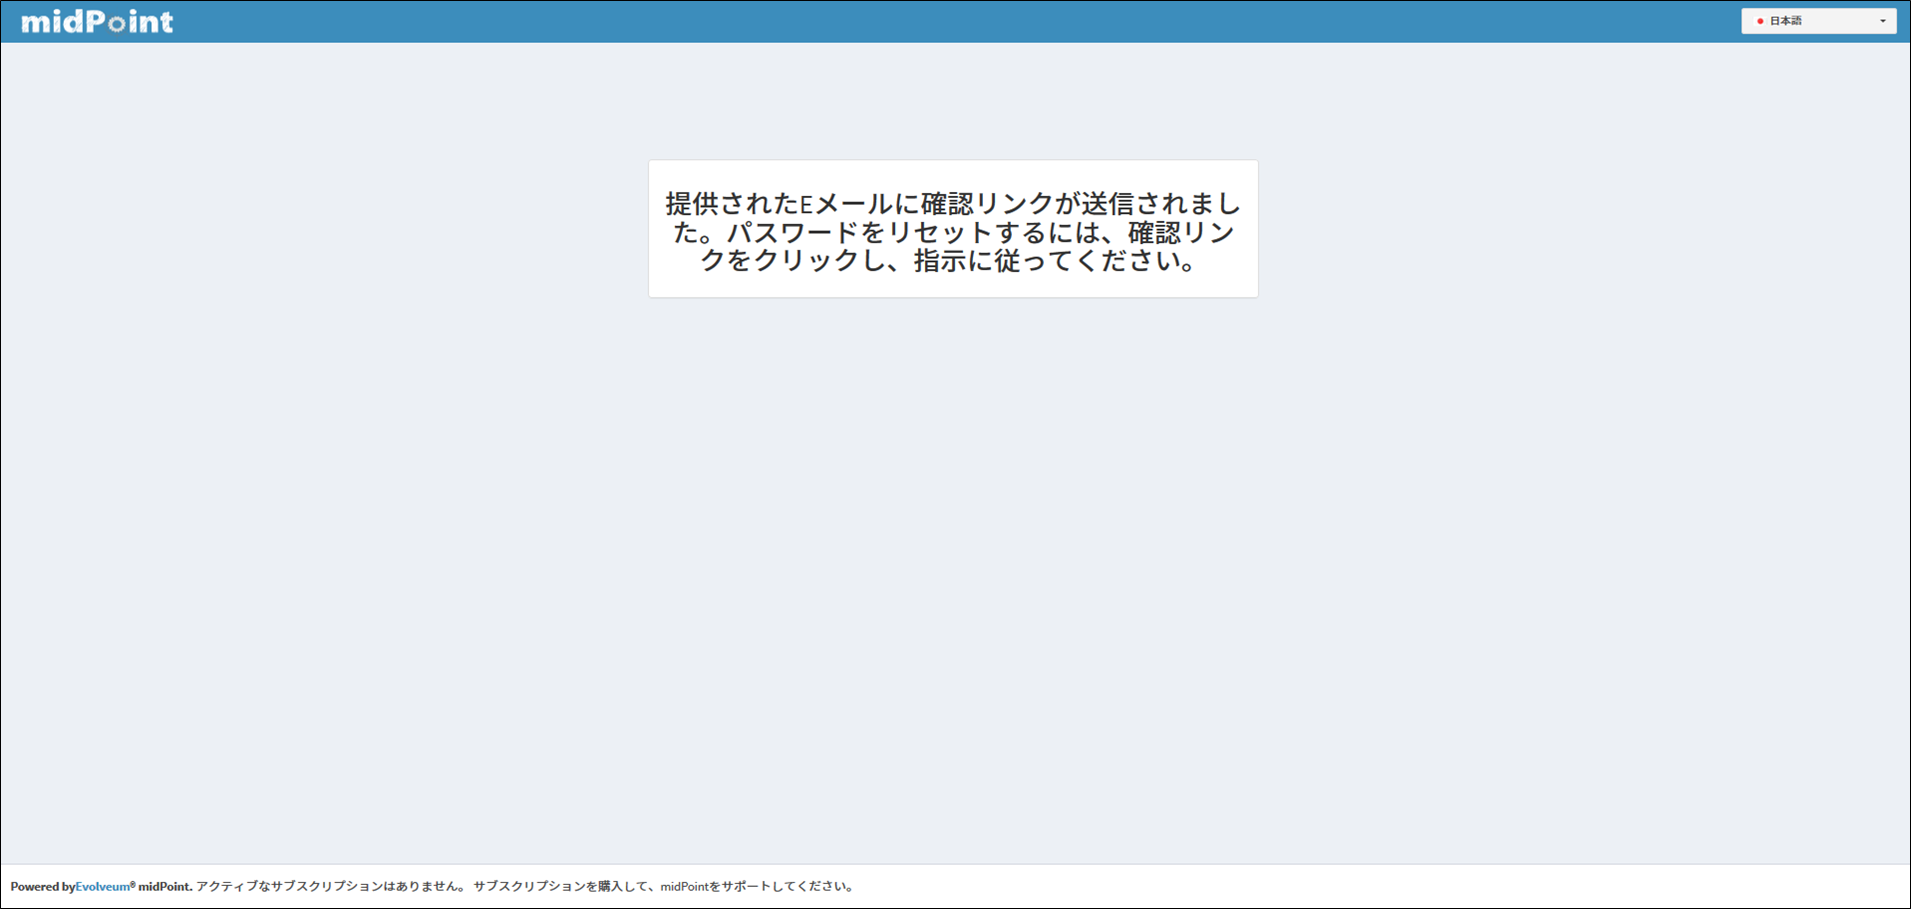
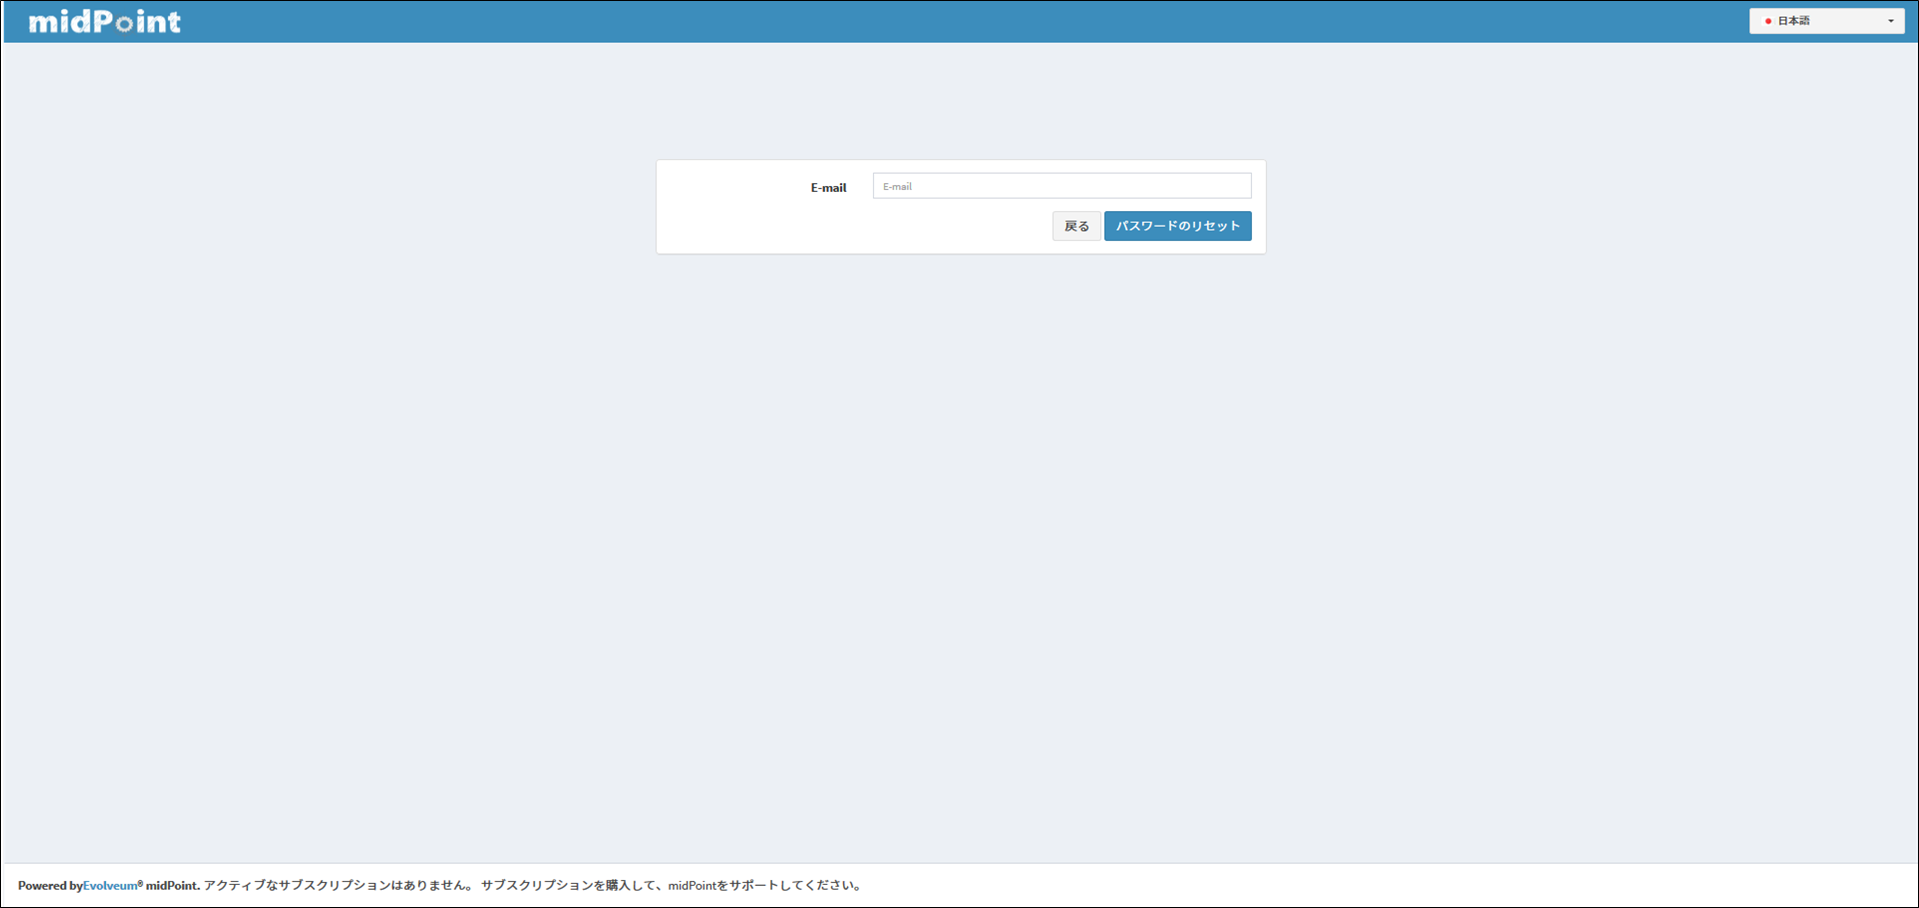
パスワードのリセット画面が表示されるので、ここでリセット対象のユーザのメールアドレスを入力し、パスワードのリセットを選択します。
送信されたメールの内容はログから確認することができます。
============================================
Wed Dec 04 08:36:43 GMT 2019
Message{to='[manage@example.com]', cc='[]', bcc='[]', subject='Password reset', contentType='null', body='Did you request password reset? If yes, click on the link bellow
https://ホストネーム/midpoint/confirm/reset?user=manage@example.com&token=MosRgQ8QjsxlIovV15uxiS5f', attachmentsCount: 0
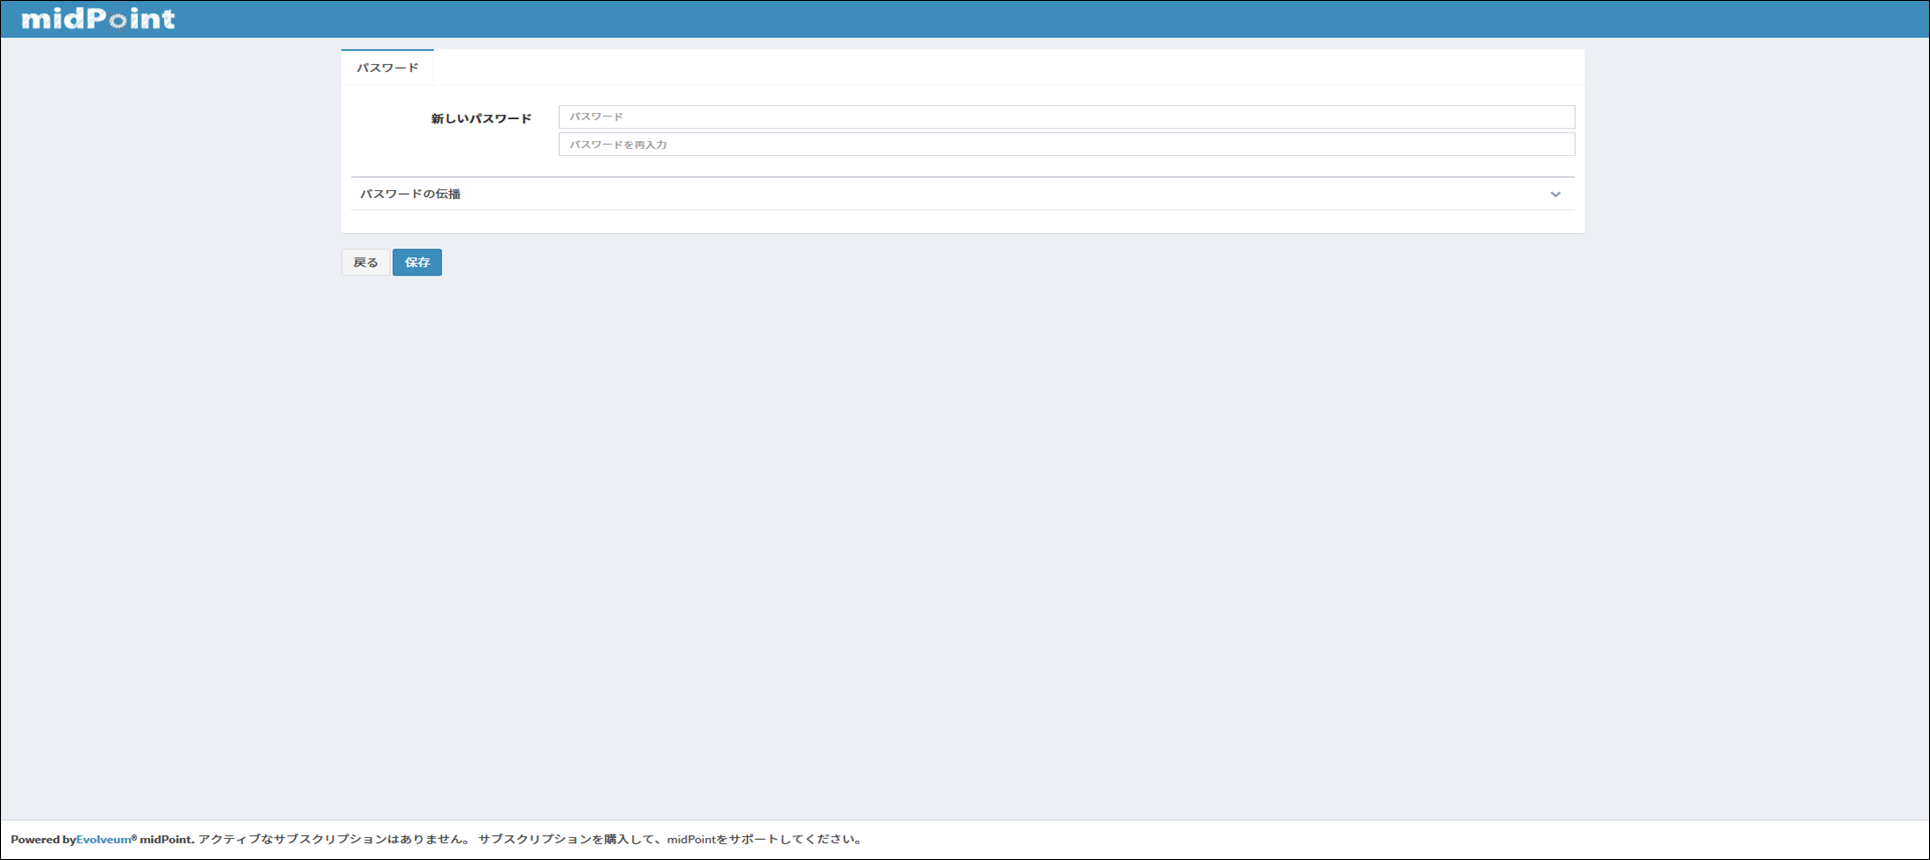
リンクを押下すると、以下のようにパスワード再入力画面が表示されます。
セキュリティ要件によっては、メールリンクによる認証では不十分となるケースも考えられます。
その場合、カスタムフォームを作成することで対応が可能です。
カスタムフォームについてはwikiをご確認ください。
最後に
midPointでのパスワード管理について、一通りの設定を解説しました。
このうち、セルフパスワードリセットについては、将来的に機能が一新される可能性があります。
今後の改良に期待したいところです。
