SwaggerでAPI設計書を管理する際のyamlの記法をまとめる。
get, post, put, delete をまとめて書こうと思ったが、
ひとつのボリュームがだいぶ大きかったので、こちらも分割で記録に残していく。
今回はGet編です。
Get
< Sample >
openapi: 3.0.0
info:
  version: 1.0.0
  title: ポケモン図鑑
paths:
  "/pokemon/{name}":
    get:
      tags:
        - "ポケモン情報取得API"
      summary:
        "ポケモン情報取得API"
      description:
        "指定した名前のポケモンを検索し、情報を取得します。"
      parameters:
        - name: "name"
          in: "path"
          description: "ポケモンの名前"
          required: true
          type: "string"
      responses:
        200:
          description: "Success"
          content:
            application/json:
              schema:
                type: "object"
                properties:
                  no:
                    type: "string"
                  name:
                    type: "string"
                  type:
                    type: "string"
                  comment:
                    type: "string"
                example:
                  no: "007"
                  name: "ゼニガメ"
                  type: "みず"
                  comment: "こうらに とじこもり みをまもる。"
        404:
          desctiption: "NotFound"
          content:
            application/json:
              schema:
                type: "object"
                properties:
                  status:
                    type: "string"
                    example: "NOT_FOUND"
                  message:
                    type: "string"
                    example: "NOT_FOUND"
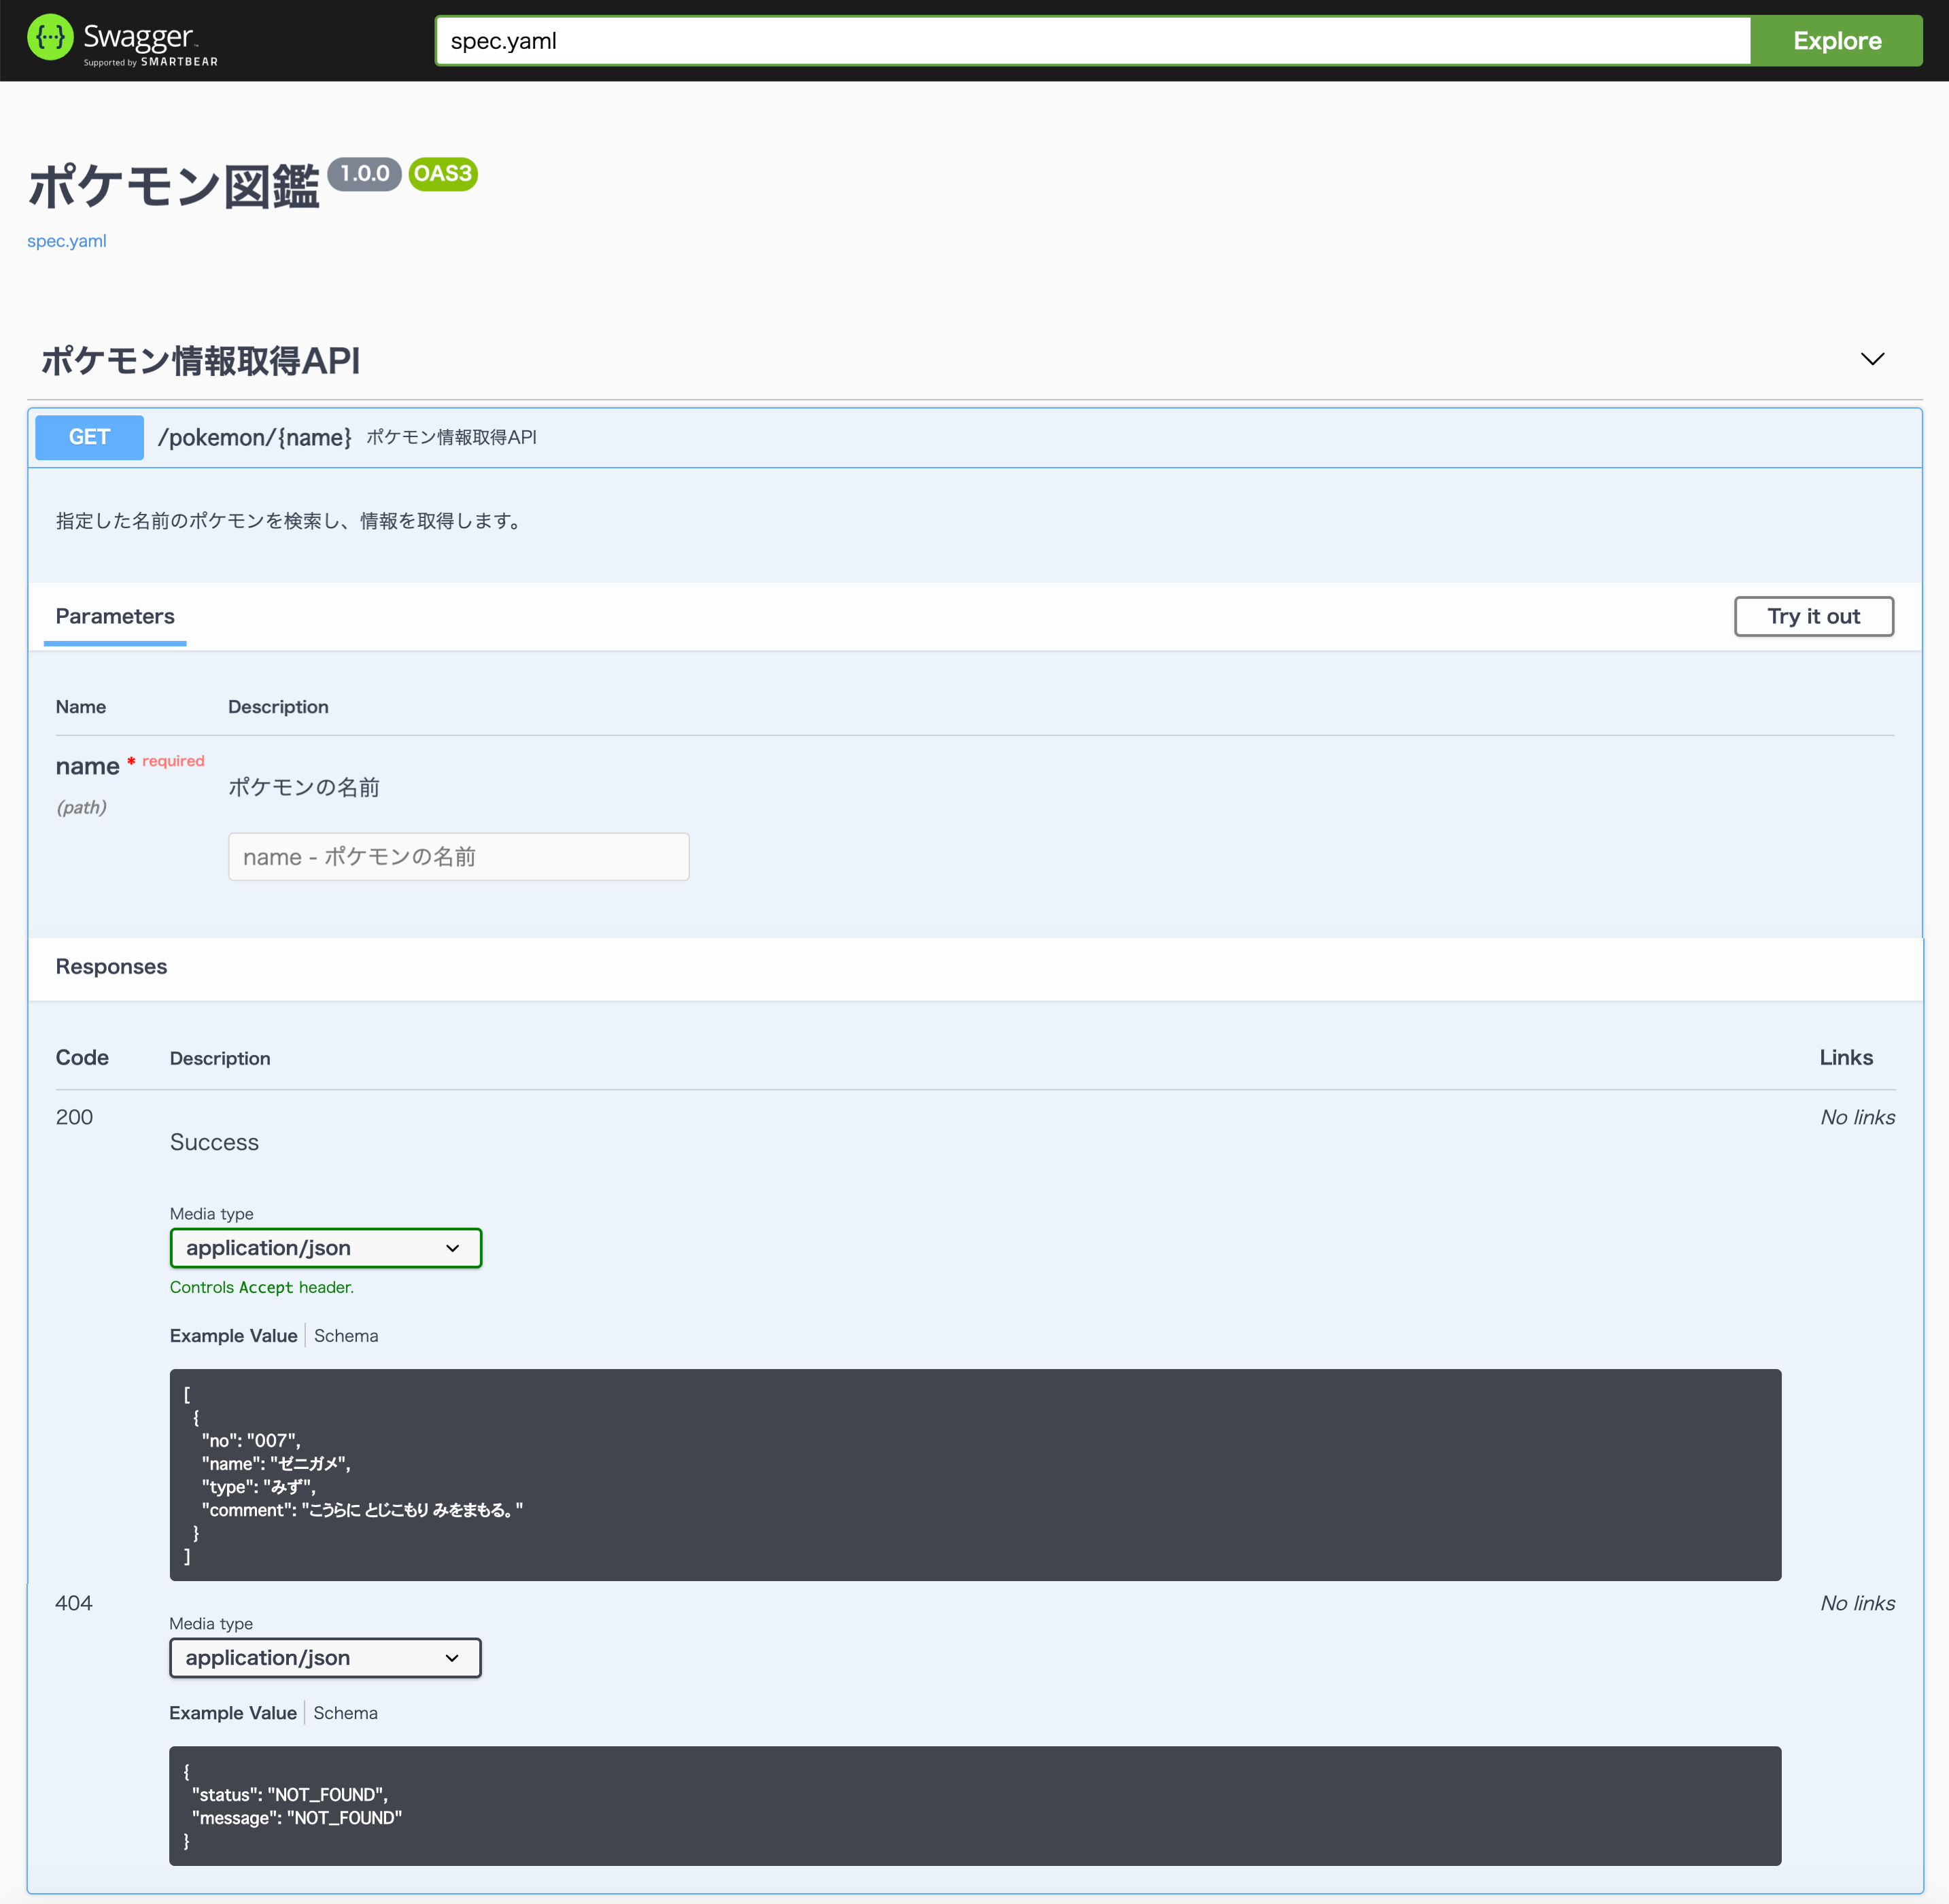
yamlに記載すると下記のように表示される!
解説
swaggerは大きく info と paths というフィールドで成り立っている。
info には、APIの基本情報(バージョンやタイトルなど)を、
paths には、エンドポイントやパラメーター、レスポンスなどを記載する。
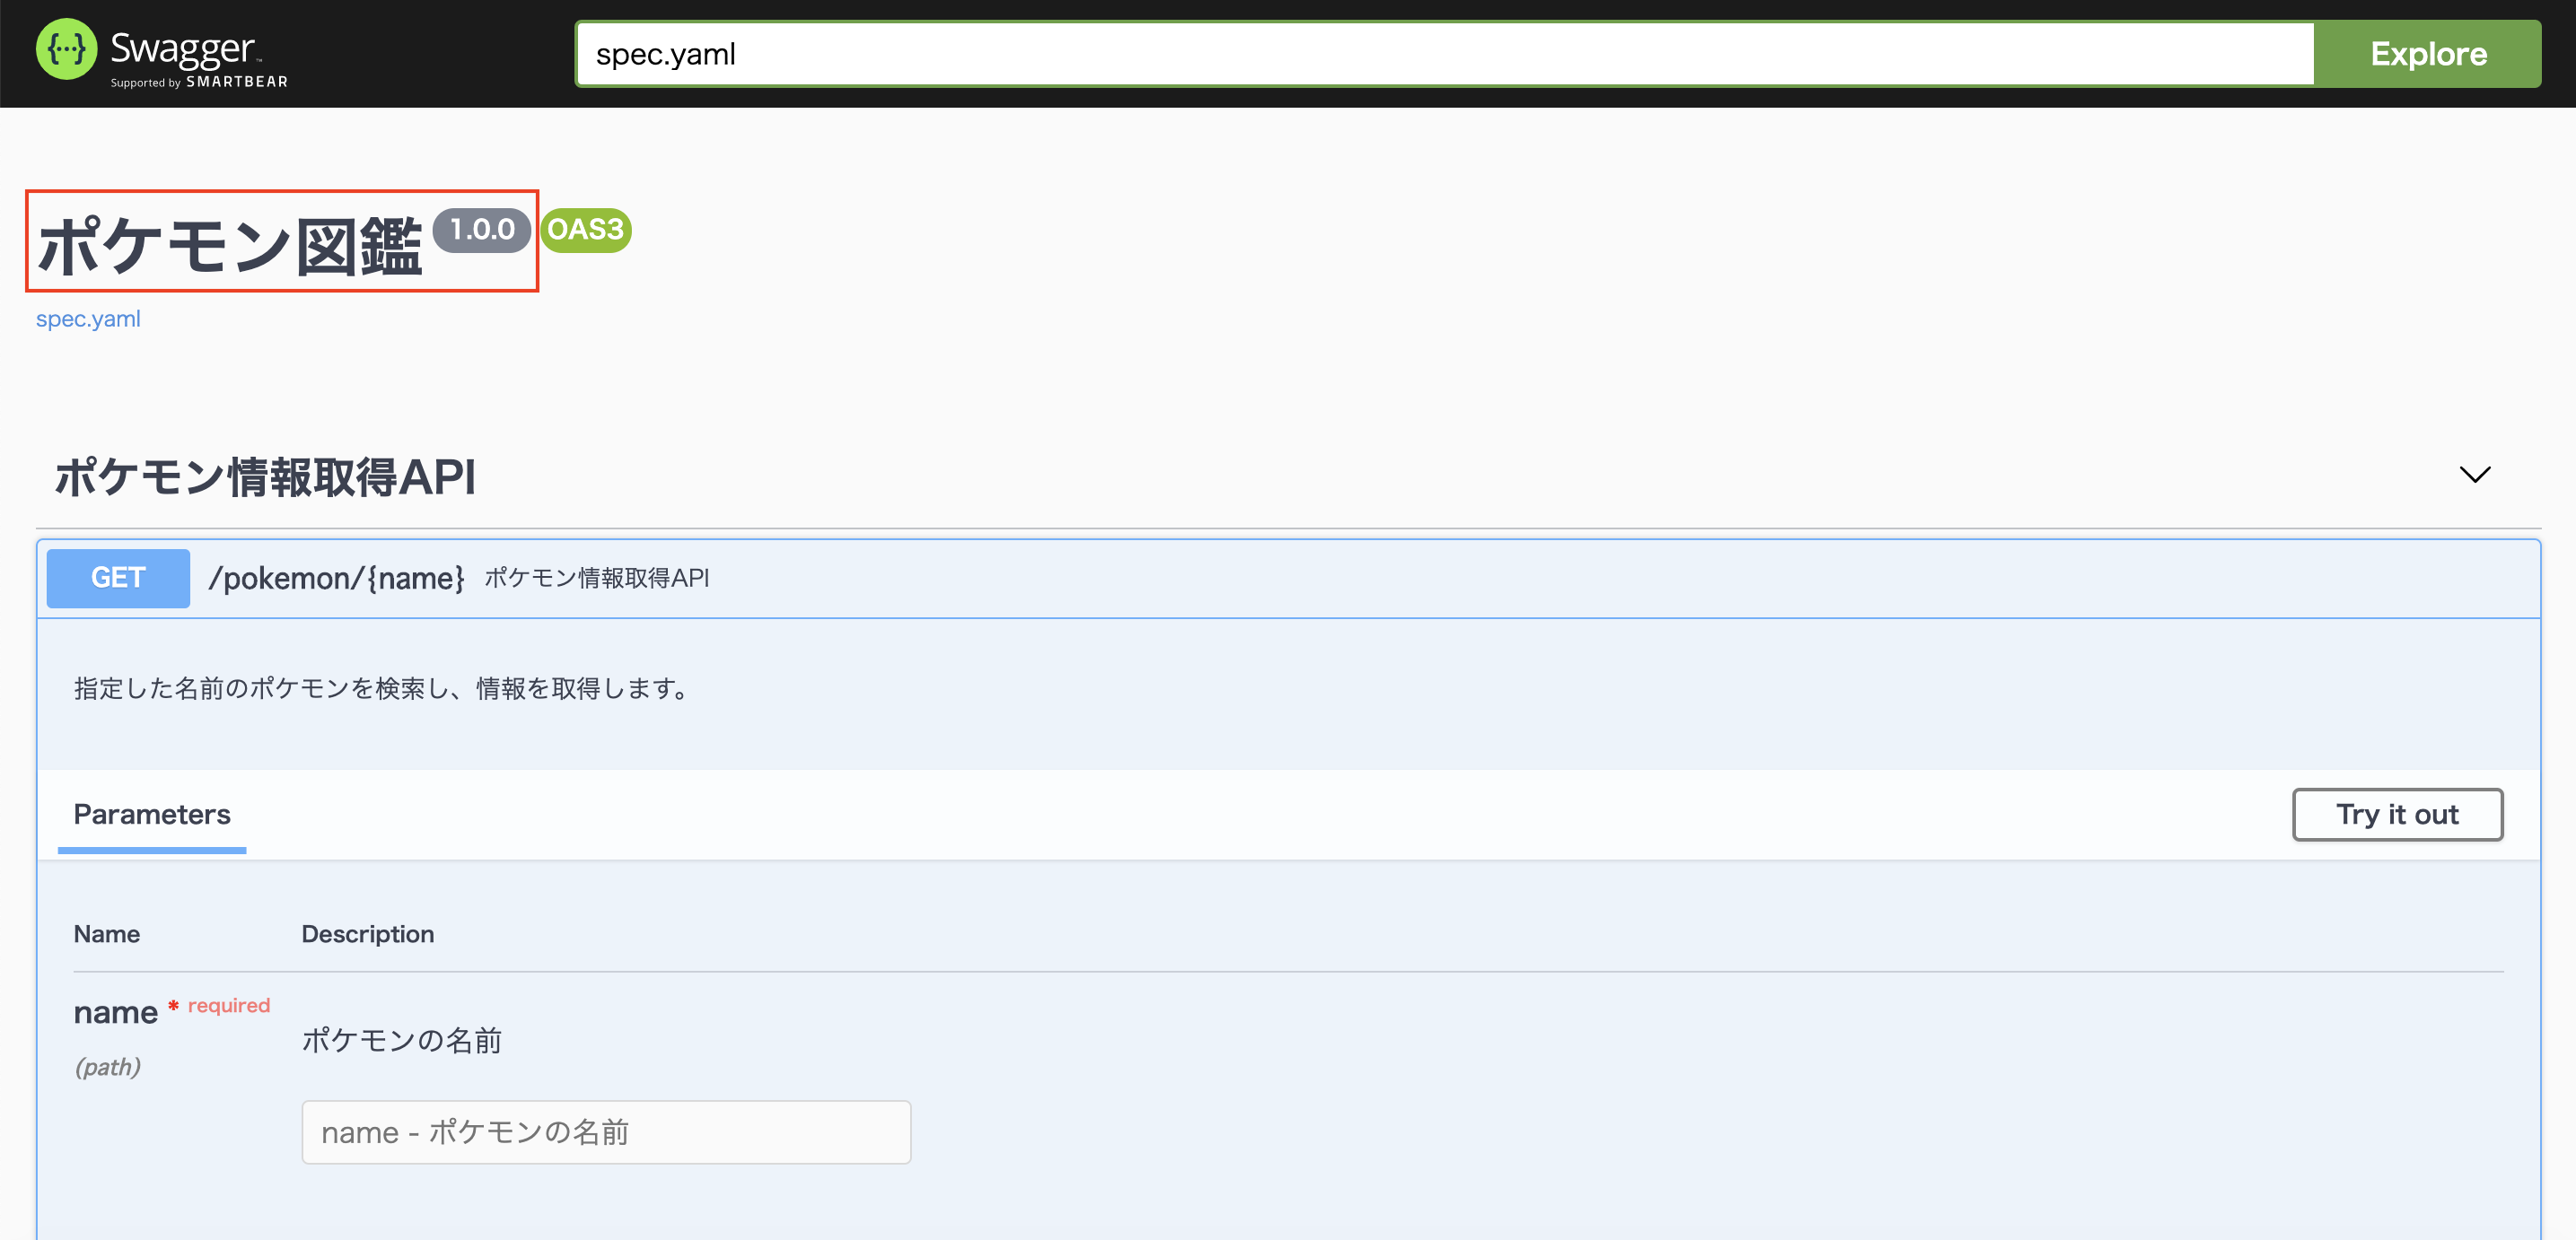
info
info:
  version: 1.0.0
  title: ポケモン図鑑
info には下記の情報を書くことができる。
| フィールド名 | 型 | 説明 | required |
|---|---|---|---|
| version | string | APIドキュメントのバージョン | ○ |
| title | string | ドキュメントのタイトル | ○ |
| description | string | ドキュメントの説明 | |
| termsOfService | string | APIの利用規約(URL形式) | |
| contact | contact object | APIについての問い合わせ先 | |
| license | license object | APIのライセンス |
今回は、vresion と title のみ記載しました。
下記画像の枠線部分が表示されます。
paths
paths:
  "/pokemon/{name}":
    get:
      tags:
        - "ポケモン情報取得API"
      summary:
        "ポケモン情報取得API"
      description:
        "指定した名前のポケモンを検索し、情報を取得します。"
      parameters:
        - name: "name"
          in: "path"
          description: "ポケモンの名前"
          required: true
          type: "string"
      responses:
        200:
          description: "Success"
          content:
            application/json:
              schema:
                type: "object"
                properties:
                  no:
                    type: "string"
                  name:
                    type: "string"
                  type:
                    type: "string"
                  comment:
                    type: "string"
                example:
                  no: "007"
                  name: "ゼニガメ"
                  type: "みず"
                  comment: "こうらに とじこもり みをまもる。"a
        404:
          desctiption: "NotFound"
          content:
            application/json:
              schema:
                type: "object"
                properties:
                  status:
                    type: "string"
                    example: "NOT_FOUND"
                  message:
                    type: "string"
                    example: "NOT_FOUND"
ここがAPIドキュメントの肝になる部分なので、パートを分けて解説します!
パスやメソッド等、APIの基盤
paths:
  "/pokemon/{name}":
    get:
      tags:
        - "ポケモン情報取得API"
      summary:
        "ポケモン情報取得API"
      description:
        "指定した名前のポケモンを検索し、情報を取得します。"
下記画像の枠線部分の記載。

| フィールド名 | 説明 |
|---|---|
| paths | エンドポイント(パス)の指定 |
| get | Httpメソッドの指定(get, post, put, delete) |
| tags | APIのタグ分け |
| summary | APIの概要 |
| description | APIの詳細説明 |
知ってると便利!!
今回はGETのみ作成していますが、下記のように記載すると、
ひとつのエンドポイントに対し複数のHttpメソッドを指定できます。
  "/pokemon/{name}":
    get:
      tags:
        - "ポケモン情報取得API"
      summary:
        "ポケモン情報取得API"
      description:
        以下省略
    put:
      tags:
        - "ポケモン情報更新API"
      summary:
        "ポケモン情報更新API"
      description:
        以下省略
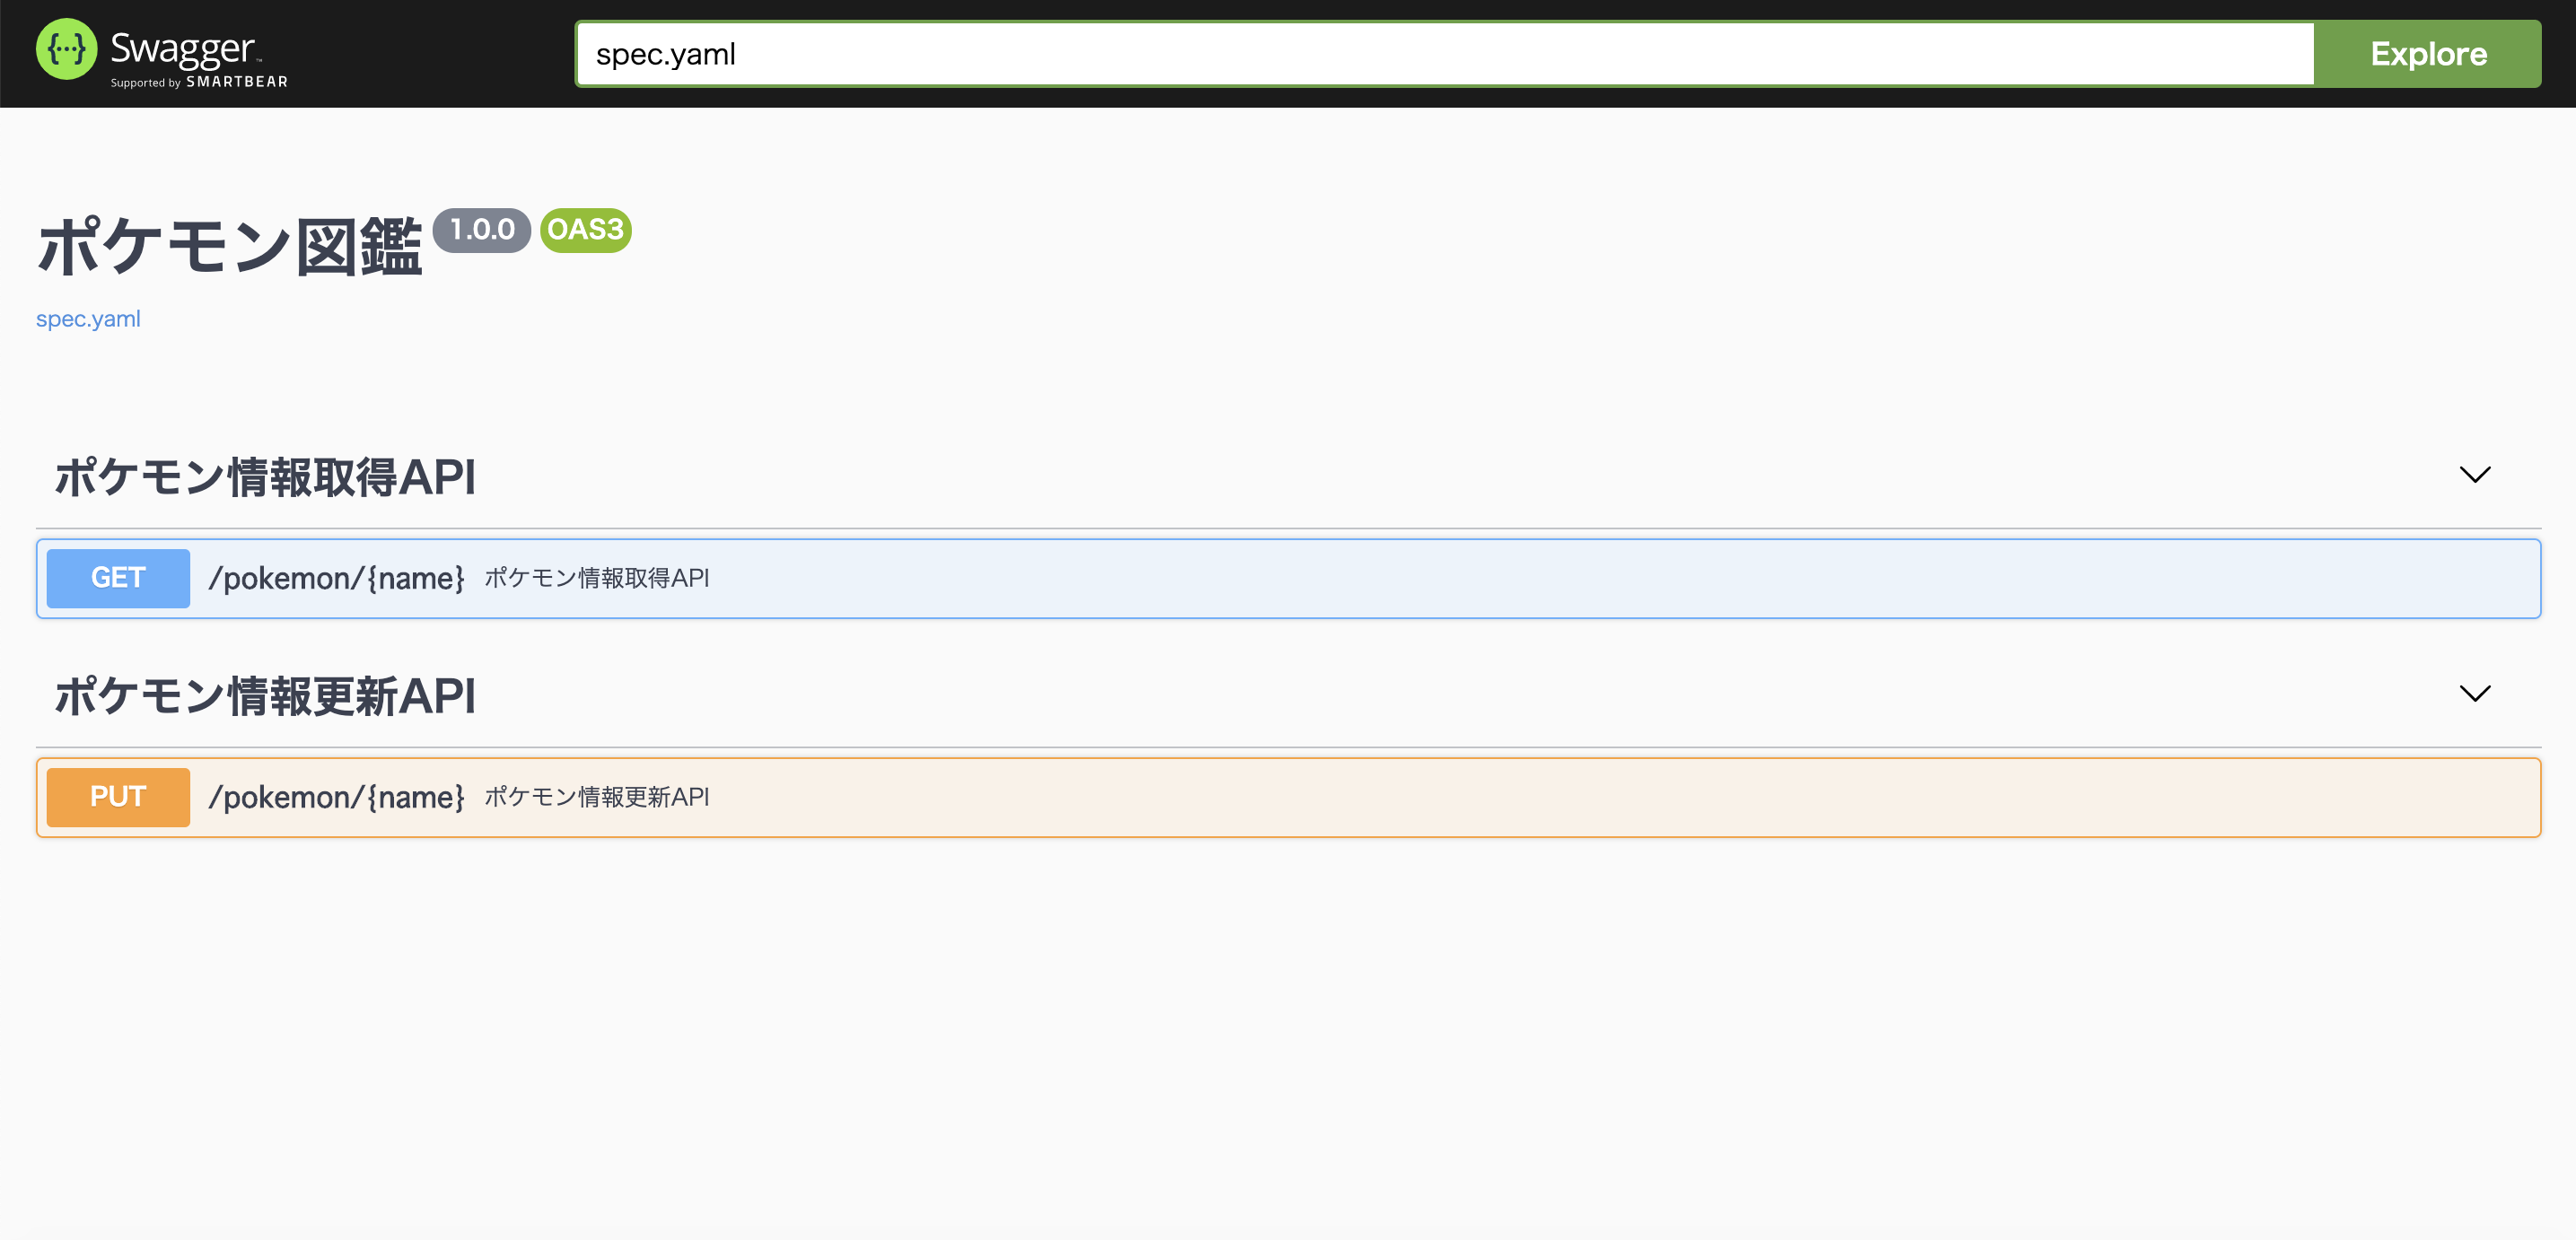
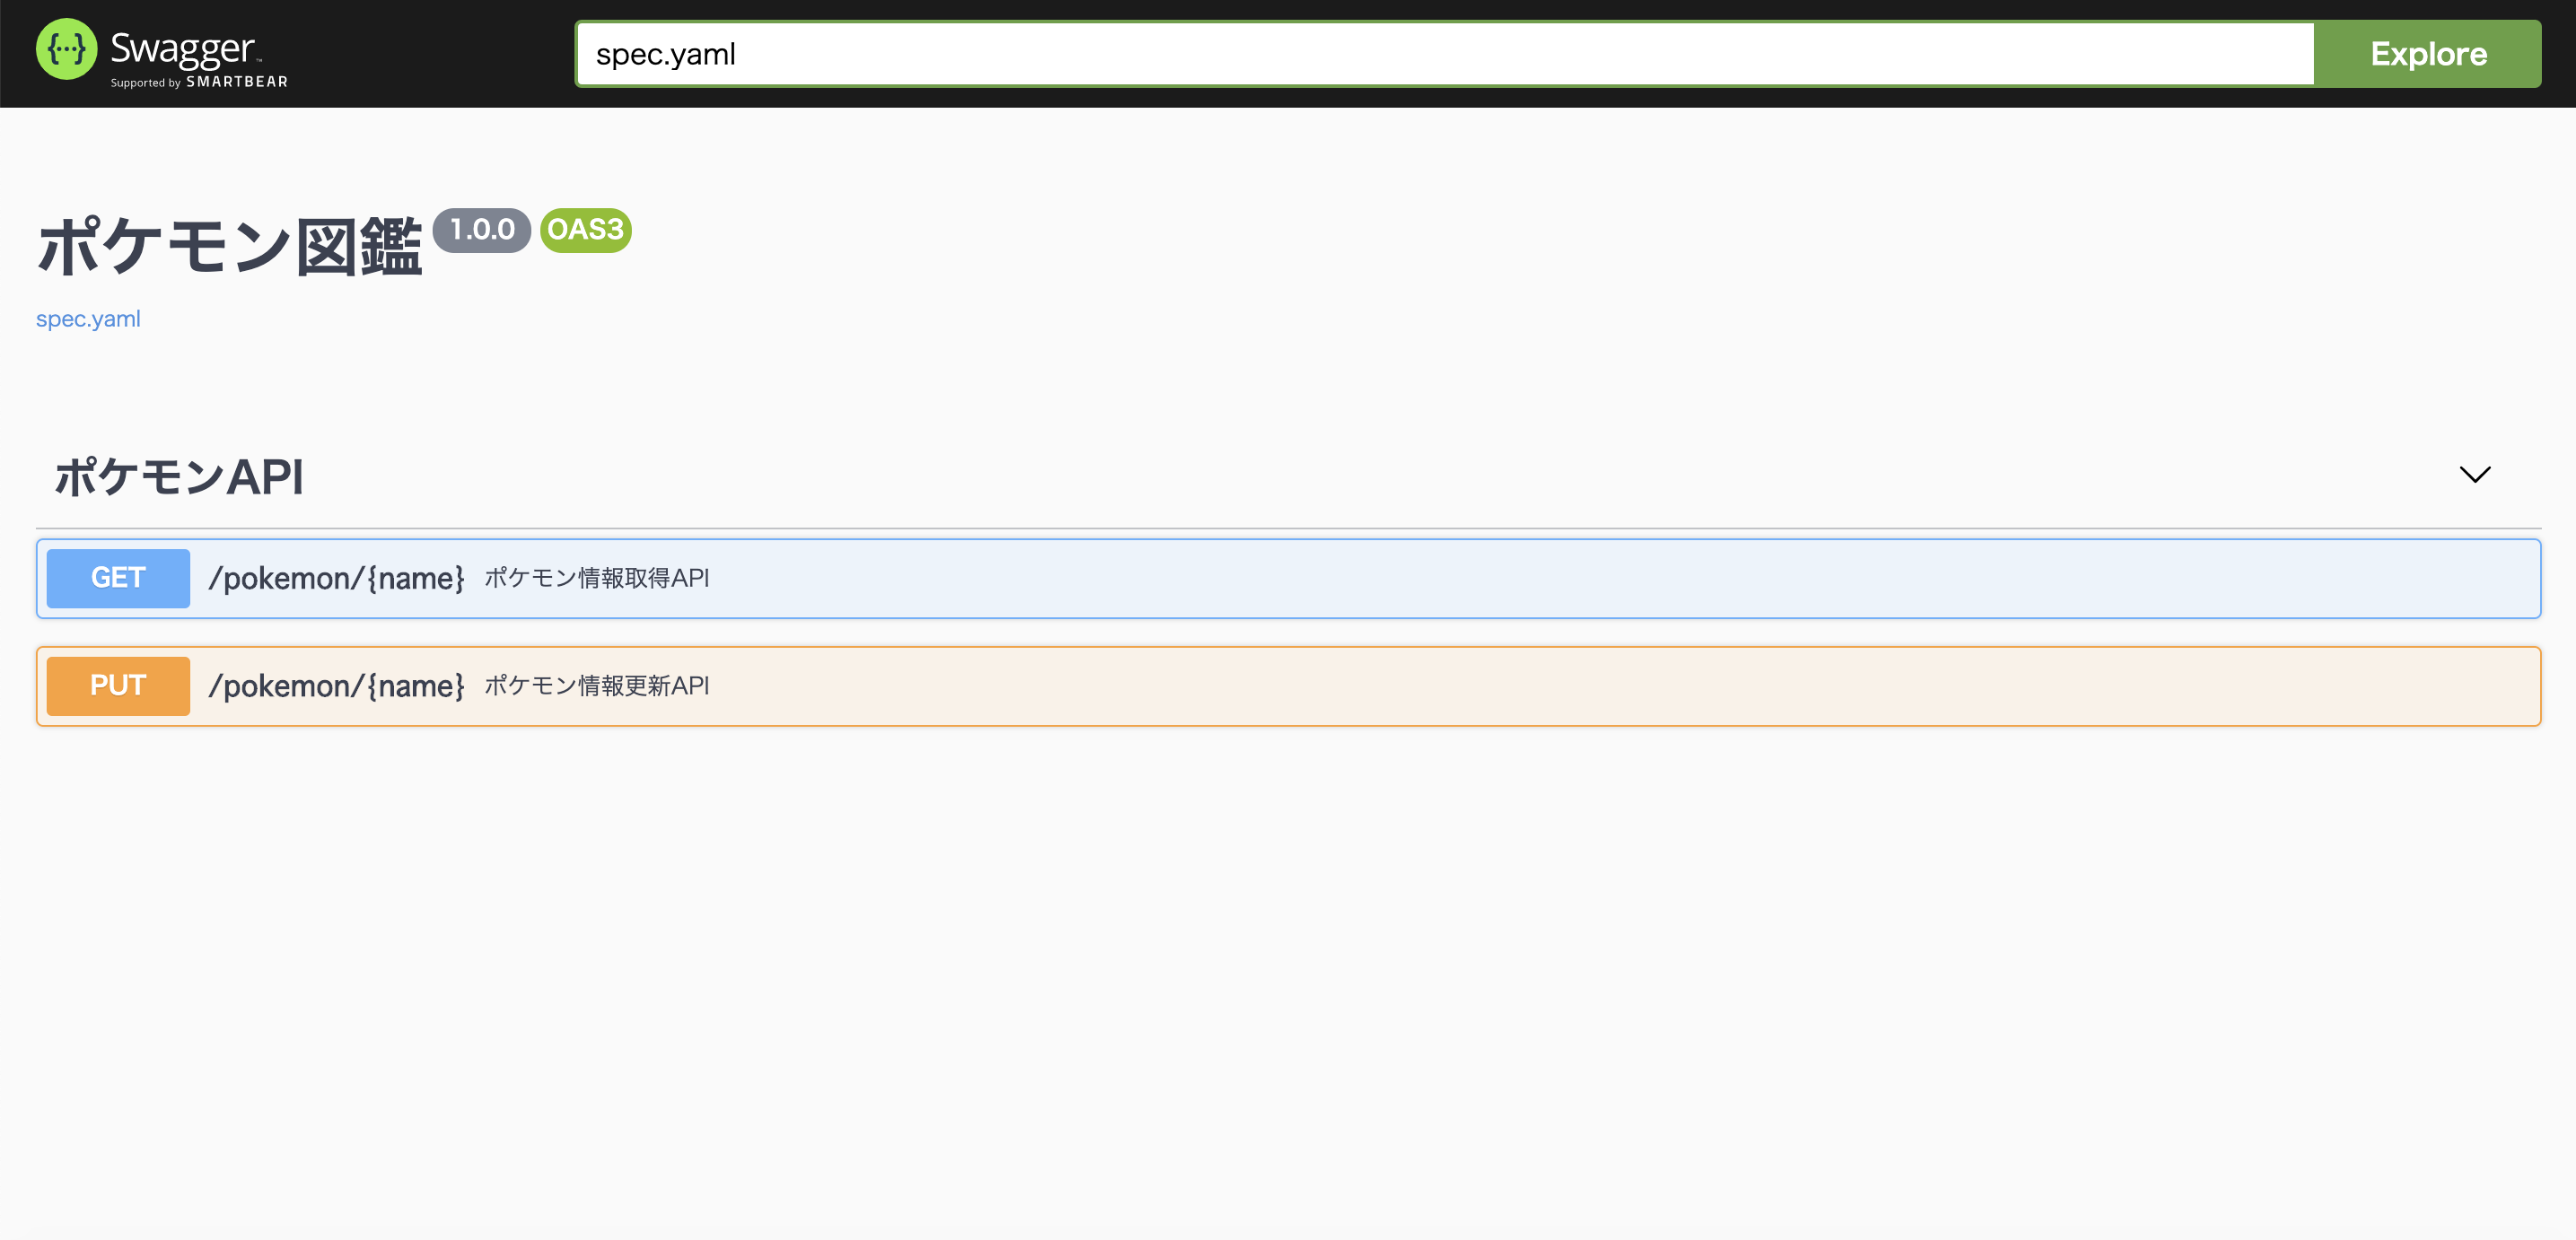
また、tags に同じ名前をつけると、同じタグで複数のAPIを管理できます。
  "/pokemon/{name}":
    get:
      tags:
        - "ポケモンAPI"
      summary:
        "ポケモン情報取得API"
      description:
        以下省略
    put:
      tags:
        - "ポケモンAPI"
      summary:
        "ポケモン情報更新API"
      description:
        以下省略
パラメーター
      parameters:
        - name: "name"
          in: "path"
          description: "ポケモンの名前"
          required: true
          type: "string"
下記画像の枠線部分の記載。
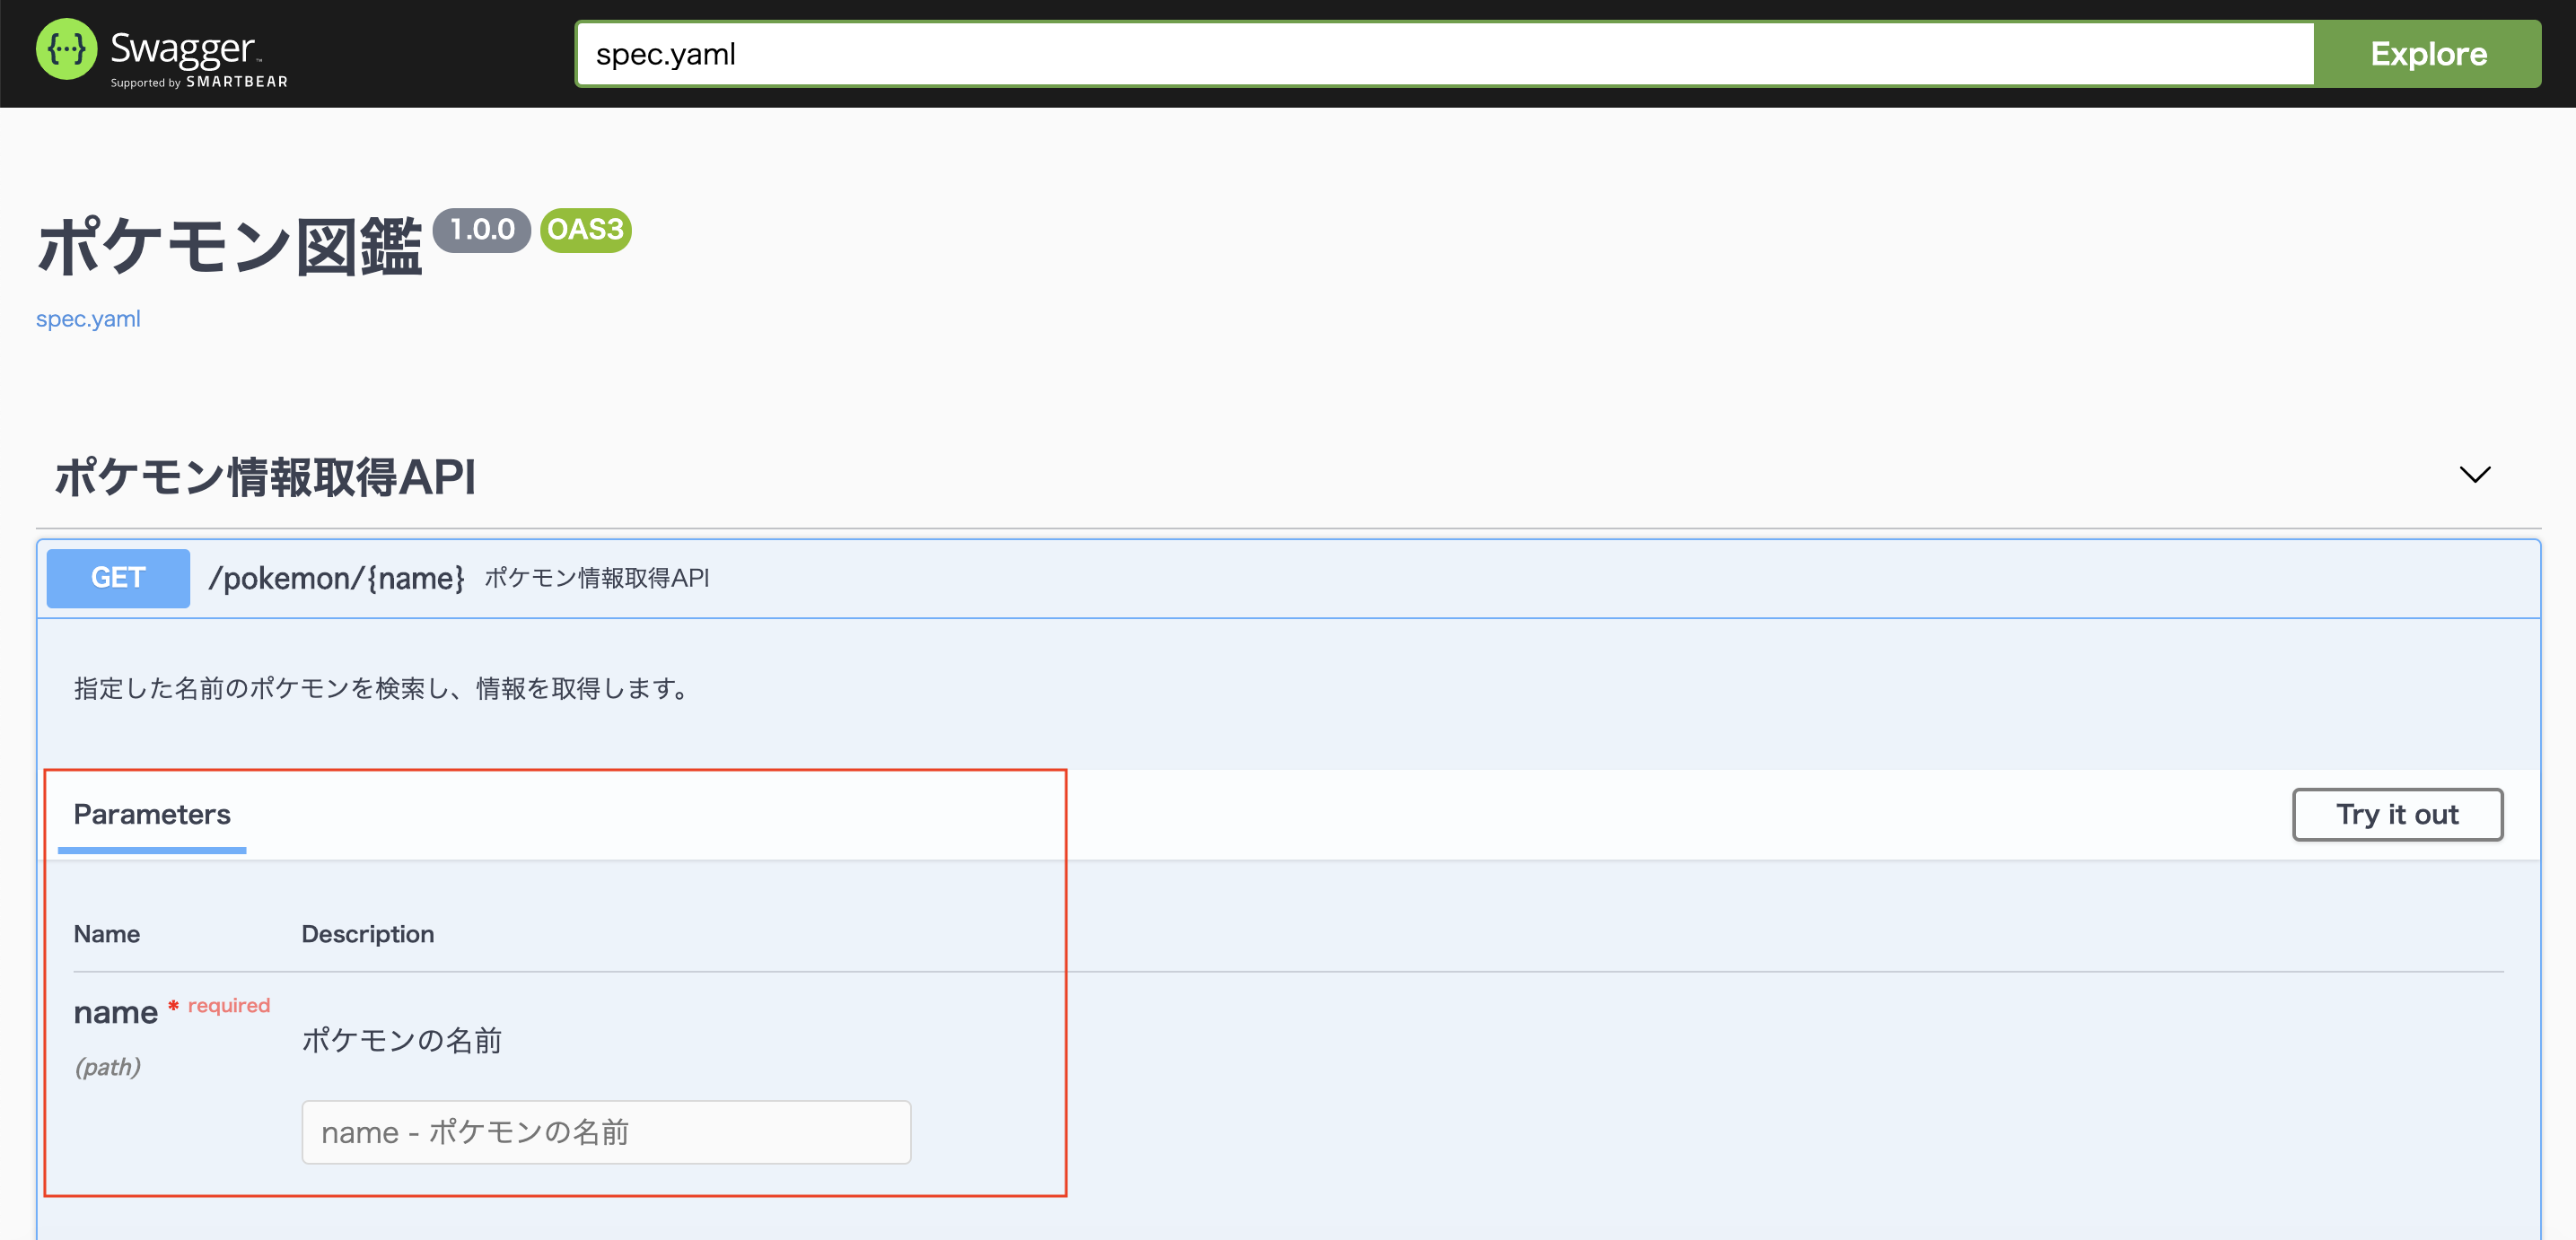
| フィールド名 | 説明 |
|---|---|
| name | パラメータの名前 |
| in | パラメーターの種類(query, header, path, formData) |
| description | パラメーターの説明 |
| reuqired | パラメーターの必須、非必須 (必須=true) |
| type | パラメーターのタイプ(string, number, integer, boolean, array, file) |
| format | パラメーターの型( ここから選ぶ) |
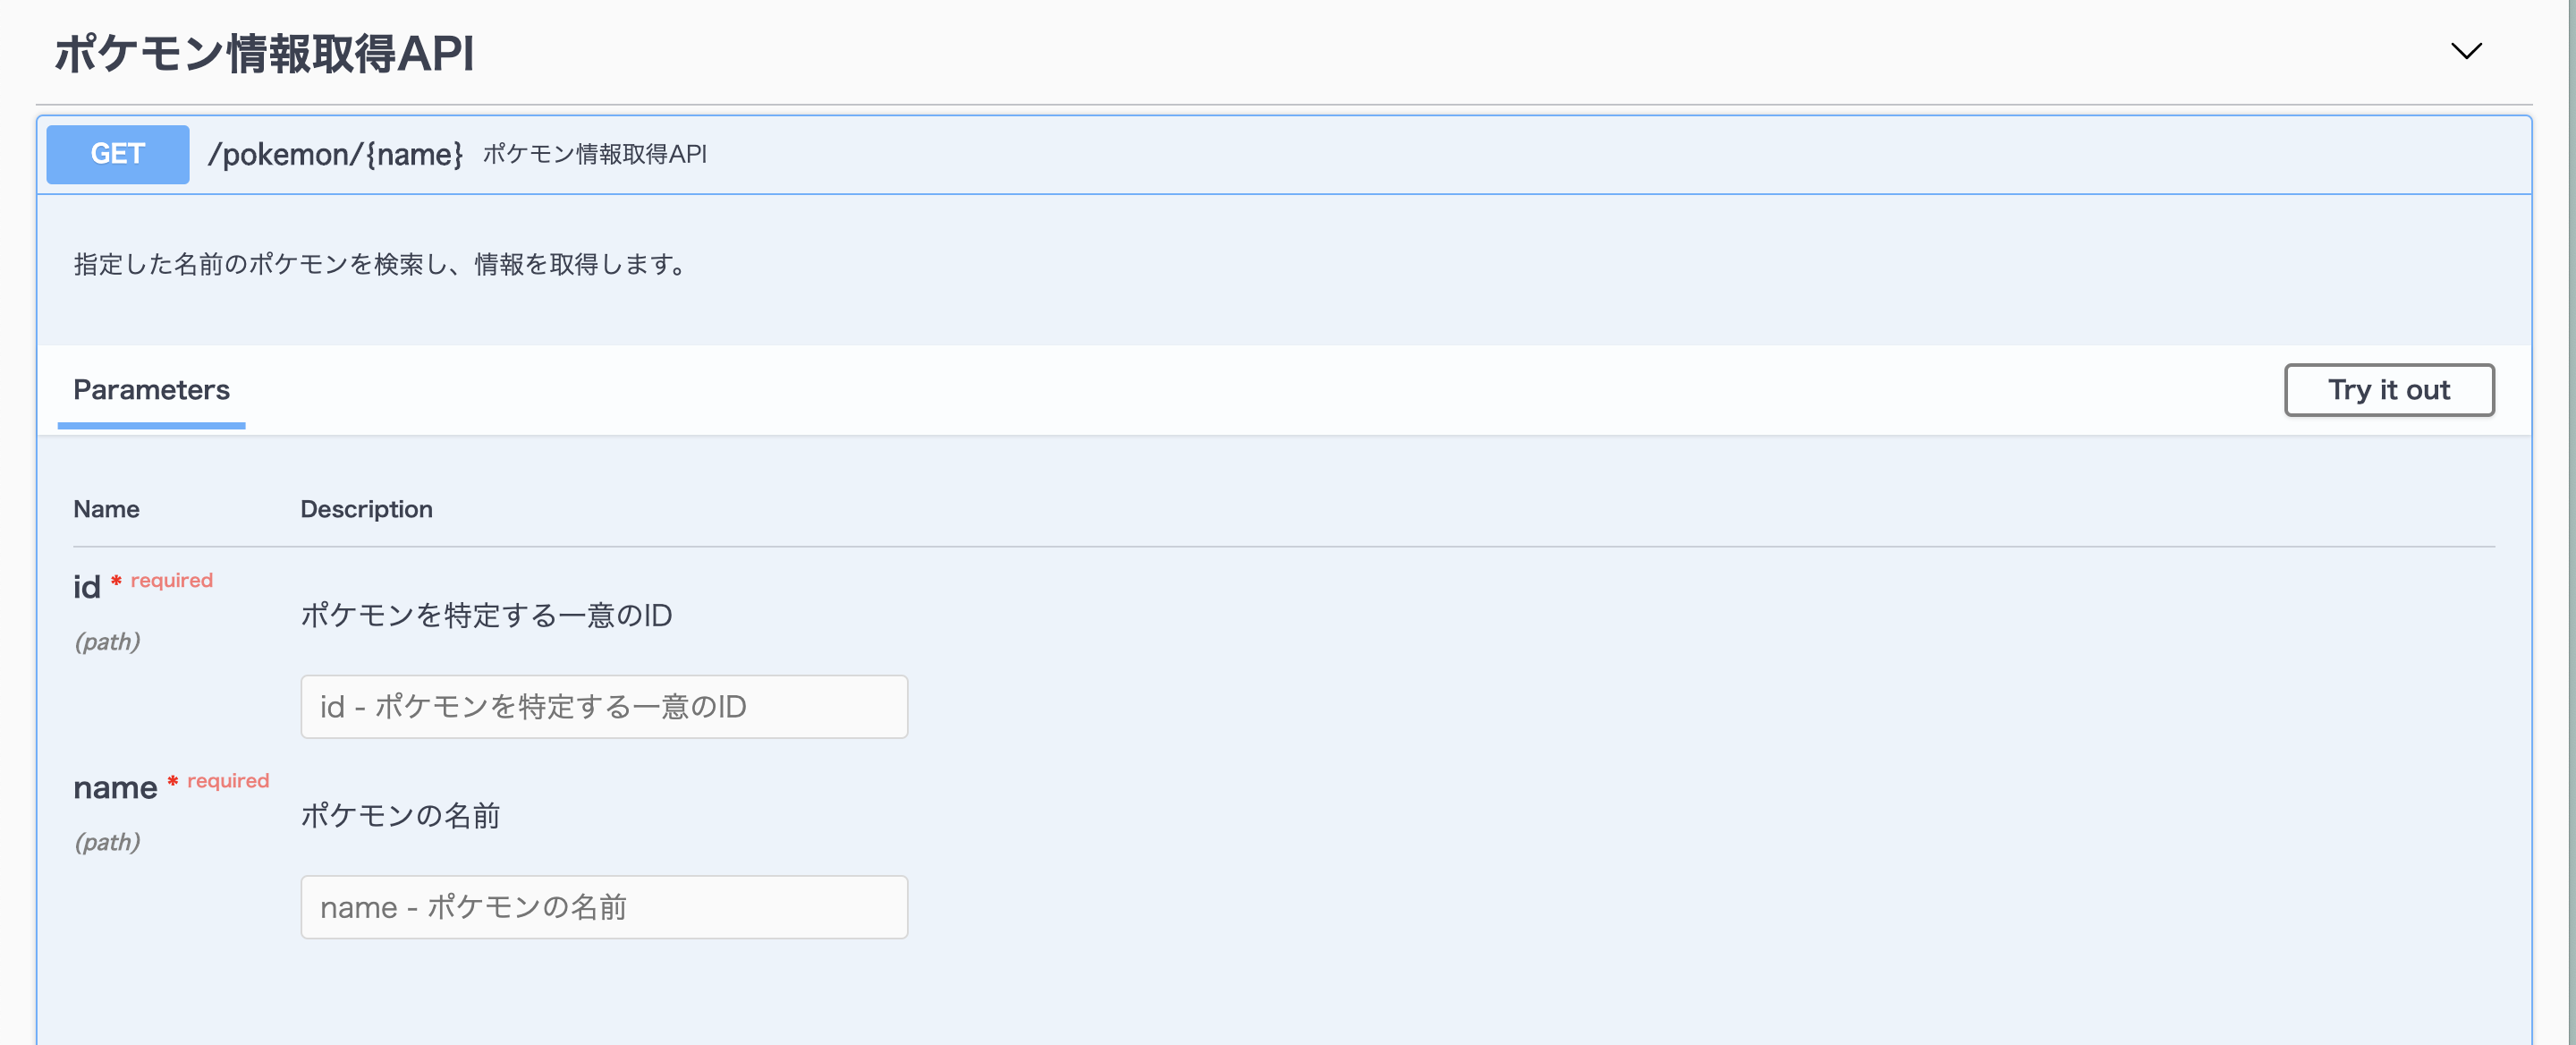
知ってると便利!!
パラメータを複数渡す場合は、下記のように記載します。
      parameters:
        - name: "id"
          in: "path"
          description: "ポケモンを特定する一意のID"
          required: true
          type: "string"
        - name: "name"
          in: "path"
          description: "ポケモンの名前"
          required: true
          type: "string"
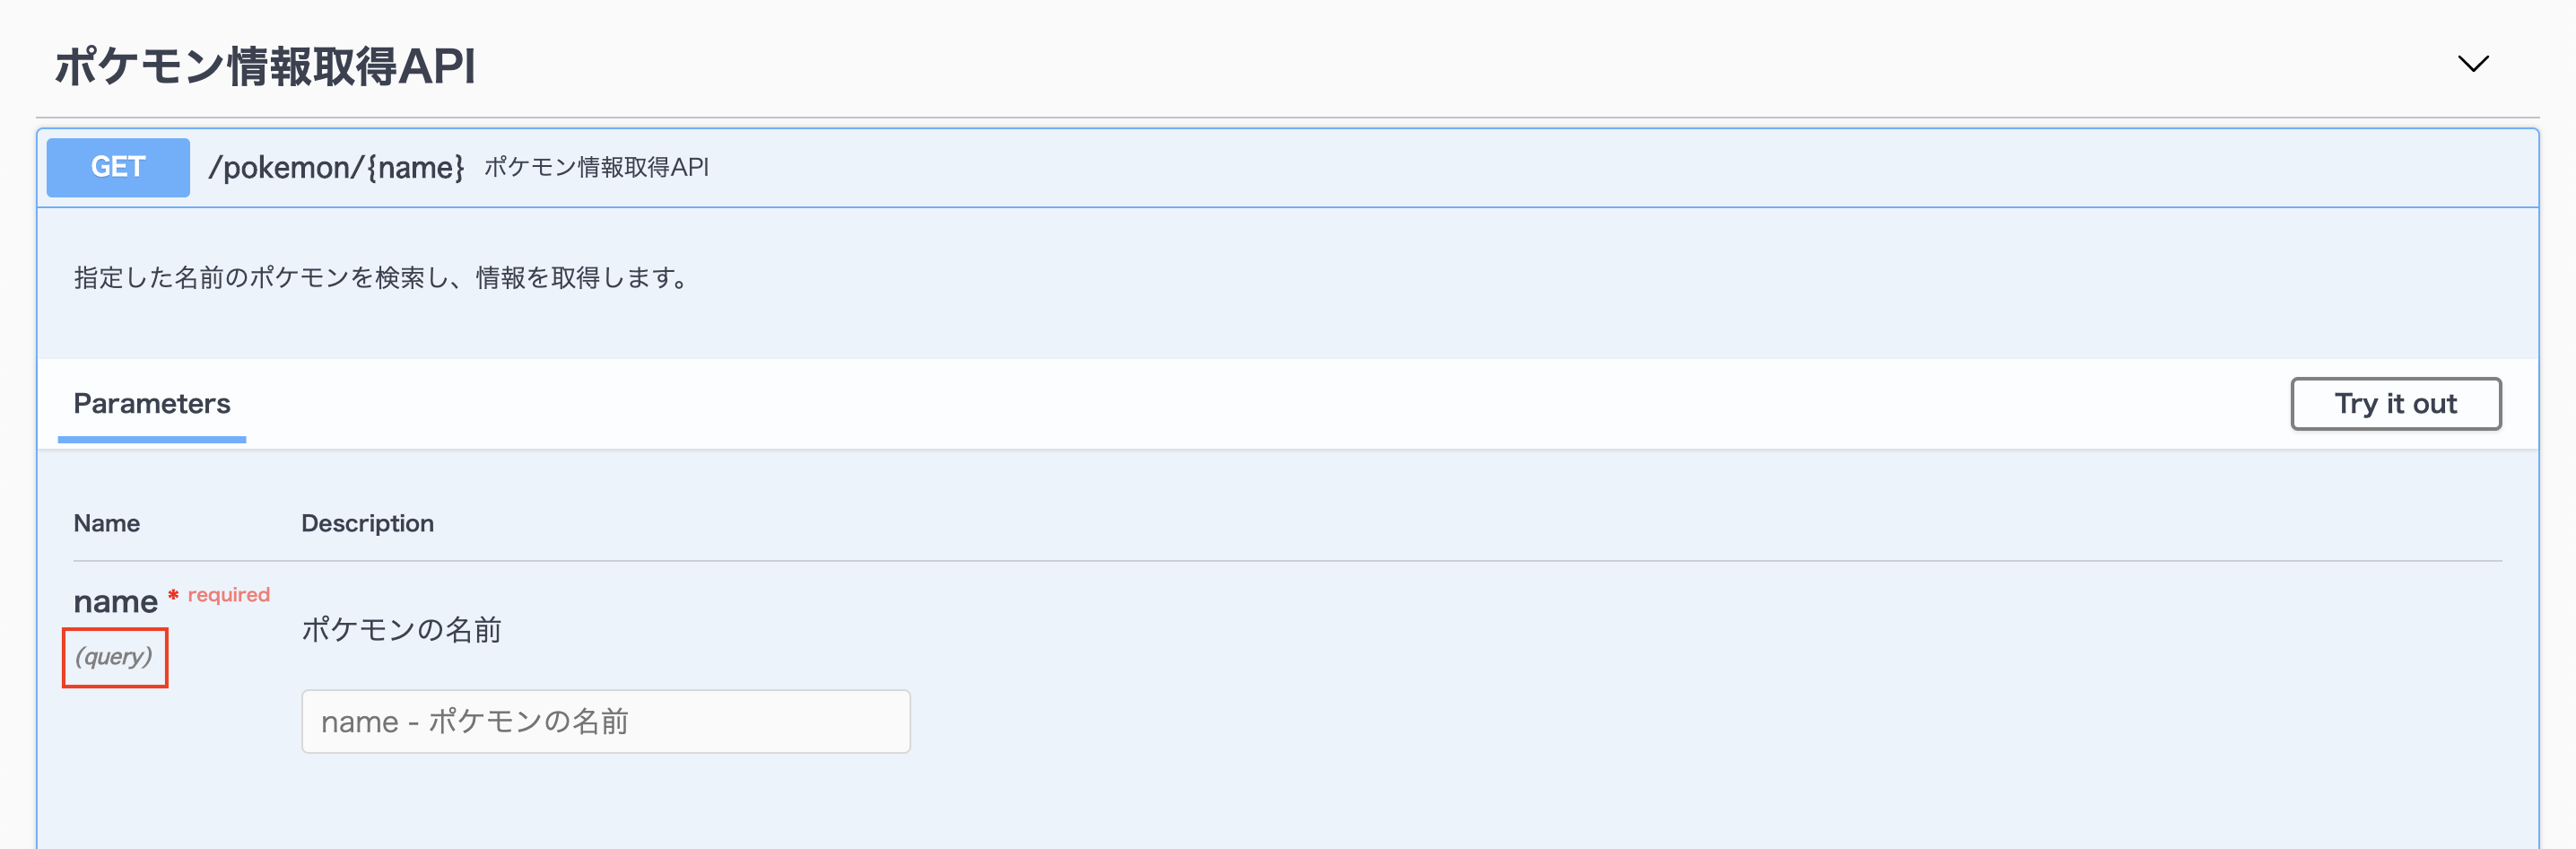
クエリパラメータの場合も、in に query を指定すれば問題ありません。
      parameters:
        - name: "name"
          in: "query"
          description: "ポケモンの名前"
          required: true
          type: "string"
レスポンス
      responses:
        200:
          description: "Success"
          content:
            application/json:
              schema:
                type: "object"
                properties:
                  no:
                    type: "string"
                  name:
                    type: "string"
                  type:
                    type: "string"
                  comment:
                    type: "string"
                example:
                  no: "007"
                  name: "ゼニガメ"
                  type: "みず"
                  comment: "こうらに とじこもり みをまもる。"
        404:
          desctiption: "NotFound"
          content:
            application/json:
              schema:
                type: "object"
                properties:
                  status:
                    type: "string"
                    example: "NOT_FOUND"
                  message:
                    type: "string"
                    example: "NOT_FOUND"
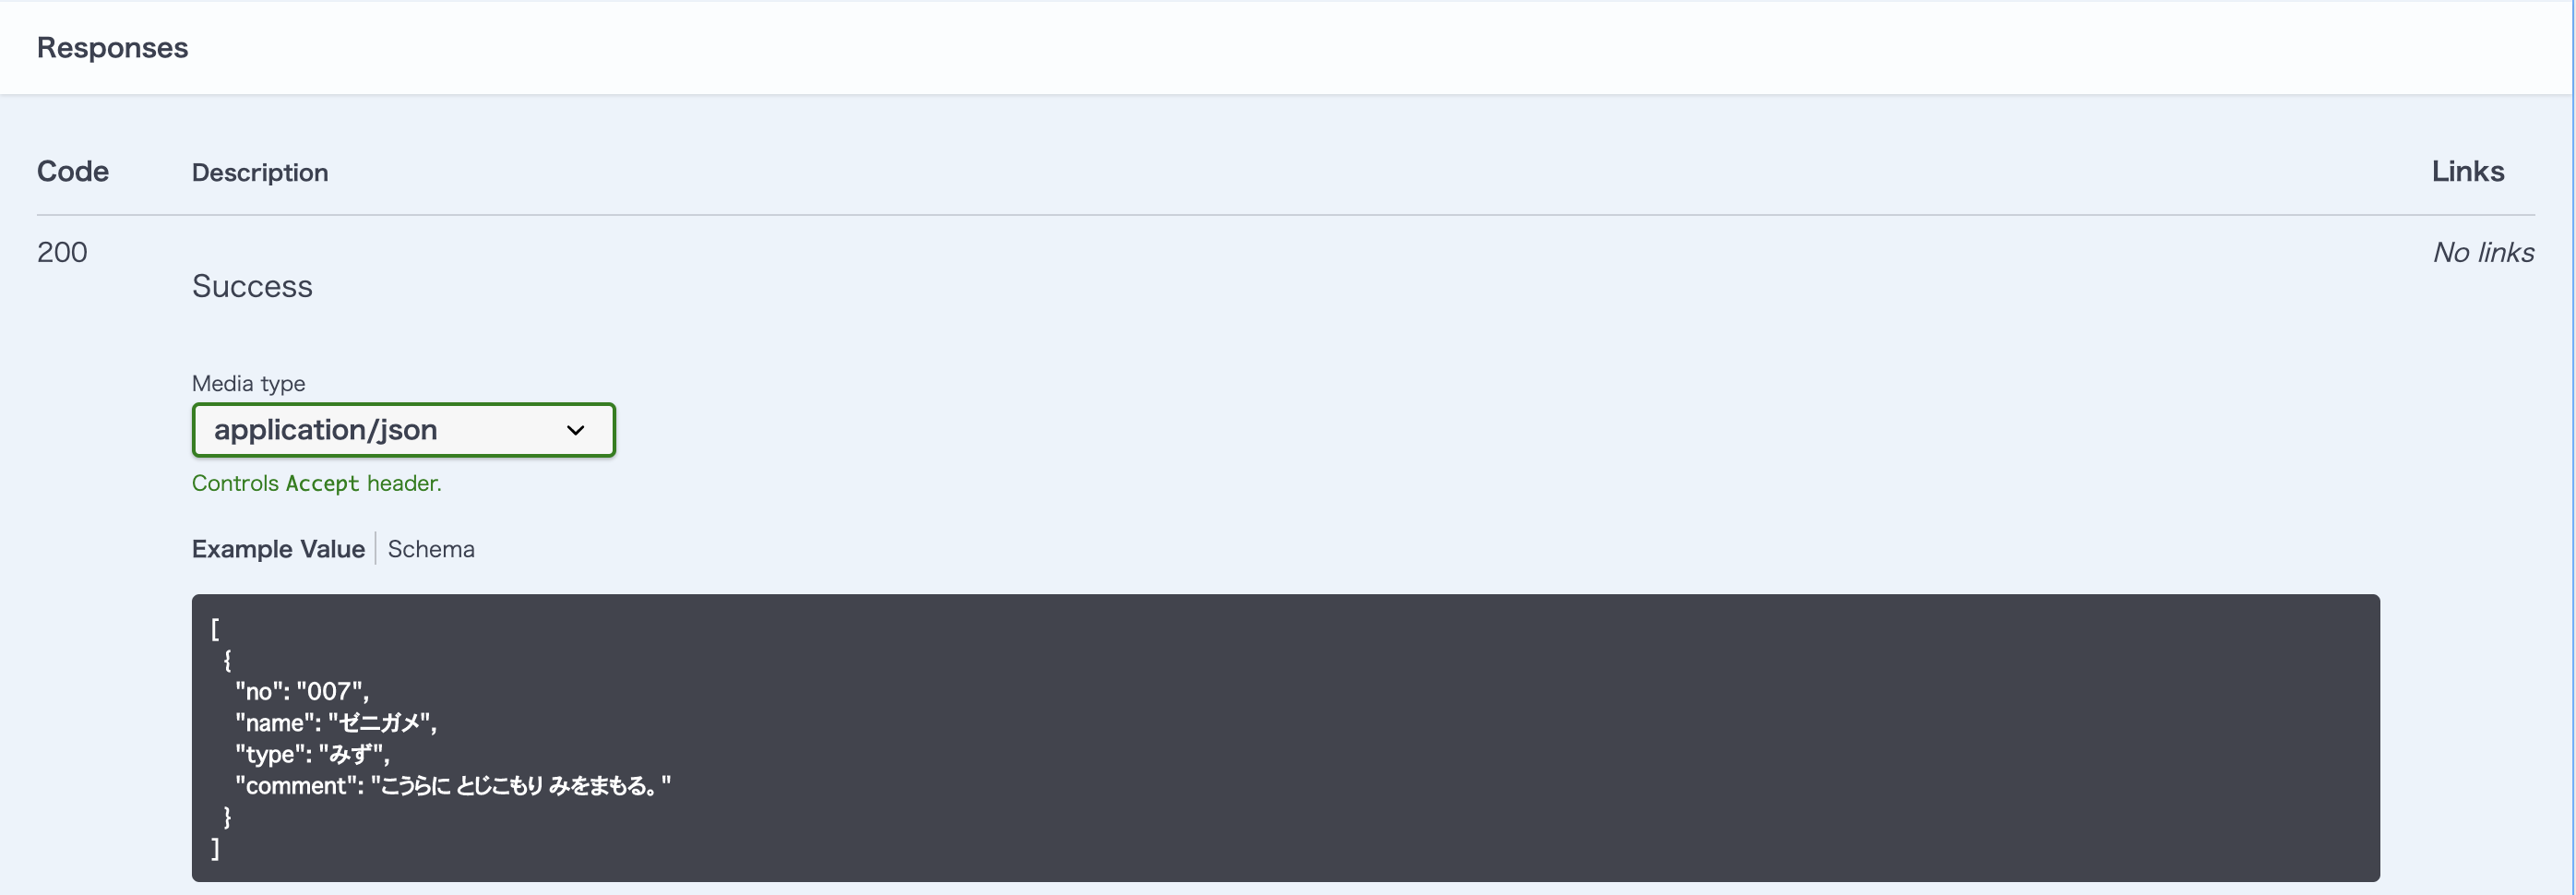
下記画像部分の記載。

| フィールド名 | 説明 |
|---|---|
| 200 | レスポンスステータスの指定(200, 400など) |
| description | レスポンスの説明 |
| content | MINEタイプ |
| schema | スキーマオブジェクト |
| type | スキーマオブジェクトのタイプ(object, array) |
typeでobjectを指定した場合
              schema:
                type: "object"
                properties:
                  no:
                    type: "string"
                  name:
                    type: "string"
                  type:
                    type: "string"
                  comment:
                    type: "string"
                example:
                  no: "007"
                  name: "ゼニガメ"
                  type: "みず"
                  comment: "こうらに とじこもり みをまもる。"
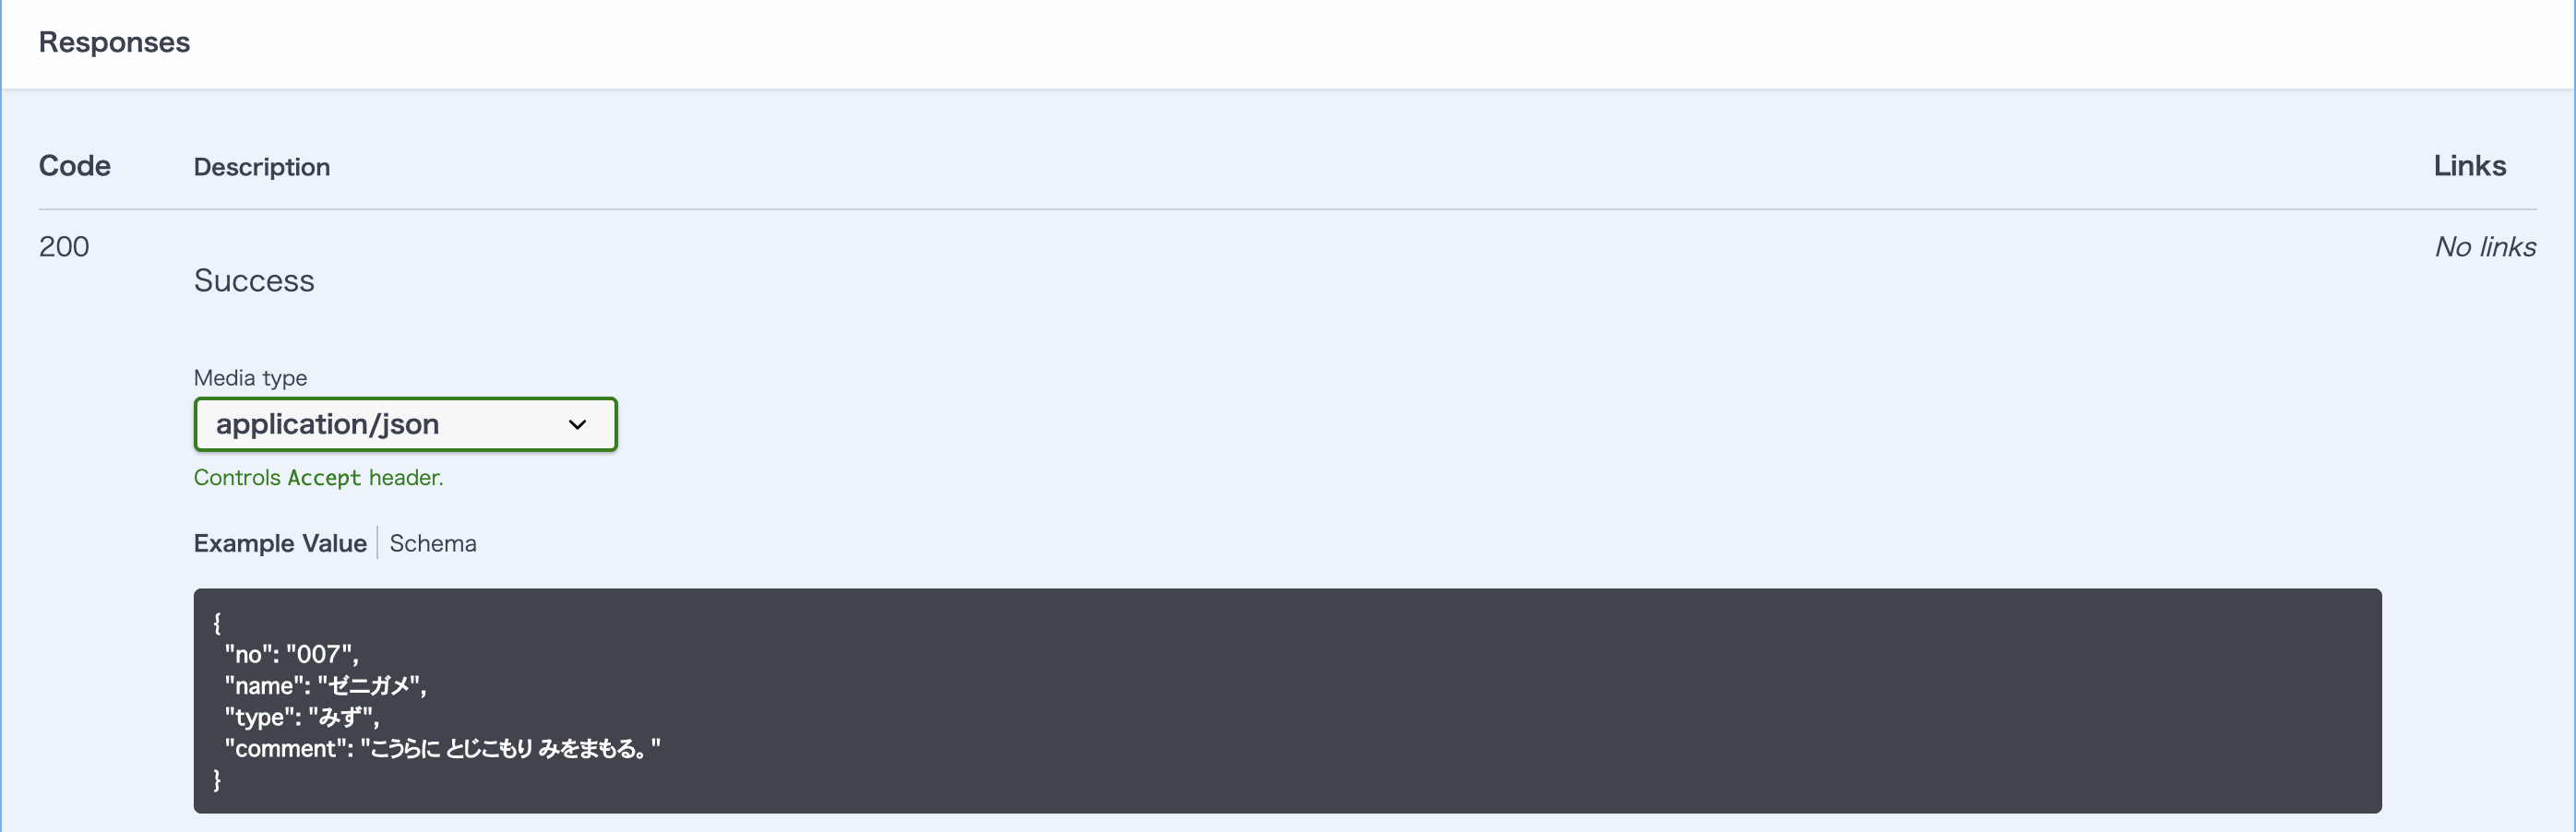
| フィールド名 | 説明 |
|---|---|
| properties | カラムの情報を記載する。 |
| type | カラムのタイプ |
| format | カラムの型( ここから選ぶ) |
| example | 表示する具体例 |
typeでarrayを指定した場合
              schema:
                type: "array"
                items:
                  type: "object"
                  properties:
                    no:
                      type: "string"
                    name:
                      type: "string"
                    type:
                      type: "string"
                    comment:
                      type: "string"
                  example:
                    no: "007"
                    name: "ゼニガメ"
                    type: "みず"
                    comment: "こうらに とじこもり みをまもる。"
| フィールド名 | 説明 |
|---|---|
| items | 配列内の要素の設定宣言 |
| type | 配列内の要素のタイプ(object, stringなど) |
| properties | カラムの情報を記載する。 |
| type | カラムのタイプ |
| format | カラムの型( ここから選ぶ) |
| example | 表示する具体例 |
まとめ
Getだけでこんなに長くなると思わなかった。自分がなんとなく手だけで書いていたものを、文字として可視化するのは難しかった。次回以降まだpost, put, deleteも残ってるから頑張りたい。
おまけ
-
API設計書をSwaggerで管理する 公開しました。