Account Activity APIの実装手順
構築環境
・windows
・insomnia
・ngrok
・xampp
※それぞれの設定方法などは今回記載していません。
Account Activity API の概要
(参考: https://developer.twitter.com/en/docs/accounts-and-users/subscribe-account-activity/overview)
・上記の内容を要約すると、webhookを使って、登録しているアカウントに対して、
何かしらアクションが起こった際にリアルタイムで情報を教えてくれるよ!
って感じです。
アクション一覧
| ツイート | ブロック |
| ツイートの削除 | ブロック解除 |
| @メンション | ミュート |
| 返信 | ミュート解除 |
| リツイート | 送信されたダイレクトメッセージ |
| ツイートの引用 | 受信したダイレクトメッセージ |
| 引用されたツイートのリツイート | 入力インジケーター |
| いいね | 領収書を読む |
| フォロー | サブスクリプションの取り消し |
| フォロー解除 |
実装手順
- Twitter Developer登録
- アプリケーション作成
- AccountActivityAPI設定
- 動作環境の準備
- CRCテスト
- Webhook登録
- イベント取得
1. Twitter Developer登録
まず初めにtwitterアカウントの作成と、Developer登録を行いましょう!
(参考: https://qiita.com/kzthrk/items/84acb969dc0b23aeae58)
2. アプリケーション作成
・アプリケーションを作成します
(https://developer.twitter.com/en/apps)
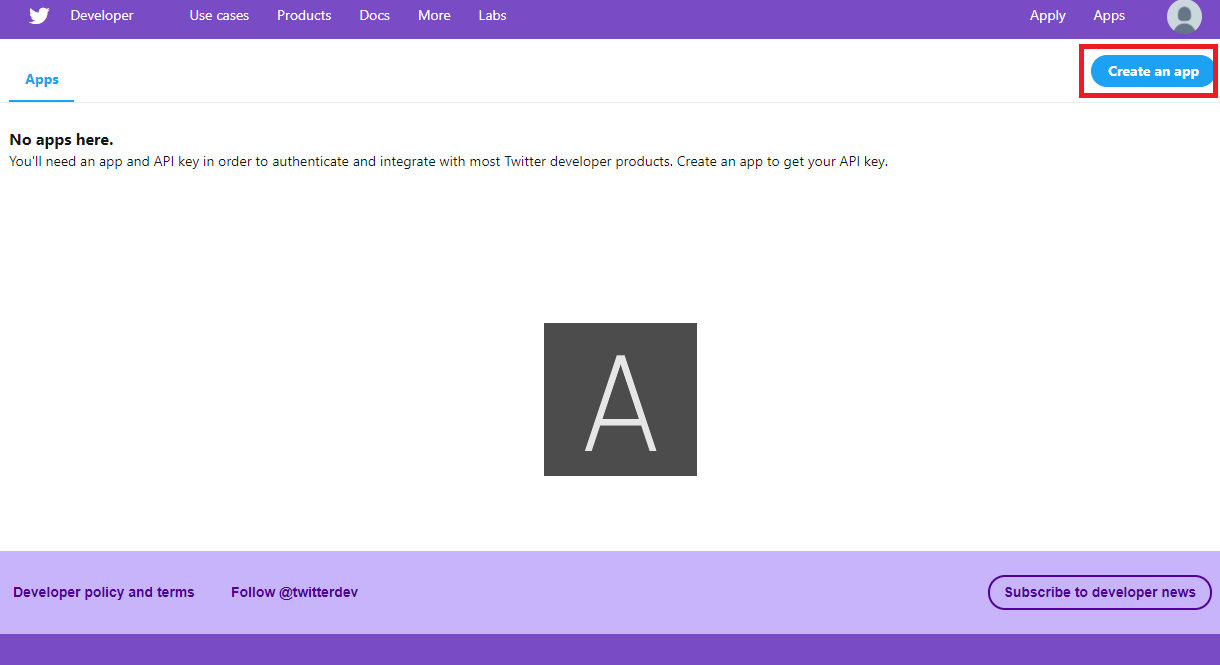
・右上の「Create an app」を押下し必要箇所を入力します。
登録後、一覧画面に作成したアプリケーションが表示されます。
※内容は結構適当でも大丈夫だったりします。
・アプリケーション行に「Details」ボタンがあるため押下。
「Permissons」→「Edit」 の Access permisson を
「Read, write, and Direct Messages」に変更し「save」する。
※必ず変更すること
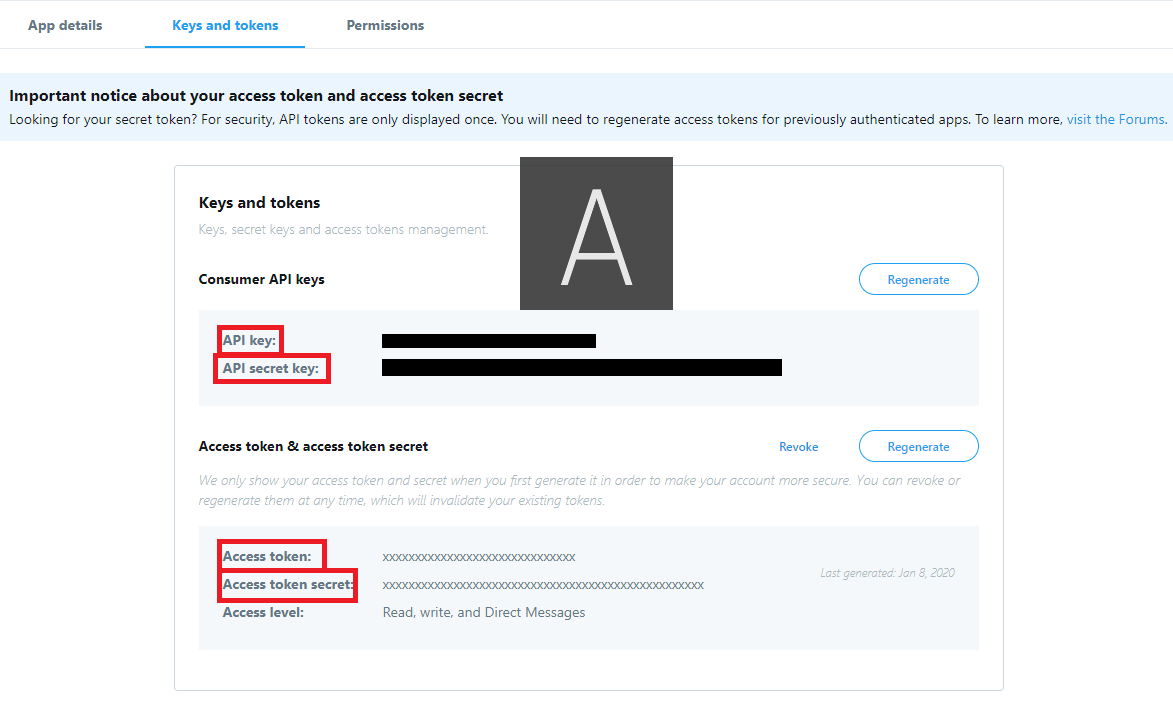
・「keys and tokens」を押下し上記画像の赤枠部分の値をメモっておきます。
3. AccountActivityAPI設定
・開発環境ページに遷移する
(https://developer.twitter.com/en/account/environments)
・一番下に「Account Activity APISandbox」の項目があるので右側の「Set up dev enviroment」を押下します。
・「label」には環境を識別するラベル名
・「App」には、「2. アプリケーション作成」で登録した
アプリケーション名を選択し「Complate setup」を押下します。
4. 動作環境準備
・動作環境はWebhookが疎通できる環境である必要があるので、ローカルにngrokを導入し外部アクセスを受け入れられるようにしています。
(https://ngrok.com/)
・xampp等でlocalhostを立て、ngrokで外部公開します。
続いてhtdocs直下にindex.phpを作り下記のコードを記入してください。
※「API secret key」の部位分は自分用に変更して下さい。
<?php
if(isset($_REQUEST['crc_token'])) {
  $signature = hash_hmac('sha256', $_REQUEST['crc_token'], 'API secret key', true);
  $response['response_token'] = 'sha256='.base64_encode($signature);
  print json_encode($response);
}
5. CRCテスト
・AccountActivityAPIではCRCテストに合格しないとAPIを使うことが出来ません。
テストを行うためAPIクライアントをインストールしてください。
※今回はInsomniaを使用しています。
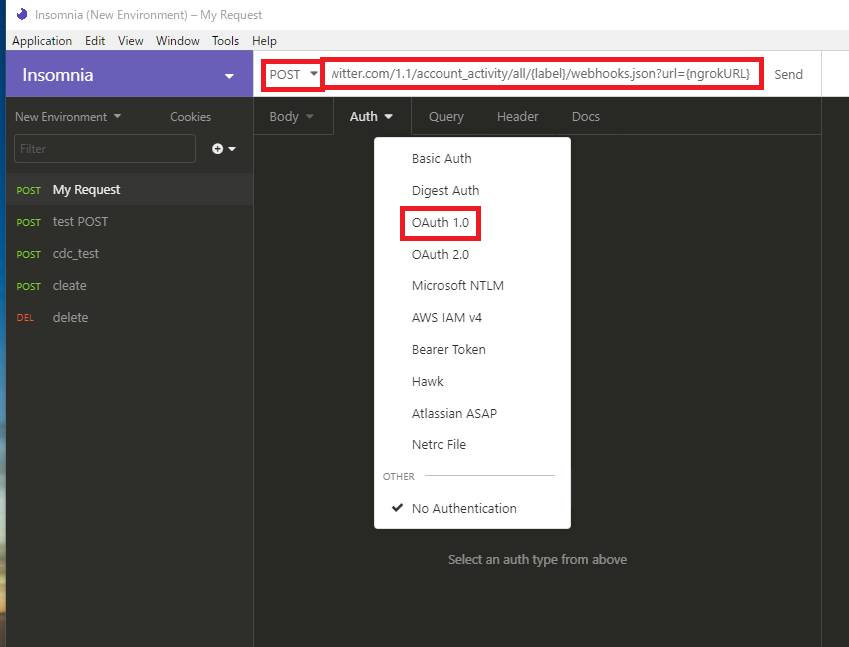
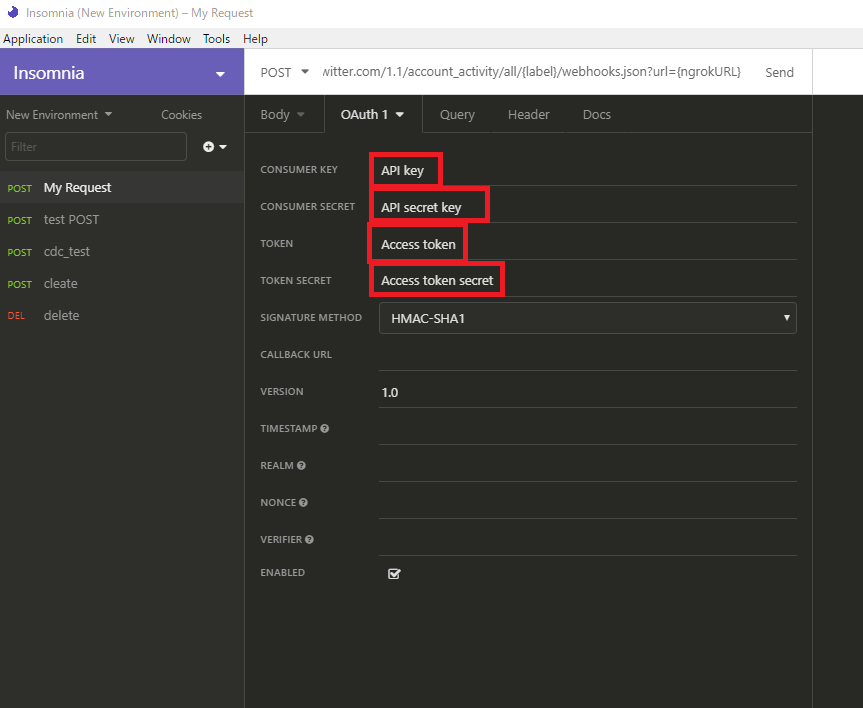
・上記画像の赤枠部分を設定後、下記のURLに対してPOSTリクエストを投げます。
https://api.twitter.com/1.1/account_activity/all/{label}/webhooks.json?url={ngrokURL}
・問題無ければ以下のようなレスポンスが返ってくるので、メモっておきましょう。
※APIを使用する際に必要な場合があります。
{
  "id": "1207212928518060000",
  "url": "https://xxxxxxxx.ngrok.io",
  "valid": true,
  "created_timestamp": "2019-12-18 08:16:06 +0000"
}
6. Webhook登録
続いてWebhookを登録します。
・Insomniaのツール、で下記URLに対してPOSTリクエストを投げます。
https://api.twitter.com/1.1/account_activity/{label}/devedev/subscriptions.json
・問題なければ「204 No Content」が帰ってくるので、ようやく設定が完了します!!!
※ここでユーザーのイベントをwebhookで取得出来る状態になります。
7. イベント取得
・このAPIでは、結果をjsonで受け取ることができるので、
phpで、そのjsonを受け取れるようにしましょう。
・下記のコードをindex.phpに記述します。
$json = file_get_contents("php://input");

// JSON文字列をobjectに変換
//   ⇒ 第2引数をtrueにしないとハマるので注意
$contents = json_decode($json, true);

$file = 'people.json';

file_put_contents($file, $contents);
・上記のコードを追加後に、webhookで登録したアカウントで何かしらアクション(「ツイート」「いいね」「フォロー」など)を起こし、people.jsonを確認してみてください。
コードが間違っていなければ、json形式のデータが格納されているはずです!
(うまくいかなかったらすいません、、、、、)


