はじめに
一時期、趣味で3Dモデリングをやっていた時期があり、前から興味があったThreeJSを触ってみましたので備忘録的な意味を込めて記事にしました。
概要
今回、自作したガチャガチャのモデルを使用して少し夏っぽい雰囲気を感じられるレンダリングを目指して色々と試してみました。
ThreeJSの機能に触れるということも目的にしていたため、少し遠回りな実装もあると思いますがご了承ください。
ディレクトリ構成
今回の最終的なディレクトリ構成は以下のようになります。
  ├── assets モデルやHDR、テクスチャを格納する
  │  │
  │  ├── models
  │  │ ├── gacha.glb ガチャガチャのモデル
  │  │ └── wood-wall.glb 木の壁のモデル
  │  │
  │  ├── hdr
  │  │ └── abandoned_hopper_terminal_04_4k.hdr
  │  │
  │  └── textures
  │     └── ground.png 床のテクスチャ画像
  │
  ├── index.html
  └── main.js
ThreeJSを読み込む
最初に、ThreeJSの ドキュメント にもある通り、ThreeJSをCDNから読み込んでいきます。
今回使用するバージョンは現時点(2024/12月時点)最新の 0.171.0 を使用していきます。
また、後にHelperやLoaderを使用するのでaddonsも読み込みます。
<!DOCTYPE html>
<html>
  <head>
    <meta charset="UTF-8" />
    <script type="importmap">
      {
        "imports": {
          "three": "https://cdn.jsdelivr.net/npm/three@0.171.0/build/three.module.js",
          "three/addons/": "https://cdn.jsdelivr.net/npm/three@0.171.0/examples/jsm/"
        }
      }
    </script>
  </head>
  <body>
    <canvas id="myCanvas"></canvas>
  </body>
  <script type="module" src="main.js"></script>
</html>
シーン & カメラとレンダラーの作成
ThreeJSではScene(空間)にLightやMeshObjectなどの要素をadd(追加)していき、RendererにSceneとCameraを渡すことでレンダリング(表示)することができます。
ここではSceneとRenderer、Cameraを作成し実際にレンダリング結果を表示してみます。
import * as THREE from "three";

window.addEventListener("DOMContentLoaded", init);

function init() {
  // レンダリングの縦横サイズを設定
  const HEIGHT = 540;
  const WIDTH = 820;

  // 出力対象のElementを取得
  const canvasElement = document.querySelector("#myCanvas");

  // シーンを作成
  const scene = new THREE.Scene();

  // カメラを作成
  // 視野角(fov)、アス比を主に設定
  const camera = new THREE.PerspectiveCamera(45, WIDTH / HEIGHT, 1, 1000);
  camera.position.z = 5;

  // レンダラーを作成
  // antialias = アンチエイリアスの設定
  const renderer = new THREE.WebGLRenderer({
    antialias: true,
    canvas: canvasElement,
  });
  renderer.setSize(WIDTH, HEIGHT);

  renderer.render(scene, camera);
}

今はまだLightや他の3DオブジェクトをSceneに追加していないのでなにも描画されていませんが、Consoleにエラーなどが表示されていなく、画像のように真っ暗な画面が表示されていればOKです。
参考: https://threejs.org/docs/#api/en/cameras/PerspectiveCamera
参考: https://threejs.org/docs/#api/en/renderers/WebGLRenderer
背景画像の設定
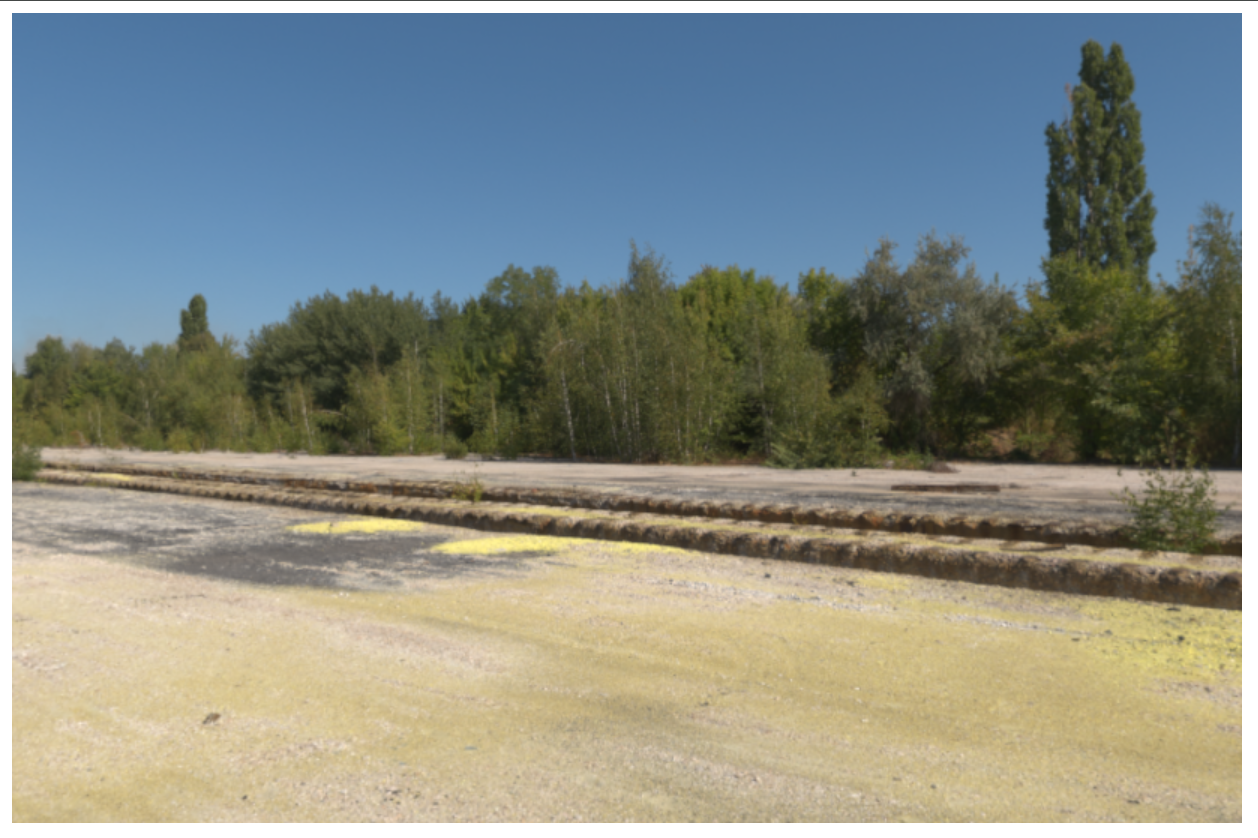
今回は背景画像として、Poly Haven のHDR画像を使用します。本来はライティングや反射で使用されることが主ですが、今回はライティングもThreeJSで行いたい(試したい)ので背景画像のみ使用する形とします。
※ Poly Havenのライセンスについて
// アドオンをインポート(2行目に記述)
import { RGBELoader } from "three/addons/loaders/RGBELoader.js";

function init() {

  // ~~前略~~

  // 背景テクスチャを設定(先述したmain.jsの最下部に追記)
  new RGBELoader().load(
    "./assets/hdr/abandoned_hopper_terminal_04_4k.hdr",
    (texture) => {
      texture.mapping = THREE.EquirectangularReflectionMapping;
      // 背景に読み込んだテクスチャを設定
      scene.background = texture;
      // 再レンダリング
      renderer.render(scene, camera);
    }
  );
}
今回HDR画像の読み込みにはアドオンの RGBELoader を使用しました。
ダウンロードしたHDR画像を ./assets/hdr/ 配下に格納し以上を追記、以下画像のようにレンダリングされていればOKです。
自作モデルの読み込み
それではいよいよ実際に以下画像の自作モデルを読み込んで描画してみたいと思います。
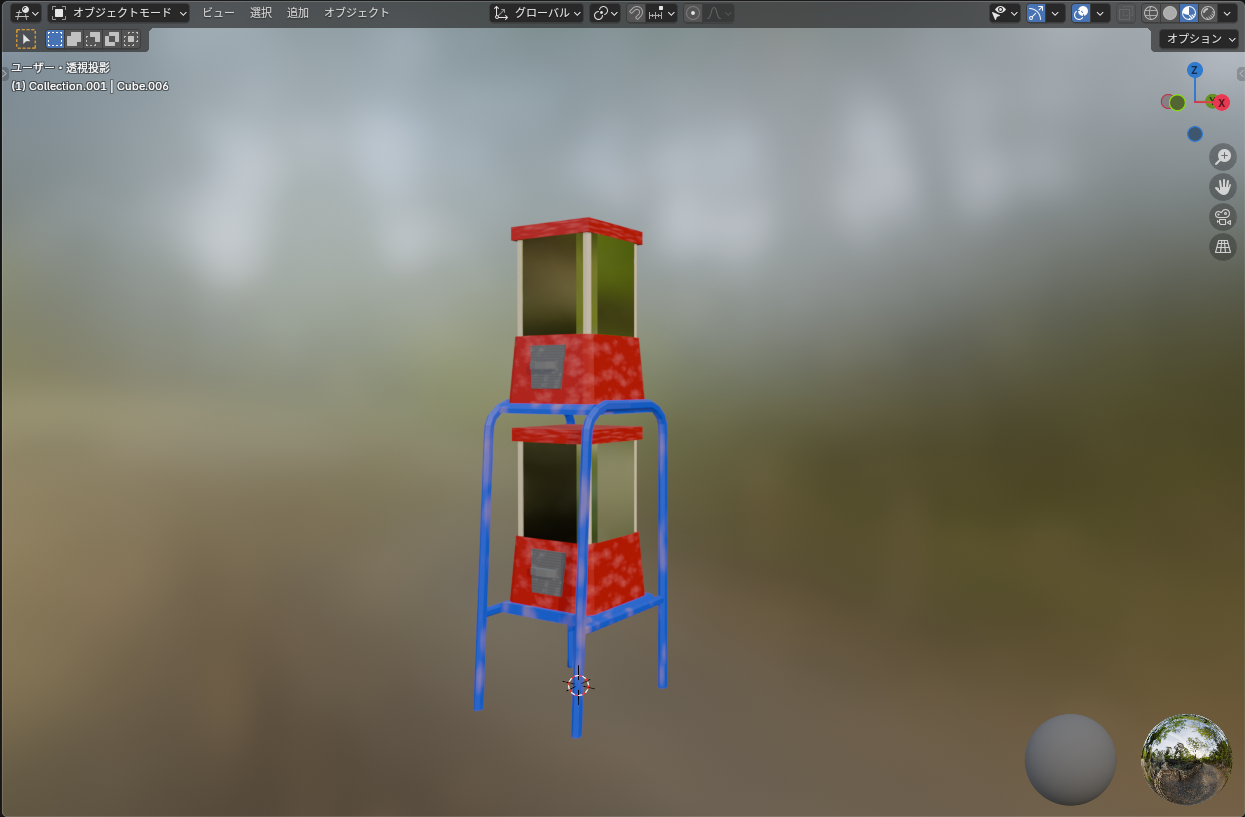
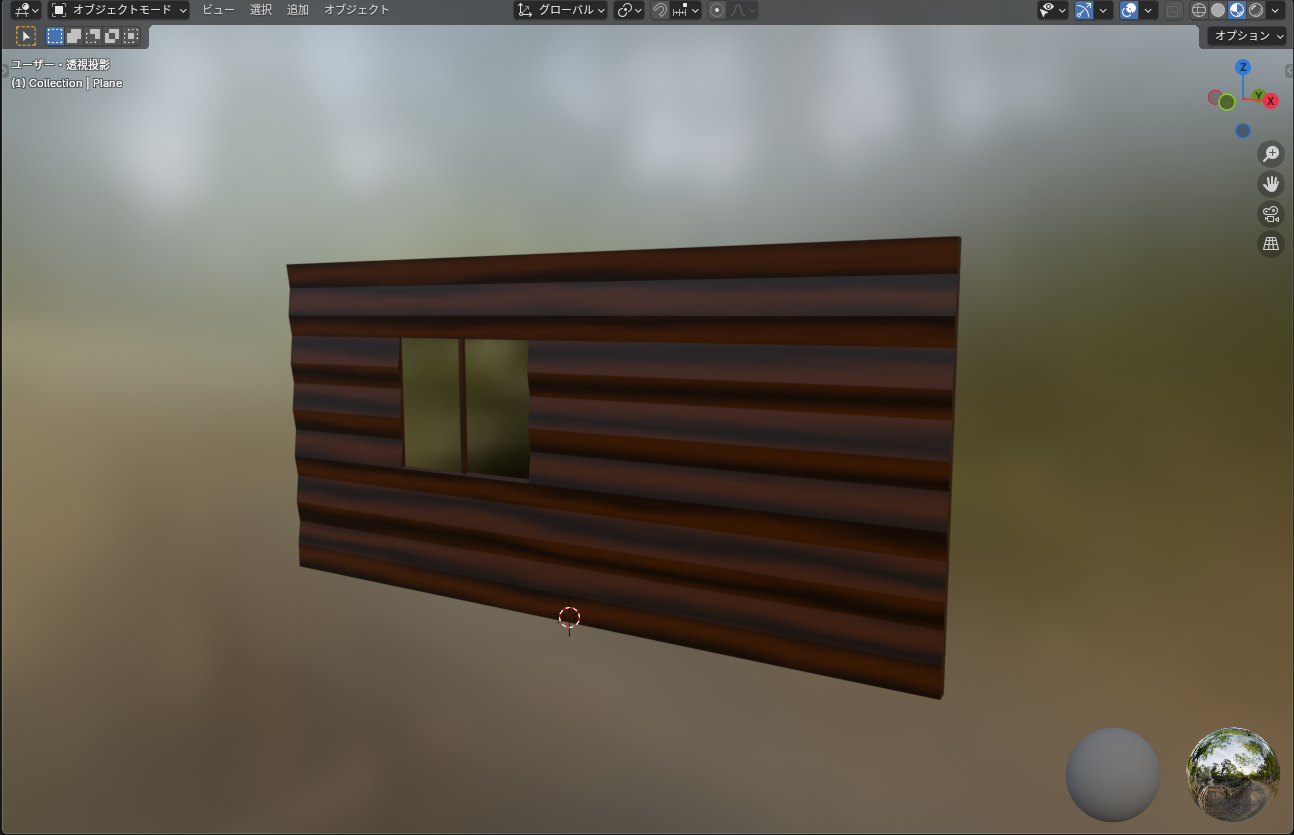
Blenderからglb形式で出力したデータを読み込むため、アドオンの GLTFLoader を使用します。
先程と同様に main.js に追記する形で実装します。
// アドオンをインポート(3行目に記述)
import { GLTFLoader } from "three/addons/loaders/GLTFLoader.js";

function init() {

  // ~~前略~~

  // ガチャガチャ達の各パラメータ
  const gacha1Params = {
    position: { x: 1.5, y: -1.8, z: 0 },
  };
  const gacha2Params = {
    position: { x: 2.5, y: -1.8, z: 0 },
  };
  const gacha3Params = {
    position: { x: 3.5, y: -1.8, z: 0 },
  };
  // 木壁のパラメータ
  const woodWallParams = {
    position: { x: 2, y: -1.8, z: -0.7 },
  };

  modelLoad("./assets/models/gacha.glb", gacha1Params);
  modelLoad("./assets/models/gacha.glb", gacha2Params);
  modelLoad("./assets/models/gacha.glb", gacha3Params);
  modelLoad("./assets/models/wood-wall.glb", woodWallParams);

  function modelLoad(modelPath, params) {
    const loader = new GLTFLoader();
    loader.load(modelPath, (glb) => {
      const glbModel = glb.scene;
      scene.add(glbModel);

      // 渡されたparamsで位置や回転を設定
      glbModel.position.set(
        params.position.x,
        params.position.y,
        params.position.z
      );

      renderer.render(scene, camera);
    });
  }
}
今回は新たに modelLoad() 関数を定義し、この関数でモデルの読み込み、引数のパラメータで各モデル位置の指定をできるようにしました。
基本的なことは変わらず、読み込んだモデルをSceneに追加しレンダリングを行います。
それでは実際にレンダリング結果を見てみます。
真っ暗ですね。何故かというと、このScene(空間)にはLightがないのです。よって光が何にも当たらないので真っ暗になっています。
Lightの作成
真っ暗な理由もわかったところでLightを追加してモデルを照らしてみましょう。ThreeJSには複数種類のLightがあります。
ドキュメント をパッと見るだけで8種類です。
今回使用するのは HemisphereLight と PointLight の2種類です。
それでは実際に使用してみて各ライトがどのような効果を持つのか見てみましょう。
HemisphereLight
空からの光の色、地面からの反射光を分けて設定できるライトで、影を落とさないという特徴があります。
function init() {

  // ~~中略~~

  // HemisphereLightを作成
  // new THREE.HemisphereLight(空の色, 反射光色, 光の強さ);
  const hemisphereLight = new THREE.HemisphereLight(
    new THREE.Color("rgb(150, 100, 255)"),
    new THREE.Color("rgb(255, 100, 100)"),
    0.4
  );
  hemisphereLight.position.set(7, 4, 3);
  scene.add(hemisphereLight);

  // ~~後略~~

}
以上でHemisphereLightの作成ができました。
レンダリング結果を見てみます。
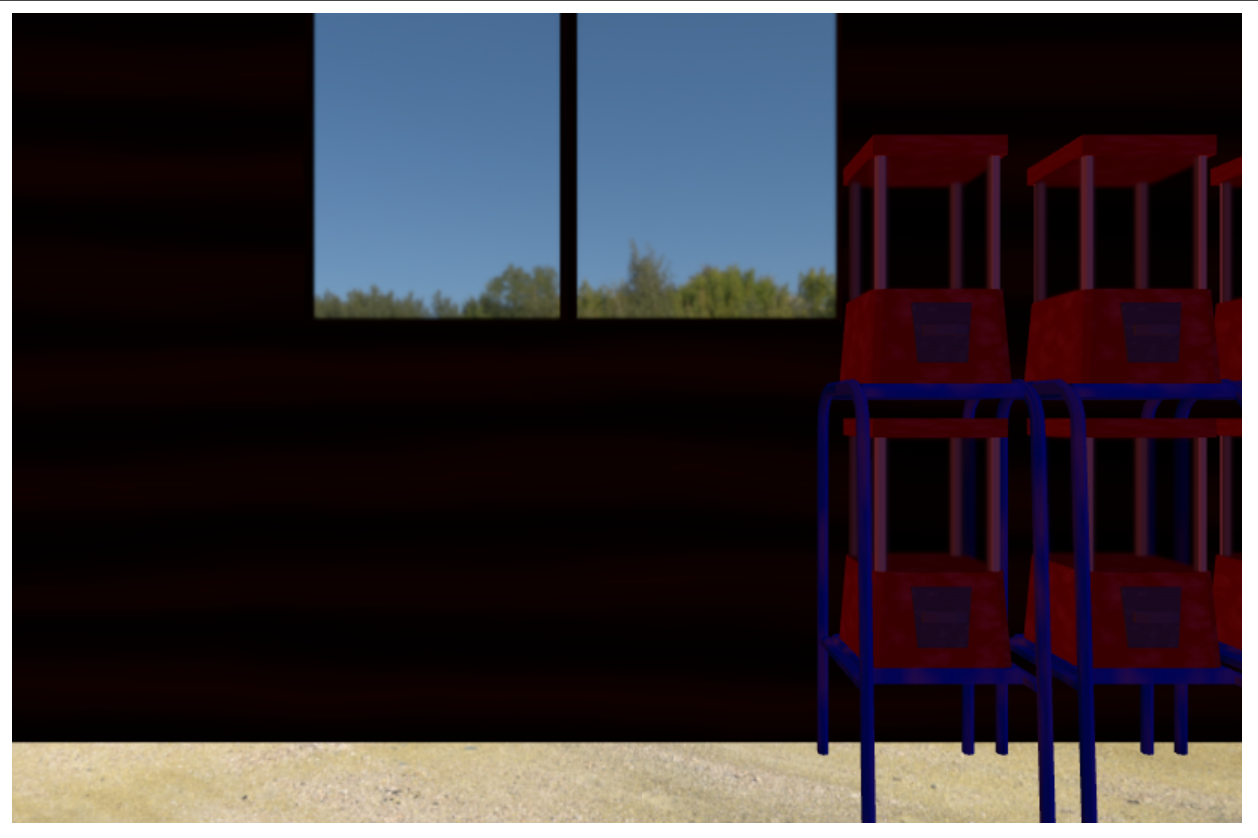
さっきは真っ暗だったのがモデルの色や形が割とはっきり見えるようになりました。
先程設定した引数の数値を変えることで光の色味や強度などを変更できるので色々と変更してみると背景オブジェクトの模様が見えたり見えなかったり、雰囲気がガラッと変わったりして面白いと思います。
PointLight
イメージとしては電球のような光が特徴のLightで、影を落とすことが可能です。
function init() {

  // ~~中略~~

  // ポイントライトを作成
  // new THREE.PointLight(色, 強度, 距離, 減衰)
  const pointLight = new THREE.PointLight(
    new THREE.Color("rgb(210, 200, 255)"),
    450
  );
  pointLight.position.set(0, 4, -3);
  pointLight.rotateY(Math.PI / 2);
  pointLight.rotateZ(-1);
  scene.add(pointLight);

  // ~~後略~~

}
先程作成したHemisphereLightの下あたりに追記します。
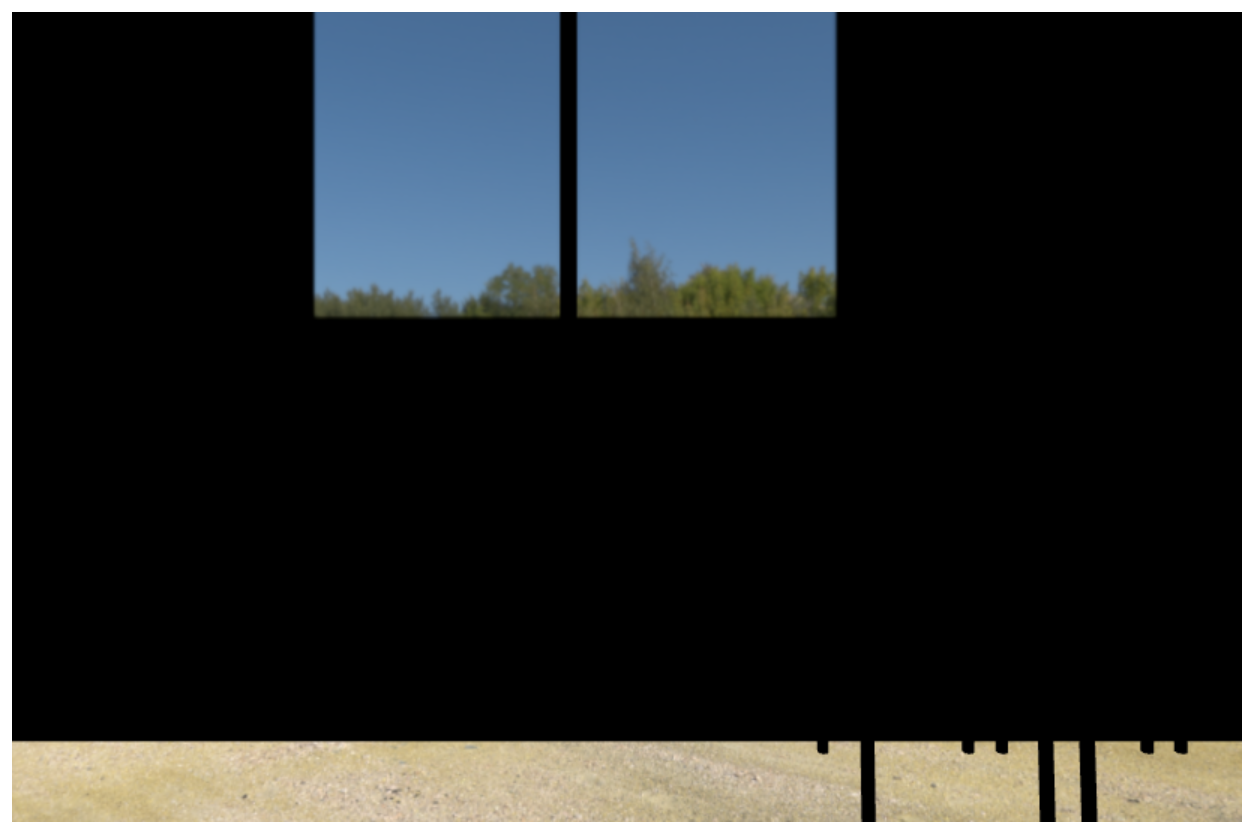
ライトの位置などは変更していますが、特段複雑なことはしていません。レンダリング結果を見てみましょう。
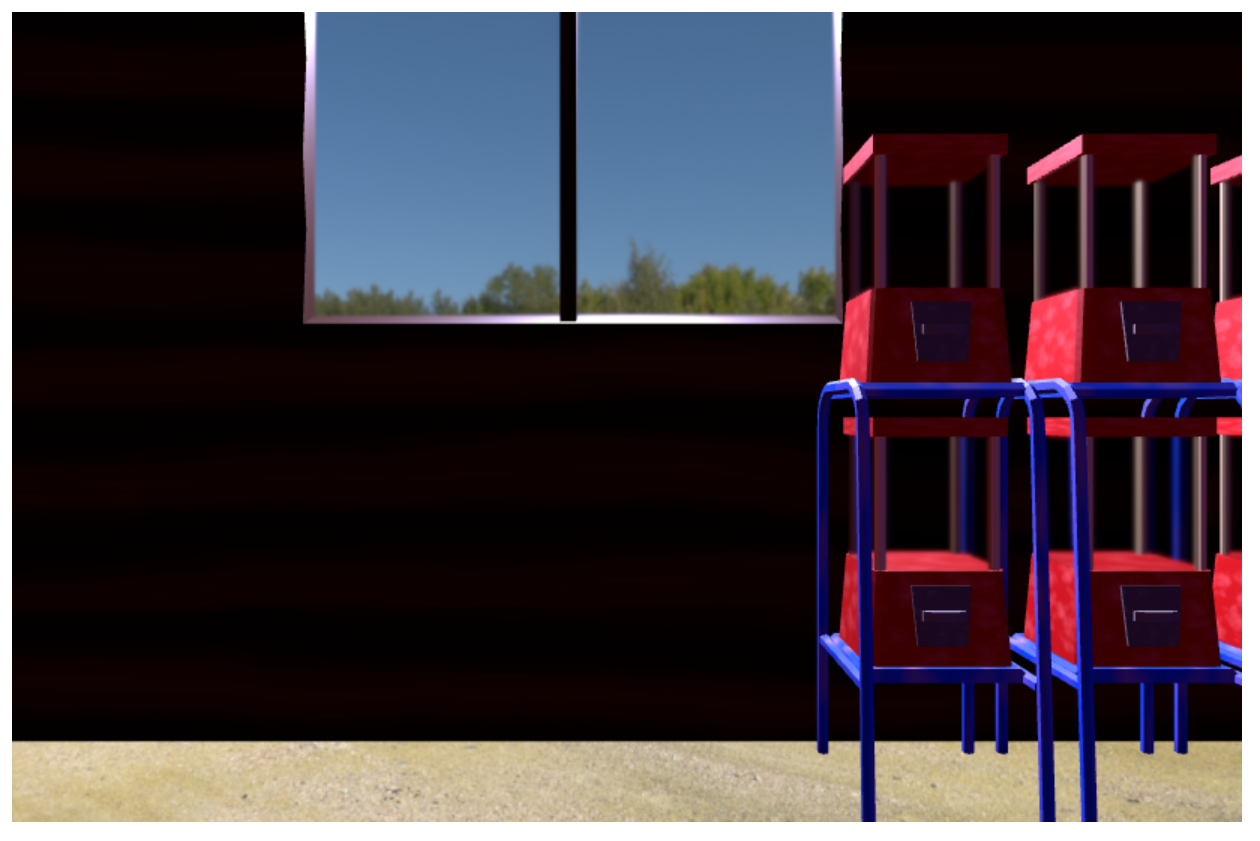
窓の外側から室内側に向けてLightを設置したので光の当たり方もそれに準じた形になっていることが確認できますね。
夏っぽい明暗の差が設定できたかなと思います。
地面の作成
現時点では地面となるモデルがないため、底が抜けているような絵になっています。
これを解消するためにThreeJSのPlaneGeometryを使用して1枚板を設置、その板にあらかじめ作成していたtextureを適用してみようと思います。
function init() {

  // ~~中略~~

  // 地面の作成
  // new THREE.PlaneGeometry(横サイズ, 縦サイズ)
  const groundGeometory = new THREE.PlaneGeometry(20, 15);
  const groundTextureLoader = new THREE.TextureLoader();
  groundTextureLoader.load("./assets/textures/ground.png", (texture) => {
    const material = new THREE.MeshBasicMaterial({ map: texture });
    const ground = new THREE.Mesh(groundGeometory, material);
    scene.add(ground);

    // 位置を設定
    ground.position.z = 3;
    ground.position.y = -1.8;
    ground.rotation.x = (Math.PI / 2) * -1;
  });

  // ~~後略~~

}
先程までは自作のモデルを読み込んで使用していましたが、今回はThreeJSの機能で作成したGeometoryと読み込んだTextureからMeshを作成しSceneに追加しています。
今回はTextureからMeshを作成しましたが、MeshBasicMaterialで色を指定して作成することも可能です。
参考:https://threejs.org/docs/#api/en/geometries/PlaneGeometry
参考:https://threejs.org/docs/#api/en/materials/MeshBasicMaterial
では作成した地面がちゃんと配置されているか確認してみます。
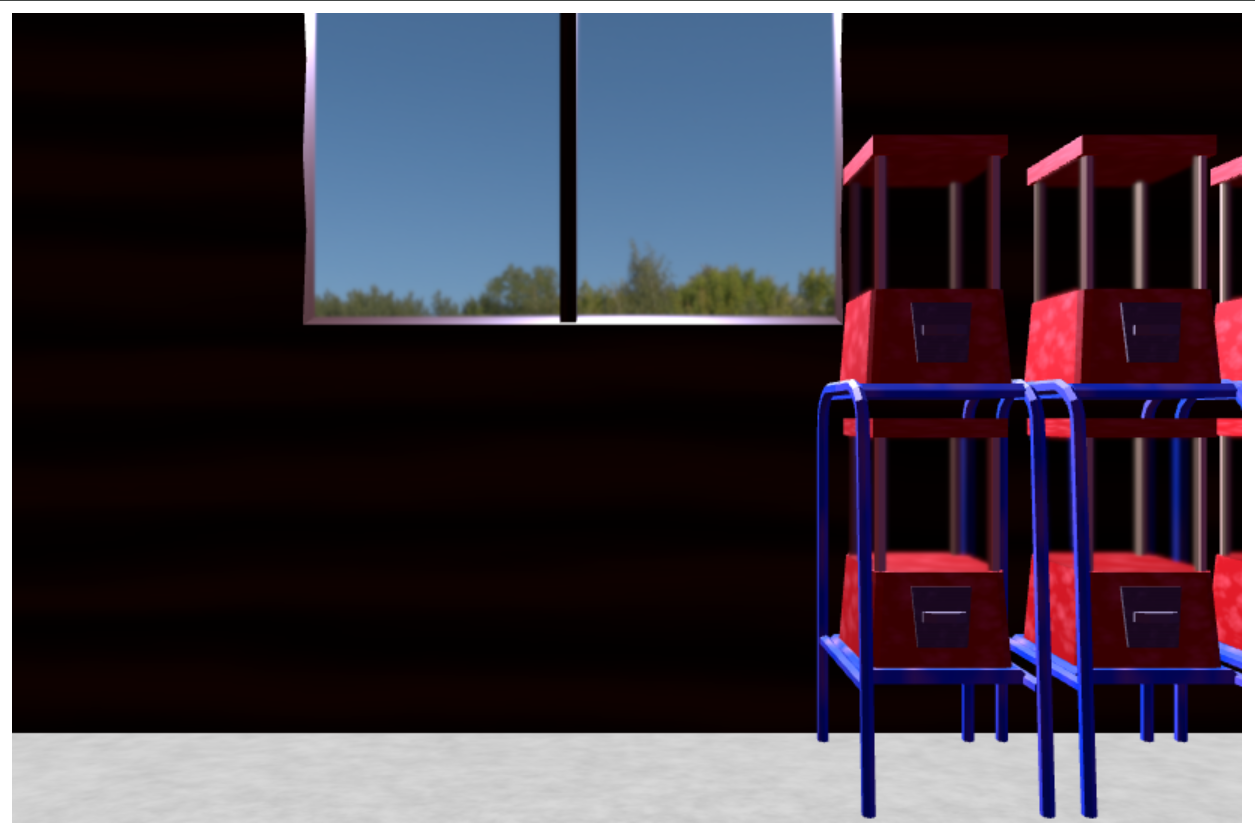
大丈夫そうですね。
ここまでで全てのモデルとライトは設定できました。最後にFogの設定と微調整、全体のコードを記載して終わりにしようと思います。
Fogの設定
Fogとは霧などの空気感の表現で使われる設定です。
function init() {

  // ~~中略~~

  // Fogを設定
  // new THREE.Fog(色, 開始距離, 終点距離)
  scene.fog = new THREE.Fog(new THREE.Color("rgb(150, 215, 252)"), 3, 40);

  // ~~後略~~

}
Fog自体の設定はこの1行です。
実際に開始距離と終点距離を色々な数値にして試してみてください。設定した開始距離や終点距離に合わせて霧がかかるような表現が確認できると思います。
参考:https://threejs.org/docs/#api/en/scenes/Fog
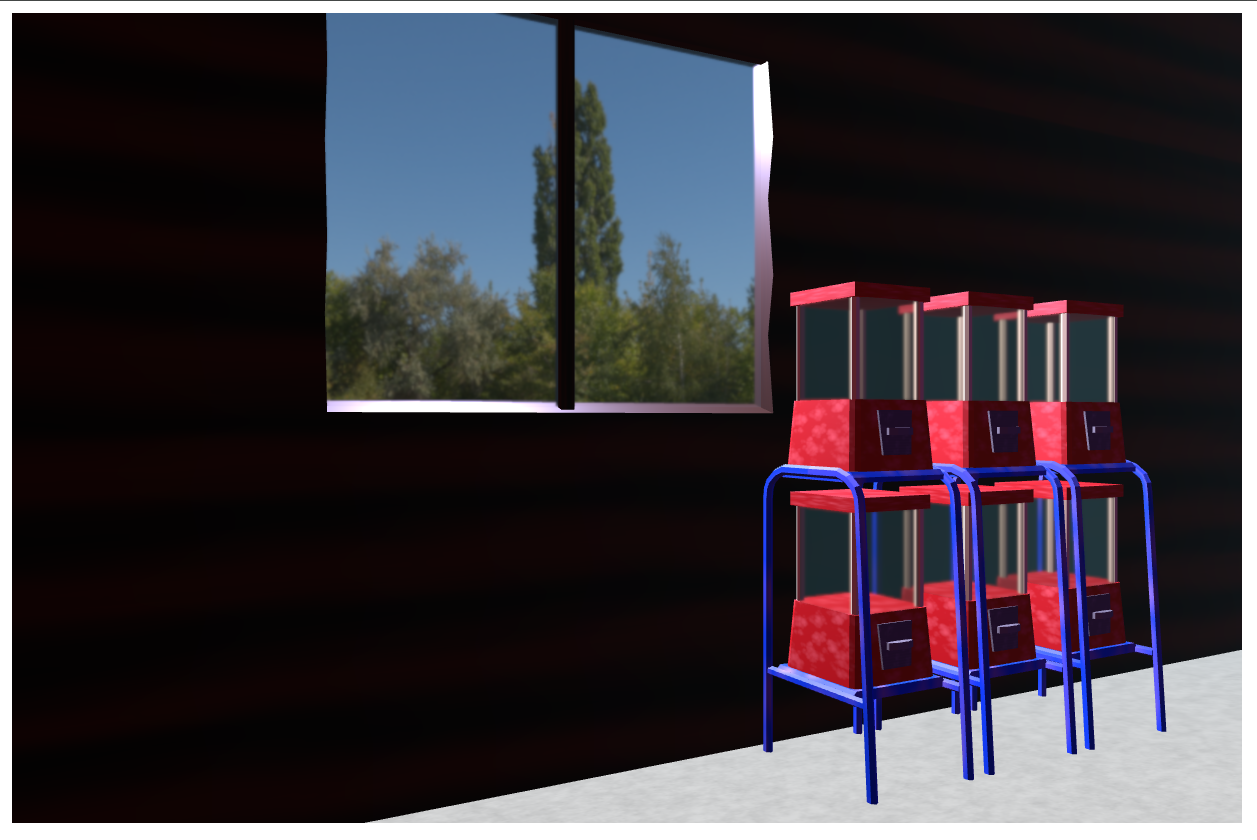
微調整と最終的なコード
それではここまでで必要な記述はすべて完了しました。しかし、細かなカメラの位置などを設定した最終的な全体のコードとレンダリング結果を記載して締めに入ります。
import * as THREE from "three";
import { RGBELoader } from "three/addons/loaders/RGBELoader.js";
import { GLTFLoader } from "three/addons/loaders/GLTFLoader.js";

window.addEventListener("DOMContentLoaded", init);

function init() {
  // レンダリングの縦横サイズを設定
  const HEIGHT = 540;
  const WIDTH = 820;

  // 出力対象のElementを取得
  const canvasElement = document.querySelector("#myCanvas");

  // シーンを作成
  const scene = new THREE.Scene();

  // カメラを作成
  // 視野角(fov)、アス比を主に設定
  const camera = new THREE.PerspectiveCamera(45, WIDTH / HEIGHT, 1, 1000);
  camera.position.z = 5;
  camera.position.x = -3;
  camera.position.y = 0.5;
  camera.rotateY(-0.5);

  // レンダラーを作成
  // antialias = アンチエイリアスの設定
  const renderer = new THREE.WebGLRenderer({
    antialias: true,
    canvas: canvasElement,
  });
  renderer.setPixelRatio(window.devicePixelRatio);
  renderer.setSize(WIDTH, HEIGHT);

  renderer.render(scene, camera);

  // 背景テクスチャを設定
  new RGBELoader().load(
    "./assets/hdr/abandoned_hopper_terminal_04_4k.hdr",
    (texture) => {
      texture.mapping = THREE.EquirectangularReflectionMapping;
      scene.background = texture;
      renderer.render(scene, camera);
    }
  );

  // ガチャガチャ達の各パラメータ
  const gacha1Params = {
    position: { x: 1.5, y: -1.8, z: 0 },
  };
  const gacha2Params = {
    position: { x: 2.5, y: -1.8, z: 0 },
  };
  const gacha3Params = {
    position: { x: 3.5, y: -1.8, z: 0 },
  };

  // 木壁のパラメータ
  const woodWallParams = {
    position: { x: 2, y: -1.8, z: -0.7 },
  };

  modelLoad("./assets/models/gacha.glb", gacha1Params);
  modelLoad("./assets/models/gacha.glb", gacha2Params);
  modelLoad("./assets/models/gacha.glb", gacha3Params);
  modelLoad("./assets/models/wood-wall.glb", woodWallParams);

  // 地面の作成
  const groundGeometory = new THREE.PlaneGeometry(20, 15);
  const groundTextureLoader = new THREE.TextureLoader();
  groundTextureLoader.load("./assets/textures/ground.png", (texture) => {
    const material = new THREE.MeshBasicMaterial({ map: texture });
    const ground = new THREE.Mesh(groundGeometory, material);
    scene.add(ground);

    // 位置を設定
    ground.position.z = 3;
    ground.position.y = -1.8;
    ground.rotation.x = (Math.PI / 2) * -1;
  });

  // HemisphereLightを作成
  // new THREE.HemisphereLight(空の色, 反射光色, 光の強さ);
  const hemisphereLight = new THREE.HemisphereLight(
    new THREE.Color("rgb(150, 100, 255)"),
    new THREE.Color("rgb(255, 100, 100)"),
    0.4
  );
  hemisphereLight.position.set(7, 4, 3);
  scene.add(hemisphereLight);

  // ポイントライトを作成
  // new THREE.PointLight(色, 強度, 距離, 減衰)
  const pointLight = new THREE.PointLight(
    new THREE.Color("rgb(210, 200, 255)"),
    450
  );
  pointLight.position.set(0, 4, -3);
  pointLight.rotateY(Math.PI / 2);
  pointLight.rotateZ(-1);
  scene.add(pointLight);

  // Fogを設定
  // new THREE.Fog(色, 開始距離, 終点距離)
  scene.fog = new THREE.Fog(new THREE.Color("rgb(150, 215, 252)"), 3, 40);

  function modelLoad(modelPath, params) {
    const loader = new GLTFLoader();
    loader.load(modelPath, (glb) => {
      const glbModel = glb.scene;
      scene.add(glbModel);

      // 渡されたparamsで位置や回転を設定
      glbModel.position.set(
        params.position.x,
        params.position.y,
        params.position.z
      );
      renderer.render(scene, camera);
    });
  }
}
微調整後のレンダリング結果
おわりに
久しぶりにBlenderを触ったということもあり、正直ThreeJSを触っている時間よりもモデリングをしている時間の方が長かった気もしますが、思ったよりも簡単に読み込みとレンダリングができて楽しかったです。
個人的に夏っぽさという意味ではあまり納得のいく出来ではないので、次回以降はもう少しライティングなどにこだわった出力をしたいですね。
非常に長くなりましたがここまで読んでいただきありがとうございました。