CentOS7にRedmine 4.2.3(2022/01/19時点で最新)とEasyGanttプラグインのインストール手順です。
※個人でやっている事も増えてきたので、ちゃんとタスク管理したいという思いと、どうせなら最新バージョンで使ってみようという事で備忘録も兼ねての記事です。
1. 環境
- OS : CentOS7.9
- Kernel: 3.10.0-1160.53.1.el7.x86_64
- Apache: 2.4.6
- MariaDB: 10.6.5
- ruby : 2.7.4
- passenger: 6.0.12
- Easy Gantt plugin: 1.13
2. OS設定
今回の環境ではSeLinuxとipv6は無効化しました。
yum -y update
yum install wget vim
sed -i 's/SELINUX=enforcing/SELINUX=disabled/g' /etc/selinux/config

vim /etc/sysctl.d/disable_ipv6.conf
net.ipv6.conf.all.disable_ipv6 = 1
net.ipv6.conf.default.disable_ipv6 = 1
:wq
sysctl -p /etc/sysctl.d/disable_ipv6.conf

firewall-cmd --add-port=80/tcp --permanent
firewall-cmd --add-port=443/tcp --permanent
firewall-cmd --reload

reboot
3. DBインストールおよびDB作成
Redmineを利用する際のDB(MariaDB)をインストールします。
このとき、MariaDB-develとMariaDB-sharedを入れ忘れるとredmineのインストール(bundle install実行時)にコケますのでお忘れなく。
curl -sS https://downloads.mariadb.com/MariaDB/mariadb_repo_setup | bash

yum -y install MariaDB-server MariaDB-shared MariaDB-devel.x86_64
systemctl start mariadb
systemctl enable mariadb
セキュアインストレーションでDBパスワードを設定します。10.6から名前がmariadb-secure-installationに変更されたようです。
mariadb-secure-installation

NOTE: RUNNING ALL PARTS OF THIS SCRIPT IS RECOMMENDED FOR ALL MariaDB
      SERVERS IN PRODUCTION USE!  PLEASE READ EACH STEP CAREFULLY!

In order to log into MariaDB to secure it, we'll need the current
password for the root user. If you've just installed MariaDB, and
havent set the root password yet, you should just press enter here.

Enter current password for root (enter for none):  # Enterを押します。
OK, successfully used password, moving on...

Setting the root password or using the unix_socket ensures that nobody
can log into the MariaDB root user without the proper authorisation.

You already have your root account protected, so you can safely answer 'n'.

Switch to unix_socket authentication [Y/n] n       # nを押します。
 ... skipping.

You already have your root account protected, so you can safely answer 'n'.

Change the root password? [Y/n] Y                  # yを押します。
New password:                                      # パスワードを設定します。
Re-enter new password:                             # パスワードを設定します。
Password updated successfully!
Reloading privilege tables..
 ... Success!


By default, a MariaDB installation has an anonymous user, allowing anyone
to log into MariaDB without having to have a user account created for
them.  This is intended only for testing, and to make the installation
go a bit smoother.  You should remove them before moving into a
production environment.

Remove anonymous users? [Y/n] y                    # yを押します。
 ... Success!

Normally, root should only be allowed to connect from 'localhost'.  This
ensures that someone cannot guess at the root password from the network.

Disallow root login remotely? [Y/n] y              # yを押します。
 ... Success!

By default, MariaDB comes with a database named 'test' that anyone can
access.  This is also intended only for testing, and should be removed
before moving into a production environment.

Remove test database and access to it? [Y/n] y     # yを押します。
 - Dropping test database...
 ... Success!
 - Removing privileges on test database...
 ... Success!

Reloading the privilege tables will ensure that all changes made so far
will take effect immediately.

Reload privilege tables now? [Y/n] y               # yを押します。
 ... Success!

Cleaning up...

All done!  If youve completed all of the above steps, your MariaDB
installation should now be secure.

Thanks for using MariaDB!
MariaDBのパスワード設定が出来たところで、Redmine用DBを作成します。
mysql -u root -p
CREATE DATABASE redmine CHARACTER SET utf8mb4;
CREATE USER 'redmine'@'localhost' IDENTIFIED BY 'XXXXXXXX';
GRANT ALL PRIVILEGES ON redmine.* TO 'redmine'@'localhost';
exit
4. Rubyインストール
Rubyをインストールします。
yum -y groupinstall "Development Tools"
yum -y install openssl-devel readline-devel zlib-devel curl-devel libyaml-devel libffi-devel install httpd httpd-devel ImageMagick ImageMagick-devel ipa-pgothic-fonts

cd /opt
curl -O https://cache.ruby-lang.org/pub/ruby/2.7/ruby-2.7.4.tar.gz

tar xvf ruby-2.7.4.tar.gz
cd ruby-2.7.4
./configure --disable-install-doc
make
make install
ruby -v
5 Redmineダウンロードおよびインストール
次にRedmineの4.2系の最新版(2022/1/19現在は4.2.3)をダウンロードおよび設定します。
mkdir /var/lib/redmine
svn co https://svn.redmine.org/redmine/branches/4.2-stable /var/lib/redmine
cd /var/lib/redmine/config

cp database.yml.example database.yml
vim database.yml
production:
  adapter: mysql2
  database: redmine
  host: localhost
  username: redmine
  password: "XXXXXXXX"  # DBに設定したパスワードを入力してください。
  # Use "utf8" instead of "utfmb4" for MySQL prior to 5.7.7
  encoding: utf8mb4
:wq

cp configuration.yml.example configuration.yml
vim configuration.yml
production:
  email_delivery:
    delivery_method: :smtp
    smtp_settings:
      address: "localhost"
      port: 25
      domain: "xx.xx.xx.xx"    # IP or ドメイン名を設定します。
:wq
では、Redmineをインストールします。
cd ..
bundle install --without development test
bundle exec rake generate_secret_token
RAILS_ENV=production bundle exec rake db:migrate
RAILS_ENV=production REDMINE_LANG=ja bundle exec rake redmine:load_default_data
権限の変更およびpassengerのインストールを実施します。
chown -R apache:apache /var/lib/redmine
gem install passenger
passenger-install-apache2-module --auto --languages ruby
passenger-install-apache2-module --snippet
RedmineにアクセスできるようapacheのConfファイルを変更します。
vim /etc/httpd/conf/httpd.conf
ServerName xx.xx.xx.xx                  # ip or ドメイン名
DocumentRoot "/var/lib/redmine/public"
:wq

vim /etc/httpd/conf.d/redmine.conf
<Directory "/var/lib/redmine/public">
  Options FollowSymlinks Includes
  AllowOverride All
  AddType text/html .html
  Require all granted
</Directory>

 # passenger-install-apache2-module --snippet の結果を貼り付け
LoadModule passenger_module /usr/local/lib/ruby/gems/2.7.0/gems/passenger-6.0.12/buildout/apache2/mod_passenger.so
<IfModule mod_passenger.c>
  PassengerRoot /usr/local/lib/ruby/gems/2.7.0/gems/passenger-6.0.12
  PassengerDefaultRuby /usr/local/bin/ruby
</IfModule>
# passenger-install-apache2-module --snippet の結果を貼り付け

PassengerMaxPoolSize 20
PassengerMaxInstancesPerApp 4
PassengerPoolIdleTime 864000
PassengerStatThrottleRate 10
:wq

systemctl start httpd
systemctl enable httpd
6. EasyGanttプラグインのインストール
EasyGanttプラグインを入れます。これには事前に無料版利用申請(と言ってもメールアドレスと名前・電話番号を入力するくらい)が必要になります。申請のリンクはこちらから
ダウンロード後、対象サーバにEasyGanttFree.zipをscp転送し下記コマンドを実行します。
cd /opt
unzip EasyGanttFree.zip
unzip EasyGanttFree-4.x.zip
mv easy_gantt /var/lib/redmine/plugins/
cd /var/lib/redmine/plugins/
chown -R apache.apache easy_gantt
gem install redmine_extensions
bundle install
bundle exec rake redmine:plugins NAME=easy_gantt RAILS_ENV=production
bundle exec rake db:migrate NAME=easy_gantt RAILS_ENV=production

systemctl restart httpd
7. アクセス確認
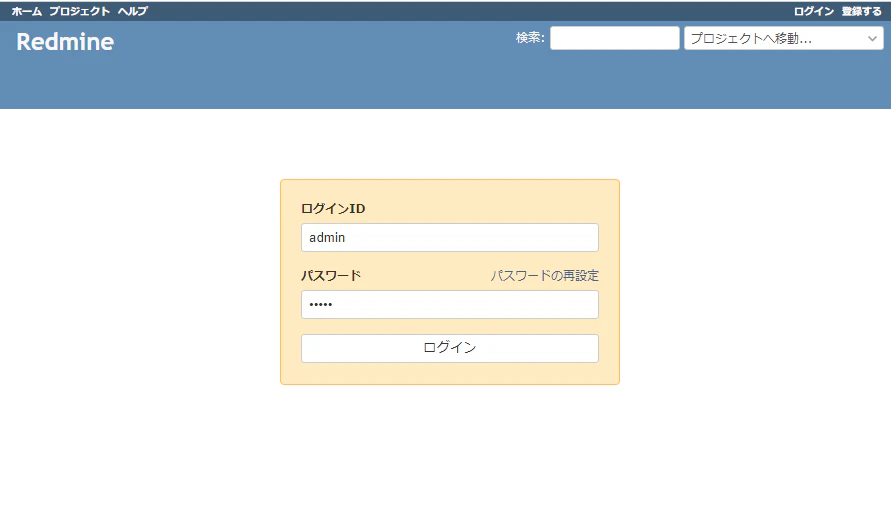
では、Redmineにアクセスしましょう。画面右上のログインボタンをクリックして、admin/adminでログインします。
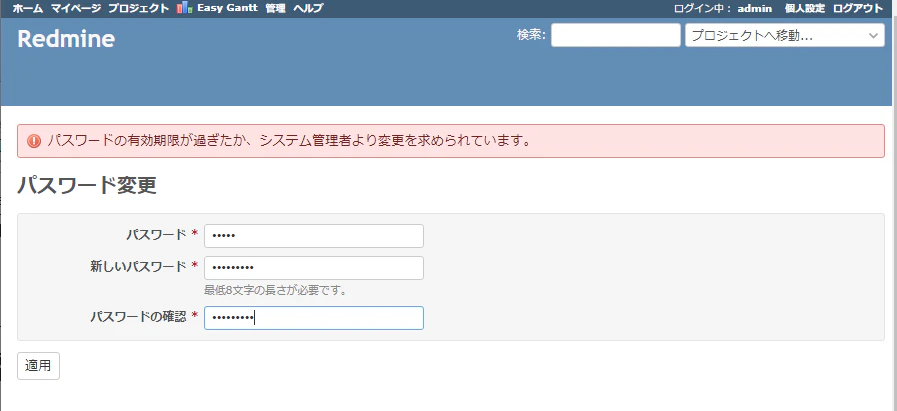
パスワードの変更要求画面がでますので、任意のパスワードに変更してください。
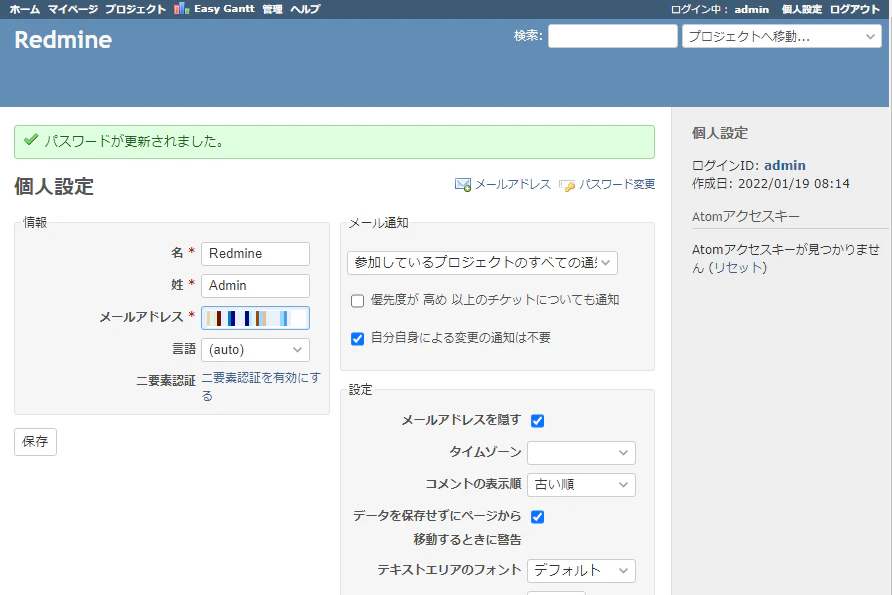
パスワード変更後に、メールアドレスも変更しておきましょう。
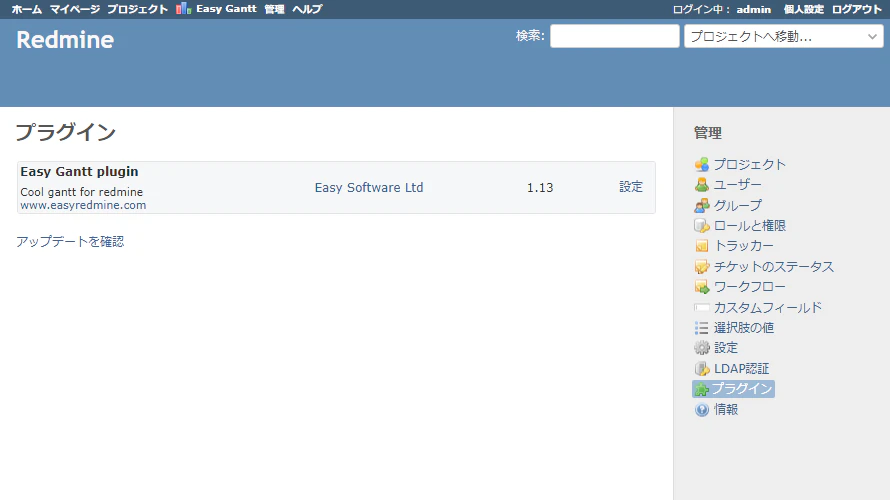
管理 → プラグインで下記のような画面が出ていれば、Easy Ganttのインストールも完了です!
8. その他
次回はすでに構築済みのGitLabとRedmineの連携記事をUPします。