前書き
この資料は2016/12/15 に行われた【ランサーズ×Mozilla×freee】React実践!勉強会で発表した際の資料を改修したものです。
(qitta に投稿するのが初めての場合、2MBまでしか画像をアップできないので、編集してます)
間違いなどがあれば、コメントや編集リクエストなどをいただければありがたいです。
目次
- 対象読者
- HOC とは何か?
- HOC の基礎
- 実際に利用されているライブラリについて
- HOC の具体的な実装例
対象読者
- Reactを利用してアプリケーションを作成したことがある人
- ReduxやFluxなどのフレームワークを利用したことがある人
HOC とは何か?
A higher-order component is just a function that takes an existing component and returns another component that wraps it.
(引用:Mixins Are Dead. Long Live Composition)
- コンポーネントを引数にして、カスタマイズしたコンポーネントを返す関数のこと
- 既存のコンポーネントに新しい機能を追加することが可能
HOCの基礎
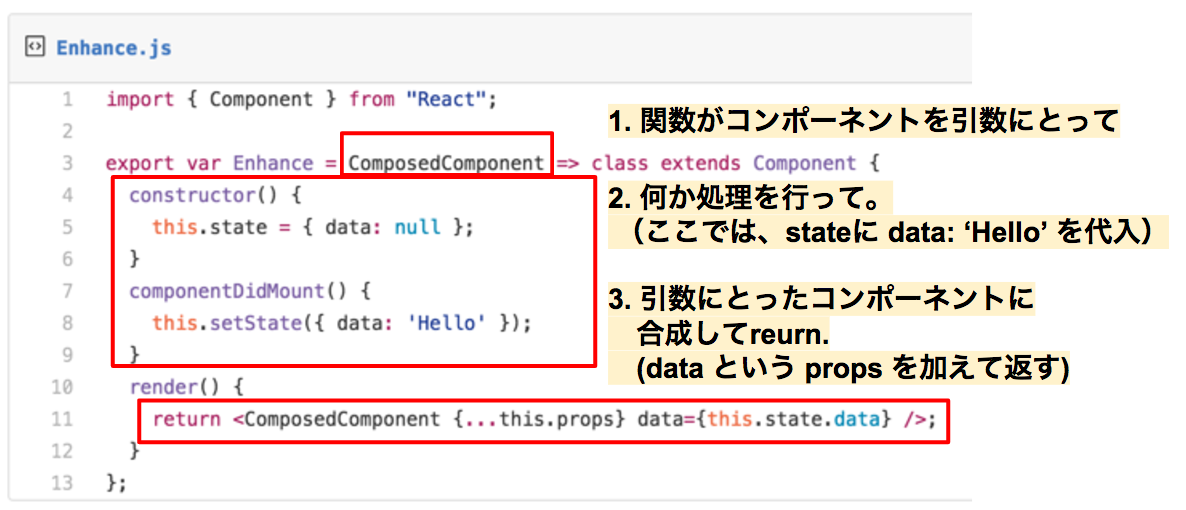
import { Component } from "React";
// 関数の引数にコンポーネントを受け取る
// function Enhance(ComposedComponent) { return xxx } と同じ
export var Enhance = ComposedComponent => class extends Component {
  constructor() {
    this.state = { data: null };
  }
  componentDidMount() {
    this.setState({ data: 'Hello' });
  }
  render() {
    // 引数で受け取った ComposedComponent に props を渡して返す
    return <ComposedComponent {...this.props} data={this.state.data} />;
  }
};
- 引数に受け取った ComposedComponent に props などをマージして return
要点を抜き出すと
利用する側の実装
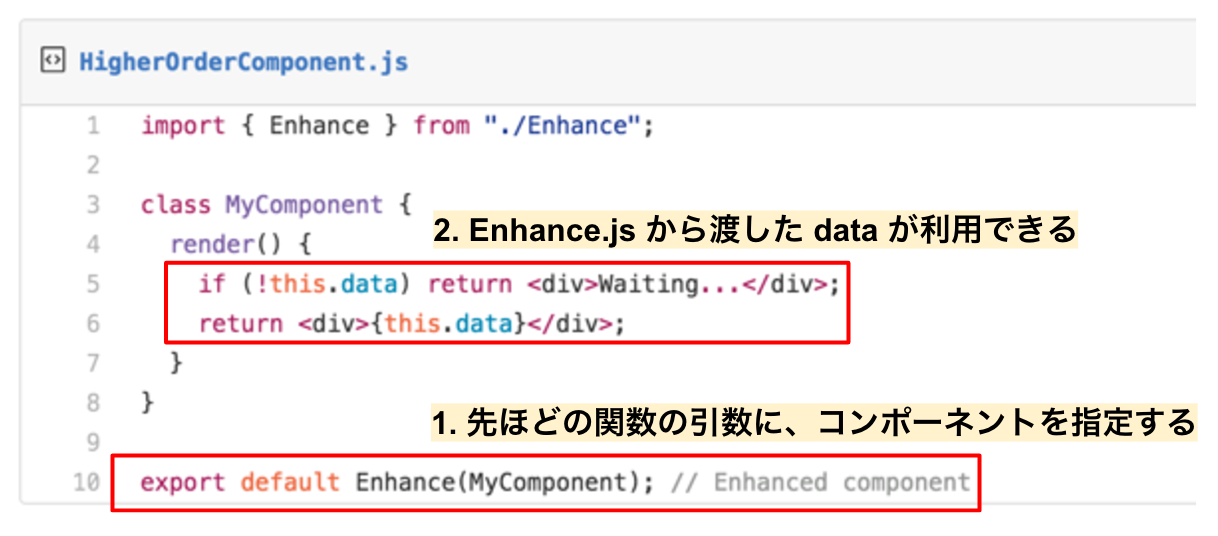
import { Enhance } from "./Enhance";

class MyComponent {
  render() {
    // MyCompoent で Enhancer の data を参照できるようになった
    if (!this.data) return <div>Waiting...</div>;
    return <div>{this.data}</div>;
  }
}

export default Enhance(MyComponent); // Enhanced component
- Enhance(MyComponent) で MyComponent に HOC を適応
- 関数でラップすることで、 data というプロパティが新たに追加された
要点を抜き出すと
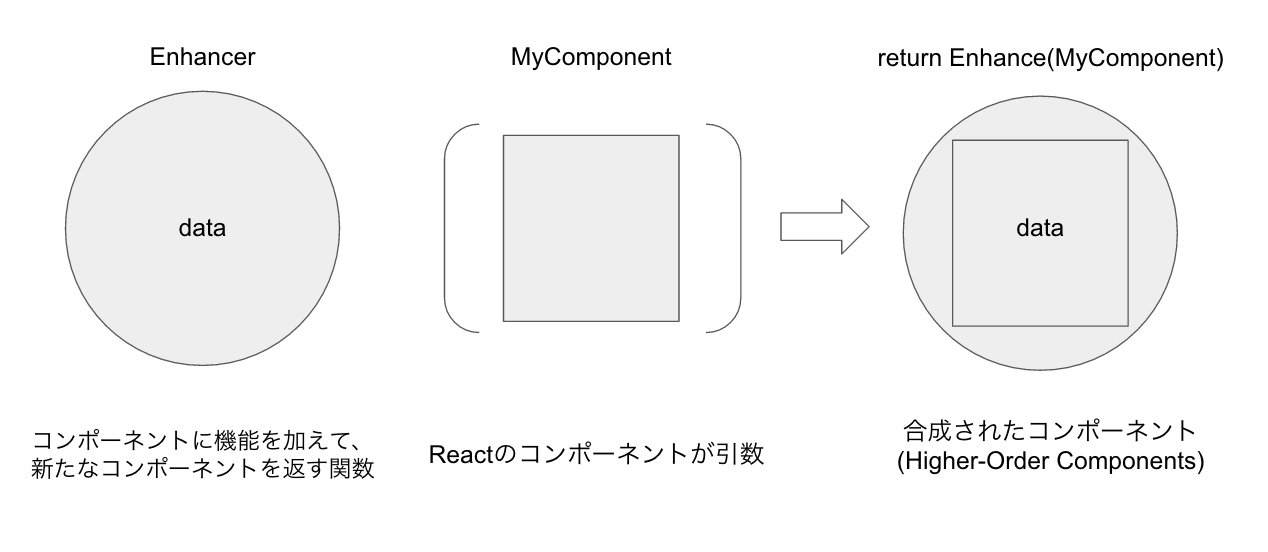
HOCの基礎:イメージ
- コンポーネントに関数を適応し、機能が合成されたコンポーネントを返す
- propsを新しく加えたり、ライフサイクルメソッドを追加することも可能
最近よく見かける HOC を利用しているライブラリとその実装
- react-redux
- connect()
- material-ui
- muiThemeable()
- redux-form
- reduxForm()
- react-router
- withRouter()
- radium
- enhanceWithRadium()
material-uiでの例
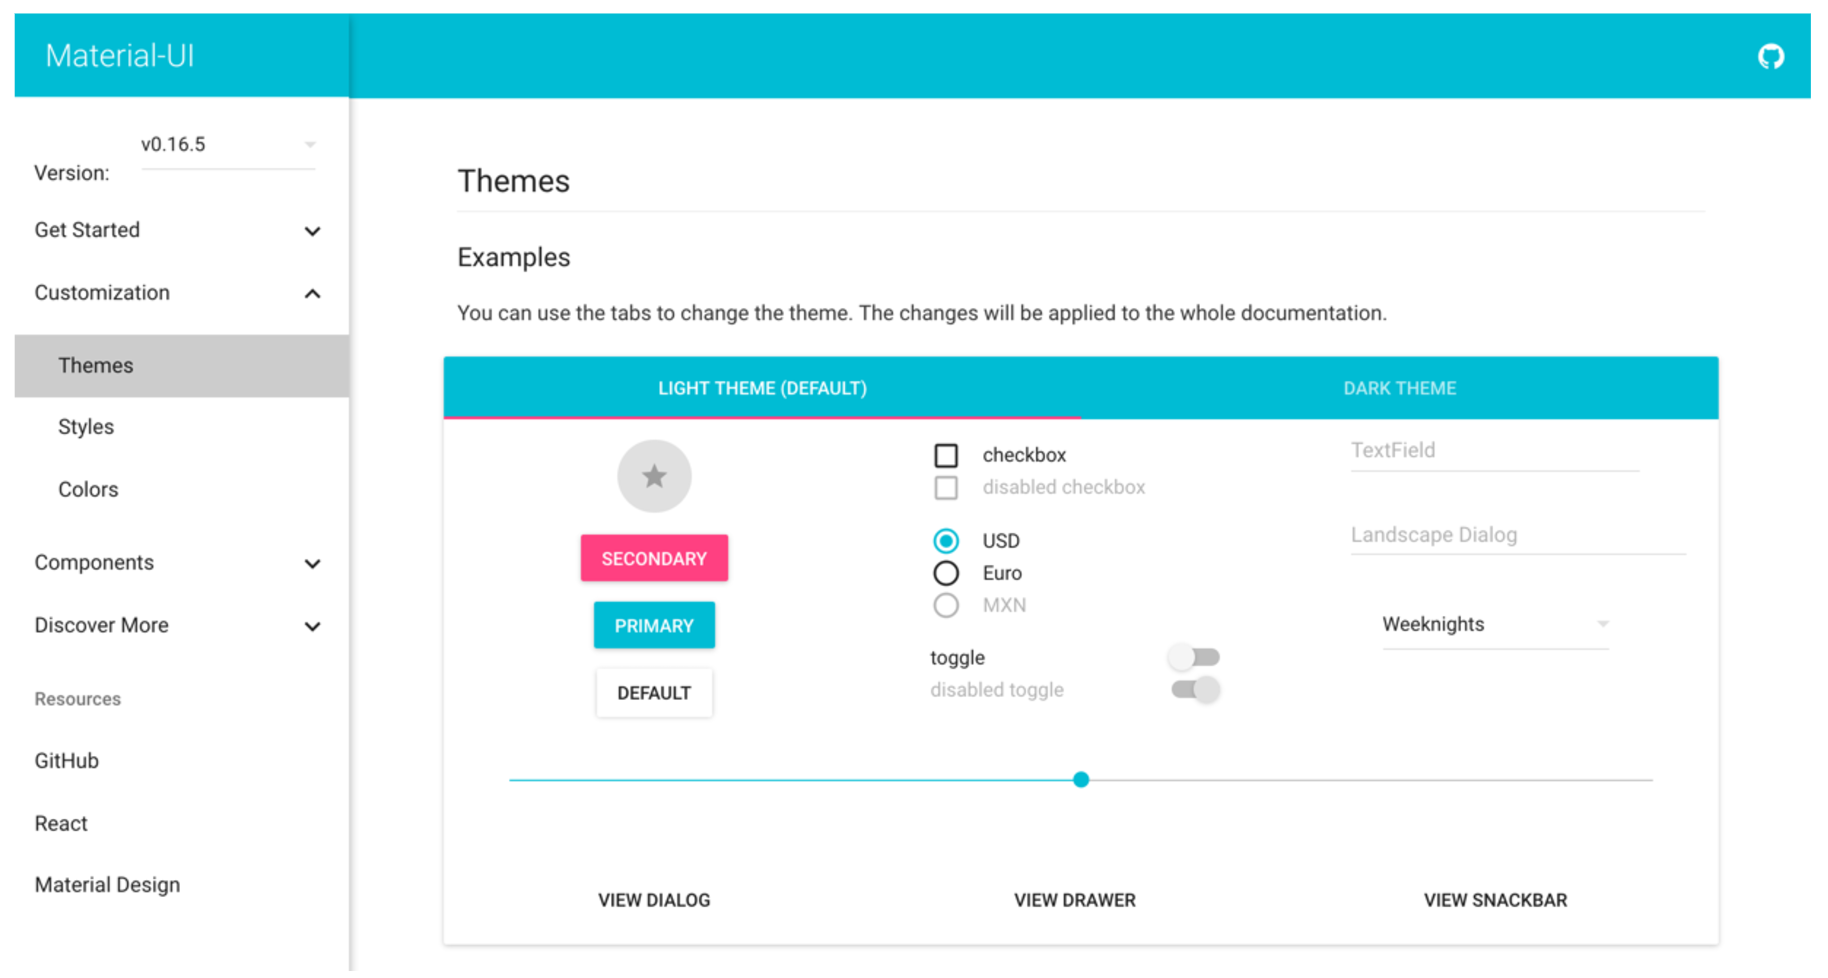
- material-ui / themes
- テーマの色設定などは、muiTheme という形で1つのファイルで管理している
- textColor などの定義を、自作のコンポーネントでも使いたい場合・・・
- muiThemeable という HOC を呼び出す
import { cyan500, pinkA200, darkBlack } from '../colors';
import spacing from '../spacing';

export default {
  spacing: spacing,
  fontFamily: 'Roboto, sans-serif',
  palette: {
    primary1Color: cyan500,
    accent1Color: pinkA200,
    textColor: darkBlack,
    // 省略...
  },
};
material-ui / muiThemeable
- マテリアルUIの textColor などの定義を、自作のコンポーネント内で呼び出す
import React from 'react';
import muiThemeable from 'material-ui/styles/muiThemeable';

const MyComponent = (props) => (
  <span style={{color: props.muiTheme.palette.textColor}}>
    Hello World!
  </span>
);

export default muiThemeable()(MyComponent);
- muiThemeable()(MyComponent)の部分がHOC
- props に muiTheme.palette.textColor が追加されて、自作のコンポーネント内でも扱えるようになった
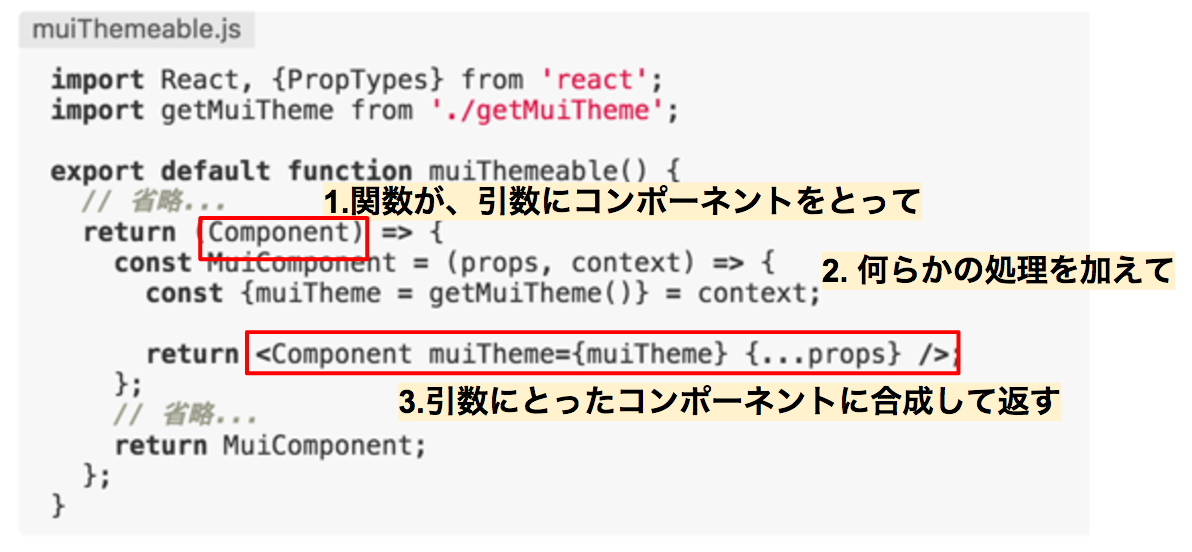
- muiThemeable.js の中身を簡略化したもの
import React, {PropTypes} from 'react';
import getMuiTheme from './getMuiTheme';

export default function muiThemeable() {
  // 省略...
  return (Component) => {
    const MuiComponent = (props, context) => {
      const {muiTheme = getMuiTheme()} = context;

      return <Component muiTheme={muiTheme} {...props} />;
    };
    // 省略...
    return MuiComponent;
  };
}
Component を引数にとって、 muiTheme という props を持った MuiComponent という新しいコンポーネントを return している
形としてみると
ReduxForm での例
- ReduxForm
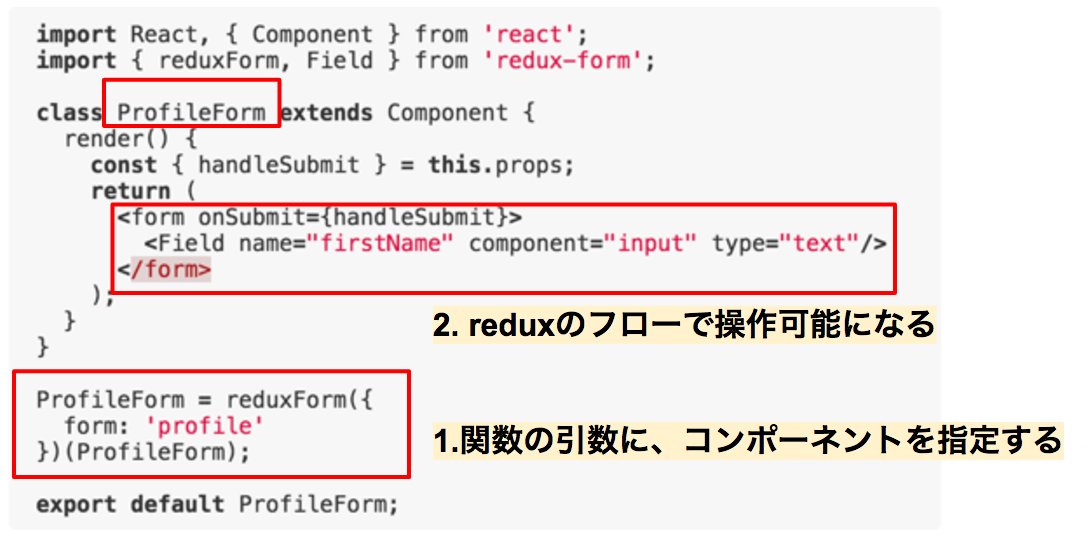
- 入力フォームなどを redux のフローで扱ってくれるライブラリ
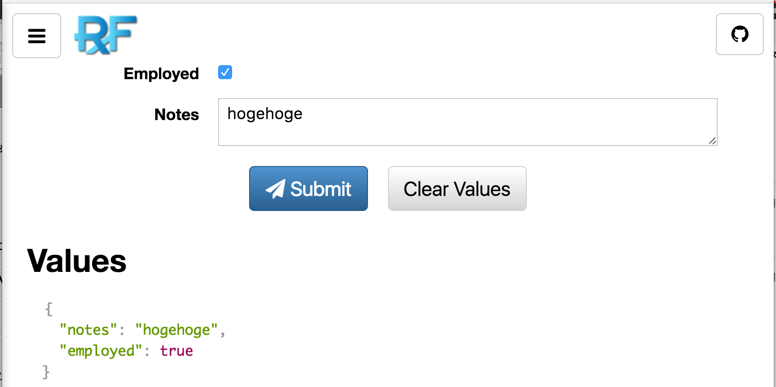
ReduxForm でHOCを利用する
簡単なプロフィールフォームの例
import React, { Component } from 'react';
import { reduxForm, Field } from 'redux-form';

class ProfileForm extends Component {
  render() {
    const { handleSubmit } = this.props;
    return (
      <form onSubmit={handleSubmit}>
        <Field name="firstName" component="input" type="text"/>
      </form>
    );
  }
}

ProfileForm = reduxForm({
  form: 'profile'
})(ProfileForm);

export default ProfileForm;
reduxForm({})(ラップされるコンポーネント)
という構成。
ReduxForm でHOCを利用する
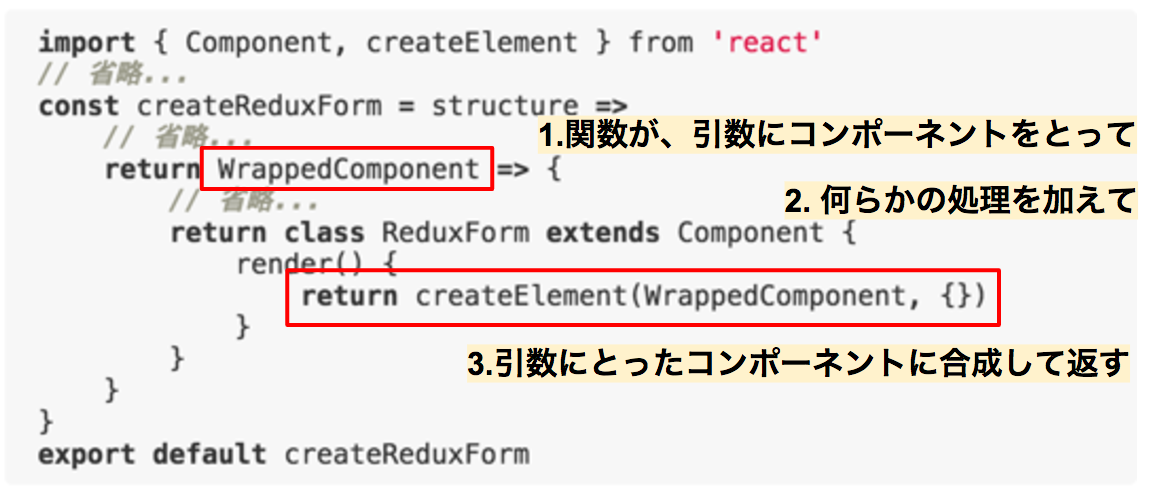
- reduxForm.js の中身を簡略化したもの
import { Component, createElement } from 'react'
// 省略...
const createReduxForm = structure =>
    // 省略...
    return WrappedComponent => {
        // 省略...
        return class ReduxForm extends Component {
            render() {
                return createElement(WrappedComponent, {})
            }
        }
    }
}
export default createReduxForm
要点を抜き出すと
ここまでのまとめ1
React 関連のライブラリを使っていて
Enhancer(WrappedComponent)
というような、コンポーネントを引数に取る構成の記述を見かけた場合は HOC の実装を使っているのではないかと考えると理解しやすい。
ここまでのまとめ2
- 関数がコンポーネントを引数にとって
- 何らかの処理を加えて
- 新しい props の注入
- 共通のライフサイクル処理
- 引数にとったコンポーネントに合成して返す
案外、 HOC の実装はパッと見で複雑でも、元のコンポーネントに新しく props を注入したりしているだけかもしれません。
HOC の 2 つのパターン
React Higher Order Components in depthの記事によると、HOC には2つのパターンがあります
- 先ほどまでの props を新しく追加する例は Props Proxy
- PropsProxy 以外には Inheritance Inversion
実際の実装を見ながら順に説明していきます。
HOC の具体的な実装例1
HOC の具体的な実装例1
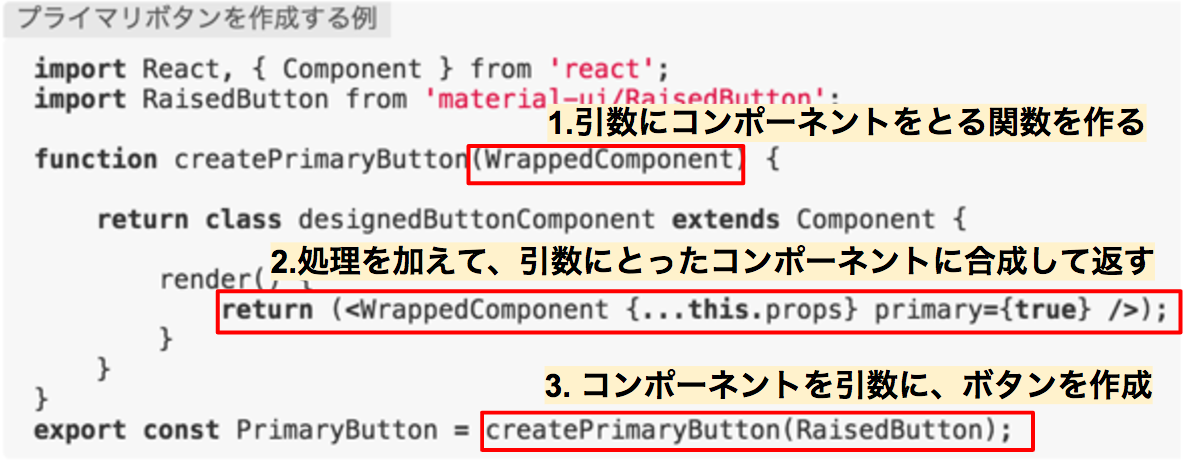
- createPrimaryButton という関数で、HOCを作成
- material-ui の RaisedButton コンポーネントを拡張
import React, { Component } from 'react';
import RaisedButton from 'material-ui/RaisedButton';

function createPrimaryButton(WrappedComponent) {

    return class designedButtonComponent extends Component {

        render() {
            return (<WrappedComponent {...this.props} primary={true} />);
        }
    }
}
export const PrimaryButton = createPrimaryButton(RaisedButton);
HOC の具体的な実装例1: HOC を作成
- コンポーネントに与えられた props をそのまま受け渡しつつ、新しく primary={true} という props を追加する
HOC の具体的な実装例1: 呼び出す側
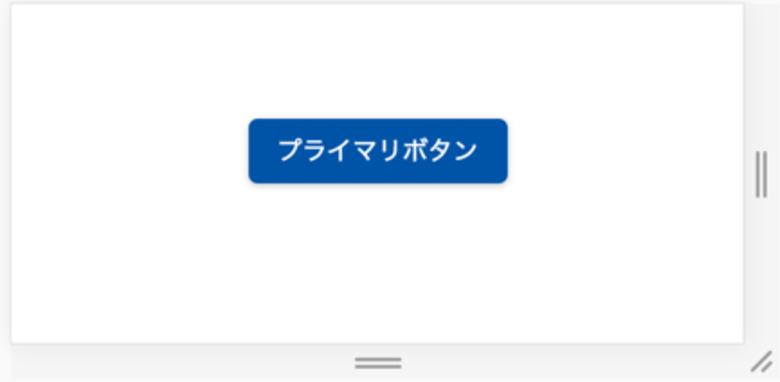
- PrimaryButton という名前で呼び出すことで、利用者側も理解しやすいコードになる
- material-ui の label などのプロパティも同時に利用出来る
import { PrimaryButton } from './buttons';
export const renderSomePageWithButton = buttonAction =>
<div>
    <PrimaryButton
        label={'プライマリボタン'} //ボタンに表示するテキスト
        onTouchTap={buttonAction}
    />
</div>
HOC の具体的な実装例1
- createButton に引数をつけて、バリエーションを増やす
- 先ほどの HOC に color, size, shape などの引数を追加
import React, { Component }from 'react';
import RaisedButton from 'material-ui/RaisedButton';
import { buttonColor, buttonSize, buttonShape } from './button_styles';

function createButton(WrappedComponent, color, size, shape) {
    return class designedButtonComponent extends Component {
        render() {
            return (<WrappedComponent
                {...this.props}
                {...buttonColor[color]}
                {...buttonSize[size]}
                {...buttonShape[shape]}
            />);
        }
    }
}
export const PrimaryButtonFullWidth = createButton(RaisedButton, 'primary', 'fullWidth', 'original');
export const SecondaryButtonRounded = createButton(RaisedButton, 'secondary', 'original', 'round');
export const AccentButtonHalfWidth = createButton(RaisedButton, 'accent', 'halfWidth', 'original');
HOC の具体的な実装例1: 呼び出す側
import {
    PrimaryButtonFullWidth,
    AccentButtonHalfWidth,
    NSecondaryButtonRounded } from './buttons';
export const renderSomePageWithButton = buttonAction =>
<div>
    <NPrimaryButtonFullWidth label={'プライマリボタン幅MAX'} />
    <NSecondaryButtonRounded label={'角丸セカンダリボタン'} />
    <NAccentButtonHalfWidth label={'アクセントボタン幅半分'} />
</div>
HOCを使ったコンポーネントのパターン実装のメリット
- HOC を用いれば、コンポーネントに新しく props を追加できる
-
PrimaryButtonFullWidthなど、限定的な名前を持たせることで、コードがリーダブルになる - FlowTypeなどで型を持たせると、さらにリーダブルになる
// @flow
type ColorType =
    'primary'
    | 'secondary'
    | 'accent'
;
function createButton(WrappedComponent: any, color:ColorType) {...}
HOC の具体的な実装例2
- 閲覧するのにログインが必要なコンポーネントをHOCで制御
- Redux で、 session.userId でログインユーザを管理している前提
- loggedInRequired()というHOCを作ってみる
HOC の具体的な実装例2: 利用する側
- ログインが必要な箇所は、HOCでラップしてあげる
- 「ログインしていません」のようなダイアログを出したい
import loggedInRequired from '../loggedInRequired.js'
// 省略...
class ProjectContainer extends Component {
// 省略...
}
export default loggedInRequired(
    connect(mapStateToProps, mapDispatchToProps)
    (ProjectContainer)
);
HOC の具体的な実装例2: HOCを作成する側
export default function loggedInRequired(WrappedComponent) {
    class loggedInRequiredComponent extends WrappedComponent {

        componentWillMount() {
            // react-redux のステートには this.store.getState() でアクセスできます
            if (!this.store.getState().session.userId) {
                // ログインしていないユーザが見た時のアクションを書く
            }
        }
        render() {
            if (!this.store.getState().session.userId) {
                // ログインしていないユーザが閲覧したらレンダリングしない
                return null;
            }
            return super.render();
        }
    }
    return loggedInRequiredComponent;
}
- さっきまでと異なるのは、 WrappedComponent を return するのではなく、 extends している点
- Inheritance Inversion というパターン
-
react-redux のステートには this.state.storeState でアクセスできます-> this.store.getState() に修正しました。(react-redux v5系以降)
HOC の具体的な実装例2で行っていること
ラップしたコンポーネント自身を extends している。(Inheritance Inversion)
- HOCのライフサイクルメソッドを、ラップしたコンポーネントに適応
- HOCから、ラップしたコンポーネントの state や props に thisでアクセス
- 条件によって、レンダリングしないように、 render をハイジャックできる
ログインが必要なコンポーネントは、このHOCを利用すれば良いため、他のコンポーネント内にif文などを書かなくて良くなり、コンポーネント自身の責務に集中出来る。
おまけ:複数のHOCを合成して使うテクニック
コンポーネントを複数のHOCでラップしたい場合
-
loggedInRequired(connect(mapStateToProps, mapDispatchToProps)(ProfileForm))のように書くのか? - redux の compose や lodash.js の _.compose を利用するとスッキリかけます
import { compose } from 'redux';
import { reduxForm } from 'redux-form';

class ProfileForm extends Component {
...
}
ProfileForm = compose(
    loggedInRequired,
    connect(mapStateToProps, mapDispatchToProps),
    reduxForm({ form: 'ProfileForm' })
)(ProfileFormContainer)

export default ProfileForm
- 関数の合成についてはこちらの記事が分かりやすいと思います。
まとめ
- HOC はコンポーネントを引数にして、カスタマイズしたコンポーネントを返す関数のこと
- material-ui や redux-form など、様々なライブラリで利用されている
- 組み合わせることで、既存のコンポーネントに新しい機能を追加することが可能
- アプリケーション内で共通に利用する機能や、パーツをまとめるのに便利
- 慣れればコードを読みやすくかける
