2
0

More than 3 years have passed since last update.

Swifterを使ったapi認証の実装について

Last updated at Posted at 2020-12-21

個人開発でswiftを使ったtwitterのアプリを作成中。
開発進めたらこの記事を少しずつ更新していく予定です。

事前準備として、twitterのapi利用の申請は済んでいる状態とします。

Swifterとは

公式サイト
https://github.com/mattdonnelly/Swifter
Swift言語で作成されたTwitterフレームワーク。

Swifterを入れる

作成したプロジェクトを選択し、「Swift Package」のタブより「Packages」の+を選択する
スクリーンショット 2020-12-20 15.56.20.png

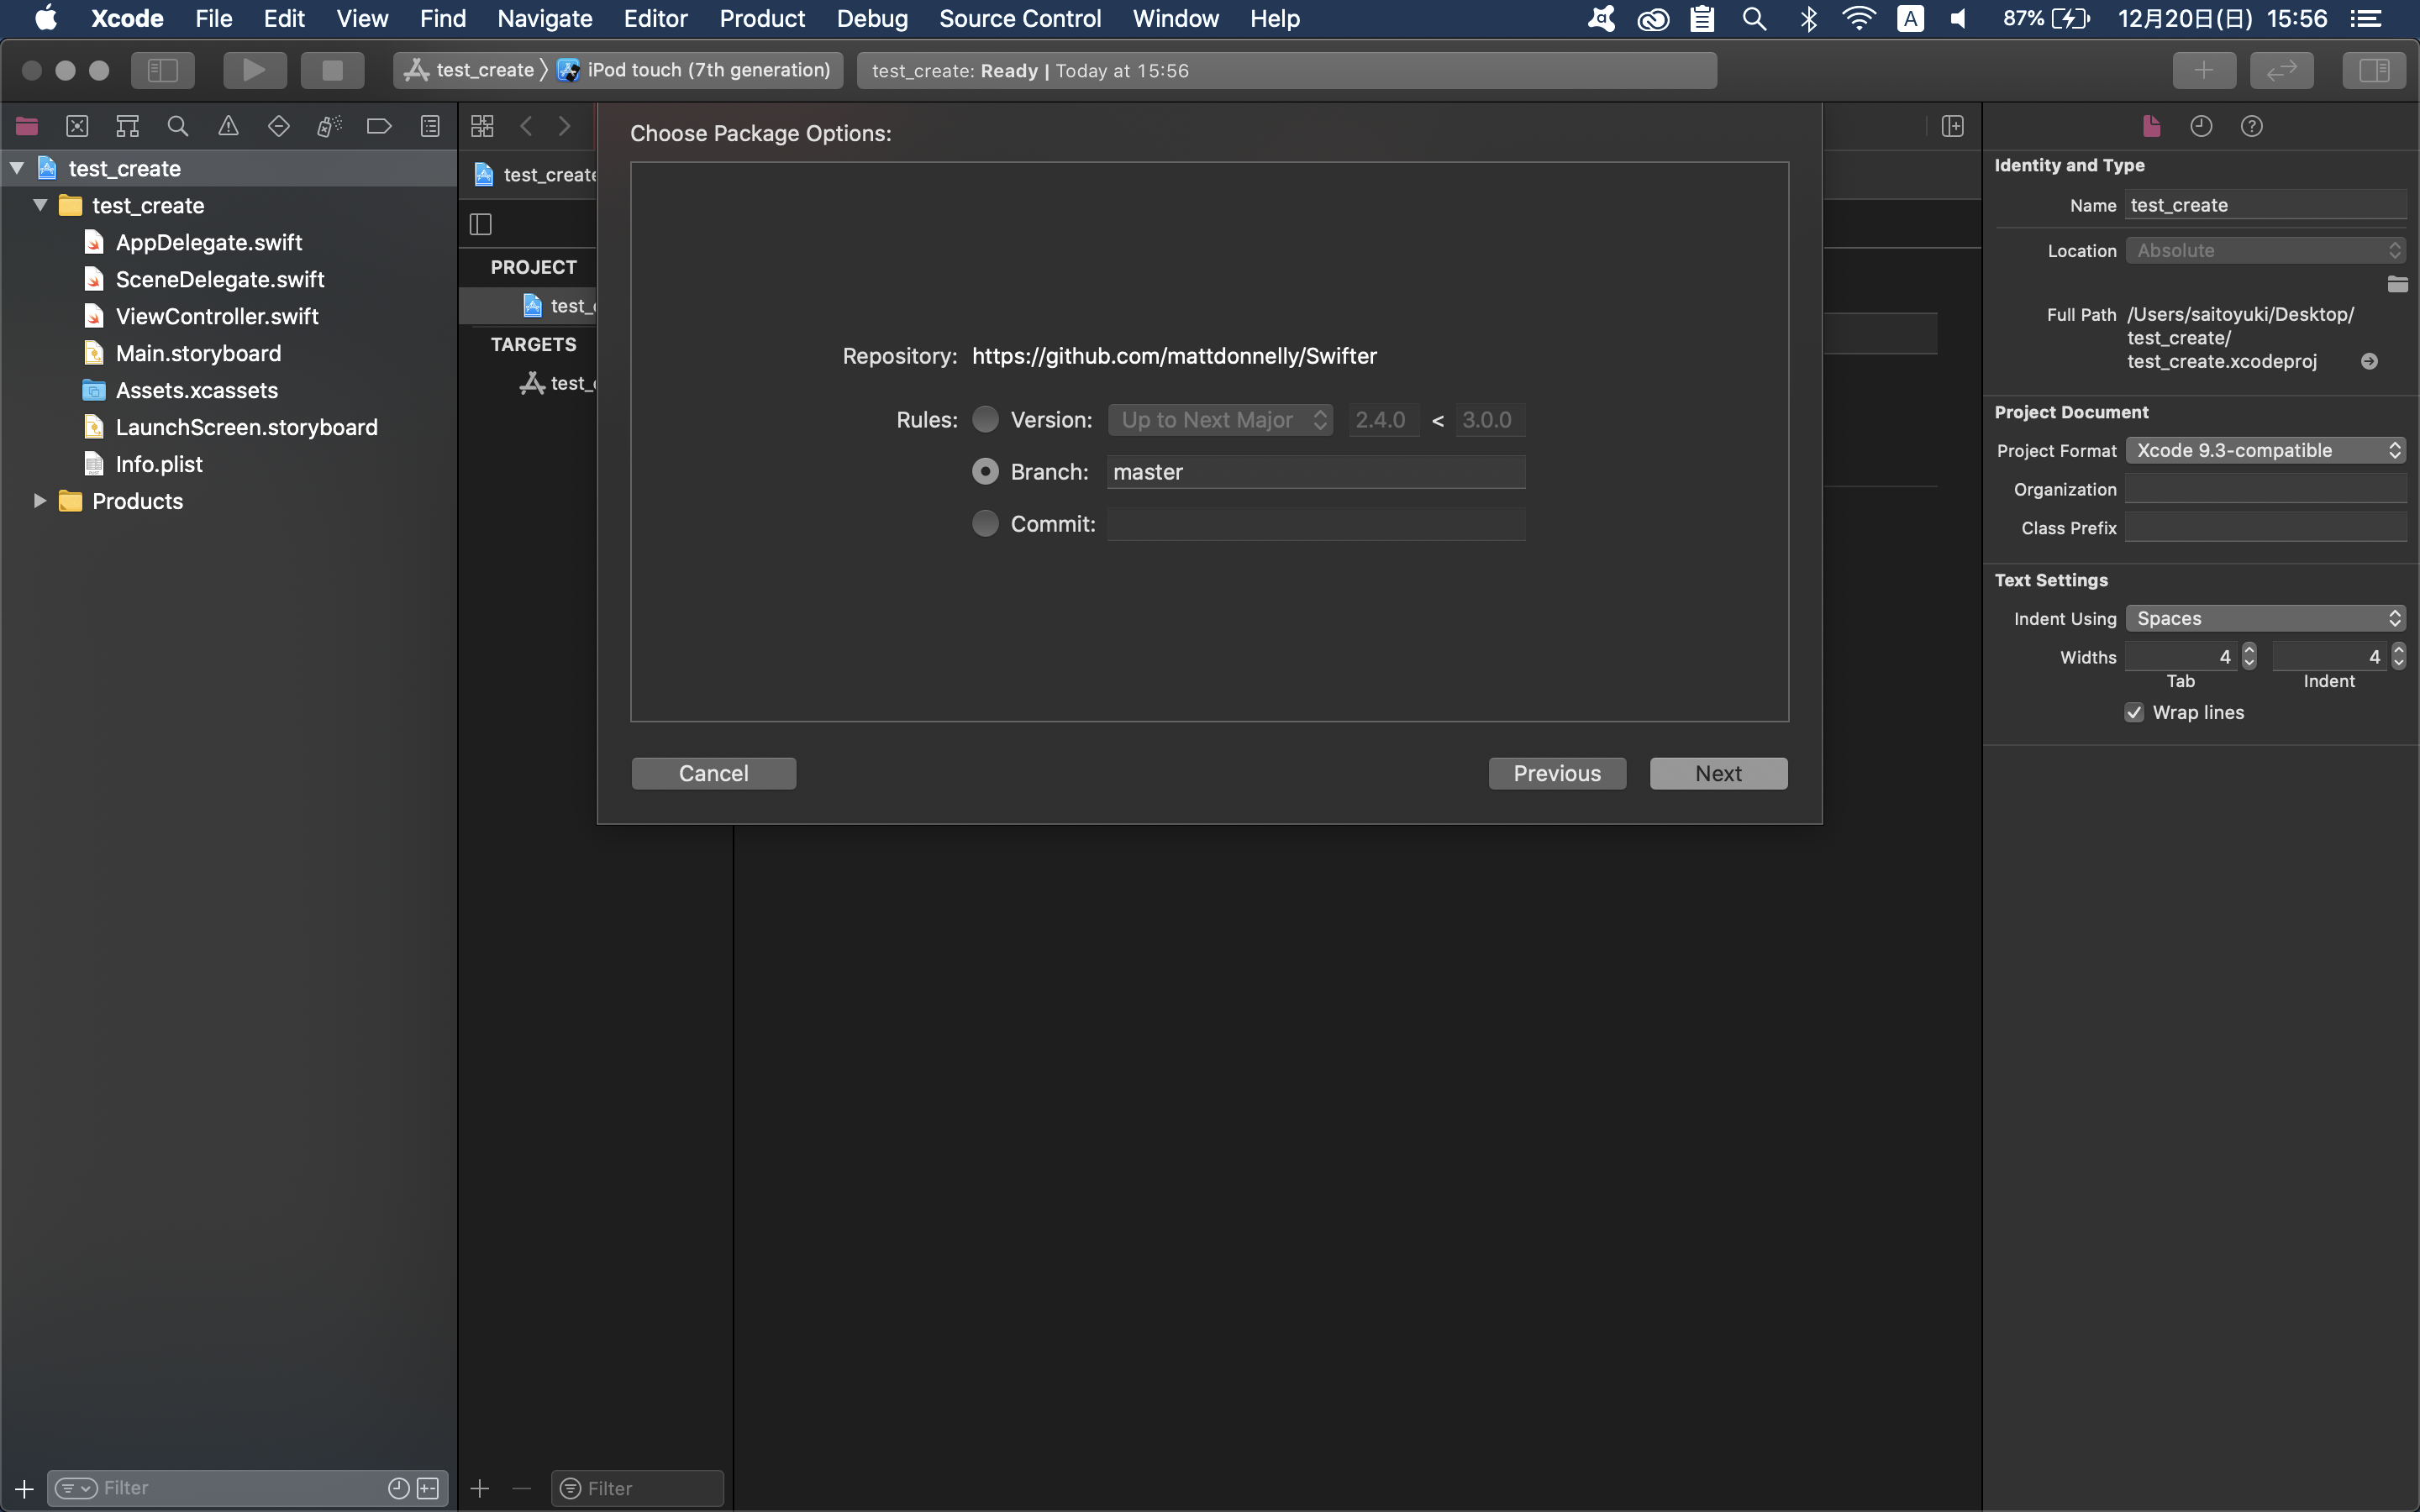
SwifterのgithubURLを入力する
スクリーンショット 2020-12-20 15.56.40.png

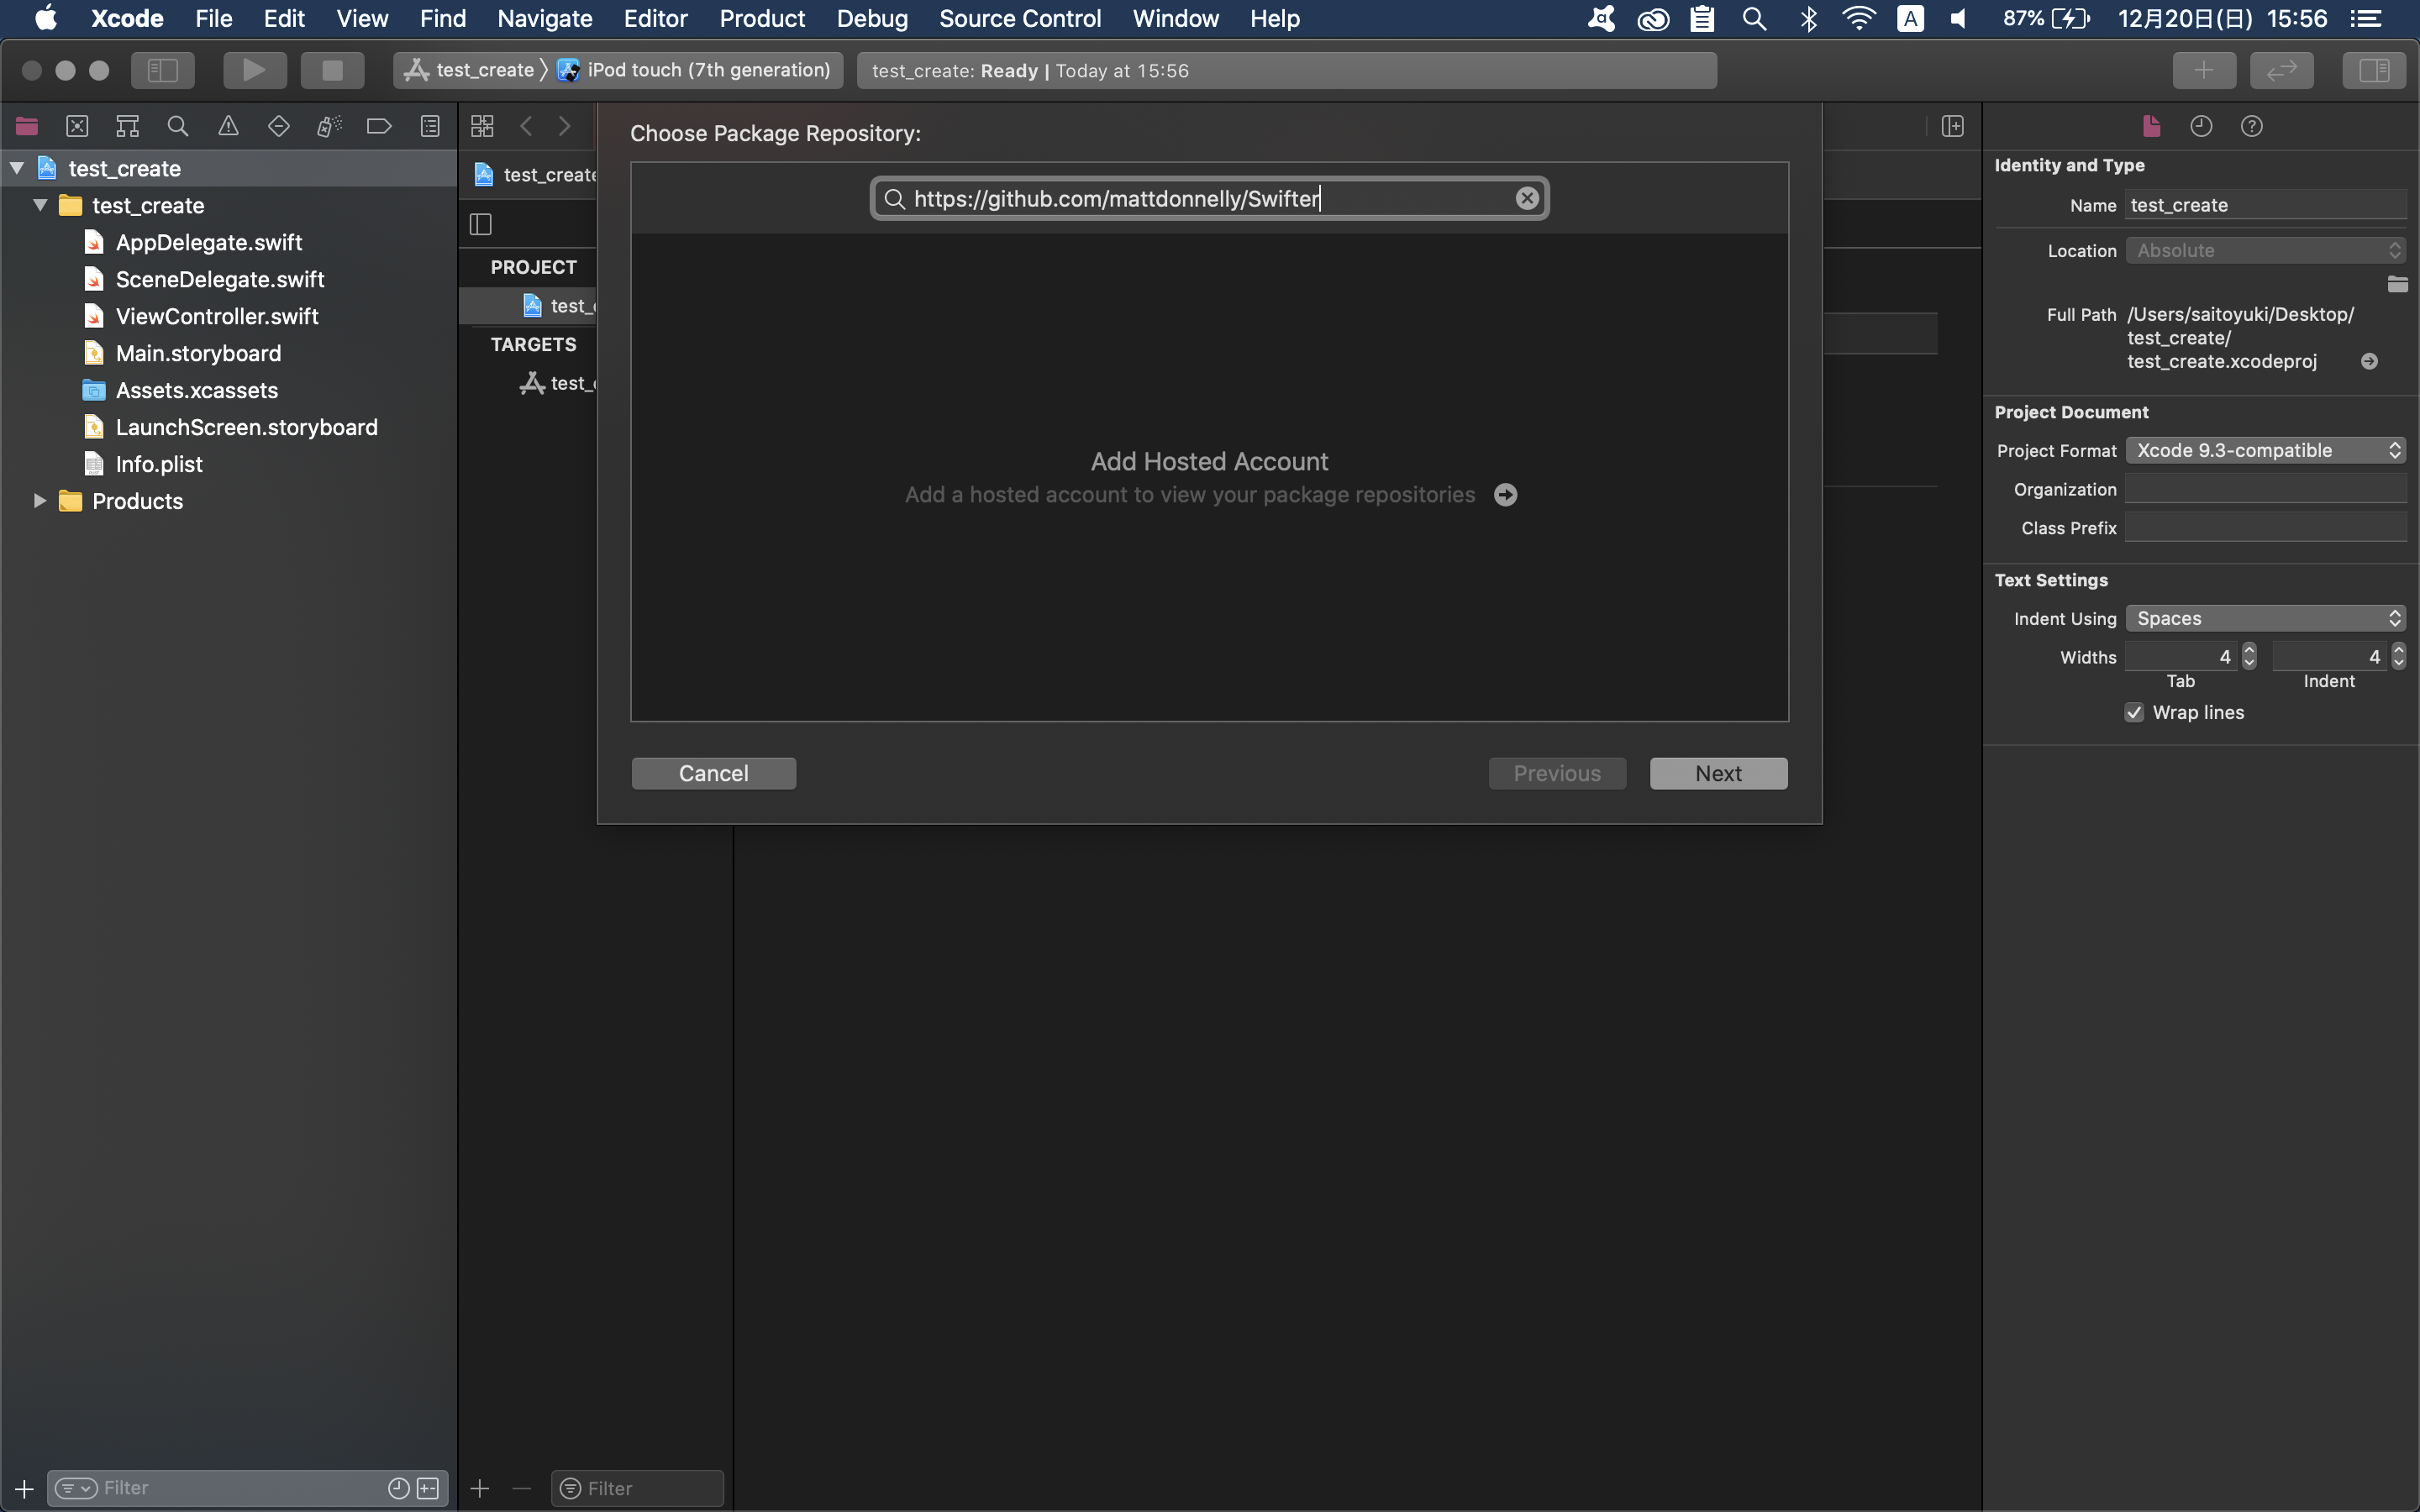
masterBranchを選択
スクリーンショット 2020-12-20 15.56.48.png

Add to Targetがプロジェクト名になっているかを確認し、Finishする
スクリーンショット 2020-12-20 15.57.02.png

api接続

swifter公式サイトのExample Requestsを参考に作成します。

ViewController.swift
@IBAction func login_button(_ sender: Any) {
        let swifter = Swifter(
            consumerKey: "Twitter_consumerKey",
            consumerSecret: "Twitter_consumerSecret"
        )
        swifter.authorize(
            withCallback: URL(string: "CallbackURL")!,
            presentingFrom: self,
            success: { accessToken, response in
                self.fetchTwitterHomeStream()
        }, failure: { error in
        })
    }
}

画面操作

ビルドします。

Simulator Screen Shot - iPod touch (7th generation) - 2020-12-21 at 16.44.26.png
Main.storyboardが表示されている状態です。
ログインのボタンを設置し、ViewControllerのlogin_buttonに紐づけています。
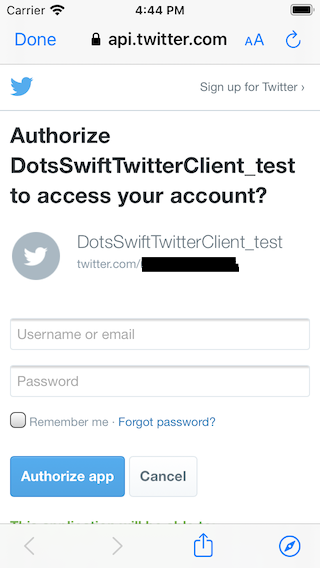
Simulator Screen Shot - iPod touch (7th generation) - 2020-12-21 at 16.44.34.png
ログインボタンを押してログイン画面に遷移。

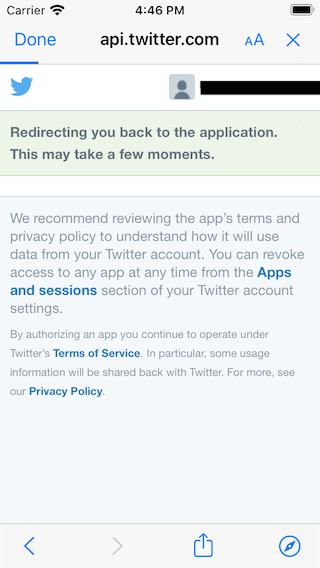
Simulator Screen Shot - iPod touch (7th generation) - 2020-12-21 at 16.46.49.png
成功するとリダイレクト画面を表示して戻ります。

2
0
0

Register as a new user and use Qiita more conveniently

  1. You get articles that match your needs
  2. You can efficiently read back useful information
  3. You can use dark theme
What you can do with signing up
2
0