やったこと
- Jetson Nanoのセットアップ
- SDカードイメージのダウンロードから日本語入力を確認まで
用意するもの(ハードウエア)
- Jetson Nano B01
- SDカード
- Samsung EVO Plus 128GB microSDXC
- DC電源アダプタ
- SUCCUL ACアダプター 5V 4A
※以前必要だったジャンパーピンは不要(同梱されている)
手順
SDカードへのイメージ書き込み
NVIDIAサイトからJetson NanoのSDカードイメージをダウンロード

- JetPack4.3(r32.3.1)に対応したSDカードイメージ
- nv-jetson-nano-sd-card-image-r32.3.1.zip
- ダウンロードサイト
上記ダウンロードしたSDカードイメージを書き込む
- お好みのソフトで書き込む
- balenaEtcherがおすすめ
Jetson Nanoセットアップ
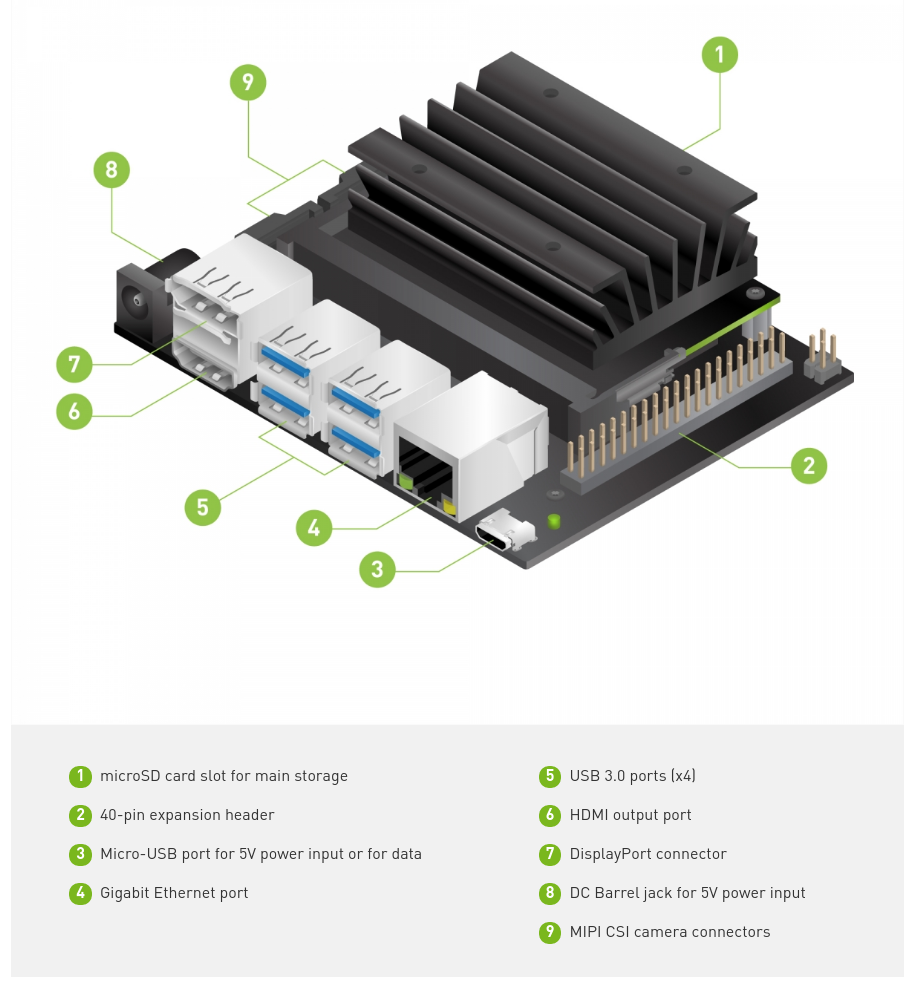
- 作成したmicro SDカードをJetson Nanoに差し込む(上図の①)
- ジャンパーピンをセット(上図の⑧の近く2本のピンをまたぐようにセットする)
- DC電源を差し込んで電源投入(上図の⑧)
- 起動したら、ユーザ名、パスワード、キーボード設定、言語設定などをウィザードに従って進めていく
- パーティションサイズ:そのままで最大まで使う設定になっている
- 言語: 日本語
- キーボード: 日本語
- ネットワークに接続(デフォルトでは有線LANのみサポート)
- 言語サポートの設定
-
システム設定 -> 言語サポート

-
システム全体に適用を押す

-
- ソフトの更新&再起動
- フォルダ名を英語にする(任意)