これは何
を一通りやってみてはまったところの一覧
あくまでこの記事の内容は投稿時点でのものです
各節のタイトルのリンク先は実際にやってみた時の repository です
First day on GitHub
Introduction to GitHub
- 特にはまりどころなし
Communicate using Markdown
- 特にはまりどころなし
GitHub Pages
- Step 4: Create a blog post の手順3.でパスを正しく記載しないと
GitHub Actions の判定で後続ステップに進まない-
https://github.com/nshun583/github-pages/commit/f13d414f908bcbeadb26ac7fca64de6aade2d5ff
- × :
_post/YYYY-MM-DD-title.md - ◯ :
_posts/YYYY-MM-DD-title.md
- × :
- 当該リポジトリの Actions タブの Step 4 相当 Workflow を強制実行したら
後続 Step 5に進んだので、完走後で別コミットを作って typo を修正してから
Pull Request → Merge した - それまで GitHub ページは正しく記事表示されなかった
- そもそも typo しなければ済む話
-
https://github.com/nshun583/github-pages/commit/f13d414f908bcbeadb26ac7fca64de6aade2d5ff
First week on GitHub
Review pull requests
- 特にはまりどころなし
Resolve merge conflicts
- 特にはまりどころなし
Release-based workflow
- Step 4: Generate release notes and merge の1つ目の Action > 手順8で要求されているのは
Click Save draft, as you will publish this release in the next stepなので
ここで勢いのままに Publish してしまうと
Step 5の手順2/3でClick the Edit button next to your draft release/Ensure the Target branch is set to main
できなくて先に進めなくて詰む(Edit ボタンがそもそも表示されない)- https://github.com/skills/release-based-workflow の雛形 repository から作業用 repository を2回作り直してようやく気がついた
- そもそもStep 5の手順4に誤植があって、
Click Update releaseではなくClick Publish releaseなことが余計に混乱を招いているが、それは既に Pull Request が出ている
Connect the dots
- 特にはまりどころなし
Automate workflows with GitHub Actions
Hello GitHub Actions
- 特にはまりどころなし
Continuous integration
- このあたりから Instructions が多少怪しくなってくる
- Step 1: Add a test workflow の
Update the workflow to remove all steps other than the "checkout" step.が
意味するのは雛形から生成された ci.yml で以下の部分を消すということ
この部分を完全に読み飛ばして先に進んでしまったが特に大きな問題はなかった- 以下の部分
      # Runs a single command using the runners shell
      - name: Run a one-line script
        run: echo Hello, world!

      # Runs a set of commands using the runners shell
      - name: Run a multi-line script
        run: |
          echo Add other actions to build,
          echo test, and deploy your project.
- Step 2: Fix the test でいきなり
1. Update the code in the ci branch to get the test to pass. You need to look something like this: _underscore_と言われるが、これは指示として何をしろと???状態- これが何を言っているかというと、README.md L115(初期状態)の以下の部分を * から _ に直せということ
*By looking at the logs, can you identify which tests failed?* To find it, go to one of the failed builds and scrolling through the log. Look for a section that lists all the unit tests. We're looking for the name of the test with an "x".
- L113にヒントがある
<!-- Note here: Learners -- yup, you found the error! Course maintainers -- leave the italics with * instead of _ for the error case. -->
- が、そもそも Step 1で Workflow に追加した以下が何をやっているかの説明が一切ないので README.md を修正するというところに思いを馳せにくい
npx remark . --use remark-preset-lint-consistent --frail
- Workflow の以下のエラーメッセージから分かれ、ということなのだろうが...

- 既に Issue と Pull Request に別々になっている
- これが何を言っているかというと、README.md L115(初期状態)の以下の部分を * から _ に直せということ
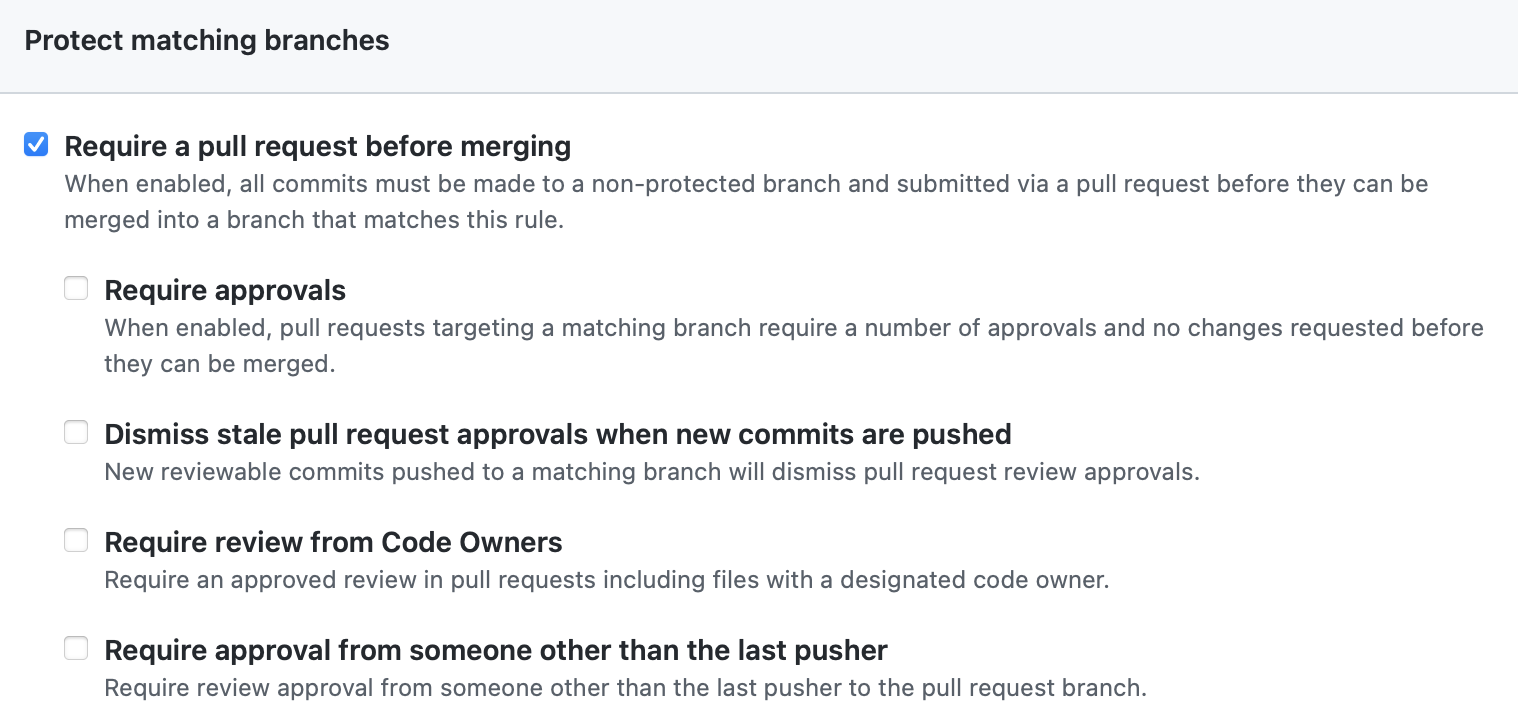
- Step 4: Add branch protections の手順4で
Check Require pull request reviews before merging.しろと言われるが、設定項目名が違う- 正しくは
- × :
Require pull request reviews before merging - ◯ :
Require a pull request before merging
- × :
- これも既に Pull Request になっている
- 正しくは
Publish packages
- Step 1 手順2
Open the pull request I made for you from the cd branch.は本当に開くだけでこの時点では Pull Request をどうこうしたりはしない- それは後程の Step 3 の
You can now merge your pull request!- Step 1 で
publish.ymlを、Step2 でDockerfileを追加してから
- Step 1 で
- なので
Add a new file at .github/workflows/publish.yml.は Code タブ のcdbracnch から - Issue にするほどではないが、分かりにくい印象は受けた
- それは後程の Step 3 の
- Step 3 を完了するといきなり Step X(最後の段階)までチュートリアル的に進んでしまって???となるが
Step 4/5の最後にそれぞれWe can't automatically verify this step for you, so please continue on to the next step below!とあるのでこれは想定通りのはず- だが不親切さは否めない
- Step 4 で
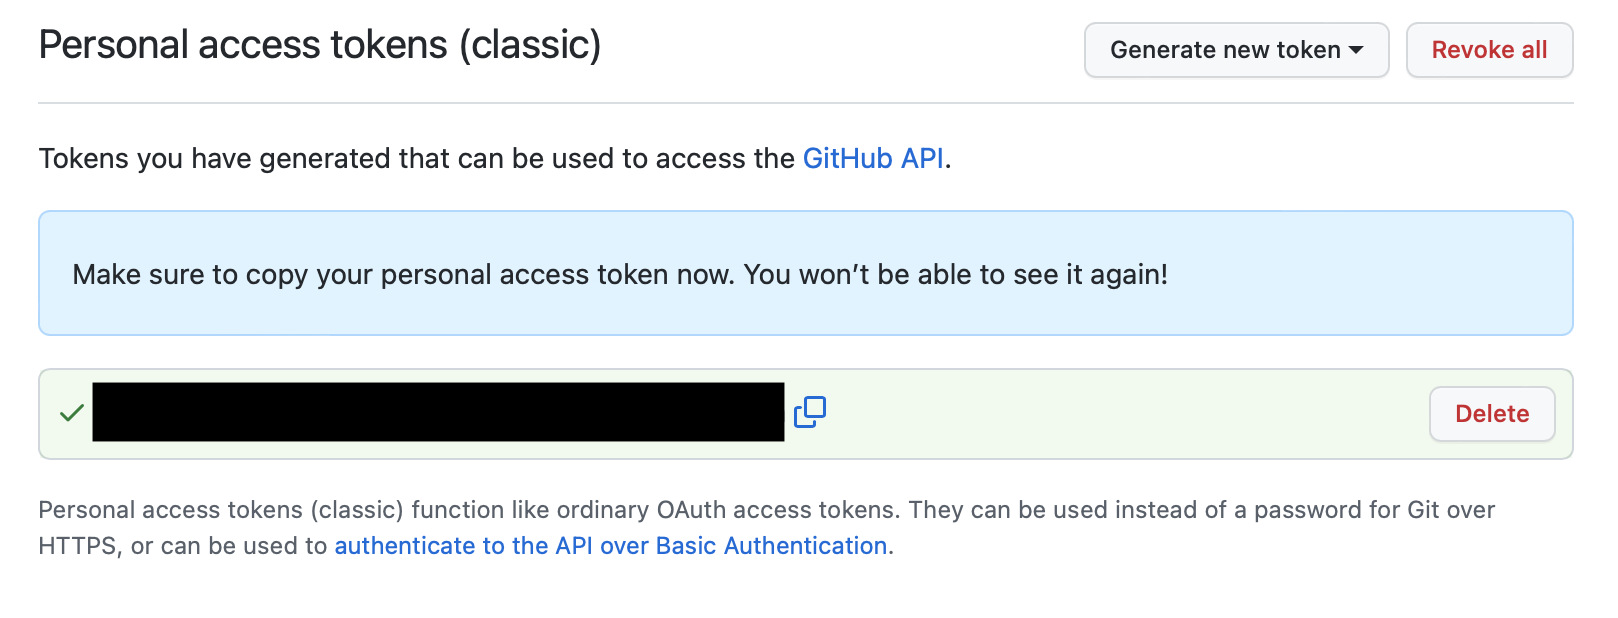
you will need to generate a personal access tokenしろと言われるが、personal access token のリンク先はCreating a fine-grained personal access tokenが推奨されるような記載になっている - Step 4 の後半部分(Token 作成後)があまりにも手順飛躍している
- いきなり以下のように言われるが、あまりにも不親切
Open your terminal (Bash or Git Bash recommended)-
Use the following command to log in:docker login docker.pkg.github.com -u USERNAME -p TOKEN
- コマンドライン環境を整備して Docker を入れるところから始めないといけないので、
ここで一気に挫折者が増えそうな手順になっている
(ここまでの GitHub Skills 各コースは Windows 機でもブラウザ内完結で問題なく実施できるので一気にハードルが上がっている) - CentOS Stream 9 で実施していたので以下の手順に従った
- あまりにも不親切なので公式の Issue にした
- いきなり以下のように言われるが、あまりにも不親切
- Step 4 で
docker login docker.pkg.github.com -u USERNAME -p TOKENすると確かにLogin Succeededするが、それ以外にも各種セキュリティ警告が出るので望ましくない- とりあえずこのコース終了後に即 access token を無効化することで対処
[shuntaro@localhost ~]$ sudo docker login docker.pkg.github.com -u nshun583 -p XXXXXXXXXXXXXXXX
[sudo] shuntaro のパスワード:
WARNING! Using --password via the CLI is insecure. Use --password-stdin.
WARNING! Your password will be stored unencrypted in /root/.docker/config.json.
Configure a credential helper to remove this warning. See
https://docs.docker.com/engine/reference/commandline/login/#credentials-store

Login Succeeded
- Step 4 で
Copy and paste the pull command from the package instructions into your terminalする箇所の URL 記載とスクリーンショットが違う- 正しくは
- × : docker pull docker.pkg.github.com/YOURNAME/js-build/tic-tac-toe:f29
- ◯ : docker pull ghcr.io/YOURNAME/publish-packages/game:sha-07a7e0a
- 既に Issue になっている
- 正しくは
- Step5 の単純誤植
- × : Find your image information by typing
Docker image ls. - ◯ : Find your image information by typing
docker image ls.
- × : Find your image information by typing
- Step 5 は Step 4 と違って最終実行状態例が記載されていないので結果が正しいかどうかを検証しにくいが、以下のようになった
[shuntaro@localhost ~]$ sudo docker image ls
REPOSITORY                               TAG           IMAGE ID       CREATED         SIZE
ghcr.io/nshun583/publish-packages/game   sha-07a7e0a   c88b6884f6b3   2 hours ago     127MB
hello-world                              latest        feb5d9fea6a5   13 months ago   13.3kB
[shuntaro@localhost ~]$ sudo docker run -d -it --rm -p 8080:80 --name ttt ghcr.io/nshun583/publish-packages/game:sha-07a7e0a
c683c11a70ae9f6480eebdcc5a02fcdc3c63a2051fd21801e5e8a243388d75bf
Deploy to Azure
- まず Step 1の冒頭からして不親切
-
Activity 1: Configure GITHUB_TOKEN permissionsで Learn how と言われるが、飛んだ先のページにAllow GitHub Actions to create and approve pull requests enabled under Workflow permissionsする方法がまず書かれてないという罠がある - どこに書かれているかというと飛んだページからさらに飛ぶ Managing GitHub Actions settings for a repository の後半
Setting the permissions of the GITHUB_TOKEN for your repository - 端的にいうと、[当該リポジトリ] > Settings > Code and automation > Actions > General の末尾以下部分

-
- Step 2: Set up an Azure environment
- 個別にどうというレベルではなく、全体的にかなり手順として重め
- いわゆる「クラウド破産」を防ぐために支払アラートだけは Azure Portal で設定しておく
- https://learn.microsoft.com/en-us/azure/cost-management-billing/costs/tutorial-acm-create-budgets
- なぜか Action Group 設定が項目自体表示されないが深入りしない(おそらく元々の Action 自体を設定していないから)

-
Create a new subscription in the Azure Portal.はアカウントのアップグレードなる行為をしたら設定できた模様

- MFA は Azure を Subscription した GitHub アカウント自体が MFA になっているので一旦保留
- 本来は管理者と別に普段利用アカウントを作成してそちらを MFA にするべき
- というかこのチュートリアルが終わったら以下で早急に Subscription を解除するのが無難
- Azure CLI のインストールはリンク参照で示されている以下の通りにやるだけ(Linuxの場合)
-
https://learn.microsoft.com/en-us/cli/azure/install-azure-cli-linux
-
Choose an installation methodは環境に応じて選ぶ
-
-
https://learn.microsoft.com/en-us/cli/azure/install-azure-cli-linux
- 途中で
--sdk-authがOption '--sdk-auth' has been deprecated and will be removed in a future release.と言われる問題は既に Issue になっている - そして根本的な問題として、教材内の GitHub Actions が壊れているので手順通りにやっても Step 3 に進むことができず、
To deploy successfully to our Azure environment, we have created a new workflow file spinup-destroy.yml in the azure-configuration branch.されていないので強制的に次に進むこともできない- これも既に Issue になっている
- なのでどうしようもないので、前述の通り Subscription を削除して
クラウド破産防止対策だけしてこのコースは道半ばで撤収
JavaScript actions
-
Step 1: Initialize a new JavaScript projectで要求されている前提インストールは以下のように対処した- Visual Studio Code or your editor of choice
- vim で十分なので割愛
- Git
- 最初から導入済
- Node.js
- https://nodejs.org/en/download/package-manager/#centos-fedora-and-red-hat-enterprise-linux
- CentOS Stream 9 だと以下のように導入バージョンが18になる
なので後続手順でusing: "node12"となっているところは全て node18 に読み替えた(が、これだとGitHub側の環境問題でうまくいかない:後述)
- Visual Studio Code or your editor of choice
[shuntaro@localhost ~]$ sudo dnf module list nodejs
メタデータの期限切れの最終確認: 0:16:28 時間前の 2022年10月24日 02時53分19秒 に実施しました。
CentOS Stream 9 - AppStream
Name                     Stream                   Profiles                                               Summary
nodejs                   18                       common [d], development, minimal, s2i                  Javascript runtime

ヒント: [d]efault, [e]nabled, [x]disabled, [i]nstalled
-
Step 5: Add your action to the workflow fileが my-workflow.yml の編集操作しか言及していないが、Step 2/3/4 と同じように main への push まで実施する(そうでないと Step 6に進まない) - CentOS Stream 9 だと前述の通り、dnf からは Node.js 18 しか導入できないが、これだと GitHub 側の環境でエラーになる
- これは GitHub.Runner が Node.js 12/16 にしか対応していないのに対し、
CentOS Stream 9 の dnf だと 18 しか導入できないことによるもの - https://github.com/nshun583/writing-javascript-actions/actions/runs/3308162986
- これは GitHub.Runner が Node.js 12/16 にしか対応していないのに対し、
System.ArgumentOutOfRangeException: Specified argument was out of the range of valid values. (Parameter ''using: node18' is not supported, use 'docker', 'node12' or 'node16' instead.')
   at GitHub.Runner.Worker.ActionManifestManager.ConvertRuns(IExecutionContext executionContext, TemplateContext templateContext, TemplateToken inputsToken, String fileRelativePath, MappingToken outputs)
   at GitHub.Runner.Worker.ActionManifestManager.Load(IExecutionContext executionContext, String manifestFile)
[shuntaro@localhost ~]$ sudo dnf module list nodejs
メタデータの期限切れの最終確認: 0:16:28 時間前の 2022年10月24日 02時53分19秒 に実施しました。
CentOS Stream 9 - AppStream
Name                     Stream                   Profiles                                               Summary
nodejs                   18                       common [d], development, minimal, s2i                  Javascript runtime

ヒント: [d]efault, [e]nabled, [x]disabled, [i]nstalled

[shuntaro@localhost ~]$ sudo dnf module install nodejs:12
メタデータの期限切れの最終確認: 1:23:49 時間前の 2022年10月24日 02時53分19秒 に実施しました。
エラー: リクエスト中の問題:
足りないグループまたはモジュール: nodejs:12
- これも Issue 送りにした


