Azure の PaaS からオンプレミスへ接続できるサービスがないか調べていたら、Azure Relay で実現できそうでしたので、Azure Relay を試してみました。
Azure Relay の概要のページにもオンプレミスのサービスとクラウドとの通信についての記載があります。
Azure Relay には、ハイブリッド接続(Web ソケット or HTTP)と WCF リレーがありますが、今回は HTTP を使用したハイブリッド接続のチュートリアル+α をやってみました。
ハイブリッド接続と WCF リレーの詳細な説明も Azure Relay の概要ページに記載があります。
ハイブリッド接続のチュートリアル
必要なもの
- Visual Studio
- Azure サブスクリプション
チュートリアルの概要
- Relay 名前空間の作成
- Relay 名前空間にハイブリッド接続の作成
- メッセージを受信するサーバー (リスナー) アプリの作成
- メッセージを送信するクライアント (送信側) アプリの作成
- 動作確認
Relay 名前空間の作成
- Azure Portal の Maketplace より Relay を作成します。
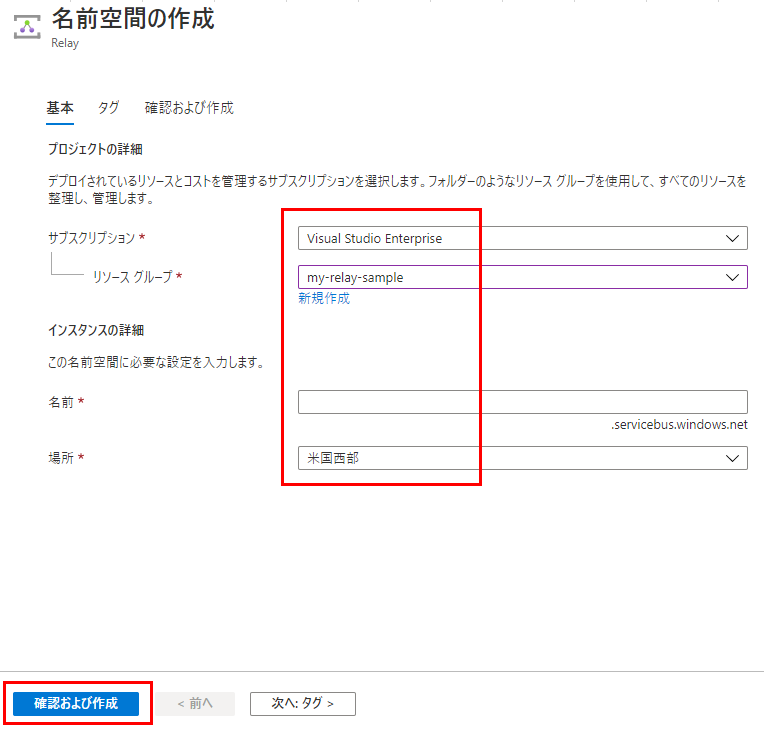
- 名前空間の作成画面で以下を入力し、「確認および作成」をクリックします。
- サブスクリプション
- リソースグループ
- 名前
- 場所
- 「作成」ボタンをクリックし、名前空間を作成します。
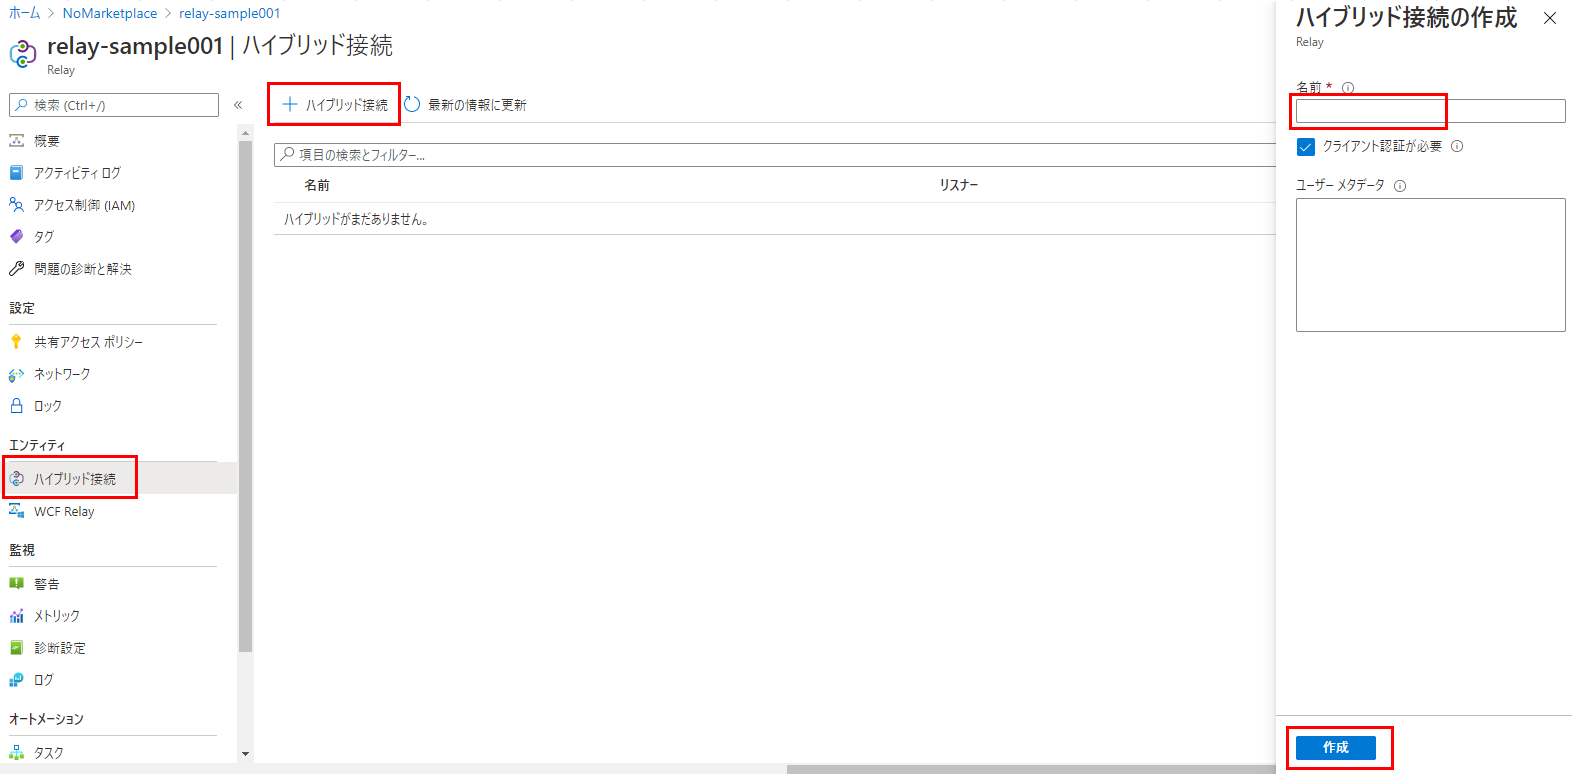
Relay 名前空間にハイブリッド接続の作成
Relay 名前空間の作成 で作成した名前空間の画面より「ハイブリッド接続」→「+ハイブリッド接続」と選択し、ハイブリッド接続の名前を入力し、「作成」ボタンをクリックします。
動作確認用のアプリの作成
ハイブリッド接続の動作確認のためのアプリの作成を行います。
クライアント側、サーバー側のアプリ共に Relay 名前空間への接続情報を記載します。
// {RelayNamespace} 部分には、Relay 名前空間の作成時に入力した「名前」を指定します。
private const string RelayNamespace = "{RelayNamespace}.servicebus.windows.net";

// {HybridConnectionName} 部分には、Relay 名前空間にハイブリッド接続の作成時に入力した「ハイブリッド接続の名前」を指定します。
private const string ConnectionName = "{HybridConnectionName}";

// {SAKKeyName} 部分には、Relay 名前空間の「共有アクセスポリシー」のポリシー名を指定します。チュートリアルでは、固定値「RootManageSharedAccessKey」を指定します。
private const string KeyName = "{SASKeyName}";

// {SASKey} 部分には、KeyName に指定したポリシーの主キーを指定します。
private const string Key = "{SASKey}";
接続情報の KeyName, Key は共有アクセスポリシー画面より取得します。

メッセージを受信するサーバー (リスナー) アプリの作成
- Visual Studio で「コンソールアプリ(.NET Core)」を作成し、Program.cs に以下の実装を行います。
- Nuget より
Microsoft.Azure.Relayをインストールします。
このアプリは、クライアントからの HTTP リクエストを受信すると、レスポンスとして hello! を返します。
using System;
using System.IO;
using System.Net;
using System.Threading.Tasks;
using Microsoft.Azure.Relay;

namespace Server
{
    public class Program
    {
        // {RelayNamespace} 部分には、Relay 名前空間の作成時に入力した「名前」を指定します。
        private const string RelayNamespace = "{RelayNamespace}.servicebus.windows.net";
        // {HybridConnectionName} 部分には、Relay 名前空間にハイブリッド接続の作成時に入力した「ハイブリッド接続の名前」を指定します。
        private const string ConnectionName = "{HybridConnectionName}";
        // {SAKKeyName} 部分には、Relay 名前空間の「共有アクセスポリシー」のポリシー名を指定します。チュートリアルでは、固定値「RootManageSharedAccessKey」を指定します。
        private const string KeyName = "{SASKeyName}";
        // {SASKey} 部分には、KeyName に指定したポリシーの主キーを指定します。
        private const string Key = "{SASKey}";

        public static void Main(string[] args)
        {
            RunAsync().GetAwaiter().GetResult();
        }

        private static async Task RunAsync()
        {
            var tokenProvider = TokenProvider.CreateSharedAccessSignatureTokenProvider(KeyName, Key);
            var listener = new HybridConnectionListener(new Uri(string.Format("sb://{0}/{1}", RelayNamespace, ConnectionName)), tokenProvider);

            // Subscribe to the status events.
            listener.Connecting += (o, e) => { Console.WriteLine("Connecting"); };
            listener.Offline += (o, e) => { Console.WriteLine("Offline"); };
            listener.Online += (o, e) => { Console.WriteLine("Online"); };

            // Provide an HTTP request handler
            listener.RequestHandler = (context) =>
            {
                // Do something with context.Request.Url, HttpMethod, Headers, InputStream...
                context.Response.StatusCode = HttpStatusCode.OK;
                context.Response.StatusDescription = "OK";
                using (var sw = new StreamWriter(context.Response.OutputStream))
                {
                    sw.WriteLine("hello!");
                }

                // The context MUST be closed here
                context.Response.Close();
            };

            // Opening the listener establishes the control channel to
            // the Azure Relay service. The control channel is continuously
            // maintained, and is reestablished when connectivity is disrupted.
            await listener.OpenAsync();
            Console.WriteLine("Server listening");

            // Start a new thread that will continuously read the console.
            await Console.In.ReadLineAsync();

            // Close the listener after you exit the processing loop.
            await listener.CloseAsync();
        }
    }
}
※ チュートリアルでは、コンソール アプリ (.NET Framework) でアプリを作成していましたが、コンソール アプリ (.NET Core) でも作成できました。
メッセージを送信するクライアント (送信側) アプリの作成
- Visual Studio で「コンソールアプリ(.NET Core)」を作成し、Program.cs に以下の実装を行います。
- Nuget より
Microsoft.Azure.Relayをインストールします。
このアプリは、サーバーに HTTP リクエストを送信し、サーバーからのレスポンスをコンソールに出力します。
using System;
using System.Threading.Tasks;
using System.Net.Http;
using Microsoft.Azure.Relay;

namespace Client
{
    class Program
    {
        // {RelayNamespace} 部分には、Relay 名前空間の作成時に入力した「名前」を指定します。
        private const string RelayNamespace = "{RelayNamespace}.servicebus.windows.net";
        // {HybridConnectionName} 部分には、Relay 名前空間にハイブリッド接続の作成時に入力した「ハイブリッド接続の名前」を指定します。
        private const string ConnectionName = "{HybridConnectionName}";
        // {SAKKeyName} 部分には、Relay 名前空間の「共有アクセスポリシー」のポリシー名を指定します。チュートリアルでは、固定値「RootManageSharedAccessKey」を指定します。
        private const string KeyName = "{SASKeyName}";
        // {SASKey} 部分には、KeyName に指定したポリシーの主キーを指定します。
        private const string Key = "{SASKey}";

        static void Main(string[] args)
        {
            RunAsync().GetAwaiter().GetResult();
        }

        private static async Task RunAsync()
        {
           var tokenProvider = TokenProvider.CreateSharedAccessSignatureTokenProvider(
            KeyName, Key);
            var uri = new Uri(string.Format("https://{0}/{1}", RelayNamespace, ConnectionName));
            var token = (await tokenProvider.GetTokenAsync(uri.AbsoluteUri, TimeSpan.FromHours(1))).TokenString;
            var client = new HttpClient();
            var request = new HttpRequestMessage()
            {
                RequestUri = uri,
                Method = HttpMethod.Get,
            };
            request.Headers.Add("ServiceBusAuthorization", token);
            var response = await client.SendAsync(request);
            Console.WriteLine(await response.Content.ReadAsStringAsync());
        }
    }
}
※ チュートリアルでは、コンソール アプリ (.NET Framework) でアプリを作成していましたが、コンソール アプリ (.NET Core) でも作成できました。
動作確認
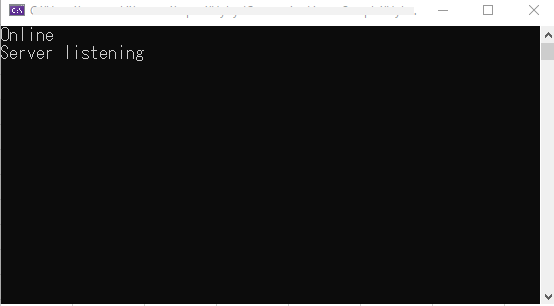
Visual Studio でサーバー (リスナー) アプリをデバッグ実行します。
コマンドプロンプトが起動し、以下のメッセージが表示されます。
サーバー (リスナー) アプリを実行した状態で、別の Visual Studio でクライアント (送信側) アプリをデバッグ実行します。
コマンドプロンプトが起動し、以下のメッセージが表示されます。

サーバー (リスナー) アプリは、リクエストを受信すると hello! を返し、クライアント (送信側) アプリは、サーバーからのレスポンスをコンソールに出力するので、クライアント側のコンソールに hello! がコンソールに出力されています。
これで、クライアントとサーバーの通信ができていることが確認できました。
アプリを Azure にデプロイして動かしてみた
もともとやりたかったことが、「Azure の PaaS からオンプレミスへ接続できるサービスがないか」だったので、次の構成で試してみます。
- メッセージを受信するサーバー (リスナー) アプリは IaaS で実行
オンプレサーバーは用意できなかったので、IaaS にしています。 - メッセージを送信するクライアント (送信側) アプリは Azure Functions で実行
プログラムも少し変えてみます。
- サーバー (リスナー) アプリでは受信した文字列をコンソールに出力できるよう変更
- クライアント (送信側) アプリから任意の文字列を送信できるように変更
メッセージを受信するサーバー (リスナー) アプリは IaaS で実行
サーバー (リスナー) アプリは、受信した文字列をコンソールに出力するよう変更します。
変更前のコード
// Provide an HTTP request handler
listener.RequestHandler = (context) =>
{
    // Do something with context.Request.Url, HttpMethod, Headers, InputStream...
    context.Response.StatusCode = HttpStatusCode.OK;
    context.Response.StatusDescription = "OK";
    using (var sw = new StreamWriter(context.Response.OutputStream))
    {
        sw.WriteLine("hello!");
    }

    // The context MUST be closed here
    context.Response.Close();
};
変更後のコード
// Provide an HTTP request handler
listener.RequestHandler = (context) =>
{
    // Do something with context.Request.Url, HttpMethod, Headers, InputStream...
    context.Response.StatusCode = HttpStatusCode.OK;
    context.Response.StatusDescription = "OK";

    var bytes = new byte[context.Request.InputStream.Length]; // add
    context.Request.InputStream.Read(bytes, 0, bytes.Length); // add
    var str = Encoding.UTF8.GetString(bytes); // add

    using (var sw = new StreamWriter(context.Response.OutputStream))
    {
        sw.WriteLine(str); // change
        Console.WriteLine(str); // add
    }

    // The context MUST be closed here
    context.Response.Close();
};
IaaS は Azure に VM(Windows Server 2019 Datacenter) を用意し、コンソールアプリを実行できるように .NET Core SDK をインストールします。また、HTTPS でハイブリッド接続するので 443 port を開けます。
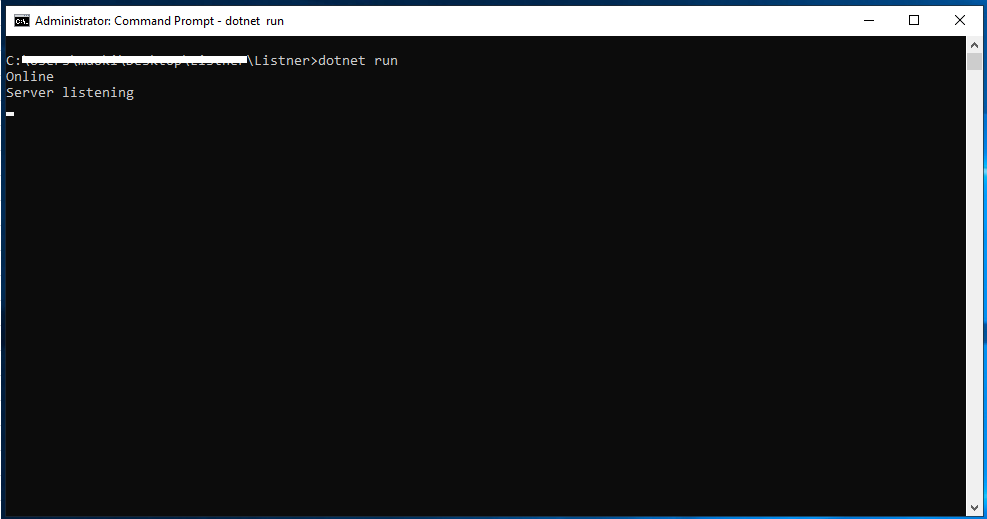
プログラムの変更と、IaaS の準備ができたら、サーバー (リスナー) アプリを IaaS に配置して、dotnet run でアプリを実行します。
メッセージを送信するクライアント (送信側) アプリは Azure Functions で実行
クライアント (送信側) アプリは Azure Functions のコードに書き換え、リクエストボディの内容をリスナーに送信するように変更します。
using System;
using System.Threading.Tasks;
using Microsoft.AspNetCore.Mvc;
using Microsoft.Azure.WebJobs;
using Microsoft.Azure.WebJobs.Extensions.Http;
using Microsoft.AspNetCore.Http;
using Microsoft.Extensions.Logging;
using Microsoft.Azure.Relay;
using System.Net.Http;
using System.IO;

namespace SenderFunction
{
    public static class Function1
    {
        // {RelayNamespace} 部分には、Relay 名前空間の作成時に入力した「名前」を指定します。
        private const string RelayNamespace = "{RelayNamespace}.servicebus.windows.net";
        // {HybridConnectionName} 部分には、Relay 名前空間にハイブリッド接続の作成時に入力した「ハイブリッド接続の名前」を指定します。
        private const string ConnectionName = "{HybridConnectionName}";
        // {SAKKeyName} 部分には、Relay 名前空間の「共有アクセスポリシー」のポリシー名を指定します。チュートリアルでは、固定値「RootManageSharedAccessKey」を指定します。
        private const string KeyName = "{SASKeyName}";
        // {SASKey} 部分には、KeyName に指定したポリシーの主キーを指定します。
        private const string Key = "{SASKey}";

        private static HttpClient _httpClient = new HttpClient();

        [FunctionName("Function1")]
        public static async Task<IActionResult> Run(
            [HttpTrigger(AuthorizationLevel.Function, "post", Route = null)] HttpRequest req, ILogger log)
        {
            log.LogInformation("C# HTTP trigger function processed a request.");

            var requestBody = await new StreamReader(req.Body).ReadToEndAsync();

            var tokenProvider = TokenProvider.CreateSharedAccessSignatureTokenProvider(KeyName, Key);
            var uri = new Uri(string.Format("https://{0}/{1}", RelayNamespace, ConnectionName));
            var token = (await tokenProvider.GetTokenAsync(uri.AbsoluteUri, TimeSpan.FromHours(1))).TokenString;
            var content = new StringContent(requestBody);
            content.Headers.Add("ServiceBusAuthorization", token);

            var response = await _httpClient.PostAsync(uri, content);
            var body = await response.Content.ReadAsStringAsync();

            return new OkObjectResult(body);
        }
    }
}
ソースコードを Azure Functions にデプロイし、Azure Functions の「テストと実行」よりリクエストを送信してみます。
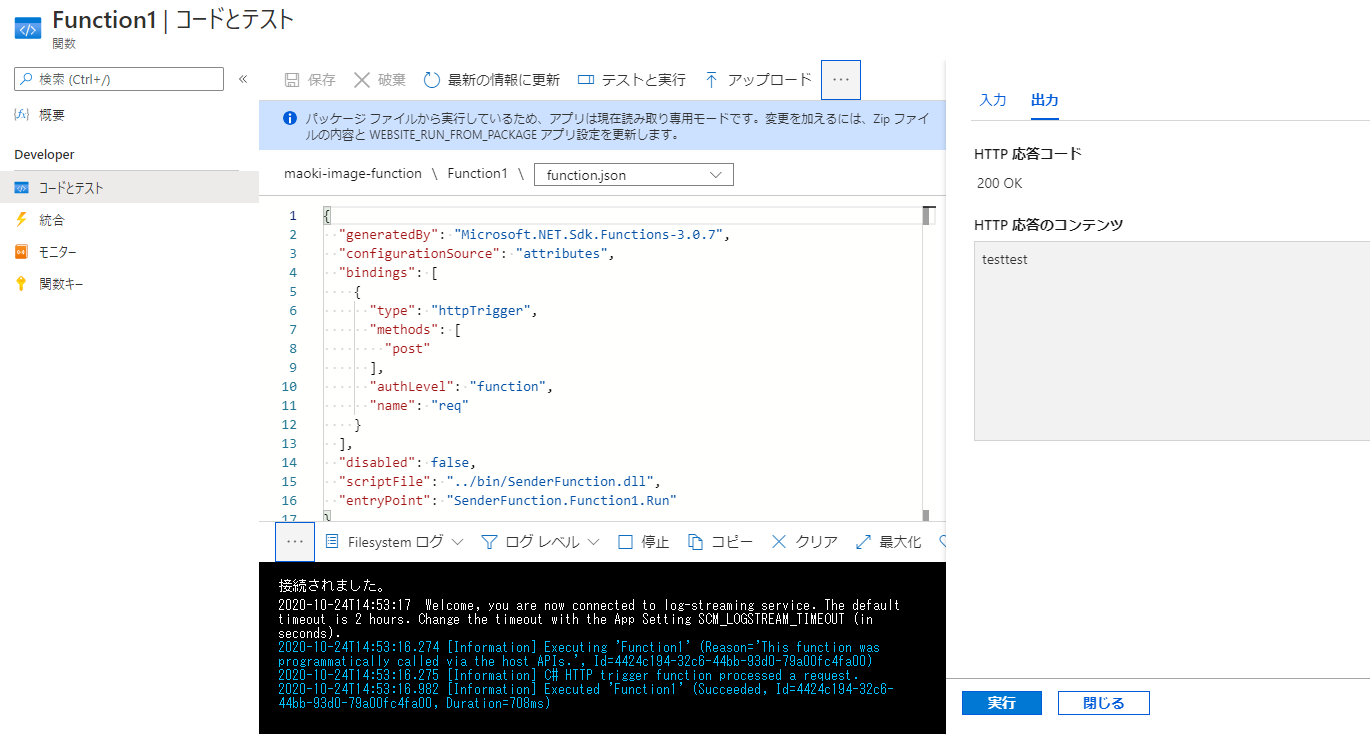
testtest を送信しました。リスナー側のコンソールに testtest が出力されています。
これで、PaaS から IaaS へ接続できることが確認できました。
