経緯
とあるプログラミングスクール受講生です。
存知の方も多いでしょう「フリマクローンサイト」作成にあたり、出品カテゴリーをajaxで実装しましたので、自分の頭の整理を兼ねてまとめていきたいと思います。
なお、カテゴリーの設定は「ancestry」というGemを使用しております。
今回の記事につきましては、カテゴリー設定後を想定しております。
※説明が必要ない方はコードのみ追ってもらえれば実装できると思います。
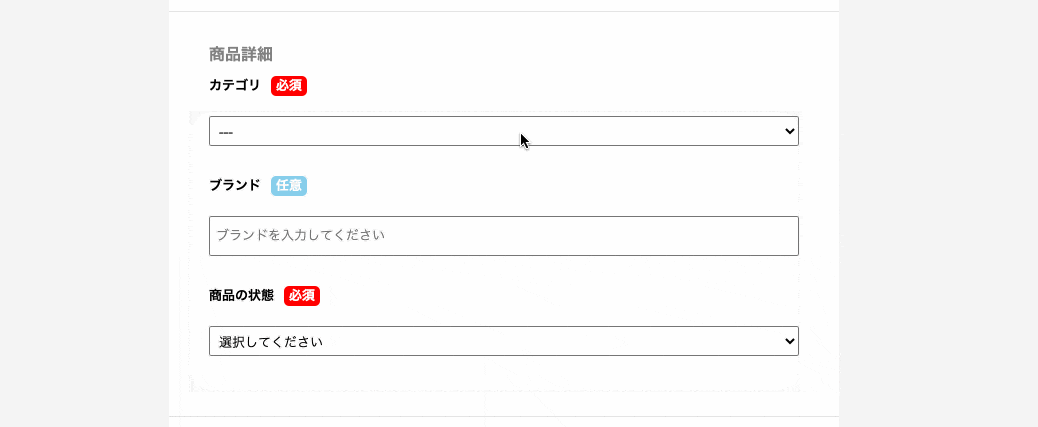
完成イメージ
コード
.form-title
  =f.label "カテゴリ"
  .form-title__required
    %label 必須
.form-input-select
  = f.select :category, @category_parent_array, {}, {class: 'listing-select-wrapper__box--select', id: 'parent_category'}
.listing-product-detail__category
- 今回、重要なのは下3行のみです。他はご自由に。
- = f.select :category, @category_parent_array, {}, {class: 'listing-select-wrapper__box--select', id: 'parent_category'}
の {} は超重要ですので消さないでください。
→ 軽く触れておきます。{}の部分が2つありますね。**一つ目が「オプション」**の記載、**二つ目(今回記載がある方)が「HTMLオプション」**となります。
「オプション」を設定しない場合は空欄でも{}の記載しておかないと、「HTMLオプション」が反映されません。
  def new
    @category_parent_array = ["---"]
    Category.where(ancestry: nil).each do |parent|
      @category_parent_array << parent.name
    end
  end

  def get_category_children
    @category_children = Category.find_by(name: "#{params[:parent_name]}", ancestry: nil).children
  end

  def get_category_grandchildren
    @category_grandchildren = Category.find("#{params[:child_id]}").children
  end
デモを見てもらうと、カテゴリーが三段階で表示されているのが確認できると思います。
・ 一段目の表示がnew
・ 二段目の表示がget_category_children
・ 三段目の表示がget_category_grandchildren
となっております。
複雑な部分はnewのコードでしょうか。
@category_parent_array に "---" しか入っていない配列を代入していますね。
次の行のeach文で先ほど設定した@category_parent_arrayの配列にカテゴリを1件ずつ代入しています。
(ancestry: nil)につきましては、「ancestry」でカテゴリーを設定した後に保存データを確認してみてください。意味がわかると思います。
二段落目、三段落目の記載はajaxでの処理となりますので、アクションを分けています。
params[:parent_name]、params[:child_id]については、ajaxでJavaScriptから飛んでくる値です。
あとで設定しますので、覚えておきましょう。
 resources :items do
    collection do
      get 'get_category_children', defaults: { format: 'json' }
      get 'get_category_grandchildren', defaults: { format: 'json' }
    end
  end
先ほどコントローラーで出てきた2つのajax用アクションを設定しています。
itemsにネストしております。
軽くcollectionについて簡単すると、routingにidが付くのがmember、付かないのがcollectionです。
今回は、「個(id)」を特定する必要がないので、collectionですね。
コントローラーは基本的に処理をビューに返すのですが、
defaults: { format: 'json' }の設定をしておくと、デフォルトでjsonファイルに処理を返すようになります。
(コントローラーでrespond_toを使用してjsonファイルに振り分ける必要が無くなります。)
json.array! @category_children do |child|
  json.id child.id
  json.name child.name
end
json.array! @category_grandchildren do |grandchild|
  json.id grandchild.id
  json.name grandchild.name
end
ファイルの場所、間違えないでくださいね!!ビューと同じ場所に格納します。
コントローラーで二段落目、三段落目のアクション処理を行うと、このjsonファイルに飛びます。
(routes.rbで先ほど設定しましたね。)
コントローラーで設定した変数をここでajax用データに変換している訳ですね。
ちなみに、**json.array!**は配列形式のデータをコントローラーから受け取る時に設定します。
ajax処理の流れは、
ビュー(カテゴリー選択)→JavaScript(発火)→コントローラー(処理)→json.jbuilder(データ変換)→JavaScript(処理)→ビュー
の繰り返し(と認識しています)。
さて、最後にJavaScriptのお出ましです。
$(function)(){

  //子カテゴリー、孫カテゴリーのセレクトボックスの選択肢
  function appendOption(category){
    //value="${category.name}"については、ストロングパラメーターでの値の取り方によってcategory.idの場合もあると思います。
    var html = `<option value="${category.name}" datacategory="${category.id}">${category.name}</option>`;
    return html;
  }

  //子カテゴリーのビュー作成
  function appendChildrenBox(insertHTML){
    var childSelectHtml = '';
    childSelectHtml = `<div class='listing-select-wrapper__added' id= 'children_wrapper'>
                        <div class='listing-select-wrapper__box'>
                          <select class="listing-select-wrapper__box--select" id="child_category" name="category_id">
                            <option value="---" data-category="---">---</option>
                            ${insertHTML}
                          <select>
                        </div>
                      </div>`;
    $('.listing-product-detail__category').append(childSelectHtml);
  }

 //孫カテゴリーのビュー作成
  function appendGrandchildrenBox(insertHTML){
    var grandchildSelectHtml = '';
    grandchildSelectHtml = `<div class='listing-select-wrapper__added' id= 'grandchildren_wrapper'>
                              <div class='listing-select-wrapper__box'>
                                <select class="listing-select-wrapper__box--select" id="grandchild_category" name="category_id">
                                  <option value="---" data-category="---">---</option>
                                  ${insertHTML}
                                </select>
                              </div>
                            </div>`;
    $('.listing-product-detail__category').append(grandchildSelectHtml);
  }

  //親カテゴリーが選択された時の処理(子カテゴリーの表示)
  $("#parent_category").on('change', function(){
    //選択された親カテゴリーの値を取得
    var parentCategory = document.getElementById('parent_category').value;
    //選択された親カテゴリーが"---"(初期設定)のままだとfalse、変わっているとtrue
    if (parentCategory != "---"){
      $.ajax({
        url: 'get_category_children',
        type: 'GET',
        //コントローラーに飛ばす値です。
        data: { parent_name: parentCategory },
        dataType: 'json'
      })
      .done(function(children){
        //まず、既に表示されている子、孫カテゴリーを削除
        $('#children_wrapper').remove();
        $('#grandchildren_wrapper').remove();
        //insertHTMLという変数にカテゴリーのセレクトボックスの選択肢を入れる。(一番最初の段落で設けた変数)
        var insertHTML = '';
        children.forEach(function(child){
          insertHTML += appendOption(child);
        });
        //2段落目で設定した子カテゴリーのビューの呼び出し
        appendChildrenBox(insertHTML);
      })
      .fail(function(){
        alert('カテゴリー取得に失敗しました');
      })
    }else{
      $('#children_wrapper').remove();
      $('#grandchildren_wrapper').remove();
    }
  });

  //子カテゴリーが選択された時の処理(孫カテゴリーの表示)
  $('.listing-product-detail__category').on('change', '#child_category', function(){
    var childId = $('#child_category option:selected').data('category');
    if (childId != "---"){
      $.ajax({
        url: 'get_category_grandchildren',
        type: 'GET',
        data: { child_id: childId },
        dataType: 'json'
      })
      .done(function(grandchildren){
        if(grandchildren.length != 0) {
          $('#grandchildren_wrapper').remove();
          $('#size_wrapper').remove();
          $('#brand_wrapper').remove();
          var insertHTML = '';
          grandchildren.forEach(function(grandchild){
            insertHTML += appendOption(grandchild);
          });
          appendGrandchildrenBox(insertHTML);
        }
      })
      .fail(function(){
        alert('カテゴリー取得に失敗しました');
      })
    }else{
      $('#grandchildren_wrapper').remove();
      $('#size_wrapper').remove();
      $('#brand_wrapper').remove();
    }
  });
});
はい。言いたいことはわかります。私、エスパーですから。
そんな皆さんに私から頑張れという便利な言葉を送ります。
ここにつきましてはあまりに長いので、コードにコメントアウトで処理の説明をしています。
イマイチわかりにくかったら各自調べてもらえればと思います。
だらだらと長い記事を最後まで読んでいただき、ありがとうございました。
○○キャンプの受講生はLGTM必須で。
参考とさせていただいたサイト
https://qiita.com/ATORA1992/items/bd824f5097caeee09678
@ATORA1992様(とてもわかりやすい記事でした。ありがとうございました!!)