Spotifyで聴いている歌をSlackのステータスに自動で反映したいという話を知人から聞きつけ、実装しました。
Spotifyの公式Web API を読み、Google apps script(GAS)を用いて、自動連携してみます。
この記事のゴール
- Spotify で今聴いている曲を Slack のステータスに反映できるようになる
- Google Apps Script の使い方が分かるようになる
- API の仕組みと実装方法が少し分かるようになる
必要な手順
1. Spotify の開発者画面にログイン
https://developer.spotify.com/dashboard/login
自分の Spotify アカウントを使ってログインしてください。
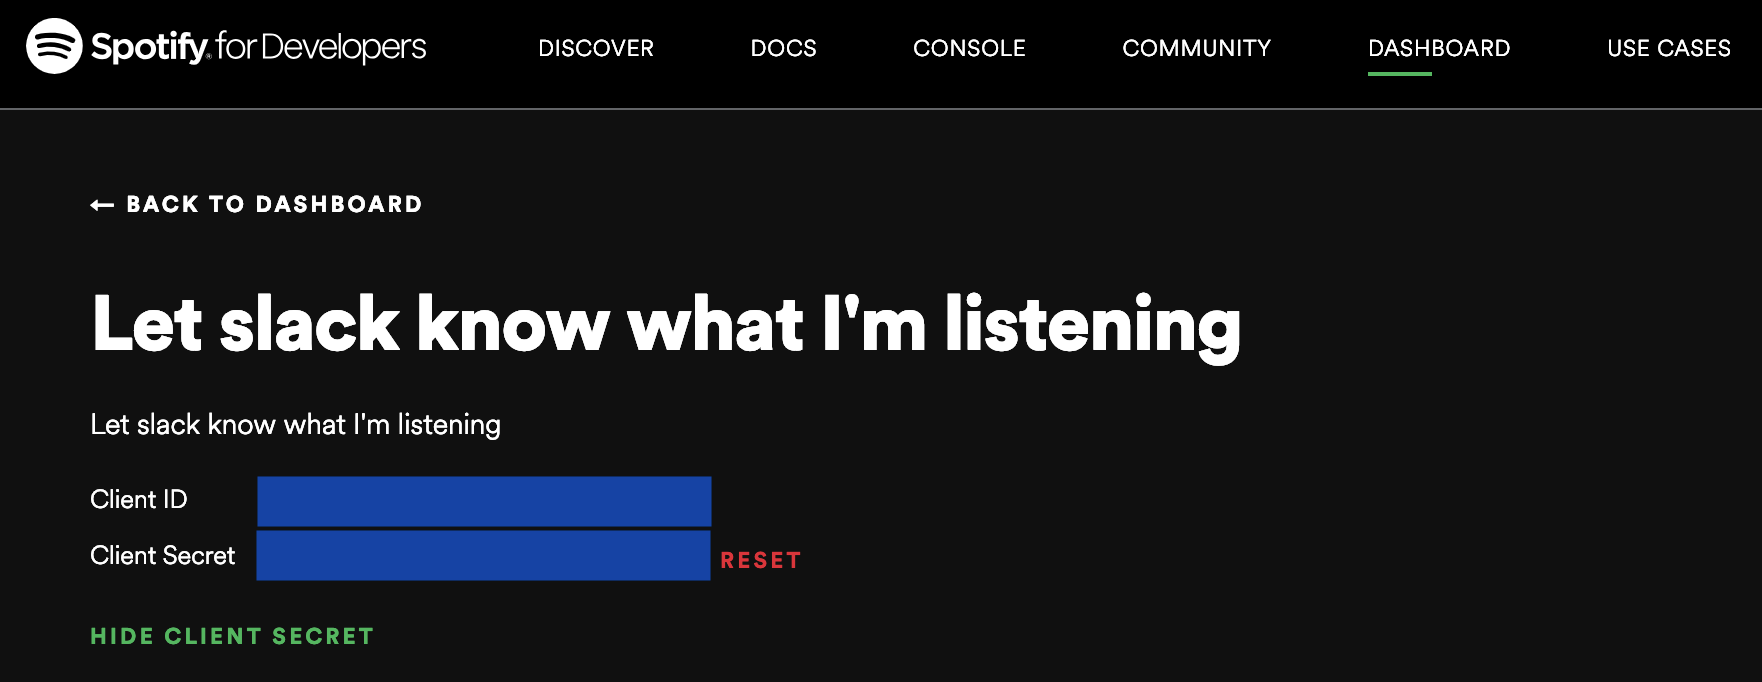
2. Dashboard から Client ID を取得
"Create A Client ID" というボタンをクリックし、Client ID を取得します。
Client ID と Client Secret を取得できますので、控えてください。
3. Slack のトークンを取得
こちらの記事を参考にさせていただきました。
https://qiita.com/ykhirao/items/3b19ee6a1458cfb4ba21
このアプリケーションでは、users.profile:write, users:readのスコープが必要となります。
4. Slack の ユーザID を取得
ブラウザにて、https://slack.com/api/users.list?token={3で取得したSlackのトークン} とすることで、メンバーの情報を一覧で取得できます。
公式のドキュメントはこちら: https://api.slack.com/methods/users.list
5. Spotify の authrization code を取得
Spotify の API を使うためには、初回だけ認証が必要になります。
※プログラムによる自動実行はできないようでした。
以下のURLをクリックし、認証してください。
https://accounts.spotify.com/authorize?response_type=code&scope=user-read-currently-playing&redirect_uri=https://example.com/callback&client_id={1で取得したClient ID}
遷移した先のURLの code= 以降が authorization code になります。:
URL例: https://example.com/callback?code={ランダムな文字列}
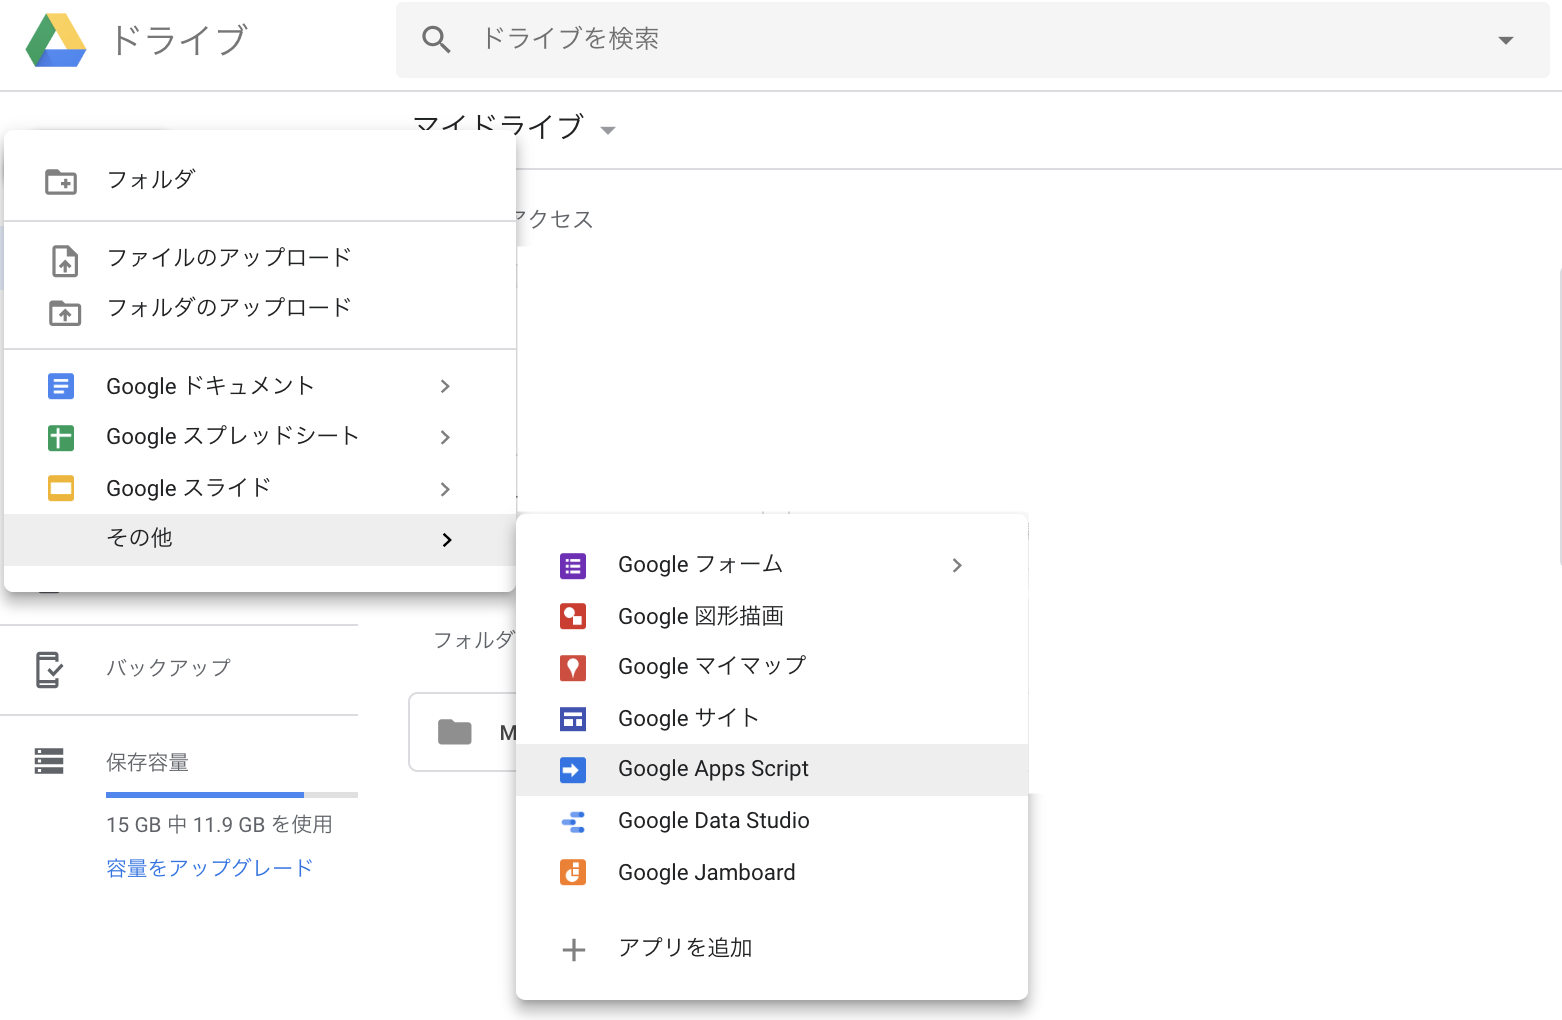
6. Google Apps Script で新たなプロジェクトを作成
Google Drive にアクセスし、新規プロジェクトを作成します。
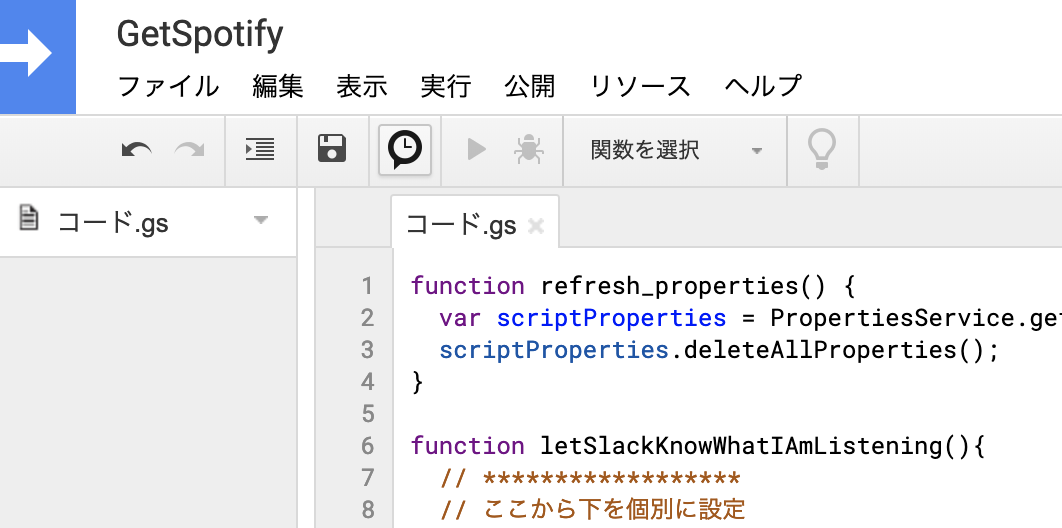
7. コードを設定
以下のコードを GAS にコピペしてください。
※うまく動作していると生じ得ないエラーのハンドリングはしていません。
※setSlackStatusFromSpotifyApp, setSlackStatus内で指定された部分にはこれまでに取得したコードを入力してください。
※slack_emojiはお使いのアカウントで有効なものを指定してください。ここでは:spotify1:としています。
function setSlackStatusFromSpotifyApp(){
  // ******************
  // ここから下を個別に設定
  const client_id = "2で取得したSpotifyのclient ID";
  const client_secret = "2で取得したSpotify のclient secret";
  const slack_user_id = "4で取得したslackのuser_id";
  const authorization_code = "5で取得したauthorization code";
  const basic_authorization = Utilities.base64Encode(client_id+":"+client_secret); // 変更不要
  // ここから上を個別に設定
  // ******************

  // Spotify へのアクセストークンを取得
  const scriptProperties = PropertiesService.getScriptProperties();
  const is_first_access = Object.keys(scriptProperties.getProperties()).length == 0;
  const access_token = is_first_access ? getFirstAccessTokenToSpotify(authorization_code, basic_authorization) : scriptProperties.getProperty('access_token');

  // 聞いている曲を Slack の Status へ反映
  const now_playing = getNowPlaying(access_token, basic_authorization);
  switch (now_playing) {
    case null: // 何も聞いていない
      setSlackStatus(slack_user_id, "", "");
      break;
    default: // now listening
      setSlackStatus(slack_user_id, now_playing, ":spotify1:");
      break;
  }
}

function getFirstAccessTokenToSpotify(authorization_code, basic_authorization) {
   const headers = { "Authorization": "Basic " + basic_authorization };
   const payload = {
     "grant_type": "authorization_code",
     "code": authorization_code,
     "redirect_uri": "https://example.com/callback"
   };
   const options = {
     "payload": payload,
     "headers": headers,
   };
   const response = UrlFetchApp.fetch("https://accounts.spotify.com/api/token", options);

   const parsedResponse = JSON.parse(response);
   const scriptProperties = PropertiesService.getScriptProperties();
   scriptProperties.setProperties({
    'access_token': parsedResponse.access_token,
    'refresh_token': parsedResponse.refresh_token
   });
   return parsedResponse.access_token;
}

function refreshAccessTokenToSpotify(basic_authorization) {
  const scriptProperties = PropertiesService.getScriptProperties();
  const refresh_token = scriptProperties.getProperty('refresh_token');

  const headers = {
    "Authorization": "Basic " + basic_authorization,
    "Content-Type": "application/x-www-form-urlencoded"
  };
  const payload = {
     "grant_type": "refresh_token",
     "refresh_token": refresh_token
  };
  const options = {
    "payload": payload,
    "headers": headers,
  };
  const response = UrlFetchApp.fetch("https://accounts.spotify.com/api/token", options);

  const parsedResponse = JSON.parse(response);
  scriptProperties.setProperty('access_token', parsedResponse.access_token);
  // refresh_token は毎回発行されるとは限らない
  if (parsedResponse.refresh_token) {
    scriptProperties.setProperty('refresh_token', parsedResponse.refresh_token);
  }
  return parsedResponse.access_token;
}

function getNowPlaying(access_token, basic_authorization) {
   const options = {
     "headers": { "Authorization": "Bearer " + access_token },
     "muteHttpExceptions": true // 401エラーへの対応のため
   };
   const response = UrlFetchApp.fetch("https://api.spotify.com/v1/me/player/currently-playing", options);

   switch (response.getResponseCode()) {
     case 200: // Spotify の曲をセット
       return getArtistAndSongString(response);
     case 204: // 何も聞いていない
       return null;
     case 401: // access_token が切れた
       const refreshed_access_token = refreshAccessTokenToSpotify(basic_authorization);
       return getNowPlaying(refreshed_access_token, basic_authorization);
     default:
       // 実行されない想定
   }
}

function setSlackStatus(slack_user_id, status_text, status_emoji) {
  const profile = { "status_text": status_text,"status_emoji": status_emoji };
  const encodedProfile = encodeURIComponent(JSON.stringify(profile));
  const token = "3で取得したSlackのトークン";
  const options = {
    "user": slack_user_id,
    "headers": {
       "Authorization": "Bearer "+token,
       "content-type": "application/json"
     }
  };
  UrlFetchApp.fetch('https://slack.com/api/users.profile.set?token="+token+"&profile='+encodedProfile, options);
}

function getArtistAndSongString(response) {
   const parsedResponse = JSON.parse(response);
   const artist = parsedResponse.item.album.artists[0].name;
   const song = parsedResponse.item.album.name;
   return artist+"/"+song;
}
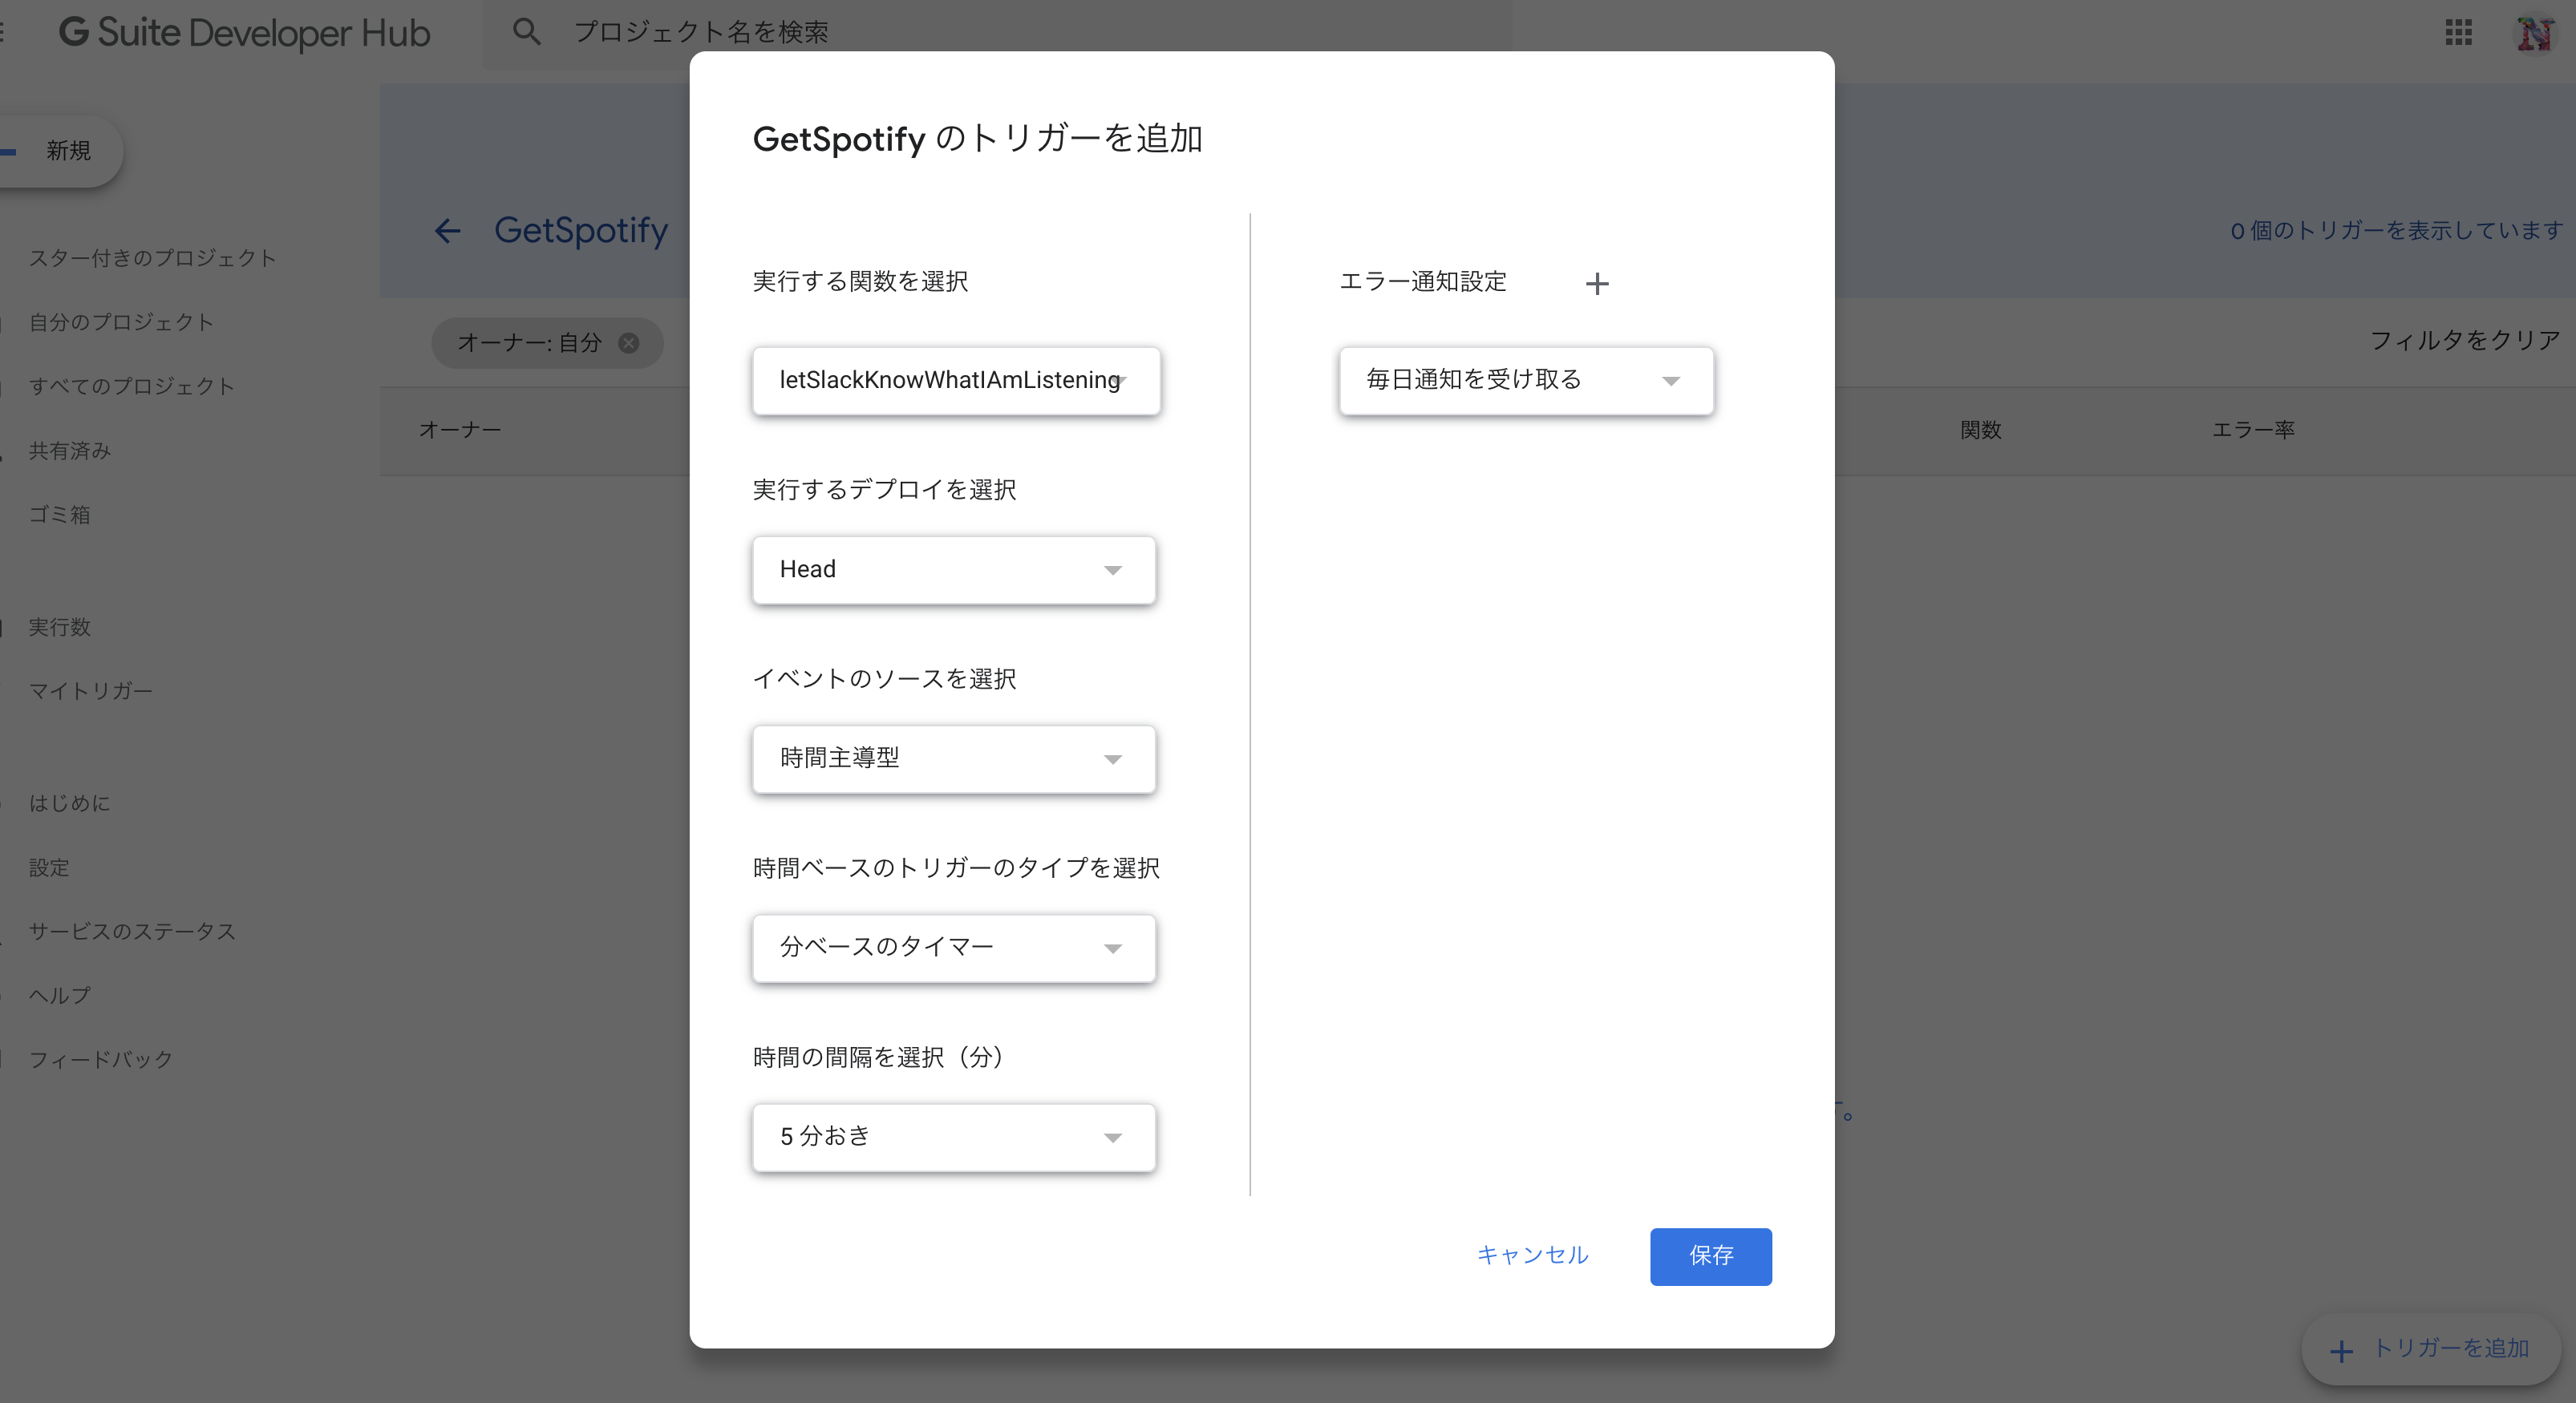
8. タイマーを設定
時計マークをクリックすると、実行タイミングをセットすることができます。
「トリガーを追加」から、letSlackKnowWhatIAmListeningを選択し、時間の間隔も指定します。
ここでは5分おきとでもしておきましょう。
これにて完了です。
解説
ここから先は、技術に興味がある方のみが対象です。
連携の概要
詳しいフローは以下をご確認ください。
https://developer.spotify.com/documentation/general/guides/authorization-guide/#authorization-code-flow
Spotify の API を使用するためには、認証情報を送る必要があります。
仕組みは以下の通りです。
①authorization code を用い、APIを使えるユーザであることを認証 -> access token, refresh token を入手
②access token は1時間だけ有効 -> 無効になると、refresh token を使って access token を再取得(以後繰り返し)
ちなみに、access token を再取得する際、新たな refresh token も入手できた場合には、次回以降それを使うとよいようです。
個別の解説1)初めてのアクセストークンを取得
初回の認証時のみで使います。
GAS では UrlFetchApp.fetchメソッドを用いて、APIを叩きます。
第一引数に指定されたURLを、第二引数に欲しい情報などを指定します。
ここでは、headers, payloadにそれぞれ認証情報を指定しています。
※redirect_uriは、上記5のURLにあるものと同一である必要があります。
パラメーターとして何を渡す必要があるかは、連携先のサービスことに異なるため、
APIドキュメントを確認する必要があります。
取得できた access token, refresh token は今後も使い続ける必要があるので、実行後も保存している必要があります。
通常 GAS では実行するたびに変数が初期化されるので、ここでは PropertiesService という GAS のオブジェクトを利用しました。
参考:https://developers.google.com/apps-script/guides/properties
function getFirstAccessTokenToSpotify(authorization_code, basic_authorization) {
   const headers = { "Authorization": "Basic " + basic_authorization };
   const payload = {
     "grant_type": "authorization_code",
     "code": authorization_code,
     "redirect_uri": "https://example.com/callback"
   };
   const options = {
     "payload": payload,
     "headers": headers,
   };
   const response = UrlFetchApp.fetch("https://accounts.spotify.com/api/token", options);

   const parsedResponse = JSON.parse(response);
   const scriptProperties = PropertiesService.getScriptProperties();
   scriptProperties.setProperties({
    'access_token': parsedResponse.access_token,
    'refresh_token': parsedResponse.refresh_token
   });
   return parsedResponse.access_token;
}
個別の解説2)Spotifyで聴いている曲を取得
Spotify で今聴いている曲を取得します。
optionsのmuteHttpExceptionsは、APIコールでエラーが返ってきても処理を続けるかどうかを指定しています。
アクセストークンが切れた際に401エラーが返ってきてしまうので、ここではエラーを無視するよう設定します。
アクセストークンが切れた場合には、再度アクセストークンを取得し直す必要があり、取得後に再帰的にこの関数を実行しています。
function getNowPlaying(access_token, basic_authorization) {
   const options = {
     "headers": { "Authorization": "Bearer " + access_token },
     "muteHttpExceptions": true // 401エラーへの対応のため
   };
   const response = UrlFetchApp.fetch("https://api.spotify.com/v1/me/player/currently-playing", options);

   switch (response.getResponseCode()) {
     case 200: // Spotify の曲をセット
       return getArtistAndSongString(response);
     case 204: // 何も聞いていない
       return null;
     case 401: // access_token が切れた
       const refreshed_access_token = refreshAccessTokenToSpotify(basic_authorization);
       return getNowPlaying(refreshed_access_token, basic_authorization);
     default:
       // 実行されない想定
   }
}
個別の解説3)アクセストークンの再取得
アクセストークンの有効期限が切れると、refresh tokenを用いて新たなアクセストークンを取得する必要があります。
以下のように、個別の解説1で保存しているrefresh tokenを使います。
先にも述べたとおり、refresh tokenは毎回返ってくるわけではないようなので、発行された時だけ保存するようにします。
※refresh tokenの詳細は以下の通り、公式のドキュメントより抜粋
A token that can be sent to the Spotify Accounts service in place of an authorization code. (When the access code expires, send a POST request to the Accounts service /api/token endpoint, but use this code in place of an authorization code. A new access token will be returned. A new refresh token might be returned too.)
function refreshAccessTokenToSpotify(basic_authorization) {
  const scriptProperties = PropertiesService.getScriptProperties();
  const refresh_token = scriptProperties.getProperty('refresh_token');

  const headers = {
    "Authorization": "Basic " + basic_authorization,
    "Content-Type": "application/x-www-form-urlencoded"
  };
  const payload = {
     "grant_type": "refresh_token",
     "refresh_token": refresh_token
  };
  const options = {
    "payload": payload,
    "headers": headers,
  };
  const response = UrlFetchApp.fetch("https://accounts.spotify.com/api/token", options);

  const parsedResponse = JSON.parse(response);
  scriptProperties.setProperty('access_token', parsedResponse.access_token);
  // refresh_token は毎回発行されるとは限らない
  if (parsedResponse.refresh_token) {
    scriptProperties.setProperty('refresh_token', parsedResponse.refresh_token);
  }
  return parsedResponse.access_token;
}
個別の解説4)Slackのステータスを設定
公式のドキュメントを参考にし、ステータスを設定します。
https://api.slack.com/methods/users.profile.set
このメソッドでは、profileをURLエンコードしている必要がありました。
optionsにprofileを指定する形はどうもうまくいかず、紆余曲折あり、今の形に落ち着きました。
別の方法でもいけるよ、ということがありましたらご教示くださいm(__)m
※slackのトークンには各自取得した値を設定してください。
※status_text, status_emojiは同時に指定する必要があります。
function setSlackStatus(slack_user_id, status_text, status_emoji) {
  const profile = { "status_text": status_text,"status_emoji": status_emoji };
  const encodedProfile = encodeURIComponent(JSON.stringify(profile));
  const token = "3で取得したslackのトークン";
  const options = {
    "user": slack_user_id,
    "headers": {
       "Authorization": "Bearer "+token,
       "content-type": "application/json"
     }
  };
  UrlFetchApp.fetch('https://slack.com/api/users.profile.set?token="+token+"&profile='+encodedProfile, options);
}