はじめに
Proxmox の SDN を利用して、Simple Zone を構築するメモ
VMWareなどでnat環境を構築するのと一緒
Simple Zone の作成
以下の構成で作成する

インストール
# apt install dnsmasq -y
# systemctl disable --now dnsmasq
# apt install frr-pythontools -y
Zone/VNet/Subnet の作成
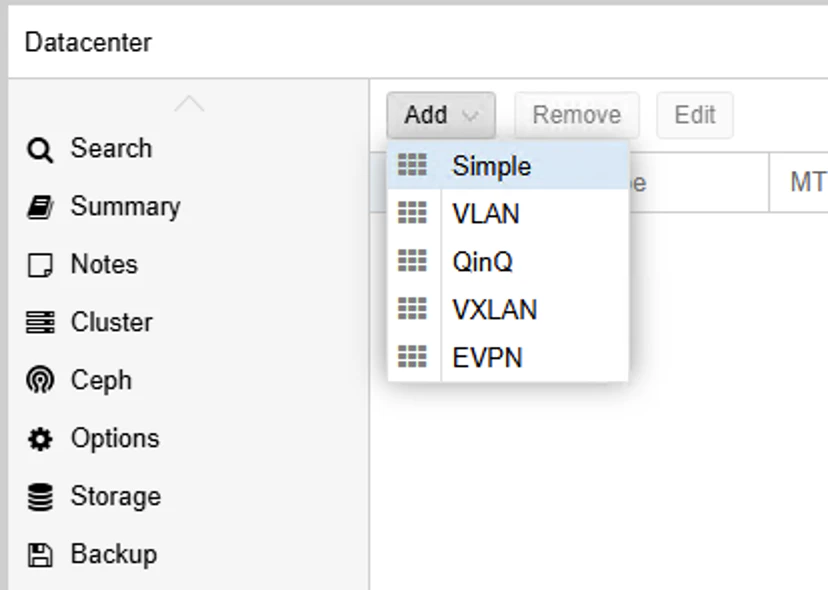
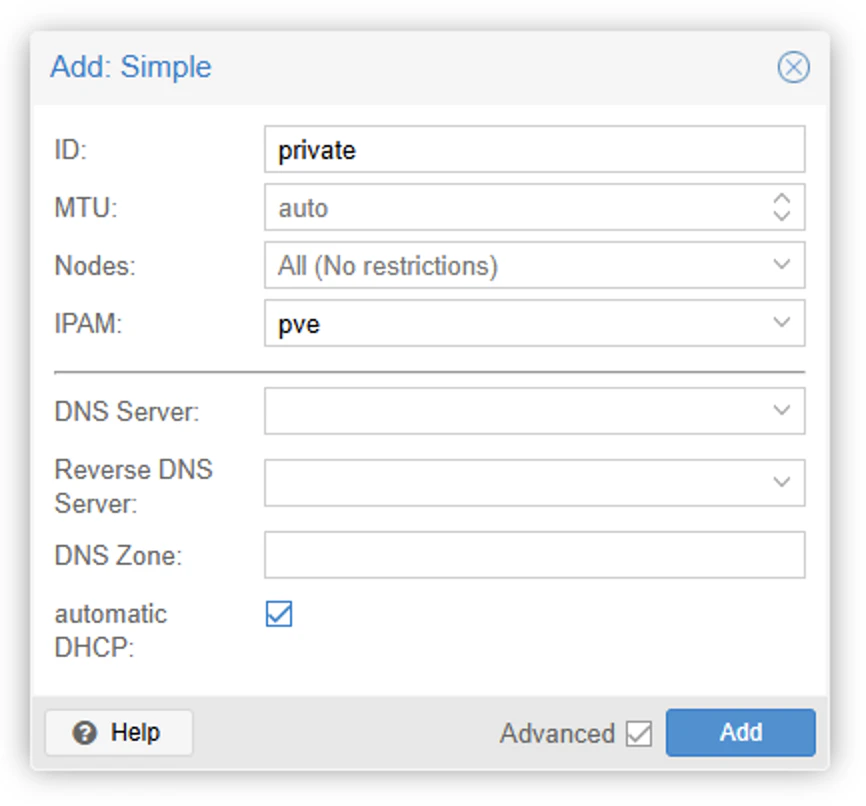
Datacenter → SDN → Zones → Add
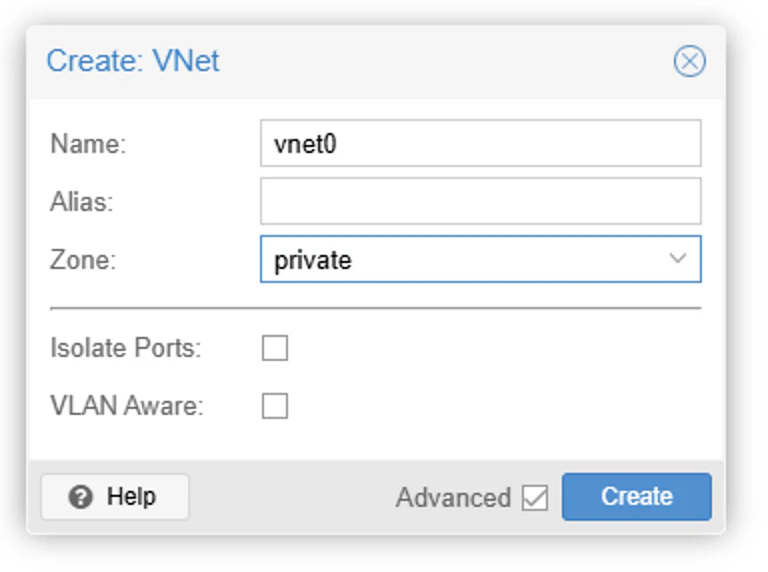
Datacenter → SDN → VNets → VNets → Create
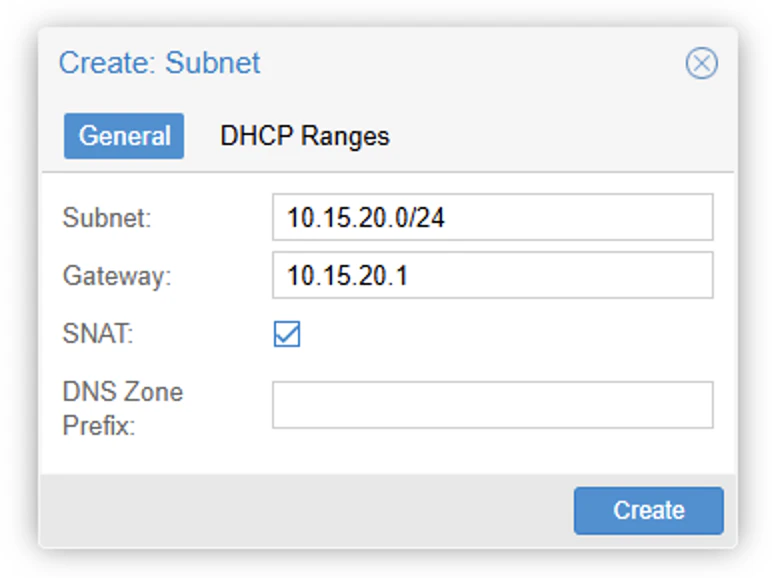
Datacenter → SDN → VNets → Subnets → Create


Datacenter → SDN → Status → Apply

avaliable になるのを待つ
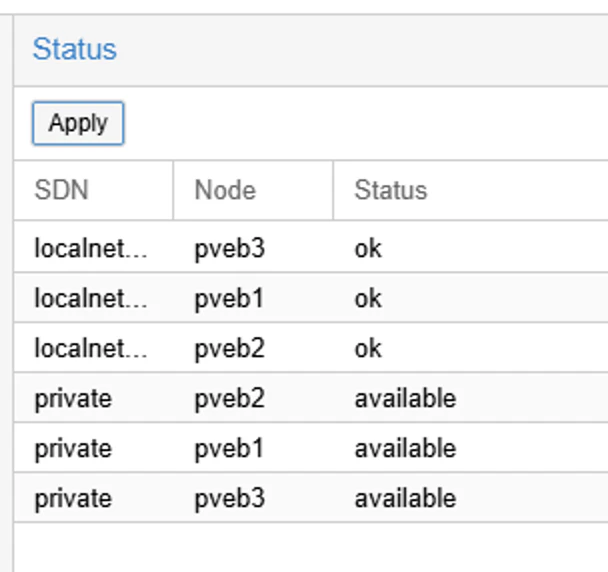
Taskにエラーがでていなければ作成完了

Firewall設定
DHCPFwd ルールの追加
Datacenter → Firewall → Add

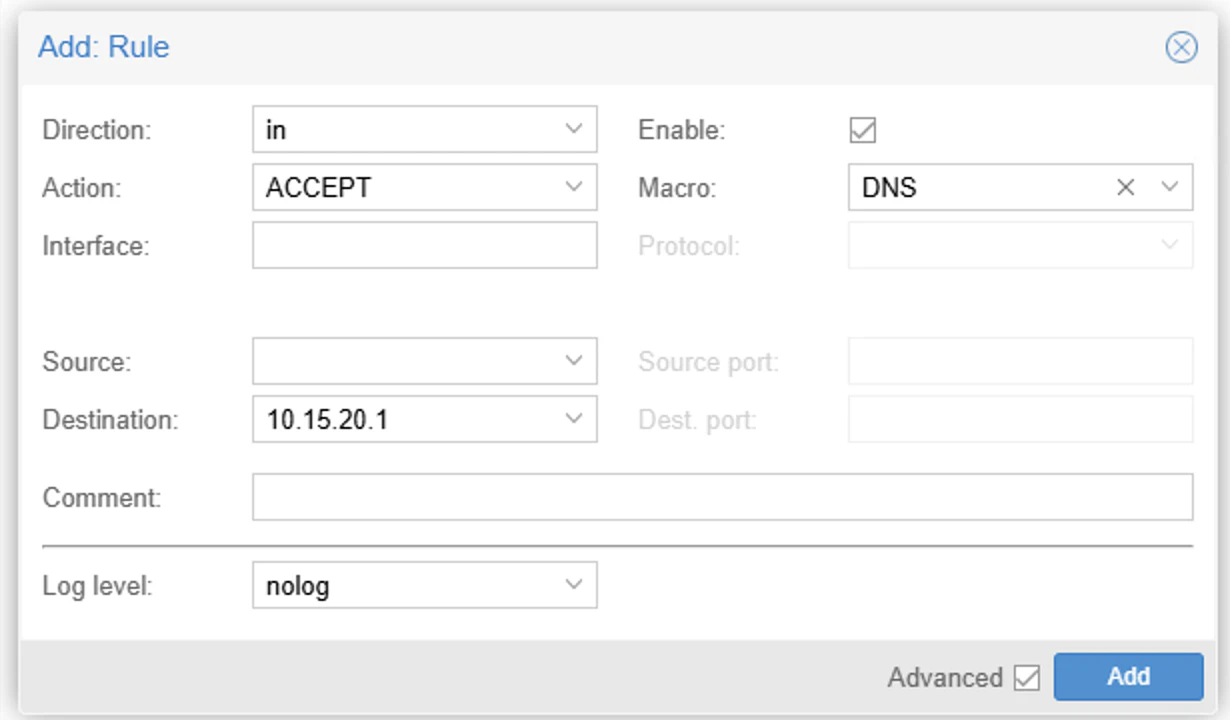
DNS ルールの追加
Datacenter → Firewall → Add
確認

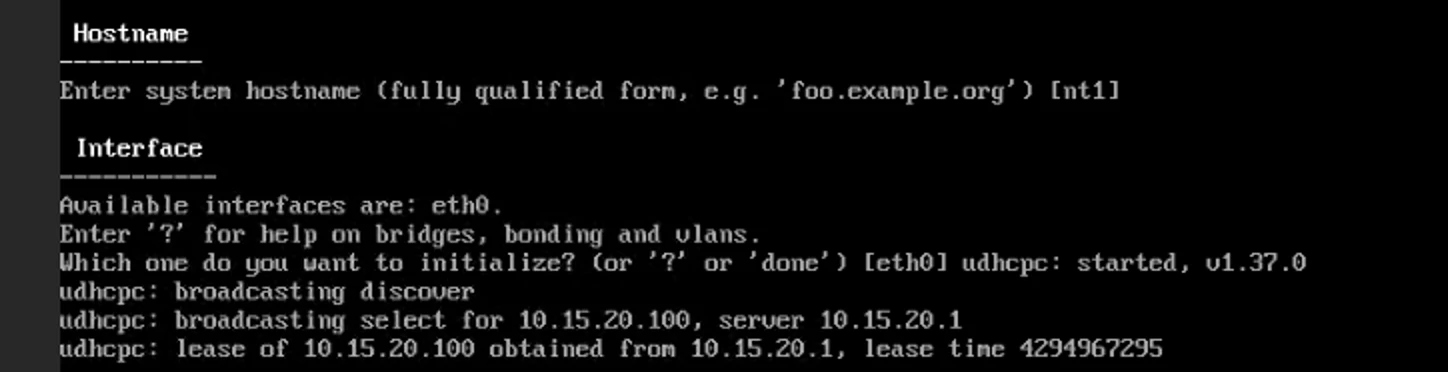
VMからの利用
DHCPにすることでIPなどを取得できる
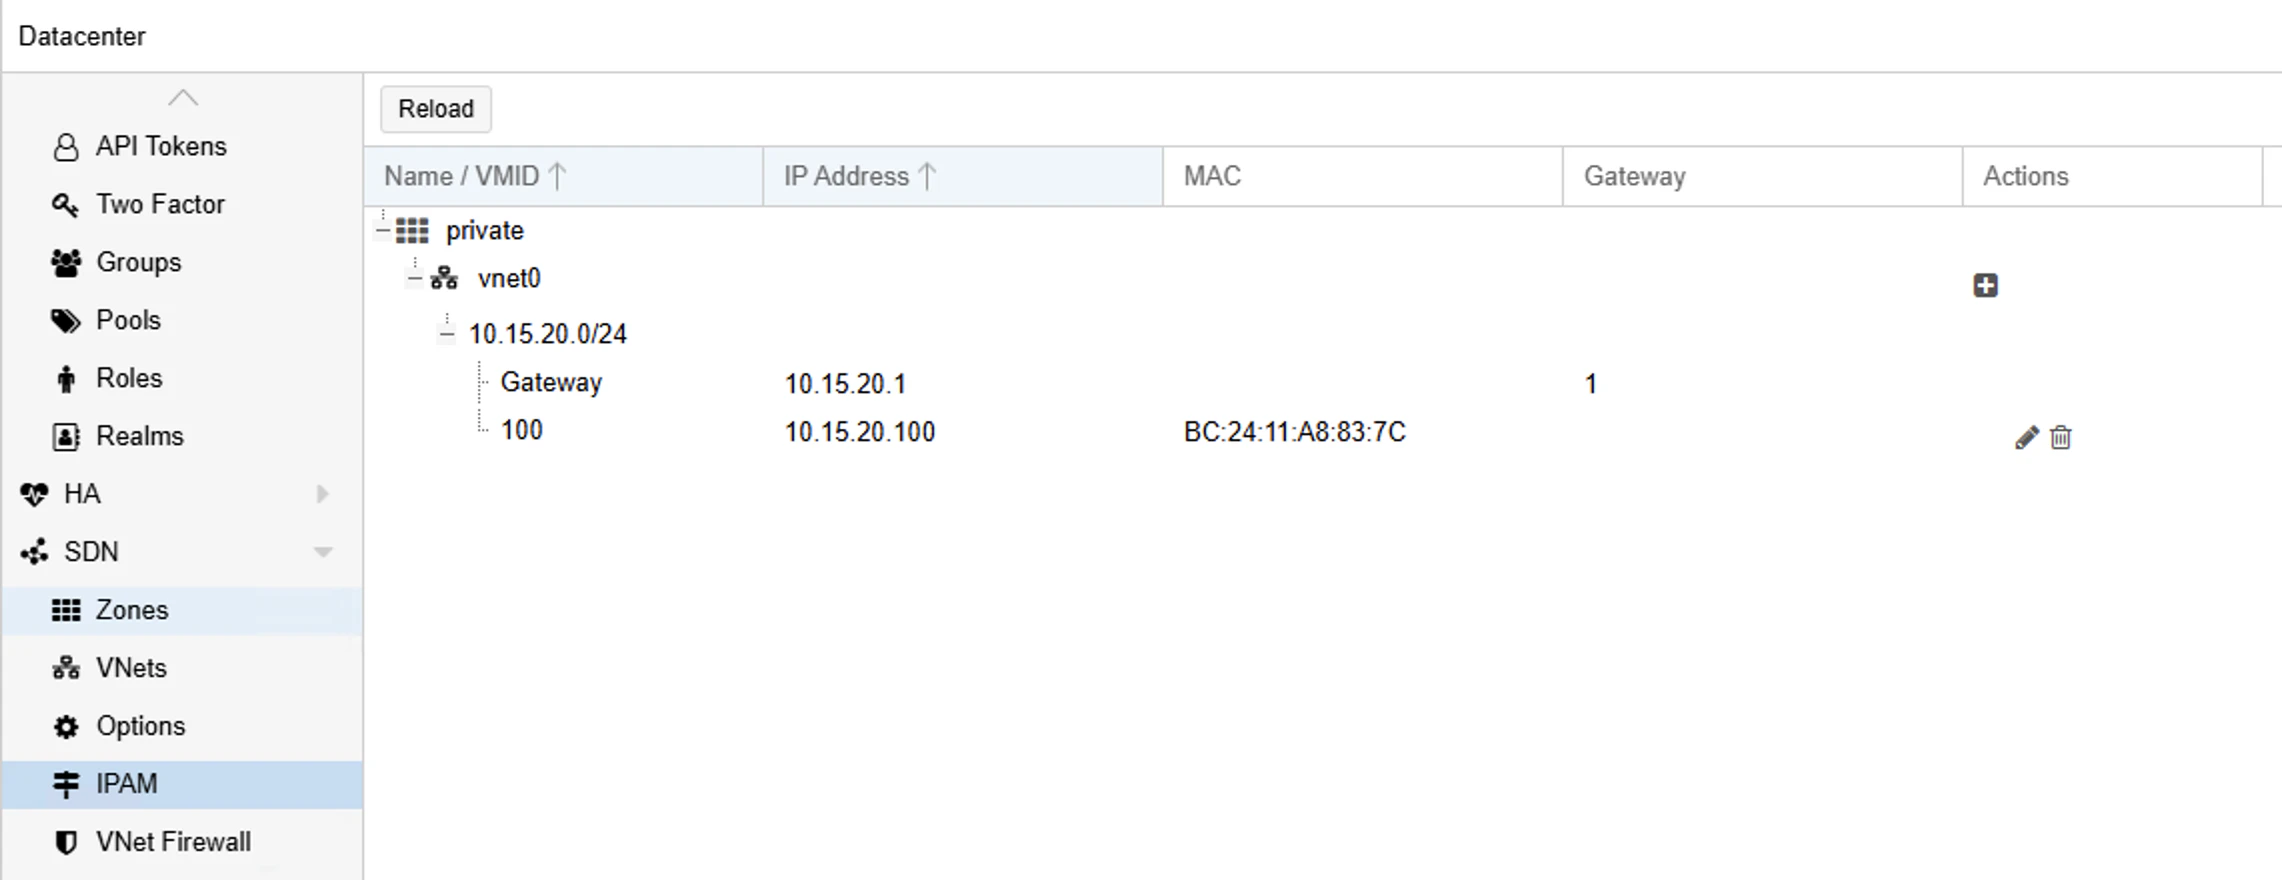
IPAMからの確認
その他
Proxmox上で、Linux Bridge を利用せずに、Open vSwitch を利用してネットワークを構築している場合は、上記の手順だけではうまくいかない。
IPAM上ではDHCPからIPが割り振られているように見えるが、VMからは見えない。
MACアドレスなども一致するので、VMにDHCPのレスポンスが届いていないように見える。
クラスタのfirewall設定でも、udp:67 を Direction: in、Action: ACCEPT で許可する必要がある。
また、外部と通信するためには、proxmox側で、カーネルパラメータ net.ipv4.ip_forward=1 にした上で、クラスタのfirewallでつような通信をACCEPTに設定する必要がある。
root@pve:~# sysctl -a | grep ip_forward
net.ipv4.ip_forward = 1
net.ipv4.ip_forward_update_priority = 1
net.ipv4.ip_forward_use_pmtu = 0

よくわからない状況になったら、落ち着いて、VMが動作しているProxmo上で、iptables -t nat -Sや、sysctl -a | grep ip_forward 、tcpdumpでどこまで届いているのか、などを順番に確認すると良い。
リンク
- Proxmox - Setup Simple Zone With SNAT and DHCP
- reddit - VMs on SDN with dhcp are not being assigned IPs
- Proxmox VE 8.1で標準搭載になったSDNを試す〜EVPNゾーンを使って仮想マシン間で通信させてみた
さいごに
かんたんでしたね