概要
djangoのリモートデバッグ環境をdocker-composeで構築します。
実行サーバーはgunicornで、リモートデバッグはpycharmのデバッグサーバーを使います。
簡単なview関数を作成、ブレークポイントを貼り、実行時に一時停止させるのを
目標とします。
調べるとqiitaにはvscodeでの記事がありました。
この記事は下記のpycharm版となります。
Docker上で動くgunicorn + DjangoアプリケーションをVS Codeからリモートデバッグする
環境の詳細を下記に記載します。
| 項目名 | 詳細 |
|---|---|
| webサーバー | nginx:1.17.7 |
| DB | mariadb:10.1 |
| アプリケーションサーバー | gunicorn:20.0.4 |
| フレームワーク | django:3.0 |
| デバッグ用IDE | pycharm pro 2020.3 |
前提条件
- mac
- docker for mac
- pycharm professional
ディレクトリ構成
.
├── gunicorn
│   ├── src
│   ├── Dockerfile
│   └── requirements.txt
├── mariadb
│   ├── data
│   └── sql
│       └── init.sql
├── nginx
│   └── conf
│       └── app_nginx.conf
├── static
└── docker-compose.yml
ソース
今回のdjangoリモートデバッグ用のリポジトリを作成しています。
djangoリモートデバッグ用のリポジトリ
djangoの初期処理から実行する場合は「init」ブランチ
このリモートデバッグ環境構築を最後までやった状態は「main」ブランチです。
main(master)ブランチは簡単なview関数を作成し、リモートデバッグできる状態になっています。
下記以降のdjango初期状態から実行する場合はinitブランチを使用してください
リモートデバッグ方式について
pycharmはリモートでデバッグする方法が2つあります。
- リモートインタプリタ
- デバッグサーバー
今回はデバッグサーバーを使います。
この方式はデバッグ用のpythonモジュールが必要なので、
gunicorn(python)が動作するdockerイメージにモジュールを追加する必要があります
pycharm公式ドキュメント: リモート PyCharm によるデバッグ
https://pleiades.io/help/pycharm/remote-debugging-with-product.html
環境構築
デバッグ用モジュールをdockerイメージに追加
上で触れてる通り、デバッグ用モジュールのインストールが必要なので、
gunicorn(python)のdockerイメージに処理を追加します。
pycharmを起動し、Add configurationを押下します。
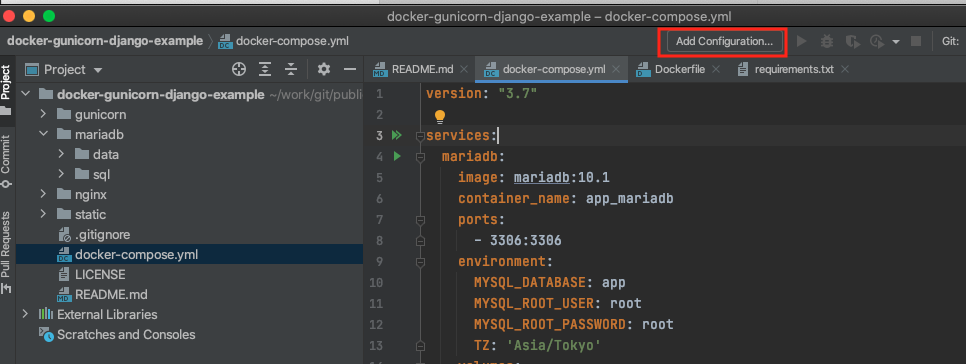
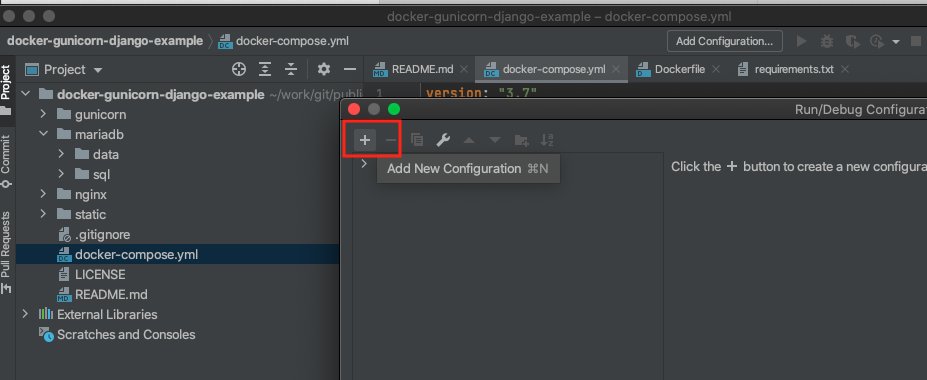
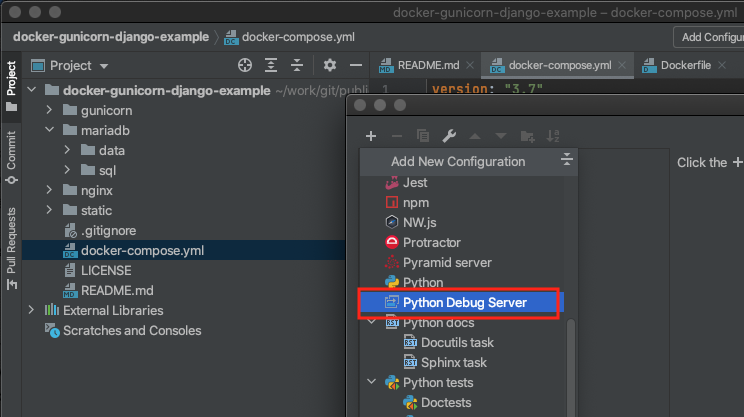
デバッグ用モジュールのインストールコマンドが記載されているのでコピーします。
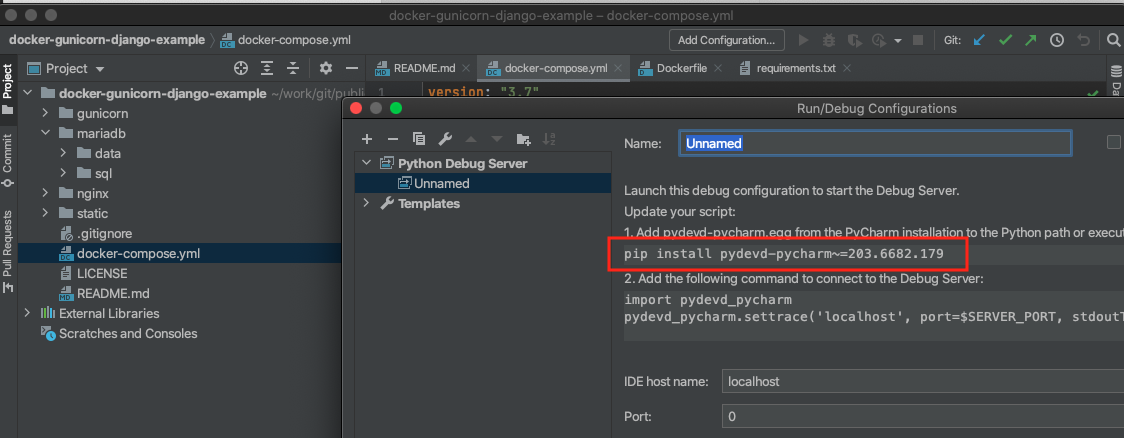
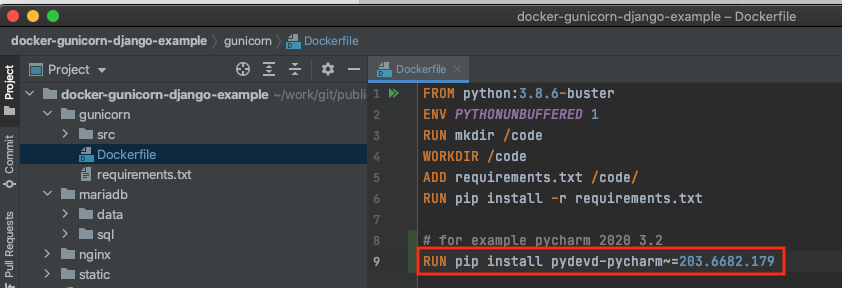
gunicorn/Dockerfileにデバッグ用モジュールのインストール処理を追加します。
djangoプロジェクト作成
docker-compose.ymlがあるディレクトリで下記コマンドを実行します。
※プロジェクト名はtest_project
docker-compose run gunicorn django-admin.py startproject test_project .
djangoアプリケーション作成
docker-compose.ymlがあるディレクトリで下記コマンドを実行します。
※アプリ名はtest_app
docker-compose run gunicorn python manage.py startapp test_app
djangoプロジェクト設定ファイルを更新
settings.py
# 自分のアプリを追加
INSTALLED_APPS = [
    'test_app.apps.TestAppConfig', # 追加した自分のアプリ
    'django.contrib.admin',
    'django.contrib.auth',
    'django.contrib.contenttypes',
    'django.contrib.sessions',
    'django.contrib.messages',
    'django.contrib.staticfiles',
]

: 省略

# mariadb接続設定に変更
DATABASES = {
    'default': {
        'ENGINE': 'django.db.backends.mysql',
        'NAME': 'app',
        'USER': 'root',
        'PASSWORD': 'root',
        'HOST': 'app_mariadb',
        'PORT': '3306',
        'OPTIONS': {
            'charset': 'utf8mb4',
        },
    }
}

: 省略

# 言語を日本語
LANGUAGE_CODE = 'ja'

# タイムゾーン変更
TIME_ZONE = 'Asia/Tokyo'
プロジェクトのurls.py
from django.contrib import admin
from django.urls import path, include

urlpatterns = [
    path('admin/', admin.site.urls),
    path('', include('test_app.urls')),
]
djangoアプリに簡単なview関数作成
アプリのurls.py
from django.urls import path, include
from . import views

app_name = 'test_app'

urlpatterns = [
    path('', views.index, name='index'),
]
views.py
from django.shortcuts import render
from django.http import HttpResponse
from django.views.generic import TemplateView

def index(request):
    test = 100 # 意味のない行。ブレークポイント貼るために処理を記述
    return HttpResponse("test")
pycharmで"Run/Debug Configurations"を作成
PyCharmの "Run/Debug Configurations" の設定で、左上の+ボタンから "Python Remote Debug" を選択します。
デバッグ設定に適当に名前をつけ、host nameとportを設定
| 項目名 | 設定値 |
|---|---|
| host name | host.docker.internal |
| port | 57588 |
次にPath mappingsをクリックし、こちらも設定
| 項目名 | 設定値 | 備考 |
|---|---|---|
| Localpath | macのsrcディレクトリのフルパス | 例: /Users/nosu/work/git/public/docker-gunicorn-django-example/gunicorn/src |
| Remote path | 57588 | port番号は適当です。他とぶつからなければ何でもいいと思います |
django起動時の処理にデバッグサーバー用処理を追加
デバッグサーバーを使用する場合、pycharmとデバッグ対象を通信させる必要があり、
そのためのコードをソースコードに追加する必要があります。
AppConfigクラスのreadyメソッドがdjangoの起動時に初回だけ実行されるので、
ここに処理を追加します
apps.py
from django.apps import AppConfig


class TestAppConfig(AppConfig):
    name = 'test_app'

    def ready(self):
        import pydevd_pycharm
        pydevd_pycharm.settrace(
            'host.docker.internal', port=57588, stdoutToServer=True, stderrToServer=True, suspend=False)
pycharm公式ドキュメント: Python リモートデバッグサーバー構成によるリモートデバッグ
https://pleiades.io/help/pycharm/remote-debugging-with-product.html#remote-debug-config
リモートデバッグ開始
pycharm側でデバッグサーバーのデバッグ開始
pycharmで虫アイコンをクリックし、デバッグサーバーのデバッグを開始します。

デバッグ起動してないと、gunicornのデバッグサーバーの通信が成功しないため、gunicorn(docker)起動前に必ずpycharmでデバッグ開始してください。
pycharm側でデバッグ開始
↓
dockerコンテナを立ち上げ、gunicornがpycharmと通信
docker-composeでdjangoなどのコンテナ立ち上げ
docker-compose.ymlがあるディレクトリで下記コマンドを実行
docker-compose up
作成したview関数にブレークポイント追加
ブラウザからアクセスし、リモートデバッグする
view関数を実行させるため、下記にアクセス
http://localhost:8000/

