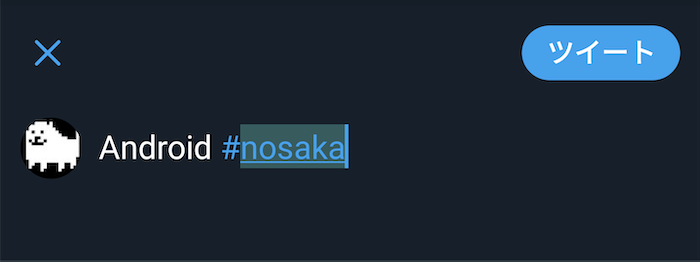
本稿の目的
#から始まるハッシュタグの部分の色が変わり、タップするとハッシュタグの内容に応じたフィードの検索などを行う機能は最近ではあたりまえのUXになっています。
iOSでの文字装飾はNSAttributedStringで行うことが一般的ですが、文字装飾した部分をクリックできるようにしたり、TwitterやFacebookのようにリアルタイムで入力した内容に応じて文字装飾を行うためにはどのように実装するべきかを説明します。
Androidについても記述しています。よろしければどうぞ。
ラベルにハッシュタグの形式に相当する部分を文字装飾する&クリックできるようにする
ハッシュタグの形式に相当する部分を正規表現をして抽出する
文字装飾するにはUITextView.attributedTextに任意のattributeを設定したNSAttributedStringの実装を設定します。
今回では、ハッシュタグの形式に相当する部分を文字装飾するためにNSMutableAttributedStringを使用し、任意の文字列、もしくはすでにUITextViewに設定されている文字列からハッシュタグの形式に相当する部分を正規表現をして抽出し、文字装飾を行います。
extension UITextView {
    /// 「#」から始まるハッシュタグに文字装飾を設定する
    public func decorateHashTag() {
        do {
            // フォントの大きさなどを引き継ぐため、`NSMutableAttributedString init(attributedString:)`を使用する
            let attrString = NSMutableAttributedString(attributedString: self.attributedText)

            attrString.beginEditing()
            defer {
                attrString.endEditing()
            }
            // Emojiはサロゲートペアを含む
            // このため、Emojiを含んだ正規表現でのNSRangeのlengthは[String.utf16.count]を使用する
            let range = NSRange(location: 0, length: self.text.utf16.count)
            let regix = try NSRegularExpression(pattern: "(?:^|\\s)(#([^\\s]+))[^\\s]?", options: .anchorsMatchLines)
            let matcher = regix.matches(in: self.text, options: .withTransparentBounds, range: range)

            let results = matcher.compactMap { (tagRange: $0.range(at: 1), contentRange: $0.range(at: 2)) }
            for result in results {
                let attributes: [NSAttributedString.Key: Any] =
                    [.foregroundColor: UIColor.blue,
                     .underlineStyle: NSUnderlineStyle.single.rawValue]
                attrString.addAttributes(attributes, range: result.tagRange)
            }
            attrString.endEditing()
            self.attributedText = attrString
        } catch {
            debugPrint("convert hash tag failed.:=\(error)")
        }
    }
}
上記例ではUITextViewのextensionとしてハッシュタグの形式に相当する部分を文字装飾するメソッドdecorateHashTagを追加しています。
decorateHashTagでは、「空白、または行頭で#からはじまる1文字以上の空白までの最短一致の文字列」をハッシュタグとして検出、下線と文字色を青に装飾しています。
なお、Twitterなどでは#以降は記号や数字を許容していませんが、上記の例では空白以外のすべてを対象としています。
Twitterのように記号と数字を除き、「ひらがな、カナ、英字、漢字」のみを対象とする例だと正規表現は(?:^|\\s)(#([ぁ-んァ-ンーa-zA-Z一-龠\\-\\r]+))[^\\s]?とおきかえてください。
大事な注意点について
フォントの大きさなどを引き継ぐため、NSMutableAttributedString init(attributedString:)を使用する
NSMutableAttributedString init(string:)を使用して文字装飾の処理を開始すると、View側で設定していたフォントの大きさの設定が失われます。
NSMutableAttributedString init(attributedString:)で設定するか、改めて文字の大きさ設定を処理内で定義してください。
NSRangeのlengthはString.utf16.countを使用する
😡👨👩👧👧らのEmojiはサロゲートペアで表現されており、それぞれ、UTF-16で表現した場合は次の通りです。
let emoji = "😡"
NSLog("%@ count:=%d, utf16_count:=%d", emoji, emoji.count, emoji.utf16.count)
😡 count:=1, utf16_count:=2
let emoji = "👨👩👧👧"
NSLog("%@ count:=%d, utf16_count:=%d", emoji, emoji.count, emoji.utf16.count)
👨👩👧👧 count:=1, utf16_count:=11
このとき、NSRangeはString.UTF16Viewのcountから長さを作るようにしないと、適切な範囲で正規表現マッチしてくれません。
こちらは 絵文字を支える技術の紹介 の記事を大変参考にさせていただきました。
(?:^|\\s)(#([ぁ-んァ-ンーa-zA-Z一-龠\\-\\r]+))[^\\s]?では世界を制せない
「記号と数字はハッシュタグの対象にしたくない」ということで、(?:^|\\s)(#([ぁ-んァ-ンーa-zA-Z一-龠\\-\\r]+))[^\\s]?の正規表現への置き換え例をあげましたが、この正規表現だと、ギリシャ文字(λ)などはハッシュタグとして認識されなくなります。これでは世界を制せませんね。
extension UITextView {
    /// 「#」から始まるハッシュタグに文字装飾を設定する
    public func decorateHashTag() {
        do {
            let attrString = NSMutableAttributedString(attributedString: self.attributedText)

            attrString.beginEditing()
            defer {
                attrString.endEditing()
            }
            // Emojiはサロゲートペアを含む
            // このため、Emojiを含んだ正規表現でのNSRangeのlengthは[String.utf16.count]を使用する
            let range = NSRange(location: 0, length: self.text.utf16.count)
            let regix = try NSRegularExpression(pattern: "(?:^|\\s)(#([^\\s]+))[^\\s]?", options: .anchorsMatchLines)
            let matcher = regix.matches(in: self.text, options: .withTransparentBounds, range: range)

            let results = matcher.compactMap { (tagRange: $0.range(at: 1), contentRange: $0.range(at: 2)) }
            let nsString = NSString(string: self.text)
            for result in results {
                let content = nsString.substring(with: result.contentRange)
                if !content.isOnlySupportedHashTag {
                    // Emojiを含む場合は対象外とする
                    continue
                }

                let attributes: [NSAttributedString.Key: Any] =
                    [.foregroundColor: UIColor.blue,
                     .underlineStyle: NSUnderlineStyle.single.rawValue]
                attrString.addAttributes(attributes, range: result.tagRange)
            }
            attrString.endEditing()
            self.attributedText = attrString
        } catch {
            debugPrint("convert hash tag failed.:=\(error)")
        }
    }
}
ただ、😡👨👩👧👧といった文字はハッシュタグにしたくないよ、という場合は、前述のコード例でサロゲートペアは除外する処理を追加してください。
!content.isOnlySupportedHashTagでは次のような拡張関数を定義することでチェックしています。Swiftでの絵文字のチェックは非常に大変なのでもし考慮不足があったらすみません。
private extension String {
    /// ハッシュタグサポート文字のみかチェックする
    /// 別途Stringの拡張で定義されている [String.containsEmoji]は一部のサロゲートペアなどに対応しておらず、
    /// 本処理ではハッシュタグとしてサポートしている文字のみが含まれているかをチェックするprivate拡張
    /// - returns: true...ハッシュタグサポート文字のみ、false...ハッシュタグでサポートしていない文字が含まれている
    var isOnlySupportedHashTag: Bool {
        return !self.contains { $0.isSingleEmoji || $0.isContainsOtherSymbol }
    }
}
private extension Character {
    /// OtherSymbolが含まれるかチェックする
    /// なお、OtherSymbolとは算術記号、通貨記号、または修飾子記号以外の記号を示す
    /// - returns: true...otherSymbolが含まれる、false...otherSymbolが含まれない
    var isContainsOtherSymbol: Bool {
        return self.unicodeScalars.count > 1
            && self.unicodeScalars.contains { $0.properties.generalCategory == Unicode.GeneralCategory.otherSymbol }
    }

    /// 1️⃣などの単体UnicodeであるEmoji是非
    /// - returns: true...Emoji、false...Emojiではない
    var isSingleEmoji: Bool {
        return self.unicodeScalars.count == 1
            && self.unicodeScalars.first?.properties.isEmojiPresentation ?? false
    }
}
いろいろな文字のUTF-16の単位
ハッシュタグ形式に文字装飾することと若干内容が外れてすみませんが、String.countとString.utf16.countの比較で検査する際の参考資料として、各種文字がUnicode上でどのようにカウントされるかを示した図が以下になります。
| 説明 | 値 | String.count |
String.utf16.count |
|---|---|---|---|
| 絵文字 | 😎 | 1 | 2 |
| 囲い文字(1) | Ⓐ | 1 | 1 |
| 囲い文字(2) | ❎ | 1 | 1 |
| 囲い文字(3) | ㈱ | 1 | 1 |
| 英字 | Z | 1 | 1 |
| 数字 | 1 | 1 | 1 |
| 漢字 | 龘 | 1 | 1 |
| ハングル文字 | 아 | 1 | 1 |
| 西方ギリシア文字 | Δ | 1 | 1 |
| コプト文字 | ⲃ | 1 | 1 |
| ラテン文字 | è | 1 | 1 |
| キリル文字 | Ж | 1 | 1 |
| グルジア文字 | Ⴀ | 1 | 1 |
| アルメニア文字 | ա | 1 | 1 |
このとき、上述に記載の表の通り、UTF-16単位数と比較するだけだと「囲い文字」などはハッシュタグとして認識されるようになります。
また、上述の表には入力の関係上記載がありませんが、フェニキア文字などは合成文字として取り扱われます。
ハッシュタグの形式に相当する部分をクリックできるようにする
前述の正規表現で抽出した範囲に対してNSAttributedString.Keyのlinkを設定し、UITextViewDelegate textView(_:shouldInteractWith:in:interaction:)でインタラプトしてください。
var attributes: [NSAttributedString.Key: Any] =
     [.foregroundColor: UIColor.blue,
      .underlineStyle: NSUnderlineStyle.single.rawValue]
// 自身のDelegateがHashTagInteractableのprotocolを実装しているかチェックする
if let interactable: HashTagInteractable = self.delegate as? HashTagInteractable {
   attributes[.link] = interactable.createHashTagURL(hashTag: content)
}
attrString.addAttributes(attributes, range: result.tagRange)
上記コードで初出したHashTagInteractableは次のようなprotocolです。
protocol HashTagInteractable: class {
    var paramKey: String { get }
    func getHashTag(interactURL: URL) -> String?
    func createHashTagURL(hashTag: String) -> URL
}
extension HashTagInteractable {

    var paramKey: String {
        return "hash_tag"
    }

    func getHashTag(interactURL: URL) -> String? {
        if let urlComponents = URLComponents(url: interactURL, resolvingAgainstBaseURL: true),
            let queryItems = urlComponents.queryItems {
            return queryItems.first(where: { queryItem -> Bool in queryItem.name == self.paramKey })?.value
        }
        return nil
    }
    func createHashTagURL(hashTag: String) -> URL {
        var urlComponents = URLComponents(string: "app://hashtag")!
        urlComponents.queryItems = [URLQueryItem(name: self.paramKey, value: hashTag)]
        return urlComponents.url!
    }
}
UITextViewDelegateを適合させた任意のクラスに対して、上記のHashTagInteractableのprotocolを適合させることで処理のインタラプトできるようになります。
extension ViewController: UITextViewDelegate, HashTagInteractable {
    func textView(_ textView: UITextView, shouldInteractWith URL: URL, in characterRange: NSRange, interaction: UITextItemInteraction) -> Bool {
        // deleageに処理を委譲し、URLによる起動は行わない
        if let hashTag = getHashTag(interactURL: URL) {
            delegate?.sectionController(self, didTappedHashTag: hashTag)
            return false
        }
        return false
    }

}
UITextViewで入力中にハッシュタグ形式に変換する
UITextViewDelegate textViewDidChange:(UITextView *)textViewで入力の監視を行い、前述のUITextViewのextensionとして追加したメソッドdecorateHashTagを呼び出します。
ただし、このときに次のような点に注意して実装する必要があります。
- 文字列編集中の場合、とくに日本語変換中などはこの処理を行わないように制御する
- 前回編集時の文字装飾設定を除去する
これらの注意点を実装したUITextViewのextensionは次の通りです。
extension UITextView {
    /// 「#」から始まるハッシュタグに文字装飾を設定する
    public func decorateHashTag() {
        if self.markedTextRange != nil {
            // 日本語入力中などは適用しないように制御
            return
        }

        // 自身のDelegateがHashTagInteractableのprotocolを実装しているかチェックする
        let hashTagInteractable = self.delegate as? HashTagInteractable

        do {
            let attrString = NSMutableAttributedString(attributedString: self.attributedText)

            attrString.beginEditing()
            defer {
                attrString.endEditing()
            }

            // Emojiはサロゲートペアを含む
            // このため、Emojiを含んだ正規表現でのNSRangeの長さは[String.utf16.count]を使用する
            let range = NSRange(location: 0, length: self.text.utf16.count)
            let regix = try NSRegularExpression(pattern: "(?:^|\\s)(#([^\\s]+))[^\\s]?", options: .anchorsMatchLines)
            let matcher = regix.matches(in: self.text, options: .withTransparentBounds, range: range)

            // 前回設定していたハッシュタグ用の文字装飾を除去する
            attrString.removeAttribute(.foregroundColor, range: range)
            attrString.removeAttribute(.underlineStyle, range: range)

            let results = matcher.compactMap { (tagRange: $0.range(at: 1), contentRange: $0.range(at: 2)) }
            let nsString = NSString(string: self.text)
            for result in results {
                let content = nsString.substring(with: result.contentRange)
                if !content.isOnlySupportedHashTag {
                    // Emojiを含む場合は対象外とする
                    continue
                }

                var attributes: [NSAttributedString.Key: Any] =
                    [.foregroundColor: UIColor.blue,
                     .underlineStyle: NSUnderlineStyle.single.rawValue]
                if let hashTagInteractable: HashTagInteractable = hashTagInteractable {
                    // リンク化する場合は UITextViewDelegate textView(_:shouldInteractWith:in:interaction:)による起動を行う
                    attributes[.link] = hashTagInteractable.createHashTagURL(hashTag: content)
                }
                attrString.addAttributes(attributes, range: result.tagRange)
            }
            attrString.endEditing()
            self.attributedText = attrString
        } catch {
            debugPrint("convert hash tag failed.:=\(error)")
        }
    }
}
文字列編集中の場合、とくに日本語変換中などはこの処理を行わないように制御する
前述の例では、次のように編集中かどうかをmarkedTextRangeというメソッドで検査しています。
if self.markedTextRange != nil {
    // 日本語入力中などは適用しないように制御
    return
}
UITextViewDelegate textViewDidChange:(UITextView *)textViewで毎回このメソッドを呼び出している場合、で日本語入力で変換中であるかを検査せずに文字装飾を行うと、変換前で文字入力が確定してしまいます。
たとえば、ローマ字入力などで「か」という文字を入力しようとする場合、k、aのキーを入力する必要がありますが、kの段階で入力が確定してしまい、「kあ」と入力のまま変換ができなくなります。
これを防止するために現在のUITextViewのmarkedTextRangeを検査し、入力中かどうかを判定する必要があります。
前回編集時の文字装飾設定を除去する
UITextViewDelegate textViewDidChange:(UITextView *)textViewで毎回このメソッドを呼び出しており、NSMutableAttributedString init(attributedString:)を使用して文字装飾を開始している場合は、前回のハッシュタグ形式の文字装飾が引き継がれるため、内容の編集時に想定しない挙動を示します。
このため、事前に文字列範囲でハッシュタグ形式の文字装飾を除去してください。
// 前回設定していたハッシュタグ用の文字装飾を除去する
attrString.removeAttribute(.foregroundColor, range: range)
attrString.removeAttribute(.underlineStyle, range: range)
