前回の記事で、VisualStudio 2022 のセットアップが完了したので、
今回は簡単なWPFアプリを作ります。
次回 LocalDB との接続サンプルを作る予定なので、ここでは ListView でデータを表示するサンプルを作ります。
ちょっと頑張って、今から View-ViewModel-Model 構成としてみます。
WPF 起動
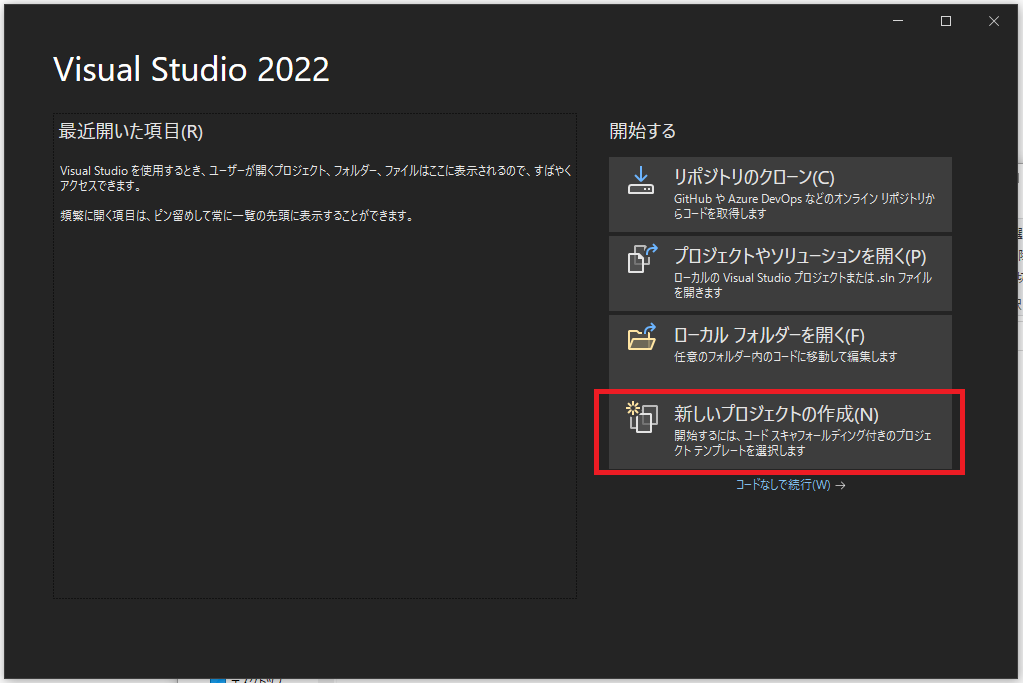
「最近開いた項目」画面が出ますがまだ何も作ってないので、「新しいプロジェクトの作成」を実行します。
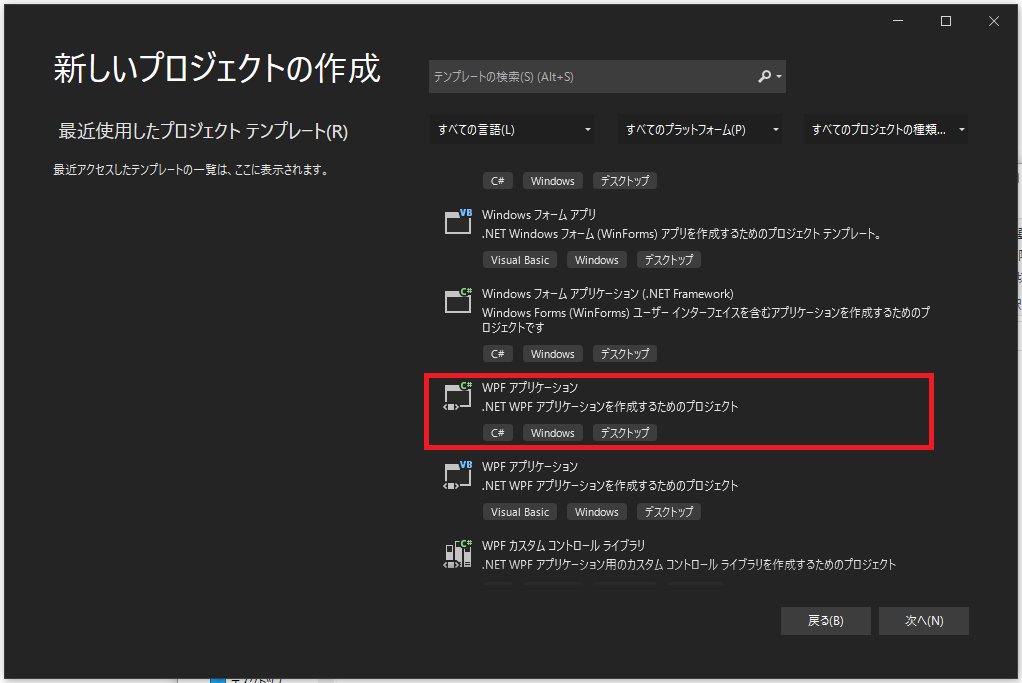
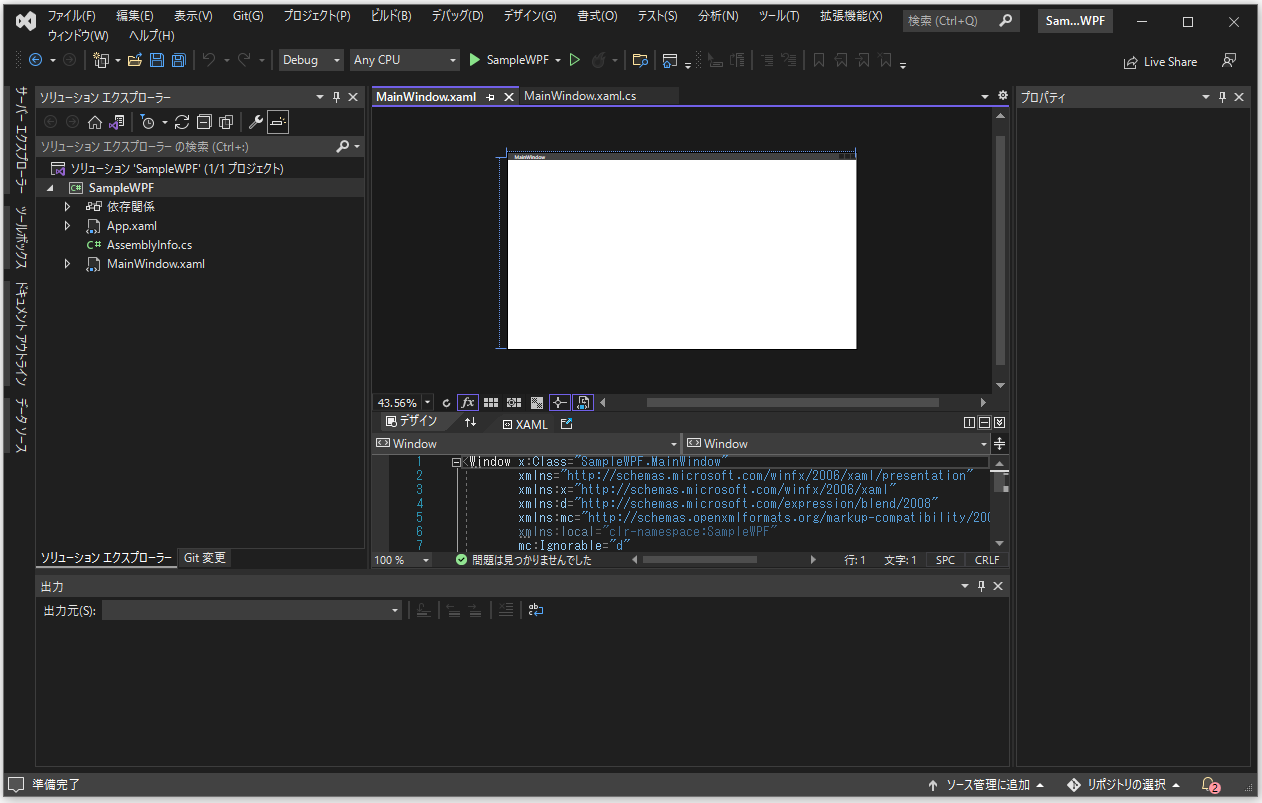
WPF (.NET Framework) プロジェクト作成
1.プロジェクトテンプレートを選択
「WPFアプリケーション
.NET WPF アプリケーションを作成するためのプロジェクト
C# Windows デスクトップ」
を選択して[次へ] クリック
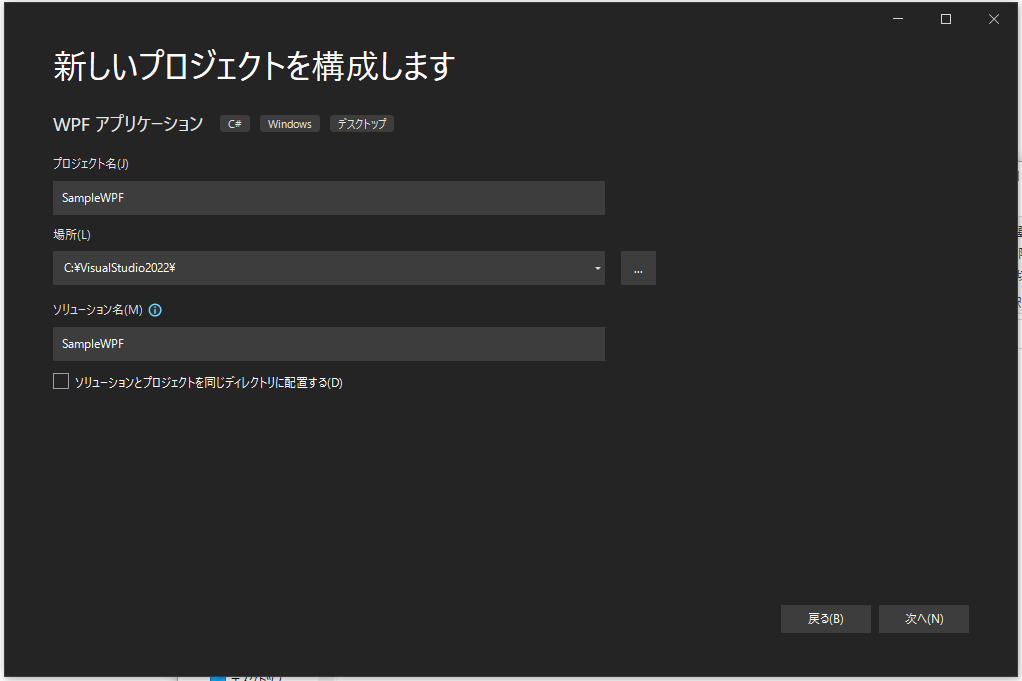
2.新しいプロジェクトを構成
プロジェクト名を「SampleWPF」として[次へ] クリック
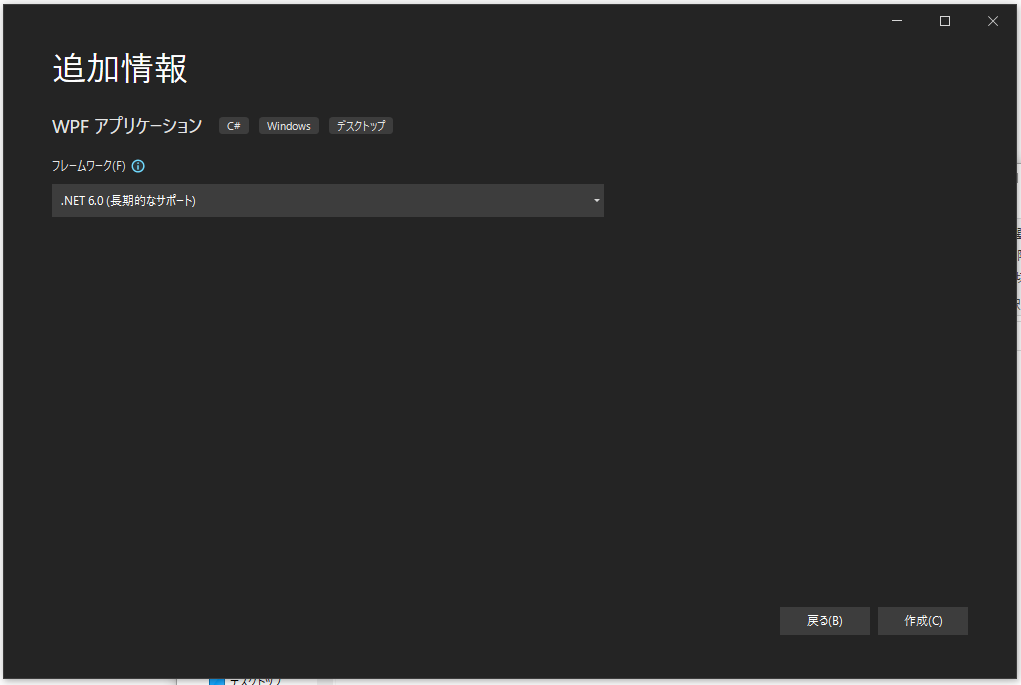
3.追加情報でフレームワークを最新の「.NET 6.0 (長期的なサポート)」を選択して「作成」をクリック
4.「SampleWPF」プロジェクトが作成され、IDEに「SampleWPF」ソリューションが開きます。
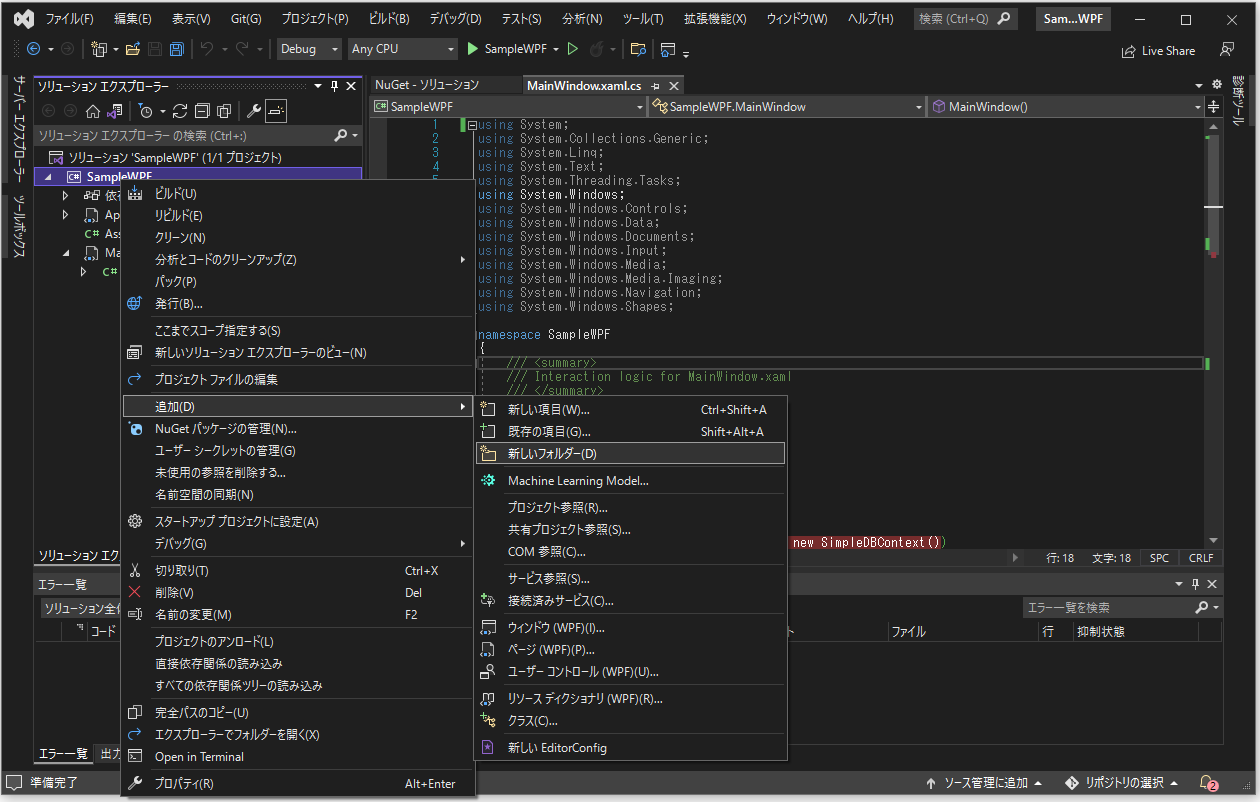
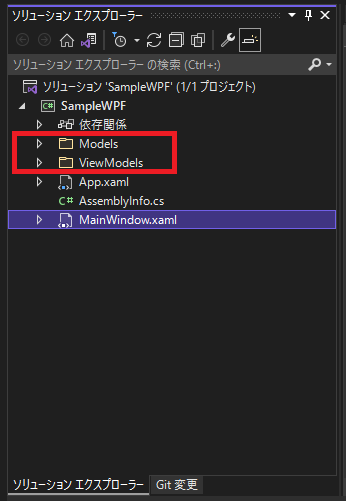
ViewModel / Model 用にフォルダ作成
プロジェクト直下に「Models」フォルダ作成します。View-ViewModel-Model 的なつくりにするため、ViewModel, Model の置き場所とします。
Model 作成
「Models」フォルダ直下に「Users.cs」クラスファイルを作成します。
- クラスは internal から public に変更
- CS8618 null非許容 Warning 対応のため、変数に「= string.Empty;」を追加
(コンストラクタ呼び出し時に null ではなく空データが作成される)
using System;
using System.Collections.Generic;
using System.Linq;
using System.Text;
using System.Threading.Tasks;

namespace SampleWPF.Models
{
    public class User
    {
        public int Id { get; set; }
        public string FirstName { get; set; } = string.Empty;
        public string LastName { get; set; } = string.Empty;
    }
}
ViewModel 作成
ここでは ListView を表示するだけとして、リスト型のデータとして、ObservableCollection というリストデータが更新されたときに通知される動的なデータ コレクションを使用します。
※「CS8603 Null 参照戻り値である可能性があります。」のワーニングがうるさいので抑制しておきます。
using SampleWPF.Models;
using System;
using System.Collections.Generic;
using System.Collections.ObjectModel;
using System.ComponentModel;
using System.Linq;
using System.Text;
using System.Threading.Tasks;

namespace SampleWPF.ViewModels
{
    public class MainWindowVM    {

        public static ObservableCollection<User>? userList { get; set; }
        public ObservableCollection<User> UserList
        {
#pragma warning disable CS8603 // Null 参照戻り値である可能性があります。
            get => userList;
#pragma warning restore CS8603
            set
            {
                userList = value;
            }
        }

        public MainWindowVM()
        {
            userList = new ObservableCollection<User>();
        }
    }
}
View と ViewModel 連携
ViewModel のクラスを MainWindow の DataContext に設定します。
ここでは、データ追加機能を実装しないので、初期データをここで設定します。
xaml 側に<Window.DataContext>タグで設定することもできますが、できるだけ疎結合にしたく、xaml.csで連携させます。
using SampleWPF.Models;
using SampleWPF.ViewModels;
using System;
using System.Linq;
using System.Text;
using System.Threading.Tasks;
using System.Windows;
namespace SampleWPF
{
/// <summary>
/// Interaction logic for MainWindow.xaml
/// </summary>
public partial class MainWindow : Window
{
public MainWindow()
{
InitializeComponent();
// View と ViewModel を連携
MainWindowVM vm = new MainWindowVM();
//データ初期化
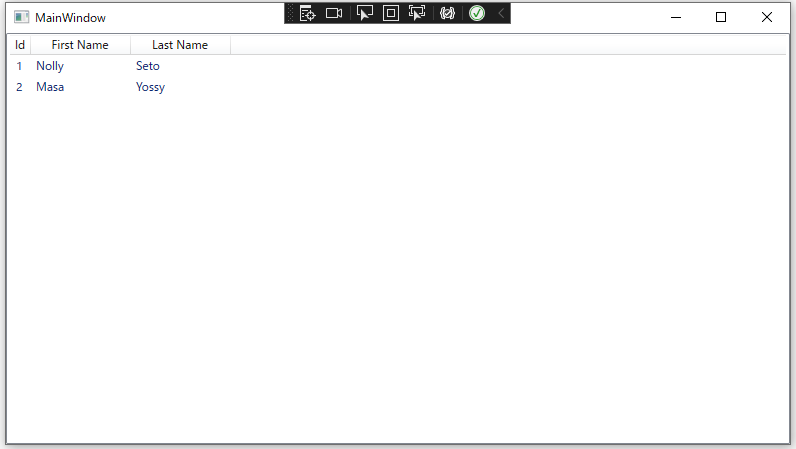
vm.UserList.Add(new User() { Id = 1, FirstName = "Nolly", LastName = "Seto" });
vm.UserList.Add(new User() { Id = 2, FirstName = "Masa", LastName = "Yossy" });
this.DataContext = vm;
}
}
}
View 作成
MainWindow.xaml に ListView で表示する部分を作成します。
リスト表示をいろいろ実装するために、GridView も使います。
「ツールボックス」からコントロールを追加できますが、レイアウト調整が面倒なので直に xaml にコードを書くことにします。
<Window x:Class="SampleWPF.MainWindow"
        xmlns="http://schemas.microsoft.com/winfx/2006/xaml/presentation"
        xmlns:x="http://schemas.microsoft.com/winfx/2006/xaml"
        xmlns:d="http://schemas.microsoft.com/expression/blend/2008"
        xmlns:mc="http://schemas.openxmlformats.org/markup-compatibility/2006"
        xmlns:local="clr-namespace:SampleWPF"
        mc:Ignorable="d"
        Title="MainWindow" Height="450" Width="800">

    <Grid>
        <Grid.RowDefinitions>
            <RowDefinition Height="100"/>
        </Grid.RowDefinitions>

        <ListView ItemsSource="{Binding UserList}">
            <ListView.View>
                <GridView>
                    <GridViewColumn Width="20" Header="Id"  DisplayMemberBinding="{Binding Id}" />
                    <GridViewColumn Width="100" Header="First Name"  DisplayMemberBinding="{Binding FirstName}" />
                    <GridViewColumn Width="100" Header="Last Name"  DisplayMemberBinding="{Binding LastName}" />
                </GridView>
            </ListView.View>
        </ListView>
    </Grid>
</Window>
デバッグ実行してみる
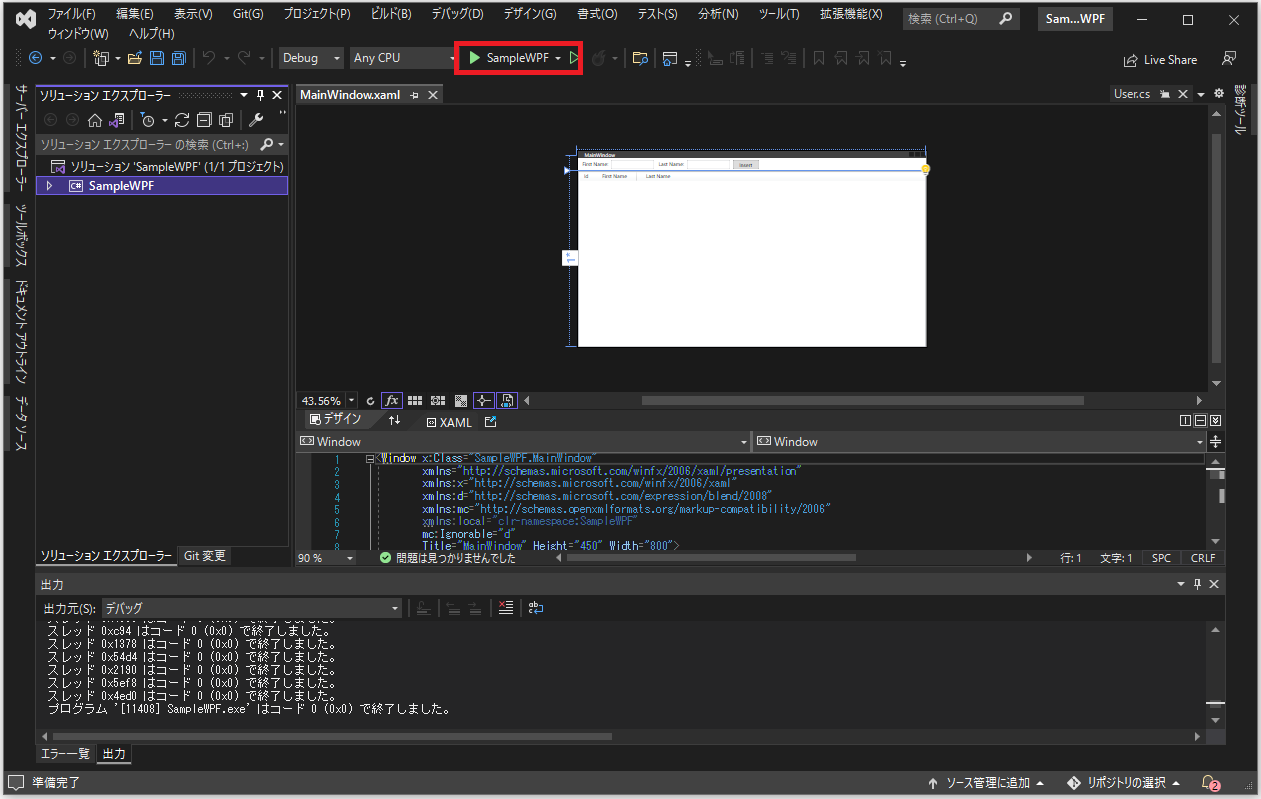
以下の画面が表示されれば、今回のミッションは完了です。
次回予告
次回は、Microsoft SQL Server Express LocalDB を実装する予定です。