はじめに
こんにちは!
東海メンターのだすです。
この記事はLife is Tech ! Tokai Advent Calendar 2022の1日目の記事です。
Android(iOS)とUnityだって工夫すれば一緒にチームを組んで作品を作ることができるよ!
みんなで楽しくものづくりしようぜ!
ということが言いたくて、その間をつなげられるUnity as a Libraryの紹介をするよという内容です。
きっかけ
ハッカソンに参加した時、チームのメンバーがAndroid、Unityなど手持ちの技術がバラバラでした。
こういう時は学習コストなどを考えると技術選定は難しいですよね。
その時使ったのがUnity as a Libraryで、UnityをAndroidのネイティブアプリ上で動かすというものでした。
Unity as a Library(UaaL)とは
Unity as a Library(UaaL)はUnityをネイティブアプリのライブラリとして利用する技術で、アプリで作ったViewとUnityで作ったViewを共存させられます。
AndroidやiOSのネイティブアプリに組み込むことができ、MirrativやRealityのアプリに使われているそうです。
開発環境
- AndroidStudio 2021.3.1
- Unity 2021.3.6f1
Unityの実装
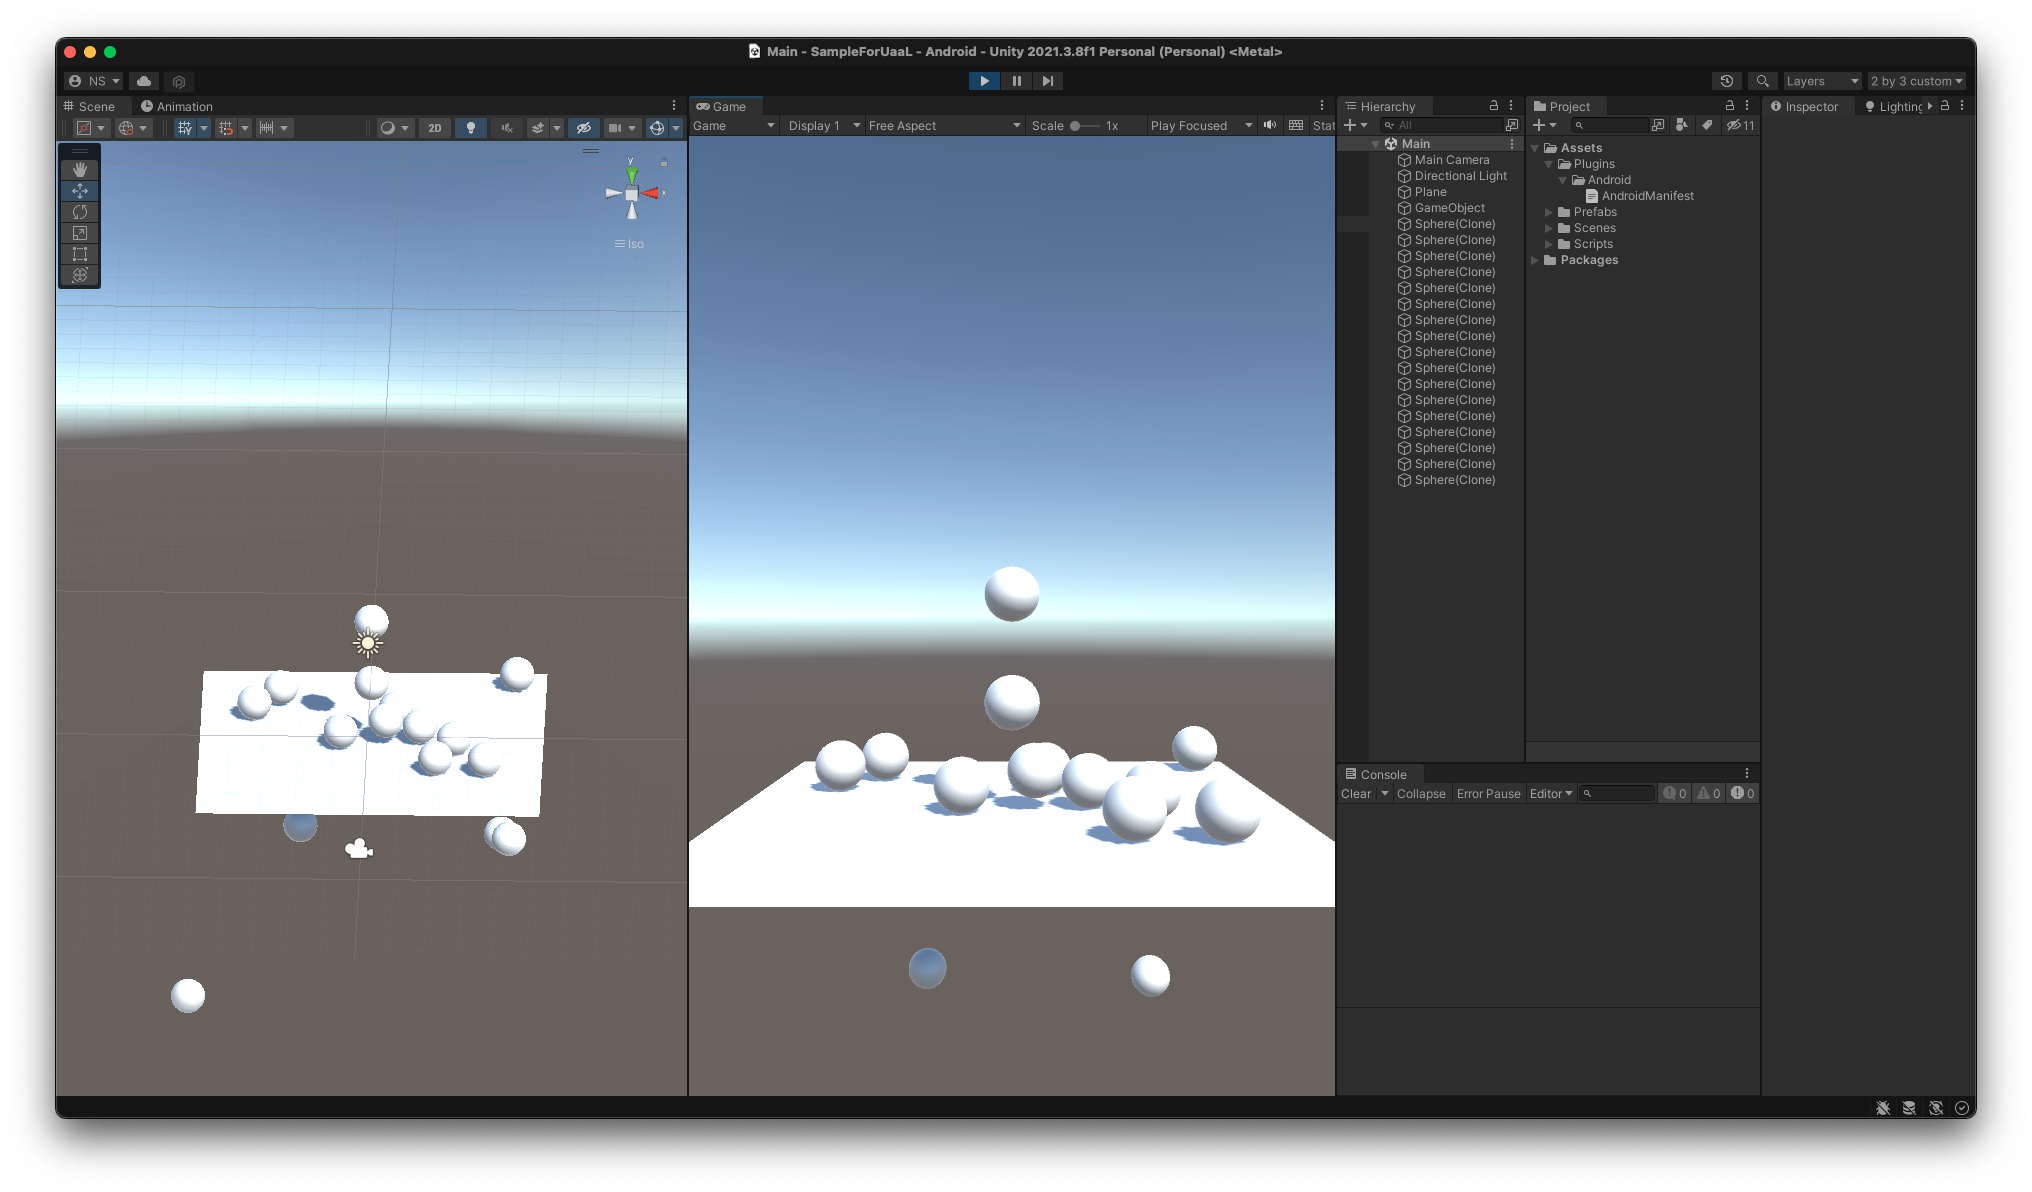
まずは簡単なUnityのプロジェクトを作ります。
今回は適当にSphereをたくさん降らせました。
これをエクスポートしてAndroidで読み込める状態にしていきます。
Unityからエクスポート
Build Settings
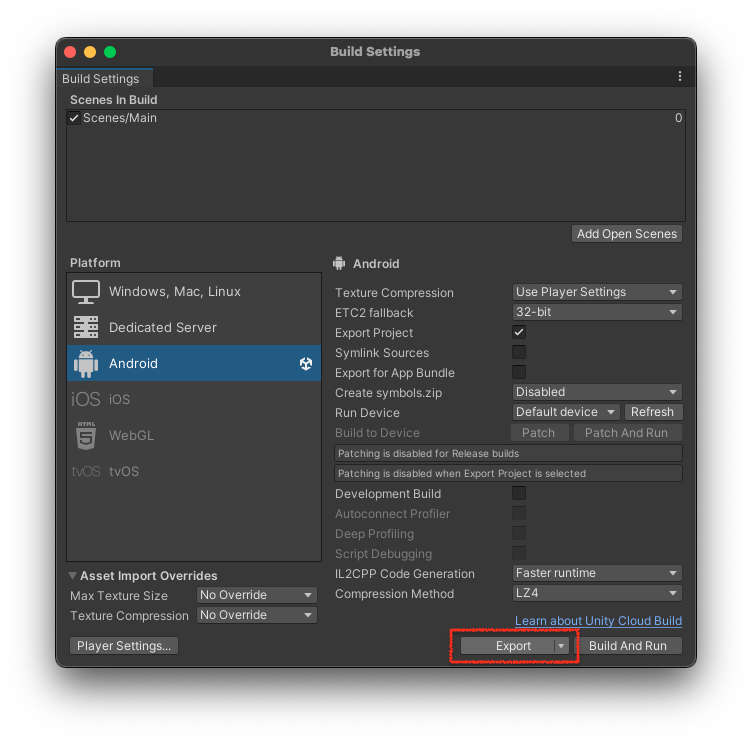
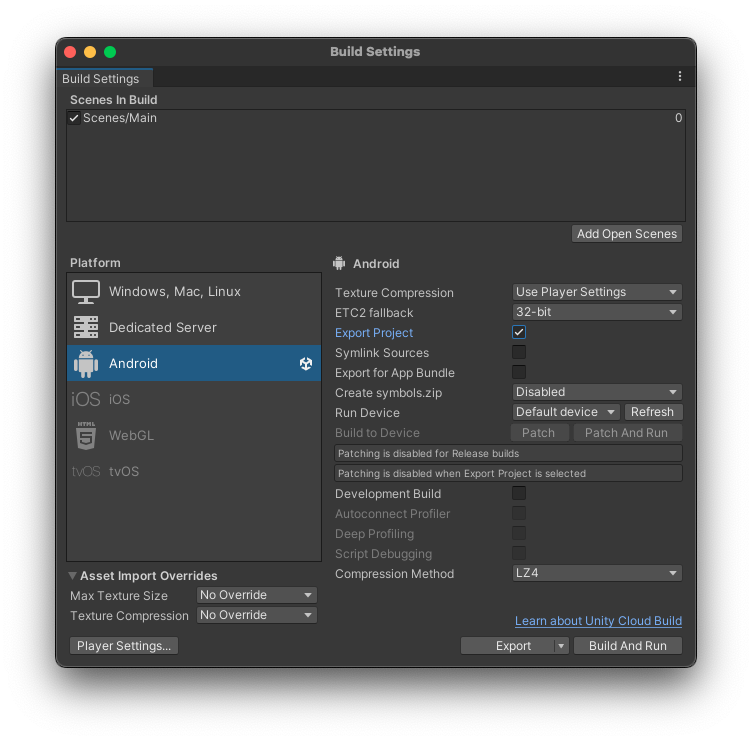
File → Build Settingsを開いて、PlatformをAndroidにします。
Export Projectにはチェックを入れておきます。
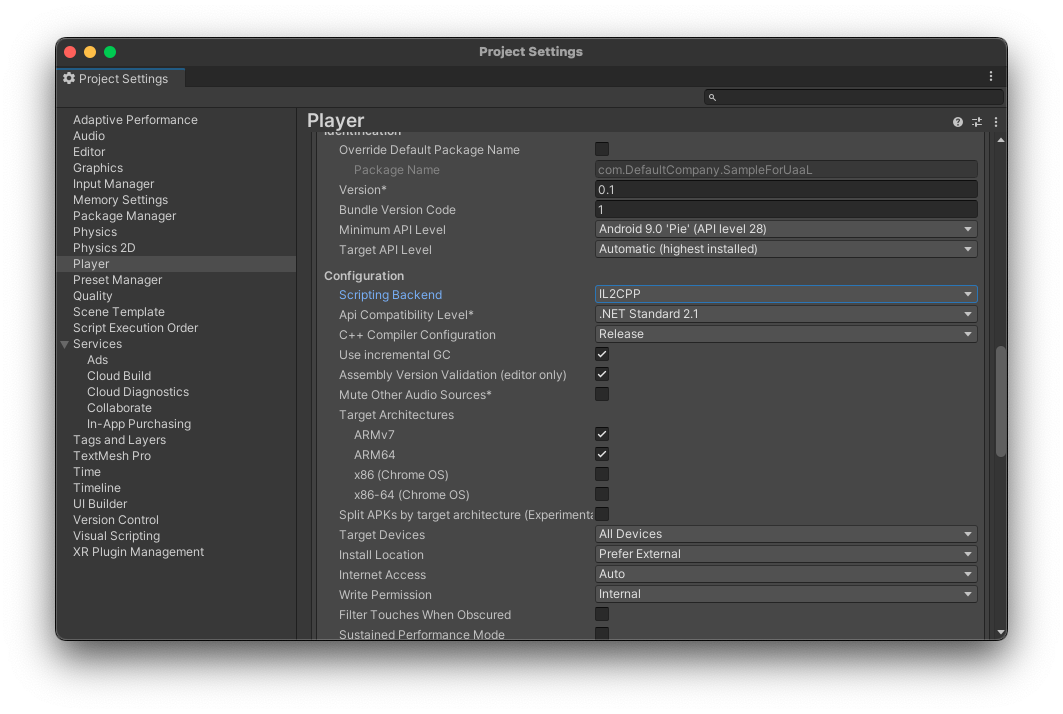
Player Settings
Build Settingsの左下のボタンよりPlayer Settingsを開きます。
Configuration → Scripting BackendをIL2CPPにします。
次にTarget Architectures → ARM64にチェックを入れます。
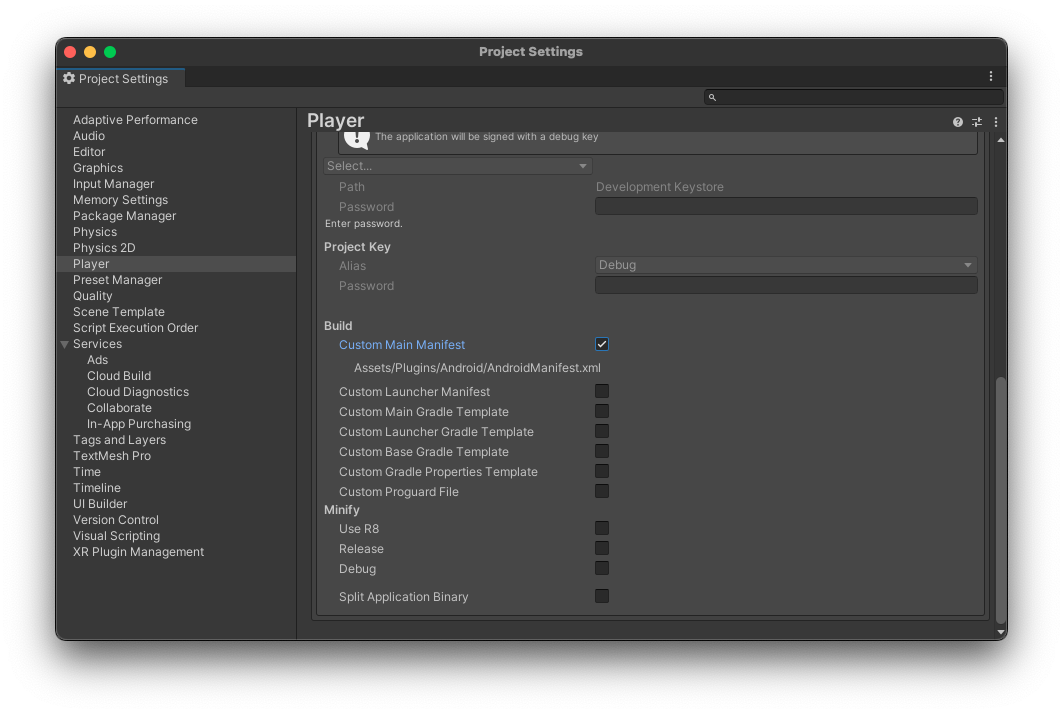
Build → Custom Main Manifestにチェックを入れて、AndroidManifest.xmlをカスタマイズできるようにします。
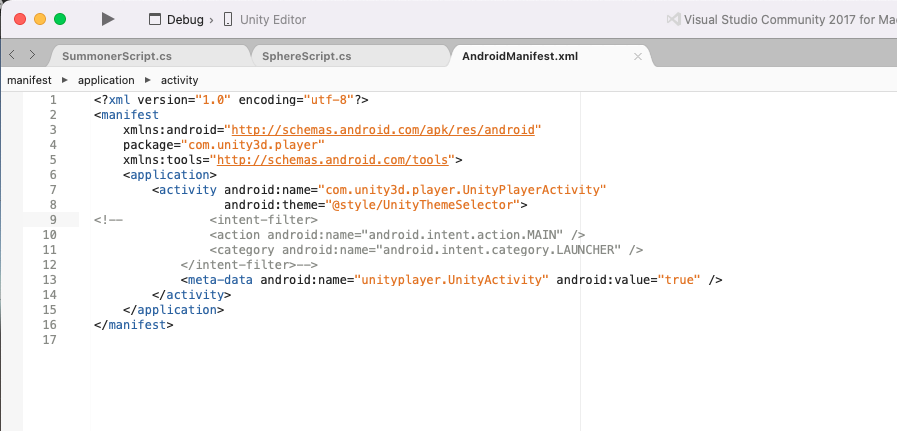
AndroidManifest.xml(Unity)
UnityのプロジェクトのアセットにAndroidManifest.xmlファイルが追加されるので編集します。
<intent-filter>~</intent-filter>を削除しておきます。
このタグが付いているActivityが立ち上げ時に実行されるので必要だったら編集してください。
エクスポート
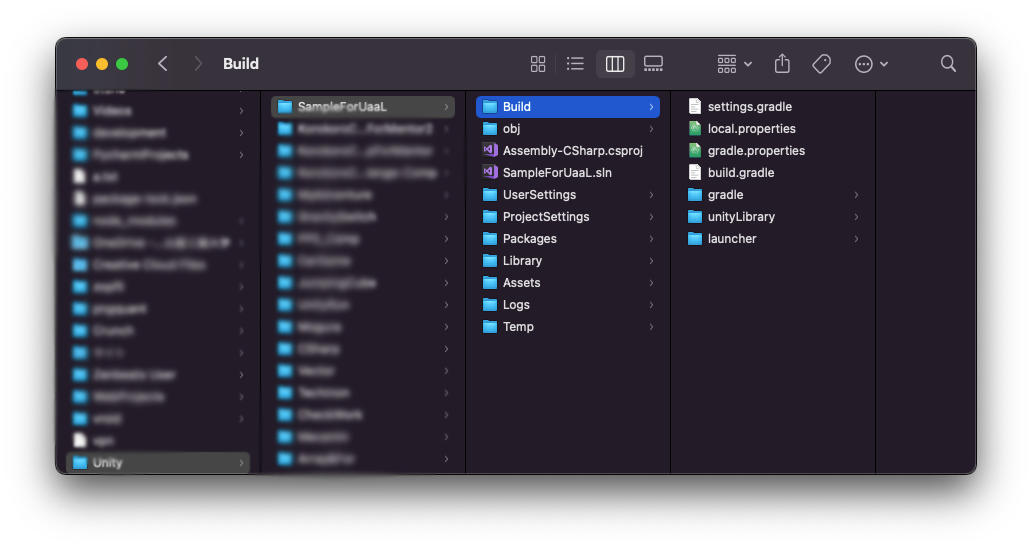
設定が終わったらプロジェクトをBuild Settings → Exportよりエクスポートします。
Buildフォルダがない場合はフォルダを作成して、ここにエクスポートしましょう。
(自分が気が付くのに時間がかかったポイント)
unityLibraryというディレクトリが出力されていれば正常です。
これでUnity側は完了です!
Androidの実装
Android側の実装をしていきます。
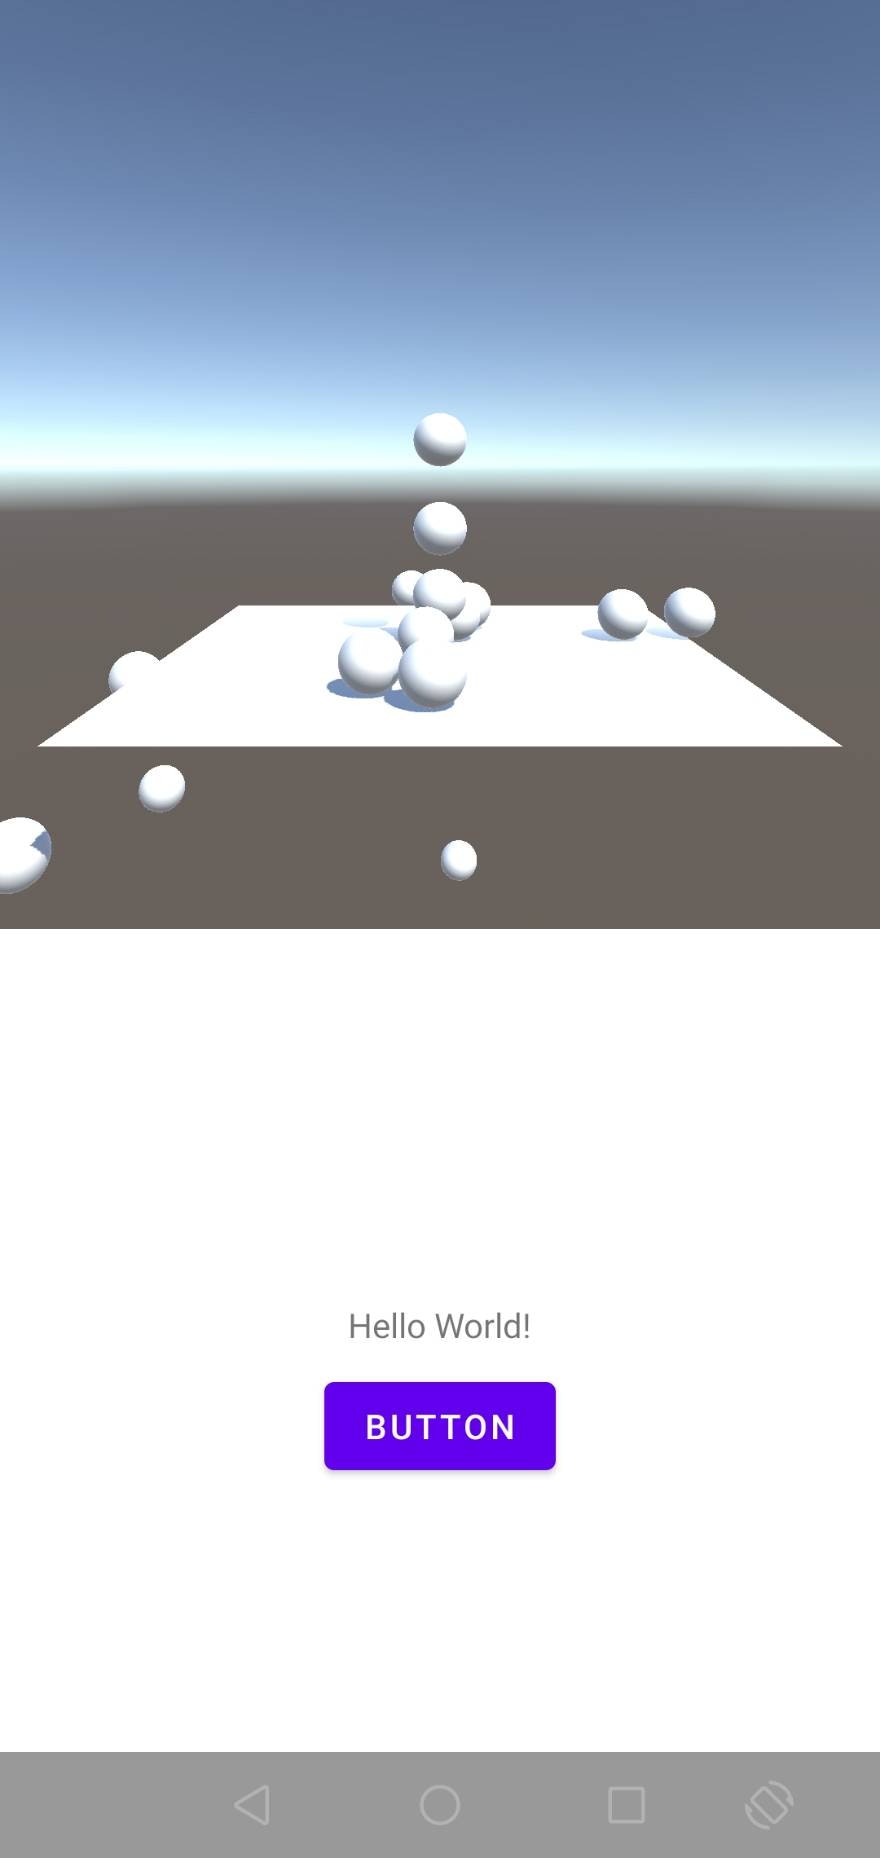
今回はシンプルに1画面の上半分にUnityを表示させてみます。
下半分はAndroidらしくネイティブのUIを配置しておきます。
Unityのインポート
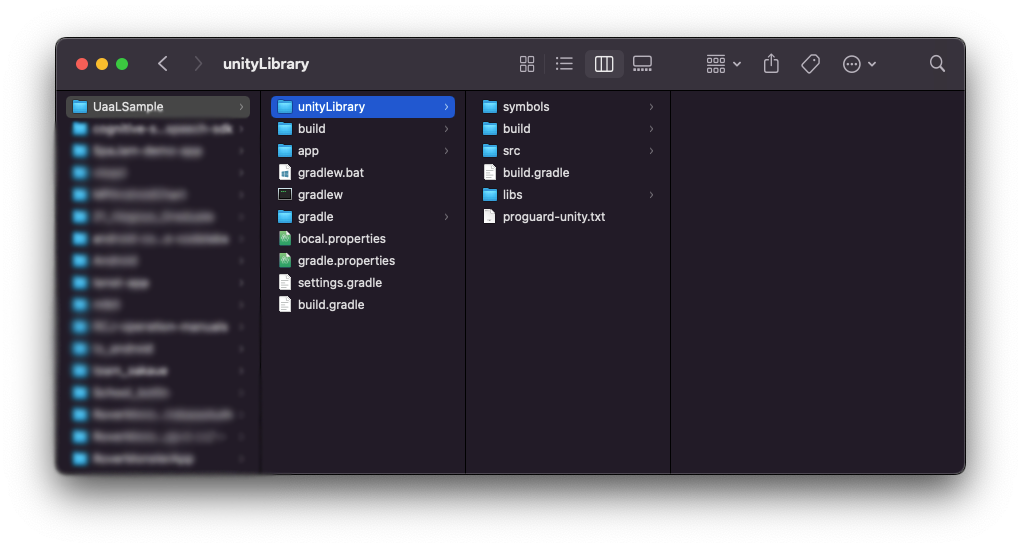
Androidプロジェクトのディレクトリ内に先ほどエクスポートしたunityLibraryをコピーして配置します。
設定
ここからプロジェクト内でUnityLibraryを扱えるように設定をしていきます。
まずは、unityLIbraryにあるプロジェクトを読み込むためにsettings.gradleに以下を加えます。
include ':unityLibrary'
依存関係を記述するためにbuild.gradle(Module:app)に以下を追加します。
dependencies {
    ...
    implementation project(':unityLibrary')
    implementation fileTree(dir: project(':unityLibrary').getProjectDir().toString() + ('\\libs'), include: ['*.jar'])
}
Unity2020以降で発生するようになったエラーに対して以下を追加します。
unityStreamingAssets=.unity3d
NDKが必要になるので以下をlocal.propertiesに追加します。
今回はUnity Hubで読み込んだNDKを参照しています。
ndk.dir=/Applications/Unity/Hub/Editor/2021.3.8f1/PlaybackEngines/AndroidPlayer/NDK
以下がUnityから参照されているらしくString.xmlに追加しないとクラッシュしました。
<string name=”game_view_content_description”>Game view</string>
以上で設定は完了です。
ビルドが通るか確認してください。
アプリの実装
次はUnityをレイアウトに追加していきます。
今回は1画面の構成なのでactivity_main.xmlとMainActivity.ktを編集します。
<?xml version="1.0" encoding="utf-8"?>
<androidx.constraintlayout.widget.ConstraintLayout xmlns:android="http://schemas.android.com/apk/res/android"
    xmlns:app="http://schemas.android.com/apk/res-auto"
    xmlns:tools="http://schemas.android.com/tools"
    android:layout_width="match_parent"
    android:layout_height="match_parent"
    tools:context=".MainActivity">

    <androidx.constraintlayout.widget.ConstraintLayout
        android:id="@+id/unity"
        android:layout_width="0dp"
        android:layout_height="0dp"
        app:layout_constraintEnd_toEndOf="parent"
        app:layout_constraintHeight_percent="0.5"
        app:layout_constraintStart_toStartOf="parent"
        app:layout_constraintTop_toTopOf="parent" />

    <LinearLayout
        android:layout_width="0dp"
        android:layout_height="0dp"
        android:gravity="center"
        android:orientation="vertical"
        app:layout_constraintBottom_toBottomOf="parent"
        app:layout_constraintEnd_toEndOf="parent"
        app:layout_constraintStart_toStartOf="parent"
        app:layout_constraintTop_toBottomOf="@+id/unity">

        <TextView
            android:id="@+id/textView"
            android:layout_width="wrap_content"
            android:layout_height="wrap_content"
            android:text="Hello World!" />

        <Button
            android:id="@+id/button"
            android:layout_width="wrap_content"
            android:layout_height="wrap_content"
            android:layout_marginTop="8dp"
            android:text="Button" />

    </LinearLayout>

</androidx.constraintlayout.widget.ConstraintLayout>
package com.norihiro.uaalsample

import androidx.appcompat.app.AppCompatActivity
import android.os.Bundle
import android.view.ViewGroup
import android.view.WindowManager.LayoutParams.SCREEN_ORIENTATION_CHANGED
import androidx.constraintlayout.widget.ConstraintLayout
import com.unity3d.player.UnityPlayer
import com.unity3d.player.UnityPlayerActivity


class MainActivity : UnityPlayerActivity() {

    override fun onCreate(savedInstanceState: Bundle?) {
        super.onCreate(savedInstanceState)
        setContentView(R.layout.activity_main)

        window.clearFlags(SCREEN_ORIENTATION_CHANGED)
        findViewById<ConstraintLayout>(R.id.unity)?.addView(
            mUnityPlayer, ViewGroup.LayoutParams(
                ViewGroup.LayoutParams.MATCH_PARENT,
                ViewGroup.LayoutParams.MATCH_PARENT
            )
        )
    }
}
動作確認
以上で実装は終わりです。
実行してみましょう!
終わりに
Unityは容量が大きくAndroidアプリとしてはビルドに時間がかかったりとデメリットもあります。
その分リッチな3D表現ができるのは場合によっては十分なメリットだと思います。
周りにいろんなエンジニアがいると思うんですけど、どうしてもプラットフォームごとにコミュニティが分かれて交流が持てないということもあると思います。
でもこうして一緒にアプリを作ることができるともっと楽しくものづくりができると思うので、よかったらUaaLを試してみてください。
いつかこの記事の続編として、Android、Unity間のデータ通信についても取り上げたいです。
参考記事
今回の記事は以下の記事を参考にさせていただきました。
ありがとうございました。
