今回の内容
- 前回作った空のオリジナル画面にHelloWorldと表示しつつ、バックライトLEDを点滅させます
1 Hello World表示
~/Sensor-Watch/movement/watch_faces/complicationに前回作った
hello_face.c の hello_face_loop内の case EVENT_ACTIVATEに、以下の2行を追加します。
        case EVENT_ACTIVATE:
            // Show your initial UI here.
            sprintf(buf, "Hello Worl");
            watch_display_string(buf, 0);
            break;
EVENT_ACTIVATEは、この画面(face)に移ってきた時に実行されるイベントです。
make フォルダに移って以下実行して
cd ../../make/
emmake make
python3 -m http.server -d build-sim
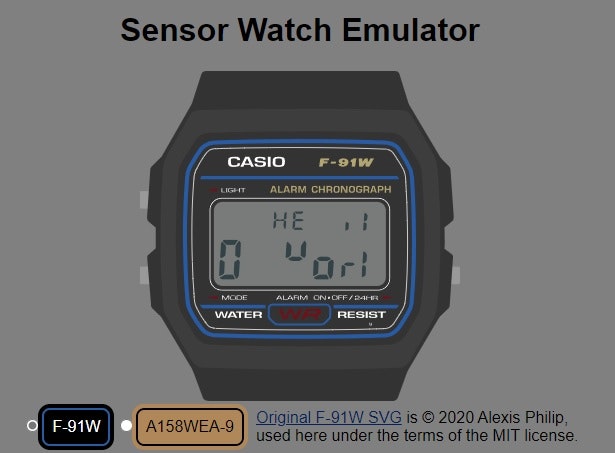
Win10のブラウザでエミュレータ画面を表示すると

7セグメント+αなので先頭2文字以外は苦しいですが、雰囲気は伝わるでしょうか。
先頭2文字はオリジナルでもモード表示に使うため多少表現力がありますが、それ以外は工夫が必要です。
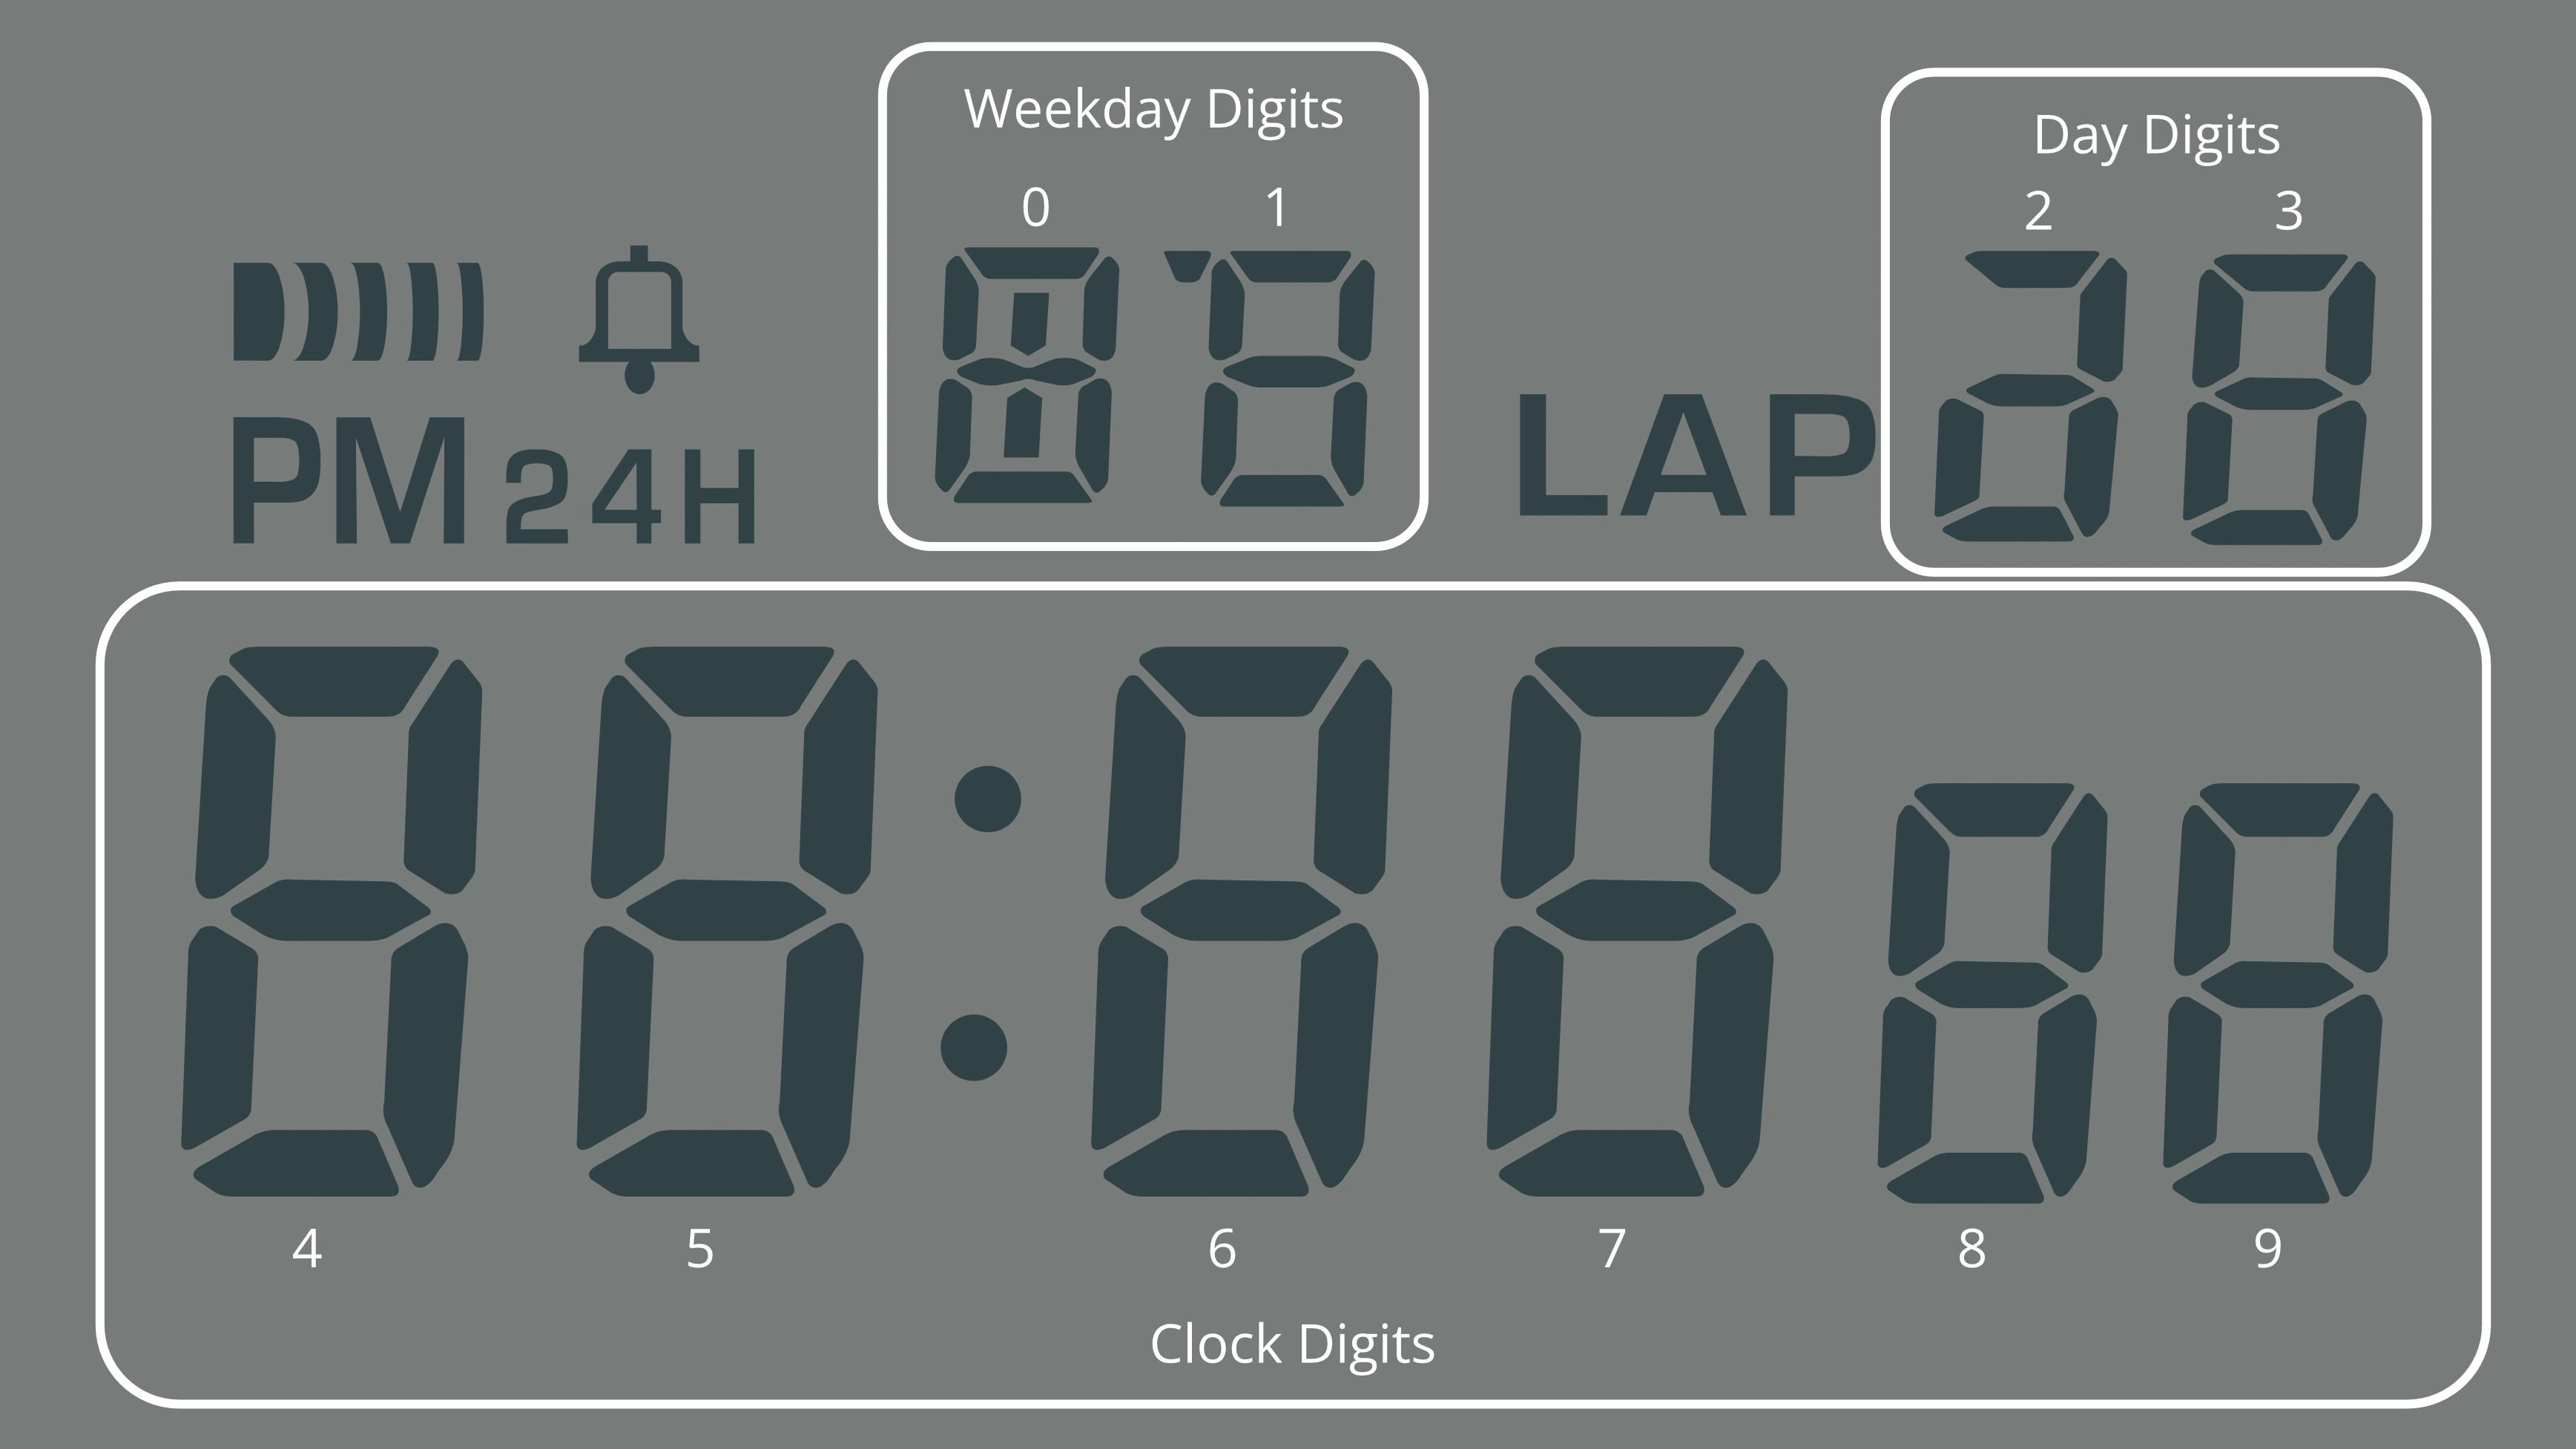
表示可能セグメントはここにあります
以下のような情報が載っているので一度確認ください。

また、オリジナルと同じ操作感にするためのデザインガイドラインもあります。自分で調べるより手っ取り早いと思いますので目を通すと良いかもしれません
2 Lチカ
次は、バックライトLEDを1秒ごとに点滅させてみます。
2.1 状態保持
Hello Worldは表示しっぱなしだけだったですが、点滅の場合は
- 消えている時→点ける
- 光っている時→消す
という点滅状態のステータス管理が必要なため、hello_face.hにある hello_state_t構造体定義の中に
bool led_blink というのを追加します。
また、サンプルで書いてある uint8_t unused は使っていなので消してOKです
typedef struct {
    // Anything you need to keep track of, put it here!
    bool led_blink; //add
    // uint8_t unused;
} hello_state_t;
2.2 状態初期化
作った bool led_blink の初期化は、hello_face.c内の hello_face_activateで行います
void hello_face_activate(movement_settings_t *settings, void *context) {
    (void) settings;
    hello_state_t *state = (hello_state_t *)context;
    state->led_blink = false; //add
    // Handle any tasks related to your watch face coming on screen.
}
2.3 定期更新
LEDの点灯状態を定期的に更新します。
状態の更新は、hello_face.cのhello_face_loop内、EVENT_TICKで行います
EVENT_TICKは、デフォルトで1秒ごとに呼び出されるようになっています。
        case EVENT_TICK:
            // If needed, update your display here.
            if (state->led_blink) {
                watch_set_led_red();
                state->led_blink = false;
            }
            else {
                watch_set_led_off();
                state->led_blink = true;
            }

            break;
再びmake フォルダに移って以下実行して
cd ../../make/
emmake make
python3 -m http.server -d build-sim
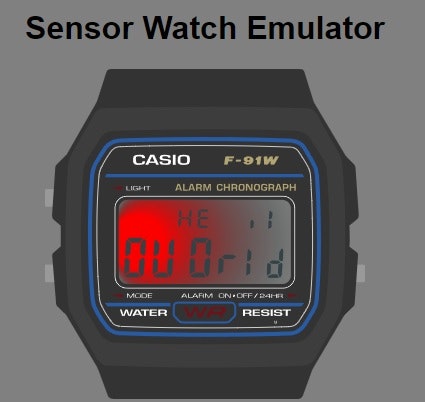
Win10のブラウザでエミュレータ画面を表示すると赤色のバックライトが点滅しながら、HELLO WORLが表示された画面が完成です

あとは、EVENT_TICKイベントで時刻を更新すれば時計になりますし、各BUTTON_UPイベントでボタン操作を実装すれば設定モード画面を作ったりしていけます。
各自でボタンのステータスを読んだり、インタバルタイマイベントを作る事も不可能ではないのですが、標準ライブラリでは省電力動作のためにトリガやスリープなどを制御しているため、標準の手順に則っておくと作成が楽で省エネなコードになると思います。
今回のソース
#ifndef HELLO_FACE_H_
#define HELLO_FACE_H_

#include "movement.h"

typedef struct {
    // Anything you need to keep track of, put it here!
    bool led_blink;
    // uint8_t unused;
} hello_state_t;

void hello_face_setup(movement_settings_t *settings, uint8_t watch_face_index, void ** context_ptr);
void hello_face_activate(movement_settings_t *settings, void *context);
bool hello_face_loop(movement_event_t event, movement_settings_t *settings, void *context);
void hello_face_resign(movement_settings_t *settings, void *context);

#define hello_face ((const watch_face_t){ \
    hello_face_setup, \
    hello_face_activate, \
    hello_face_loop, \
    hello_face_resign, \
    NULL, \
})

#endif // HELLO_FACE_H_
#include <stdlib.h>
#include <string.h>
#include "hello_face.h"

void hello_face_setup(movement_settings_t *settings, uint8_t watch_face_index, void ** context_ptr) {
    (void) settings;
    if (*context_ptr == NULL) {
        *context_ptr = malloc(sizeof(hello_state_t));
        memset(*context_ptr, 0, sizeof(hello_state_t));
        // Do any one-time tasks in here; the inside of this conditional happens only at boot.
    }
    // Do any pin or peripheral setup here; this will be called whenever the watch wakes from deep sleep.
}

void hello_face_activate(movement_settings_t *settings, void *context) {
    (void) settings;
    hello_state_t *state = (hello_state_t *)context;
    state->led_blink = false;
    // Handle any tasks related to your watch face coming on screen.
}

bool hello_face_loop(movement_event_t event, movement_settings_t *settings, void *context) {
    hello_state_t *state = (hello_state_t *)context;
    char buf[11];

    switch (event.event_type) {
        case EVENT_ACTIVATE:
            // Show your initial UI here.
            sprintf(buf, "HelloWorld");
            watch_display_string(buf, 0);
            break;
        case EVENT_TICK:
            // If needed, update your display here.
            if (state->led_blink) {
                watch_set_led_red();
                state->led_blink = false;
            }
            else {
                watch_set_led_off();
                state->led_blink = true;
            }

            break;
        case EVENT_MODE_BUTTON_UP:
            // You shouldn't need to change this case; Mode almost always moves to the next watch face.
            movement_move_to_next_face();
            break;
        case EVENT_LIGHT_BUTTON_UP:
            // If you have other uses for the Light button, you can opt not to illuminate the LED for this event.
            movement_illuminate_led();
            break;
        case EVENT_ALARM_BUTTON_UP:
            // Just in case you have need for another button.
            break;
        case EVENT_TIMEOUT:
            // Your watch face will receive this event after a period of inactivity. If it makes sense to resign,
            // you may uncomment this line to move back to the first watch face in the list:
            // movement_move_to_face(0);
            break;
        case EVENT_LOW_ENERGY_UPDATE:
            // If you did not resign in EVENT_TIMEOUT, you can use this event to update the display once a minute.
            // Avoid displaying fast-updating values like seconds, since the display won't update again for 60 seconds.
            // You should also consider starting the tick animation, to show the wearer that this is sleep mode:
            // watch_start_tick_animation(500);
            break;
        default:
            break;
    }

    // return true if the watch can enter standby mode. If you are PWM'ing an LED or buzzing the buzzer here,
    // you should return false since the PWM driver does not operate in standby mode.
    return true;
}

void hello_face_resign(movement_settings_t *settings, void *context) {
    (void) settings;
    (void) context;

    // handle any cleanup before your watch face goes off-screen.
}