概要
フルスタックPWAの環境構築を見直していたら、@nrwl/nxに出会ったので使ってみた。
15分くらいで環境構築からデプロイまでたどり着けるようになったのでワークフローを共有します。Schematics書けばもっと早くなりそう。
前提
- firebase-toolsの初期設定が完了している
ワークフロー
- ① Nx Workspaceの作成(3分くらい)
- ② @angular/pwaのインストール(30秒くらい)
- ③ Firebaseプロジェクトの作成(30秒くらい)
- ④ @angular/fireのインストール(2分)
- ⑤ NestJSをCloud Functions for Firebaseに対応(4分くらい)
- ⑥ Firebaseのプラン変更(30秒くらい)
- ⑦ デプロイ(4分くらい)
① Nx Workspaceの作成
はじめにcreate-nx-workspaceコマンドでNxのWorkspaceを作成する。
基本的にコマンドはnpxを用いていく。
$ npx create-nx-workspace@latest pwa-sample \
--preset angular-nest --app-name ng-pwa-sample \
--style scss --linter eslint --nx-cloud false
作成が完了したら出来上がったpwa-sampleディレクトリに移動する。
$ cd pwa-sample
② @angular/pwaのインストール
ng addと同じようにnx addを用いるとSchematicsが動くので、PWA対応のために@angular/pwaをインストールする。
$ npx nx add @angular/pwa
③ Firebaseプロジェクトの作成
@angular/fireをインストールする前に、Firebaseのプロジェクトを作っておく。
$ PROJECT_NAME=sample-pwa
$ PROJECT_ID=$PROJECT_NAME-$(printf %04d $(($RANDOM % 10000)))
// sample-pwa-0021
$ npx firebase projects:create $PROJECT_ID --display-name $PROJECT_NAME
④ @angular/fireのインストール
Firebaseプロジェクトを作成したら、@angular/fireをインストールする。
$ npx nx add @angular/fire
インストール時に使用するFirebaseのプロジェクトを聞かれるので先程作成したプロジェクトを選択する。
⑤ NestJSをCloud Functions for Firebaseに対応
.firebasercの設定
Cloud Functionsをデプロイする際に必要になってくるので、下記コマンドで.firebasercにデフォルトのプロジェクトを設定する
$ npx firebase use $PROJECT_ID --alias default
必要なパッケージのインストール
また、Cloud Functions for Firebaseに必要なパッケージをインストールする
$ npm install firebase-functions firebase-admin express
Cloud FunctionsからNestJSを呼ぶ設定
apps/api/srcにmain.prod.tsを作成し、下記の内容を記載する。
import { NestFactory } from '@nestjs/core';
import { ExpressAdapter } from '@nestjs/platform-express';
import * as express from 'express';
import * as functions from 'firebase-functions';
import { AppModule } from './app/app.module';

export async function bootstrap(expressInstance) {
  const app = await NestFactory.create(
    AppModule,
    new ExpressAdapter(expressInstance)
  );
  const globalPrefix = 'api';
  app.setGlobalPrefix(globalPrefix);
  await app.init();
}

const expressServer = express();

export const api = functions.region('us-central1')
.https.onRequest(async (request, response) => {
    await bootstrap(expressServer);
    expressServer(request, response);
});
デプロイ用の設定①(angular.jsonの編集)
angular.jsonに下記の通り追記する。
1つ目の追記は本番環境でmain.tsの代わりに、main.prod.tsを用いる設定で、2つ目はapi(NestJS)のデプロイコマンドの設定。
{
  "version": 1,
  "projects": {
    ...,
    "api": {
      ...,
      "architect": {
        "build": {
          "configurations": {
            "production": {
              ...,
              "fileReplacements": [
                {
                  "replace": "apps/api/src/environments/environment.ts",
                  "with": "apps/api/src/environments/environment.prod.ts"
                },
+               {
+                 "replace": "apps/api/src/main.ts",
+                 "with": "apps/api/src/main.prod.ts"
+               }
              ]
            }
          }
        },
+       "deploy": {
+         "builder": "@nrwl/workspace:run-commands",
+         "options": {
+           "commands": [
+             {
+                 "command": "npx firebase deploy --only functions"
+             }
+           ]
+         }
+       }
      }
    }
  }
}
デプロイの設定②(package.jsonの変換スクリプトの用意)
import { readFileSync, writeFileSync } from 'fs';
import { join } from 'path';
import * as fs from 'fs';

async function main() {
    const BASE_PATH = join(__dirname, '..', '..');
    console.debug('BASE_PATH:', BASE_PATH);
    const srcDir = BASE_PATH;
    const distDir = join(BASE_PATH, 'dist/apps/api');

    const src = readFileSync(join(srcDir, 'package.json')).toString();
    const dist = convertPackageJson(src);

    if (!fs.existsSync(distDir)) fs.mkdirSync(distDir, {recursive: true});
    writeFileSync(join(distDir, 'package.json'), dist);
}

function convertPackageJson(src: string): string {
    const packageJson = JSON.parse(src);
    delete packageJson['scripts'];
    delete packageJson['devDependencies'];
    packageJson['main'] = 'main.js';
    packageJson['engines'] = {'node': '12'};
    return JSON.stringify(packageJson, null , '\t');
}

main();
デプロイの設定③(firebase.jsonの変換スクリプトの用意)
{
  "hosting": {
     ...,
     "rewrites": [
+      {
+         "source": "/api/**",
+         "function": "api"
+      },
       {
         "source": "**",
         "destination": "/index.html"
       }
     ]
  },
+ "functions": {
+   "predeploy": [
+     "npx nx build api --prod",
+     "npx ts-node ./tools/scripts/generate-api-package-json.ts"
+   ],
+   "source": "dist/apps/api"
+ }
}
※ rewritesは上から処理されるので順番に注意!
1つ目のhosting.rewritesはhttps://<projectId>.web.app/api/**へのリクエストをCloudFunctionsのapi関数宛のリクエストに書き換える設定。(サンプルではhttps://<projectId>.web.app/api/helloでNestJSがJSONを返してくれる。)
2つ目のfunctionsはCloud Functionsをデプロイするときの設定。
⑥ Firebaseのプラン変更
Cloud Functions for Firebaseを使うためにはBlazeプランにアップグレードしないと行けないので、Firebase Consoleの「Functions」タブにいって有効化する。
⑦ デプロイ
nxコマンドを使うとangular.jsonに書かれた設定に基づいてデプロイしてくれる。
// Deploy NestJS App
$ npx nx deploy api
// Deploy Angular App
$ npx nx deploy ng-pwa-sample
⑧ ブラウザから確認
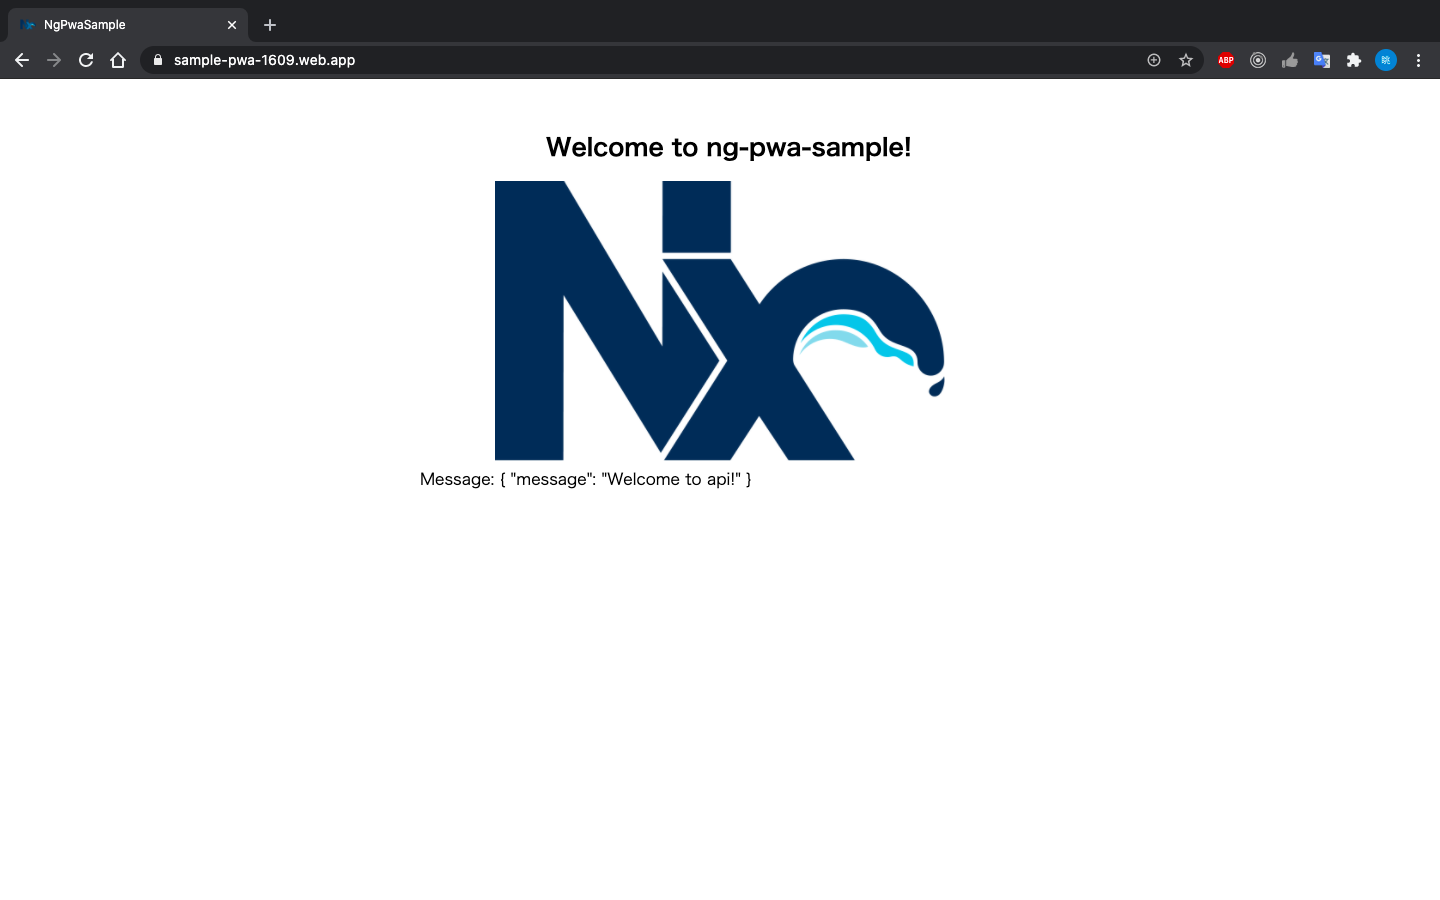
デプロイが終わるとFirebase Hostingのurlが表示されますのでアクセスして確認しましょう。
「Message」のところに{"message": "Welcome to api!"}と表示されていればAPIとの通信が成功しています。
今後の改善点
ワークフローの問題点としてはCloud FunctionsとNestJSをつなぐためだけにExpressを使っていることと、⑤の工程が複雑なことが挙げられます。前者はFastifyへの以降、後者はSchematicsでの自動化で対応できればと思います。たぶん⑤を自動化できれば、10分くらいで環境構築終わるようになるでしょう。
あとがき
最初はNxでAngularのSchematicsが動くか心配でしたが、蓋を開けてみればNx自体がschematicsの塊でした。NestJSも全く触れたことがなかったですがAngularライクな感じですごく効率が捗りそうです。
Angular好きな人は、ぜひこの環境を試してみてください!

