はじめに
前回は「24 日目に LINE ミニアプリが完成する初心者 ── Day12. リッチメニューの作成」と題して、LINE 公式アカウントにリッチメニューを設置しました。
今回はリッチメニューから「問い合わせ」が選択された時に、問い合わせ種別の選択が行えるようにしていきたいと思います。
Flex Message の作成
はじめに問い合わせ種別の選択が行えるメッセージを作成します。
メッセージのレイアウトは LINE 側で用意している Flex Message Simulator を使ってカスタマイズを行うことができます。
私は以下のように作成しました。
今回button 要素の type は message を選択しています。
送信機能を実装
Flex Message の作成が完了したら送信機能の実装を行っていきます。
pages/api配下に新しくwebhook.tsを作成していきます。
今回はリッチメニューのお問い合わせを押した時に投稿される「>お問い合わせ」というメッセージに反応して、問い合わせ種別を問うメッセージを送っていきます。
export default async function handler(req, res) {
  if (req.method === "POST") {
    const { events } = req.body;

    // LINE Webhookからのリクエストがない場合は終了
    if (!events || events.length === 0) {
      return res.status(200).json({ message: "No events" });
    }

    // メッセージイベントを処理
    const event = events[0]; // 最初のイベントを取得
    if (event.type === "message" && event.message.type === "text") {
      const userMessage = event.message.text;

      // ">お問い合わせ"の場合にFlex Messageを返信
      if (userMessage === ">お問い合わせ") {
        const flexMessage = {
          type: "flex",
          altText: "質問メニュー",
          contents: {
            type: "bubble",
            body: {
              type: "box",
              layout: "vertical",
              contents: [
                {
                  type: "box",
                  layout: "vertical",
                  contents: [
                    {
                      type: "text",
                      text: "ご質問内容を選択してください",
                      weight: "regular",
                      offsetStart: "xxl",
                      margin: "sm",
                      offsetTop: "md",
                    },
                    {
                      type: "separator",
                      margin: "xxl",
                      color: "#e5e5e5",
                    },
                  ],
                  backgroundColor: "#fafafa",
                },
                {
                  type: "box",
                  layout: "vertical",
                  contents: [
                    {
                      type: "button",
                      action: {
                        type: "message",
                        label: "物件情報の問い合わせ",
                        text: "物件情報の問い合わせ",
                      },
                    },
                    {
                      type: "button",
                      action: {
                        type: "message",
                        label: "お家探しの情報収集のやり方",
                        text: "お家探しの情報収集のやり方",
                      },
                    },
                    {
                      type: "button",
                      action: {
                        type: "message",
                        label: "住宅購入資金の考え方・予算について",
                        text: "住宅購入資金の考え方・予算について",
                      },
                    },
                    {
                      type: "button",
                      action: {
                        type: "message",
                        label: "新築と中古どちらを買うべきか?",
                        text: "新築と中古どちらを買うべきか?",
                      },
                    },
                    {
                      type: "button",
                      action: {
                        type: "message",
                        label: "リノベーションの流れについて",
                        text: "リノベーションの流れについて",
                      },
                    },
                    {
                      type: "button",
                      action: {
                        type: "message",
                        label: "湘南エリアの魅力",
                        text: "湘南エリアの魅力",
                      },
                    },
                    {
                      type: "button",
                      action: {
                        type: "message",
                        label: "リノベ不動産辻堂羽鳥店について",
                        text: "リノベ不動産辻堂羽鳥店について",
                      },
                    },
                    {
                      type: "button",
                      action: {
                        type: "message",
                        label: "その他",
                        text: "その他",
                      },
                    },
                  ],
                  paddingTop: "md",
                  paddingBottom: "md",
                },
              ],
              paddingAll: "none",
            },
            styles: {
              footer: {
                separator: true,
              },
            },
          },
        };

        try {
          const url = "https://api.line.me/v2/bot/message/reply";

          const response = await fetch(url, {
            method: "POST",
            headers: {
              "Content-Type": "application/json",
              Authorization: `Bearer ${process.env.NEXT_PUBLIC_LINE_ACCESS_TOKEN}`,
            },
            body: JSON.stringify({
              replyToken: event.replyToken,
              messages: [flexMessage],
            }),
          });

          const result = await response.json();
          res.status(200).json(result);
        } catch (err) {
          res.status(500).json({ error: "Internal Server Error" });
        }
      }
    }

    // 他のイベントは無視
    return res.status(200).json({ message: "Event not processed" });
  } else {
    // POST以外のリクエストを拒否
    res.setHeader("Allow", ["POST"]);
    return res.status(405).json({ error: `Method ${req.method} Not Allowed` });
  }
}
デプロイ
送信機能の実装が完了したら、いつも通り以下のコマンドでデプロイを行います。
netlify deploy --build --prod
Webhook の設定
先ほどのメッセージを送信するには Webhook の設定が必要になります。
LINE Developers コンソールのトップ画面から Messaging API のチャネルを選択します。
タブから「Messaging API 設定」を開いていきます。
ここに Webhook 設定という項目があるので「編集」をクリックしましょう。
ここでデプロイした URL に`/api/webhook`を追加した URL を設定して「更新」を行います。
検証
更新ができたら正しく設定ができているか「検証」ボタンを押して確認を行いましょう。
正しく設定ができていると成功モーダルが表示されます。
最後に「Webhook の利用」というトグルボタンをオンにしておきましょう。
ここがオフになっていると Webhook は使えないので注意してください。
動作確認
最後にいつも通り動作確認を行っていきましょう。
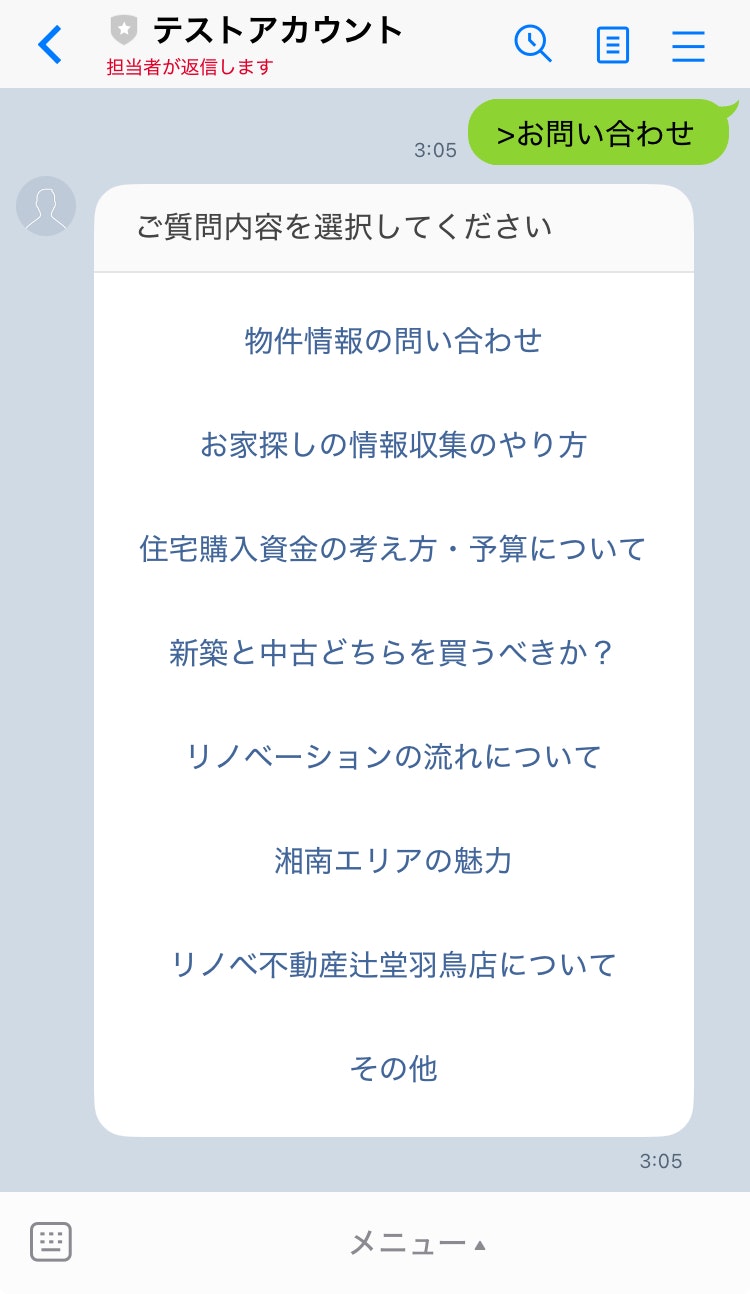
LINE の画面からリッチメニューの問い合わせを押してみます。
正しく選択肢が表示されました!

勿論それぞれの選択肢を押すとメッセージが入力されるのが確認できました。

まとめ
ここまでで前回実装したリッチメニューの問い合わせを選択した際に、問い合わせ種別を選択するメッセージが返信される機能実装してきました。
次回は、問い合わせ内容をスプレッドシートへ出力する機能を実装していきたいと思います。
残りは 11 日!
気になる方は是非フォローやカレンダー購読をお願いします![]()


