いいっすよね。UFO。
あの愛らしいフォルムとか、中から何でてくるかわかんないミステリアス感とか…最高やん?
でも、皆さん実際に見たことあります?
もしかしたら………ないんじゃないですか?
「言われてみれば一度も見たことがない…?」
「小さい頃に見たあれは僕らの妄想なのか…?」
「UFOなんて本当はいないんだ…!!!」
と、不安な夜をお過ごしの方も多いと思います。
でも安心してください。
いるんです。
そう。アメリカならね。
※これは FOSS4G Advent Calendar 2019 の19日目の記事です。
todo
- UFOの目撃情報を追う
- データを取得する
- csvに吐き出す
- geocodingする(位置情報を取得する)
- csvを更新
- GeoJSONに吐き出す
- ブラウザの地図上に表示する
UFOの目撃情報を追う
アメリカには国立UFO情報センター(NUFORC)という1974年以来継続的に運用されている、アメリカ全土のUFO目撃情報が集約されたステキなサイトがあります。
すげえなアメリカ。
今回はこちらのデータセットを利用させてもらいましょう。
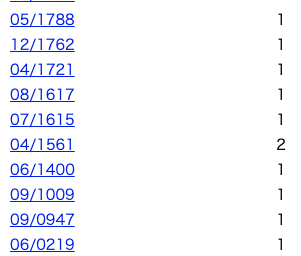
データはこちらに月ごとにまとめられており、最新のものは12月に2件ほど登録されていますが、今回は月ごとのデータが出揃った11月のものを拝借しましょう。
11/2019をクリックすると以下の様にデータが表形式で格納されていることがわかります。
スクレイピングがイージーそうですね。
ちなみに一番古いデータは**西暦209年6月**です。すげえな国立UFO情報センター。
データを取得する
~~Pythonでスクレイピングなんて猫でも出来るので、~~今回はあまり触ったことのないGoでスクレイピングしてみましょう。
まずは$GOPATH/src/github.com/hogehoge以下にディレクトリを作成し、go.modを作成します。これでディレクトリごとにパッケージ管理できるみたい。
Goでは$GOPATH/src/github.com/hogehoge以下にソースコードを配置するのがお作法の様です。
mkdir $GOPATH/src/github.com/hogehoge/ufo_view
cd $GOPATH/src/github.com/hogehoge/ufo_view
go mod init
作成したディレクトリにmain.goを作成し、コードを書いていきましょう。
touch main.go
package main

//スクレイピングしたいURL
var targetURL = "http://www.nuforc.org/webreports/ndxe201911.html"

func main() {
}
まず先に必要なパッケージをインポートしておきます。(外部パッケージはgo get github.com/kellydunn/golang-geoの様な感じで事前にダウンロードしてください)
import (
	"flag"
	"fmt"
	"os"

	geo "github.com/kellydunn/golang-geo"

	"github.com/PuerkitoBio/goquery"
	"github.com/gocarina/gocsv"
	geojson "github.com/paulmach/go.geojson"
)
main.goの中にスクレイピングしたデータを格納するための構造体とその配列の型を定義しましょう
type ufoData struct {
	Date     string  `csv:"Date"`
	City     string  `csv:"City"`
	State    string  `csv:"State"`
	Shape    string  `csv:"Shape"`
	Duration string  `csv:"Duration"`
	Summary  string  `csv:"Summary"`
	Posted   string  `csv:"Posted"`
	Lat      float64 `csv:"Lat"`
	Lng      float64 `csv:"Lng"`
}

type ufoDates []ufoData
スクレイピングするための関数を書きます
ufoDateList := scraping.GetUFO(targetURL)

func GetUFO(url string) ufoDates {
	var ufoDataList ufoDates
	//URLを読み込んで格納
	doc, err := goquery.NewDocument(url)
	if err != nil {
		panic(err)
	}
	//mapのキーとするためのスライスを定義
	dataSample := []string{"Date", "City", "State", "Shape", "Duration", "Summary", "Posted", "Lat", "Lng"}
	f := 0
	//htmlのtrタグを取得
	doc.Find("tr").Each(func(index int, s *goquery.Selection) {

		ufo := make(map[string]string)
		//子タグ(1レコード)を取得
		s.Children().Each(func(i int, c *goquery.Selection) {
			//タグ内のtextを格納
			elements := c.Text()
			ufo[dataSample[i]] = elements
		})
		//構造体に格納
		data := ufoData{ufo["Date"],
			ufo["City"],
			ufo["State"],
			ufo["Shape"],
			ufo["Duration"],
			ufo["Summary"],
			ufo["Posted"],
			0,
			0}
		//ヘッダー行を飛ばす
		if f != 0 {
			//スライスに格納
			ufoDataList = append(ufoDataList, data)
		}
		f++
	})
	return ufoDataList
}
csvに吐き出す
取得したデータをcsvに吐き出します。
scraping.WriteCSV(afterGeoCodingDataList)

func WriteCSV(ufoDateList ufoDates) {
	file, _ := os.OpenFile("ufo_data.csv", os.O_WRONLY|os.O_CREATE, 0666)
	defer file.Close()

	gocsv.MarshalFile(&ufoDateList, file)
	return
}
作成されたcsvを見ましょう。
Date,City,State,Shape,Duration,Summary,Posted,Lat,Lng
11/30/19 06:30,New Port Richey,FL,Unknown,Few minutes,I seen something with colorful lights moving strangely. It was pretty low to be an airplane. And the way it moved was definitely not a,12/1/19,0,0
11/30/19 06:00,Plymouth,MA,Light,15 seconds,"Bright light moving in the sky at ASTRONOMICAL speed then disappearing, re-appearing  and plummeting to earth.",12/1/19,0,0
11/30/19 05:20,Lytham St Annes (UK/England),,,30-90 seconds,"15 stars moving quickly and silently over St Annes on Sea.  ((NUFORC Note:  ""Starlink"" satellites.  PD))",12/1/19,0,0
...
ちゃんと取得できてる!
geocodingする(位置情報を取得する)
気が付いた方もいるかもれませんが、元データには緯度経度の情報が含まれておらず、Lat,Lngのカラムは0となっています(ufoDataを0に設定しているので)
なので位置情報を付与していきましょう。
緯度経度の情報は入っていませんが、Cityカラムに都市名が入っていますので、この情報をもとにgeocodingしていきましょう!
※geocoding:地名などの情報から緯度経度などの位置情報を付与すること。
geocodingには、思考停止でGCPを使います。
Google Maps PlatformのGeocoding APIを叩きますのでGCPアカウントを作成しておいてください。
APIを叩きすぎると家庭が崩壊します。不正利用にも気をつけましょう。
AWSが不正利用され300万円の請求が届いてから免除までの一部始終
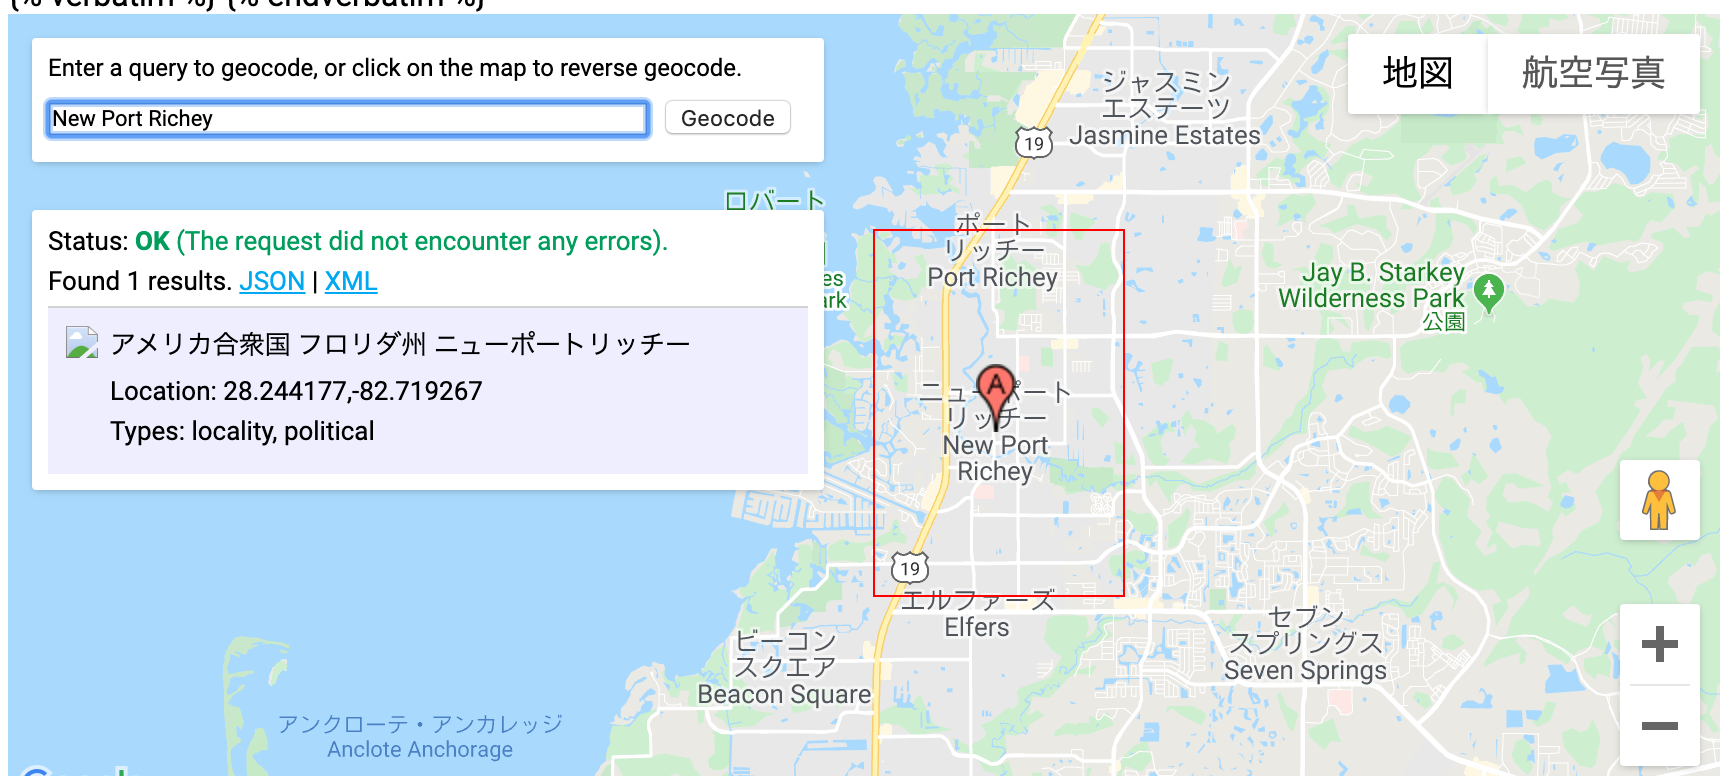
New Port Richeyと入力するとこんな感じで緯度経度が取得できます。

※こちらから試せます。
このAPIとgolang-geoパッケージを利用してgeocodingを行います。
api_keyなんかはflagパッケージを利用してコマンドライン引数からとるとか、環境変数に入れるなどしましょう。
公開すると一生後悔します。
afterGeoCodingDataList := scraping.GeoCoding(ufoDateList)

func GeoCoding(ufoDateList ufoDates) ufoDates {
	var afterGeoCodingDataList ufoDates
	var GoogleAPIKey = flag.String("a", "default", "api_keyを指定")
	flag.Parse()
	g := new(geo.GoogleGeocoder)
	geo.SetGoogleAPIKey(*GoogleAPIKey)
	//var data, _ = g.Geocode("New Port Richey")
	for _, d := range ufoDateList {
		var data, err = g.Geocode(d.City)
		if err != nil {
			d.Lat = 0
			d.Lng = 0
			afterGeoCodingDataList = append(afterGeoCodingDataList, d)
		} else {
			d.Lat = data.Lat()
			d.Lng = data.Lng()
			afterGeoCodingDataList = append(afterGeoCodingDataList, d)
		}
	}
	fmt.Println(afterGeoCodingDataList)
	return afterGeoCodingDataList
}
csvを更新
APIを叩くたびに課金される、というのは我々下級国民にとって精神的外傷が大きいので、geocodingした情報は先ほど作成したcsvに突っ込んで更新しましょう。
scraping.WriteCSV(afterGeoCodingDataList)

func WriteCSV(ufoDateList ufoDates) {
	file, _ := os.OpenFile("ufo_data.csv", os.O_WRONLY|os.O_CREATE, 0666)
	defer file.Close()

	gocsv.MarshalFile(&ufoDateList, file)
	return
}
geojsonに吐き出す
GeoJSONとは...
GeoJSONは、JavaScript Object Notation (JSON) を基とした、GISデータを記述するためのフォーマットです(地理空間データ交換フォーマット)。この形式では、Point, LineString, Polygon, MultiPoint, MultiLineString,MultiPolygon,GeometryCollectionをサポートしています。軽量言語であり、Web GISでの利用例が多く見られます。GitHubには、GeoJSONの地図表示機能があり、リポジトリにデータを配置するだけで可視化が可能です。以下では、GeoJSONで点、線、面を記述する手法について解説します。
「GIS実習オープン教材」より
とのことです。
要は位置情報の入ったJSONってことっすね。
scraping.StructToGeojson(ufoDateList)

func StructToGeojson(ufoDateList []*ufoData) {
	fc := geojson.NewFeatureCollection()
	for _, d := range ufoDateList {
		g := geojson.NewPointFeature([]float64{d.Lng, d.Lat})
		g.Properties["Date"] = d.Date
		g.Properties["City"] = d.City
		g.Properties["State"] = d.State
		g.Properties["Shape"] = d.Shape
		g.Properties["Duration"] = d.Duration
		g.Properties["Summary"] = d.Summary
		g.Properties["Posted"] = d.Posted
		fc.AddFeature(g)
	}
	fcJSON, err := fc.MarshalJSON()
	if err != nil {
		panic(err)
	}
	file, err := os.OpenFile("ufo_data.json", os.O_WRONLY|os.O_CREATE, 0600)
	if err != nil {
		panic(err)
	}
	defer file.Close()
	file.Write(fcJSON)
}
これで以下の様なGeoJSONが吐き出されたと思います。
(整形してなくてすいません…)
{"type":"FeatureCollection","features":[{"type":"Feature","geometry":{"type":"Point","coordinates":[-82.7192671,28.2441768]},"properties":{"City":"New Port Richey","Date":"11/30/19 06:30","Duration":"Few minutes","Posted":"12/1/19","Shape":"Unknown","State":"FL","Summary":"I seen something with colorful lights moving strangely. It was pretty low to be an airplane. And the way it moved was definitely not a"}},{"type":"Feature","geometry":{"type":"Point","coordinates":[-70.6672621,41.9584457]},"properties":{"City":"Plymouth","Date":"11/30/19 06:00","Duration":"15 seconds","Posted":"12/1/19","Shape":"Light","State":"MA","Summary":"Bright light moving in the sky at ASTRONOMICAL speed then disappearing, re-appearing and plummeting to earth."}}...
ブラウザの地図上に表示する
※yoichigmf@githubさんからご指摘いただきましたが、geocodingの結果をGoogleマップ以外の地図に表示させることは禁止されておりました。大変申し訳ございません。
当然ではございますが、googleのサービスを利用する際には利用規約等を良く確認するようにいたします。
フロントエンドはよくわからないので、ナニモワカラナイVue.jsを利用します。
# vuecliのインストール
npm i -g @vue/cli
# vueと言う名前でプロジェクトを作成して移動
vue create vue && cd vue
vue/src/assetsに作成したgeojsonの拡張子を.jsonに変更して入れていきましょう。
あと、どっかから適当にUFOの画像でも探してきて同じ場所に保存してください。
ファイルをバシバシ修正、存在しないなら作成していきます。
import Vue from 'vue'
import App from './App.vue'
import router from './router'
import store from './store'

import 'mapbox-gl/dist/mapbox-gl.css'

Vue.config.productionTip = false

new Vue({
    router,
    store,
    render: h => h(App)
}).$mount('#app')
<template>
    <div class="about">
        <MapPane></MapPane>
    </div>
</template>

<script>
    import MapPane from '@/components/MapPane.vue'

    export default {
        name: 'about',
        components: {
            MapPane
        }
    }
</script>
<template>
    <div class='mapPane'>
        <div id='map'></div>
    </div>
</template>

<script>
    import mapboxgl from 'mapbox-gl'
    import ufo_data from '@/assets/ufo_data.json'
    import ufo_image from '@/assets/ufo.png'

    export default {
        name: 'MapPane',
        mounted: function () {
            this.mapCreate();
        },
        methods: {
            mapCreate: function () {
                let map = new mapboxgl.Map({
                    container: "map",
                    style: {
                        "version": 8,
                        "sources": {
                            "OSM": {
                                "type": "raster",
                                "tiles": ["http://a.tile.openstreetmap.org/{z}/{x}/{y}.png"],
                                "tileSize": 256,
                            }
                        },
                        "layers": [{
                            "id": "OSM",
                            "type": "raster",
                            "source": "OSM",
                            "minzoom": 0,
                            "maxzoom": 18
                        }]
                    },
                    center: [-82.7192671,28.2441768],
                    zoom: 12
                });

                map.on('load', function () {
                    map.addSource('ufo_point', {
                        type: 'geojson',
                        data: ufo_data
                    });

                    map.loadImage(ufo_image, function (error, res) {
                        map.addImage('ufo_image', res);
                    });

                    map.addLayer({
                        "id": "ufo_point",
                        "type": "symbol",
                        "source": "ufo_point",
                        "layout": {
                            "icon-image": "ufo_image",
                            "icon-allow-overlap": true,
                            "icon-size": 0.08
                        },
                    });
                });

                map.addControl(new mapboxgl.NavigationControl());
            }
        }
    }
</script>

<style scoped>
    #map {
        z-index: 0;
        height: 800px;
    }
</style>
修正したらローカルでサーバーを起動させていきましょう!
ローカルサーバーを起動
npm run serve
サーバーが立ち上がったらブラウザからhttp://localhost:8080/に接続してみましょう!
UFOいっぱいおる!!!!!!!!!
結論
Goは楽しい
Vue.jsは楽ちん
UFOはかわいい


