#はじめに
swiftとContainer View Controllerの実装の把握のために
Facebook風な画面のアニメーションを行うアプリのソース(obj-c)をswiftに書き換えてみました。
Container ViewはiOS6から使えるようになった機能、swiftはiOS7以上、ということで対象はiOS7以上のアプリ制作です
ご指摘から内容を
NavigationItem→BarButtonItemと変更しています。
#概要
- ViewContoller に Container View Controllerを複数個乗せる
- ButtonからのEventをNSNotificationCenterで受ける
- 画面を左右にアニメーションさせる
- がんばってconstrainsつけてみる
#手順
- storyboardへの配置
- クラスの実装
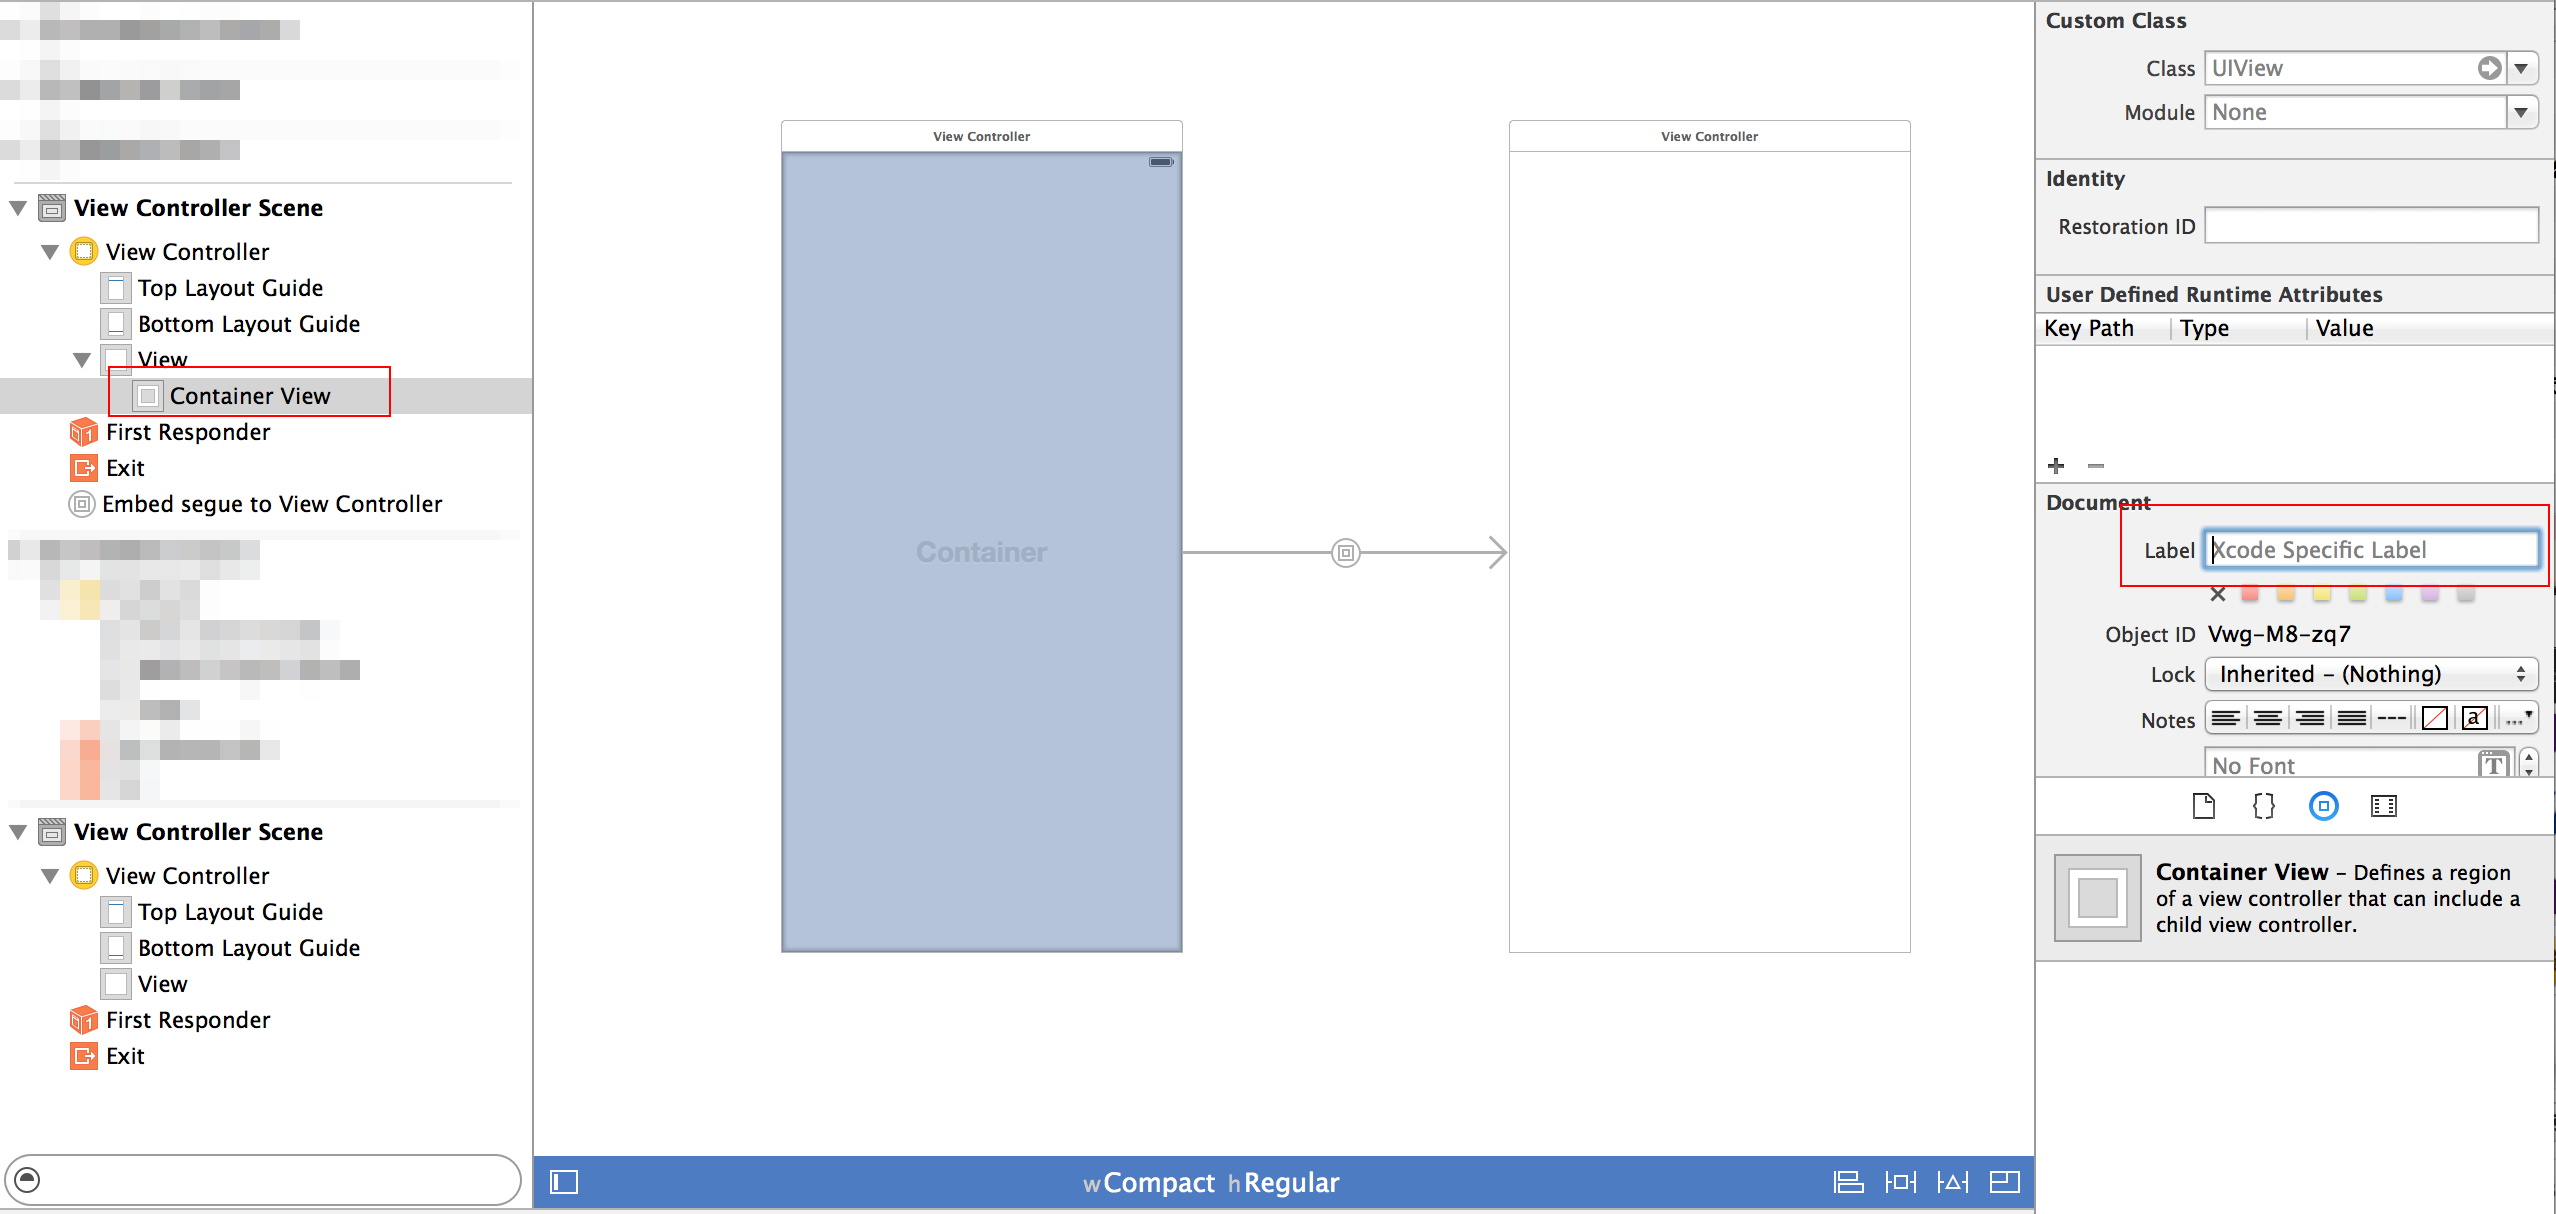
#storyboardでContainerViewを配置
ViewControlleにContainer Viewを配置すると
segueでenmedされているViewController が追加されます。
Document Outlineに複数のContainerがあると紛らわしいので
lableにコントローラー名を入れておきます。
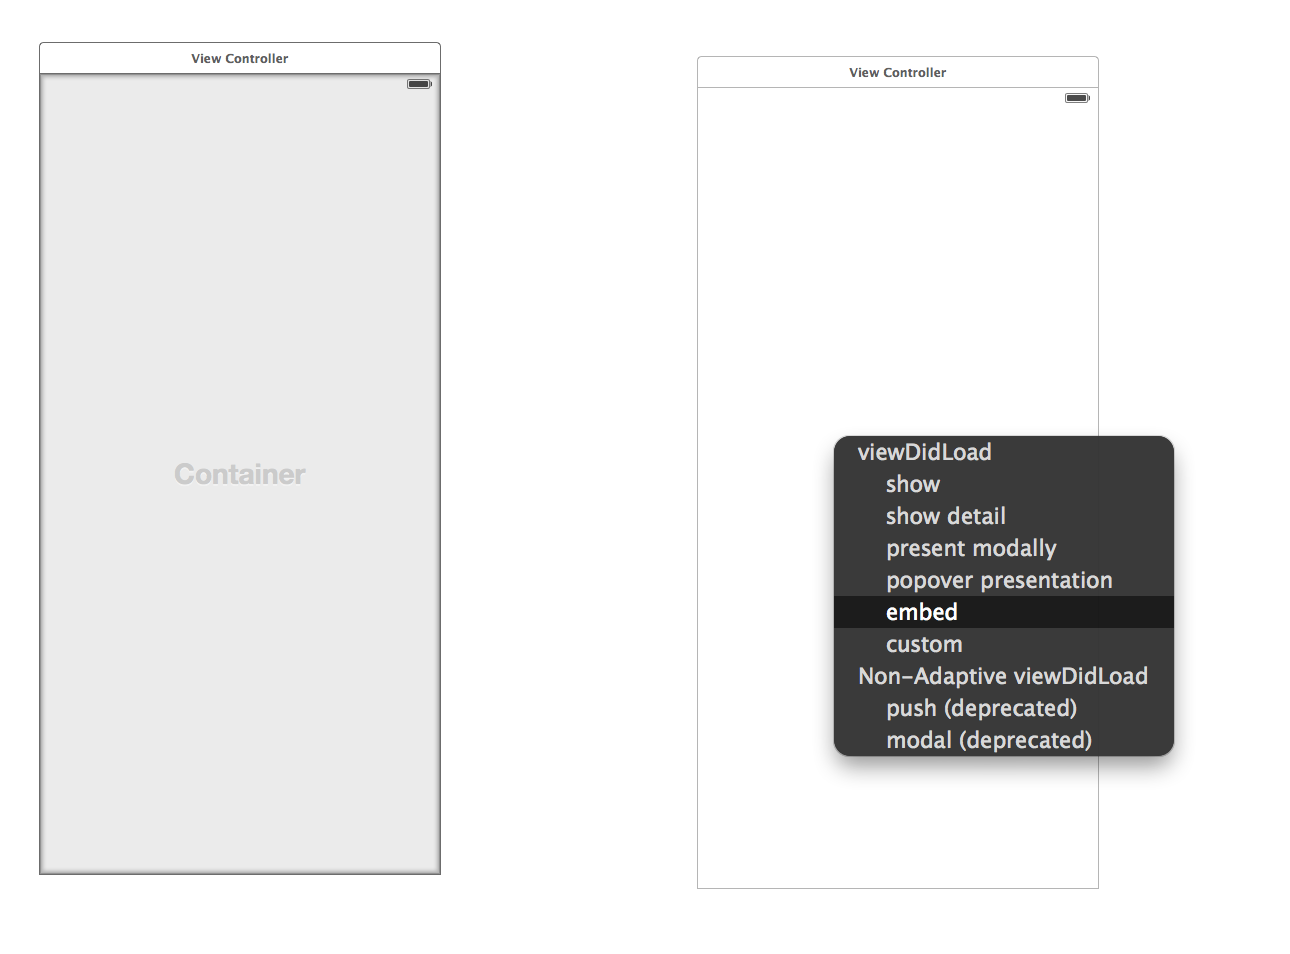
先に作成しているViewControllerをembedする場合はContainerから対象へsegueを引くと選択できます
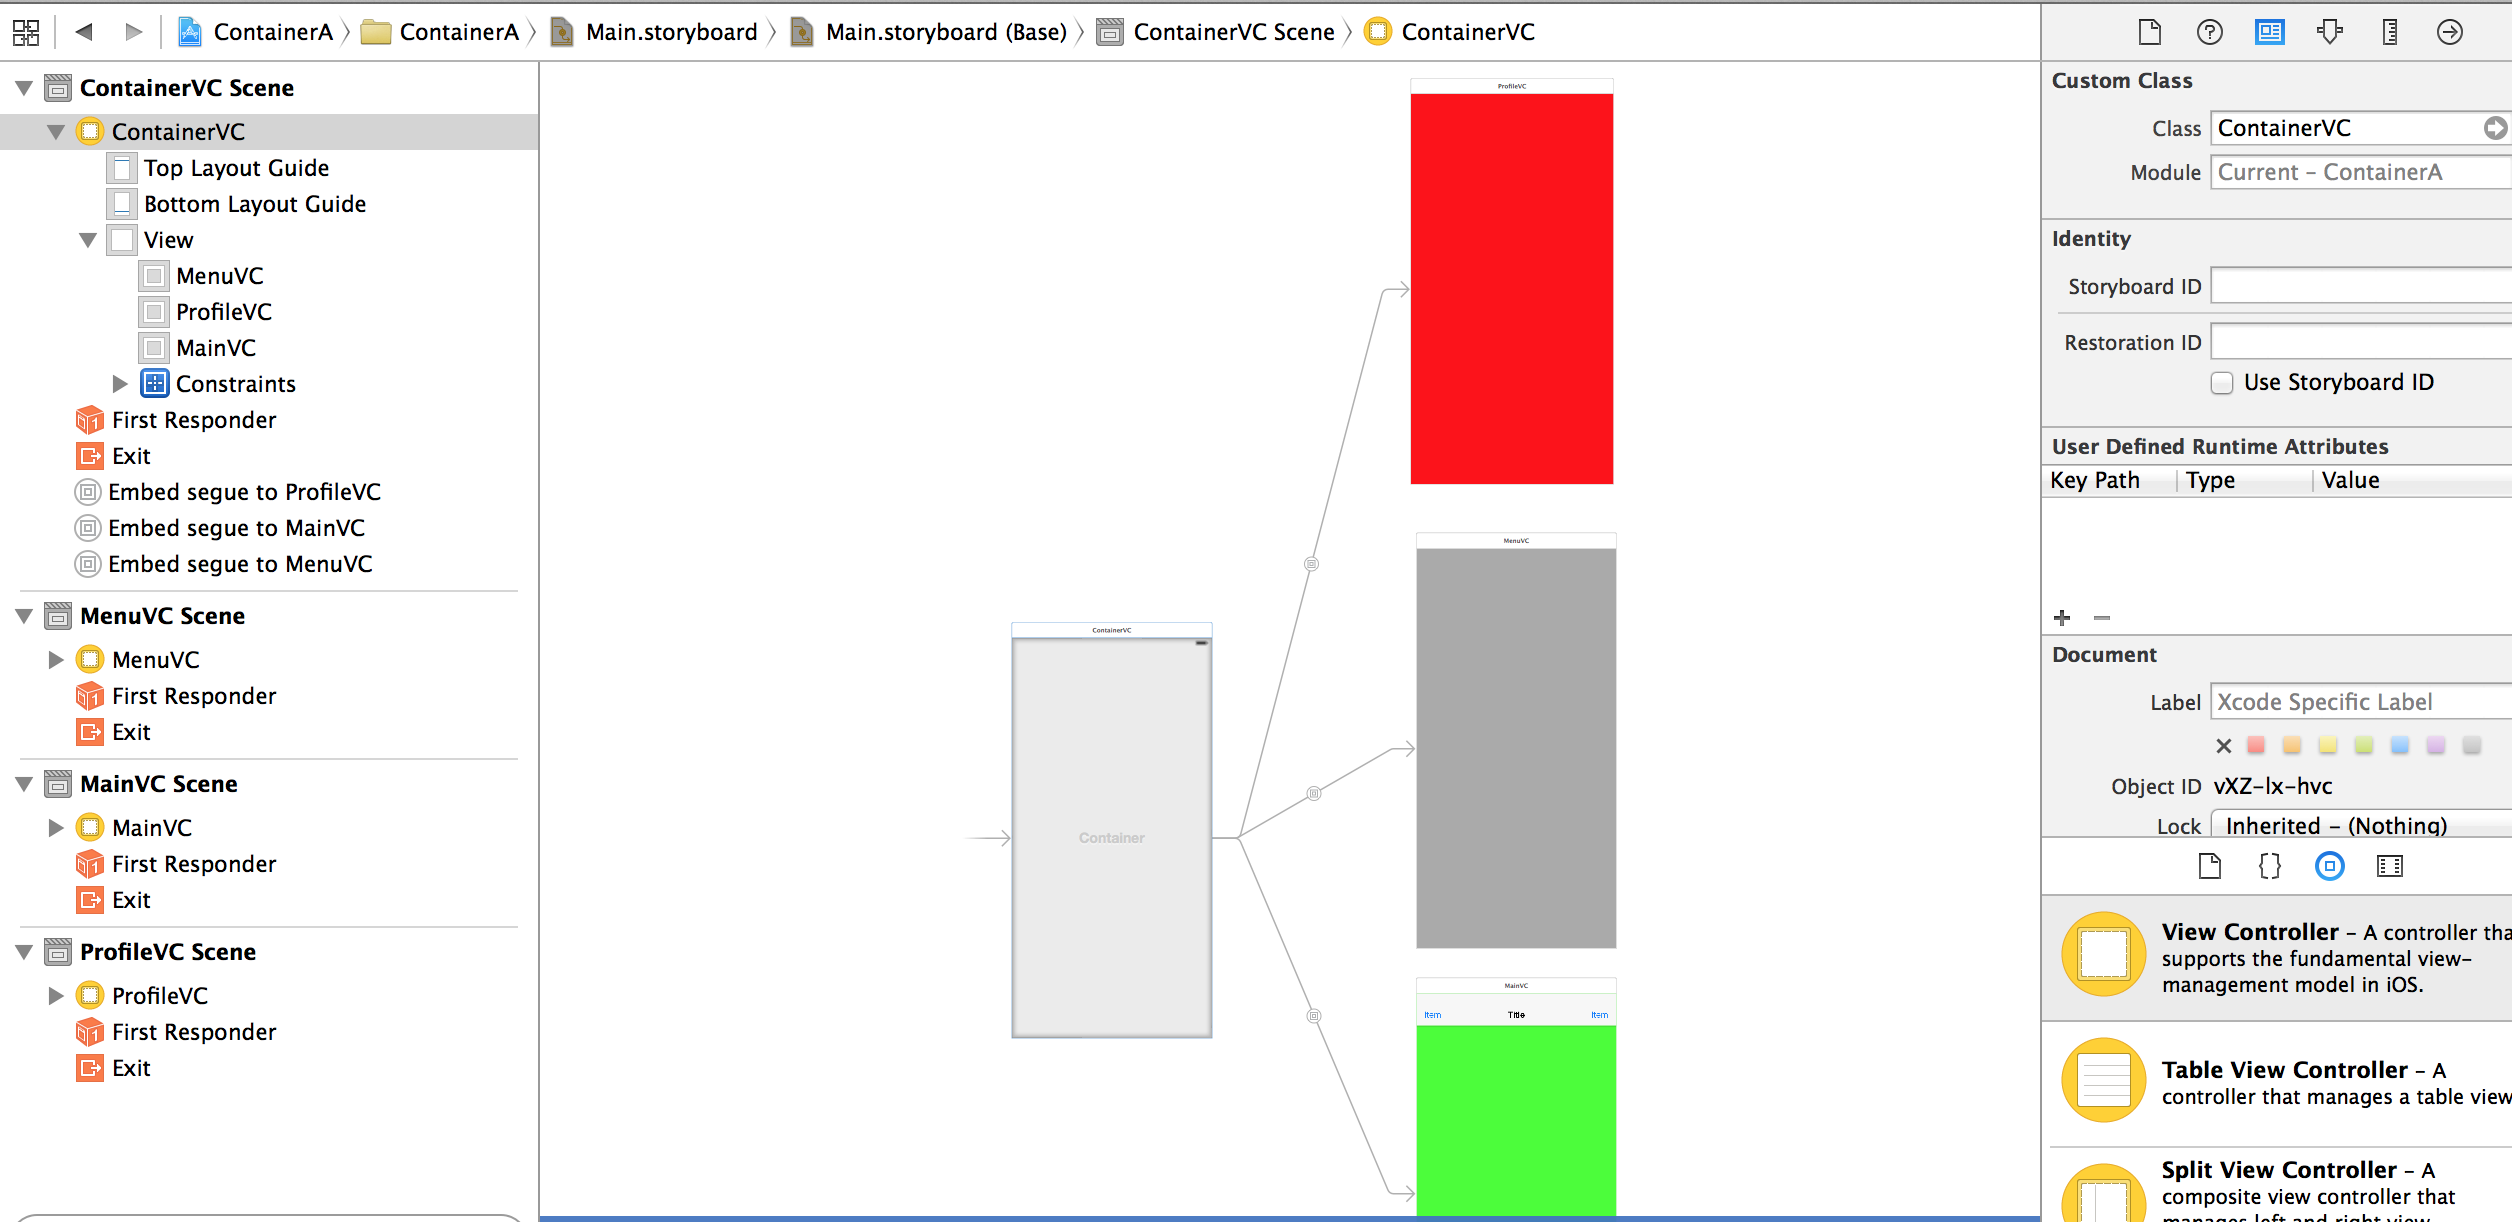
(1) Container Viewを3つ乗せたViewControllerを配置
(2) 空のViewControllerのクラスファイルを4つ作ります
- ContainerVC.swift
- MenuVC.swift
- MainVC.swift
- ProfileVC.swift
(3) storyboardに配置したViewContollerに(2)で作成したクラスファイルを指定します
(4) ContainerVC以外のViewContollerに背景色をつけます
(5) MainVCに
- NavigationBar
-
NavigationItemBarButtonItem(二つ)
を配置します。
#クラスファイルでの実装
##設定を共有するクラス
元のコード
#import <Foundation/Foundation.h>
@interface ShareSettings : NSObject
@property (nonatomic) BOOL menuTapped;
@property (nonatomic) BOOL profileTapped;
+ (id)sharedSettings;
@end
+(id)sharedSettings;
ここが困りました。
杉上さんが寄稿されている記事から参考にさせていただいて
http://qiita.com/susieyy/items/f71435cc962e70d81b37#2-21
書き換えたものが次の通りです。
import UIKit

class ShareSettings: NSObject {

    var menuTapped: Bool!
    var profileTapped: Bool!

    override init() {
        super.init()
    }
    override var description: String { return "ShareSetting class" }

    class var sharedInstance : ShareSettings {
        struct Static {
            static let instance : ShareSettings = ShareSettings()
        }
        return Static.instance
    }
}
##ContainerVC
(1)3つのContainer View へのOutletと設定の初期化を記述します
outletの記述後、@IBOutletで指定したContainerViewにstoryboardで接続します
class ContainerVC: UIViewController {
    @IBOutlet weak var menuVC: UIView!
    @IBOutlet weak var profileVC: UIView!
    @IBOutlet weak var mainVC: UIView!
    var shareSettings :ShareSetting = ShareSetting.sharedInstance;

    override func viewDidLoad() {
        super.viewDidLoad()

        // Do any additional setup after loading the view.
        shareSettings.menuTapped = false
        shareSettings.profileTapped = false
    }
//略
}
(2)NSNotificationCenterの追加と削除
    override func viewDidAppear(animated: Bool) {
        super.viewDidAppear(animated)
        NSNotificationCenter.defaultCenter().addObserver(
            self, selector: "menuTapped", name: "menuTappedNotification", object: nil)
        NSNotificationCenter.defaultCenter().addObserver(
            self, selector: "profileTapped", name: "profileTappedNotification", object: nil)
    }

    override func viewDidDisappear(animated: Bool) {
        NSNotificationCenter.defaultCenter().removeObserver(
            self, name: "menuTappedNotification", object: nil)
        NSNotificationCenter.defaultCenter().removeObserver(
            self, name: "profileTappedNotification", object: nil)
    }
(3)NavigationItem BarButtonItemを押した時の動作をつける
- 左のメニュー画面コンテナ、右のプロフィール画面コンテナの横幅は固定
- 中央のメイン画面コンテナはフルサイズ
- 中央のメイン画面は左、右コンテナより大きい
とルールを決めて
constrainsをつけます。
    func menuTapped(){
        if (shareSettings.menuTapped.boolValue){
            UIView.animateWithDuration(
                0.3,
                animations: {
                    self.mainVC.frame =
                        CGRectMake(0, self.mainVC.frame.origin.y, self.mainVC.frame.size.width, self.mainVC.frame.size.height)
                    //hidden
                    self.menuVC.frame =
                        CGRectMake( -self.menuVC.frame.size.width, self.menuVC.frame.origin.y, self.menuVC.frame.size.width, self.menuVC.frame.size.height)
                }
            )
        } else {
            UIView.animateWithDuration(
                0.3,
                animations: {
                    self.mainVC.frame =
                        CGRectMake(self.menuVC.frame.size.width, self.mainVC.frame.origin.y, self.mainVC.frame.size.width, self.mainVC.frame.size.height)
                    //appear
                    self.menuVC.frame =
                        CGRectMake( 0, self.menuVC.frame.origin.y, self.menuVC.frame.size.width, self.menuVC.frame.size.height)
                }
            )
        }
        shareSettings.menuTapped = !shareSettings.menuTapped
    }

    func profileTapped(){
        if (shareSettings.profileTapped.boolValue){
            UIView.animateWithDuration(
                0.3,
                animations: {
                    self.mainVC.frame =
                        CGRectMake(0, self.mainVC.frame.origin.y, self.mainVC.frame.size.width, self.mainVC.frame.size.height)
                    //hidden
                    self.profileVC.frame =
                        CGRectMake(self.view.frame.size.width, self.profileVC.frame.origin.y, self.profileVC.frame.size.width, self.profileVC.frame.size.height)
                }
            )
        } else {
            UIView.animateWithDuration(
                0.3,
                animations: {
                    self.mainVC.frame =
                        CGRectMake(-self.profileVC.frame.size.width, self.mainVC.frame.origin.y, self.mainVC.frame.size.width, self.mainVC.frame.size.height)
                    //appear
                    self.profileVC.frame =
                        CGRectMake(self.view.frame.size.width - self.profileVC.frame.size.width, self.profileVC.frame.origin.y, self.profileVC.frame.size.width, self.profileVC.frame.size.height)
                }
            )
        }
        shareSettings.profileTapped = !shareSettings.profileTapped
    }
起動時
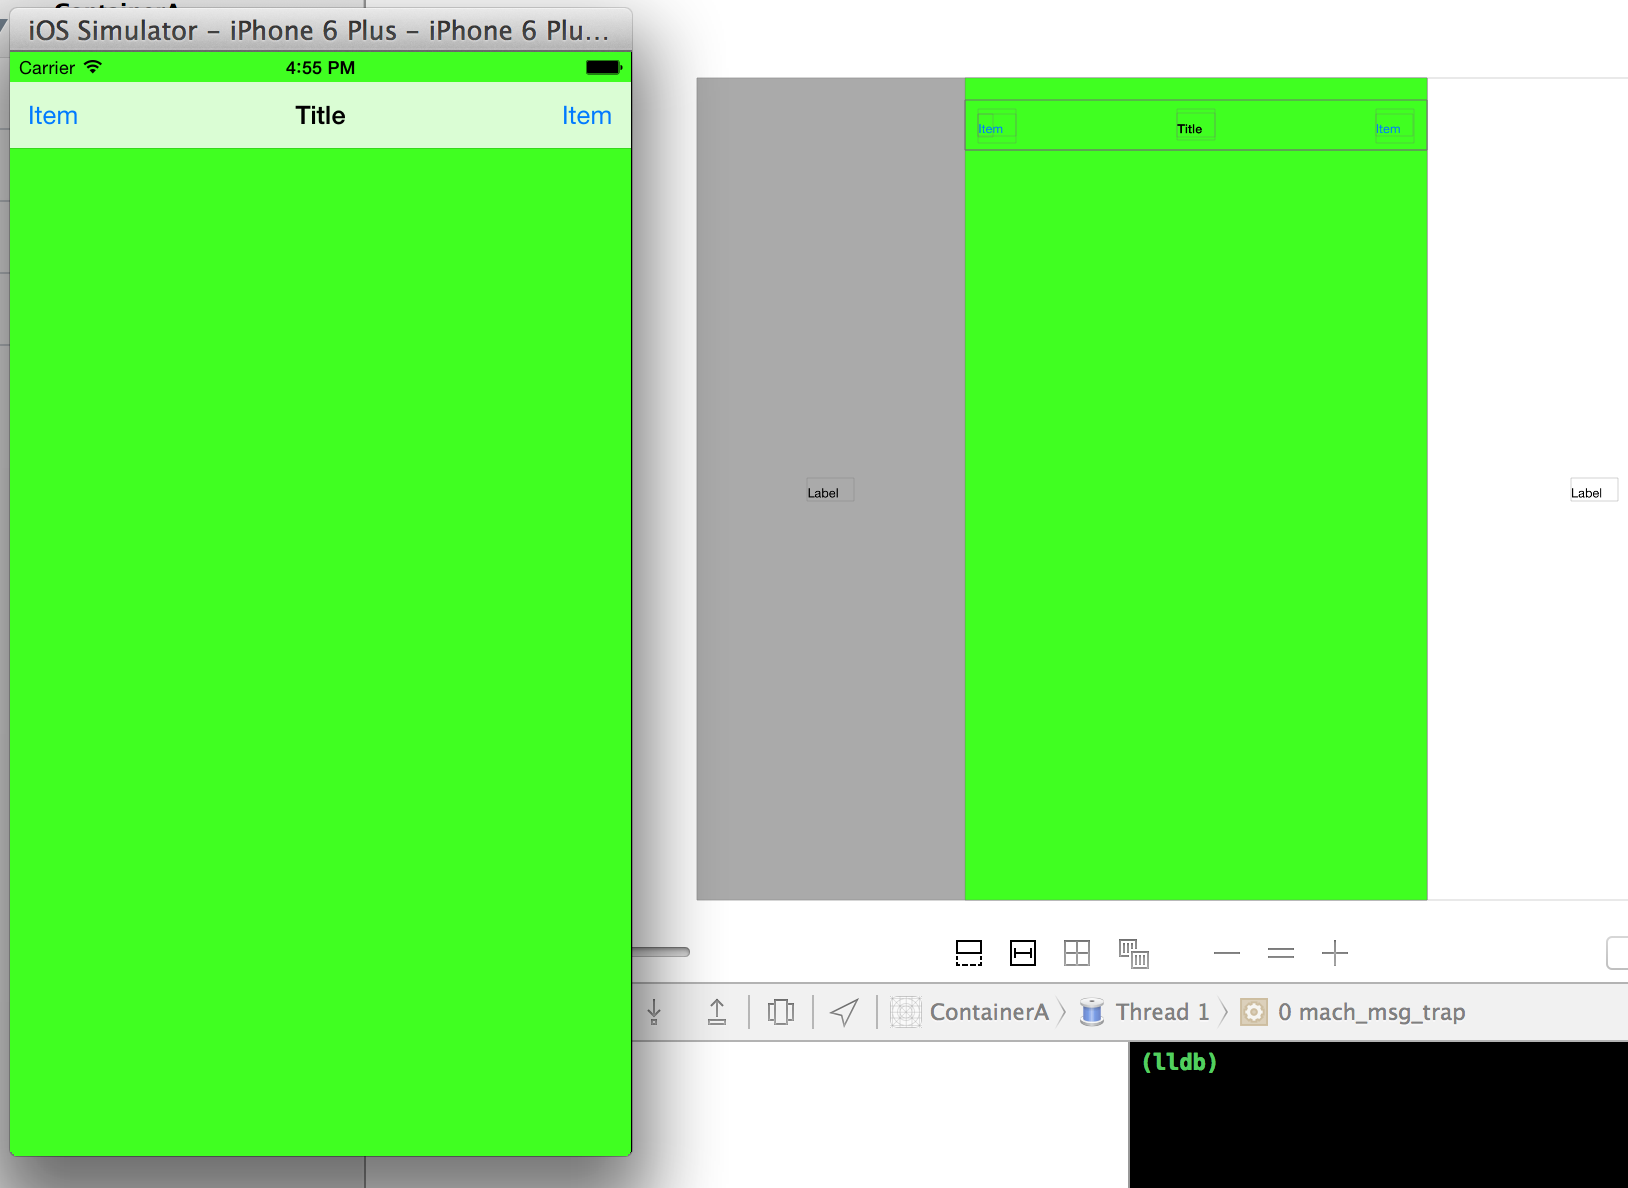
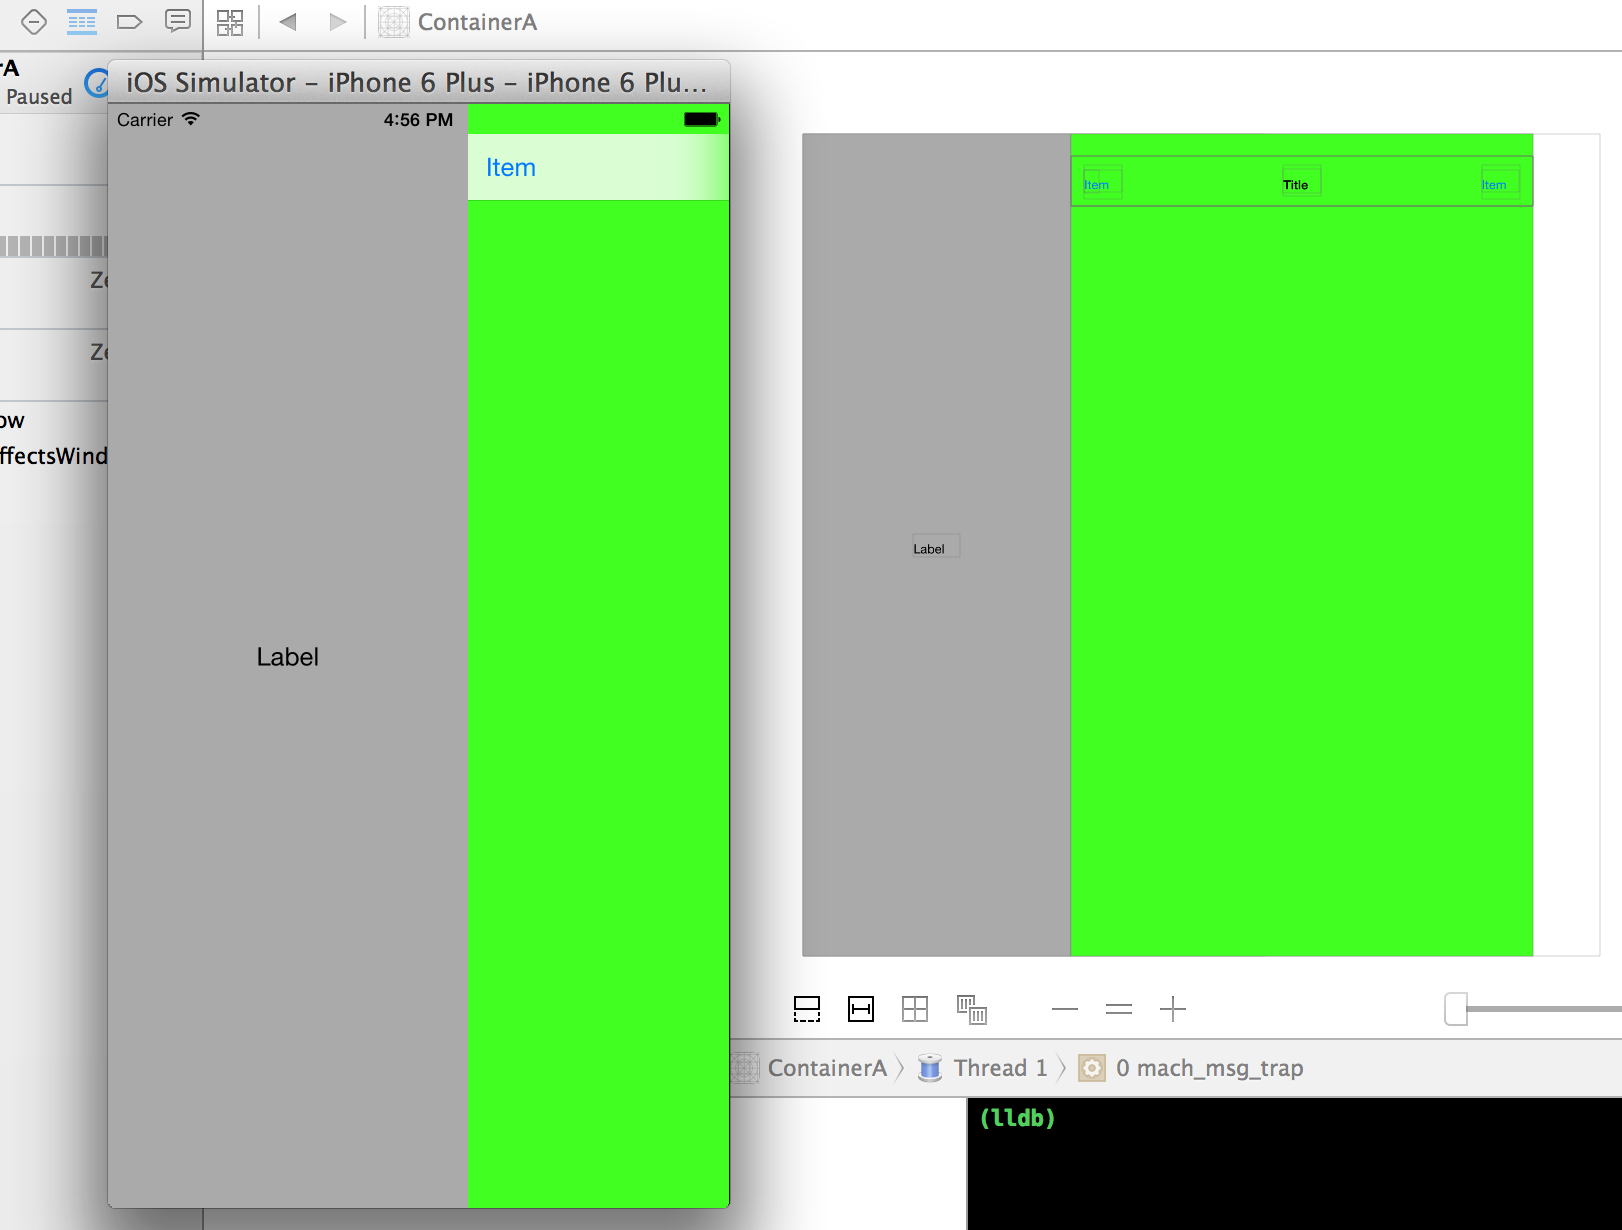
左ボタン(Menu)を押したとき
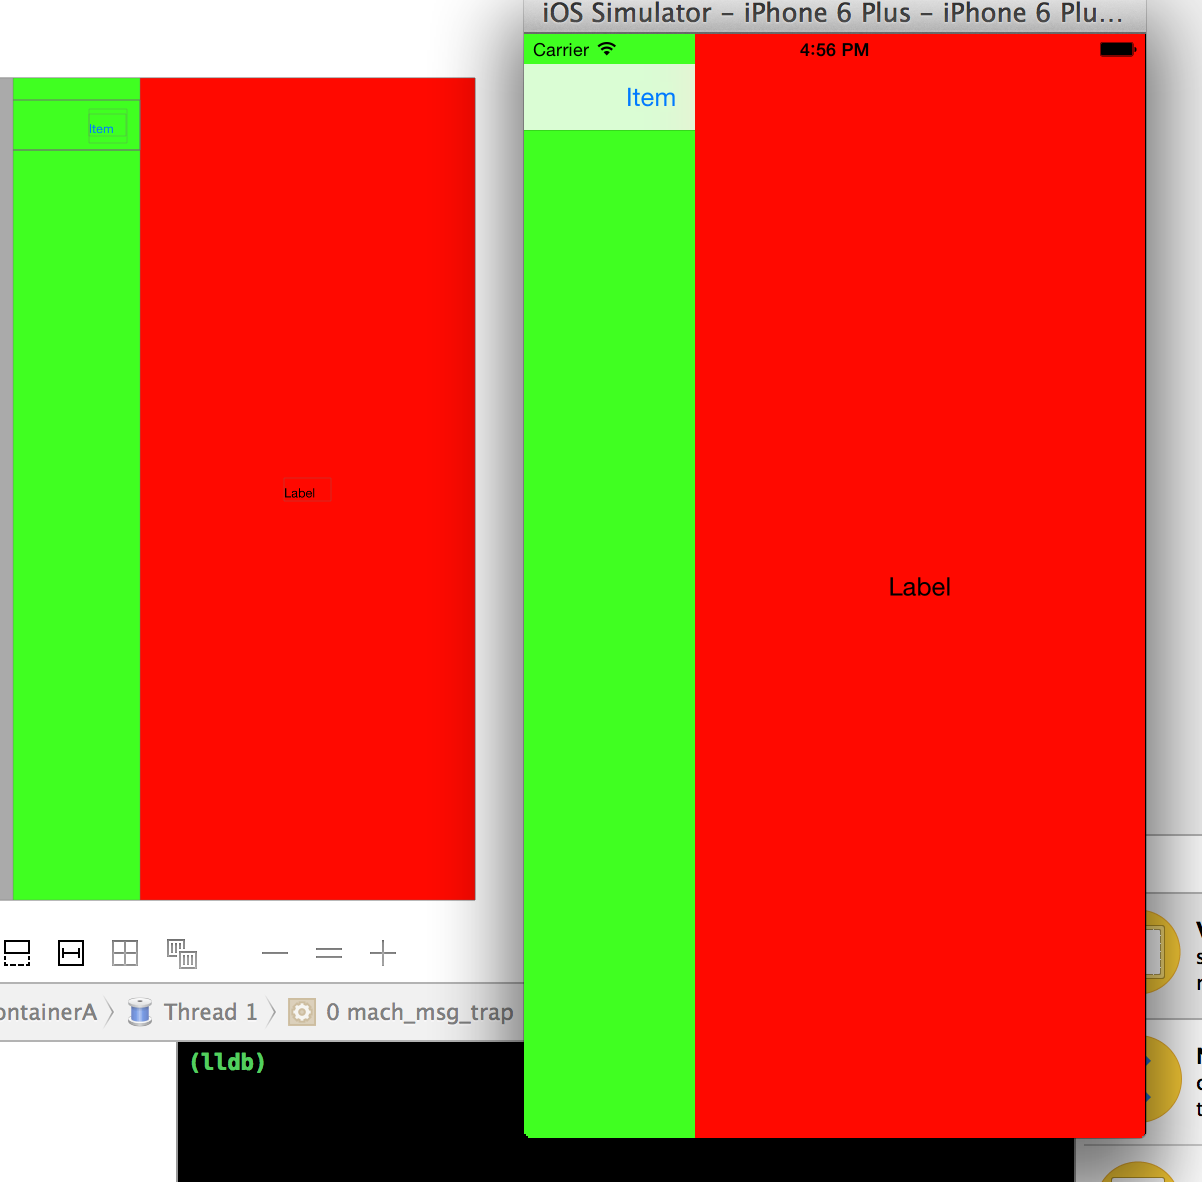
右ボタン(Profile)を押したとき
##MainVC
NotificationCenterへ通知する部分を記述します。
@IBActionで指定した NavigationItem BarButtonItemにstoryboard上で接続します
import UIKit

class MainVC: UIViewController {

    override func viewDidLoad() {
        super.viewDidLoad()

        // Do any additional setup after loading the view.
    }

    override func didReceiveMemoryWarning() {
        super.didReceiveMemoryWarning()
        // Dispose of any resources that can be recreated.
    }

    @IBAction func menuTapped(sender: AnyObject) {
        NSNotificationCenter.defaultCenter().postNotificationName("menuTappedNotification", object: nil)
    }

    @IBAction func profileTapped(sender: AnyObject) {
        NSNotificationCenter.defaultCenter().postNotificationName("profileTappedNotification", object: nil)
    }
}
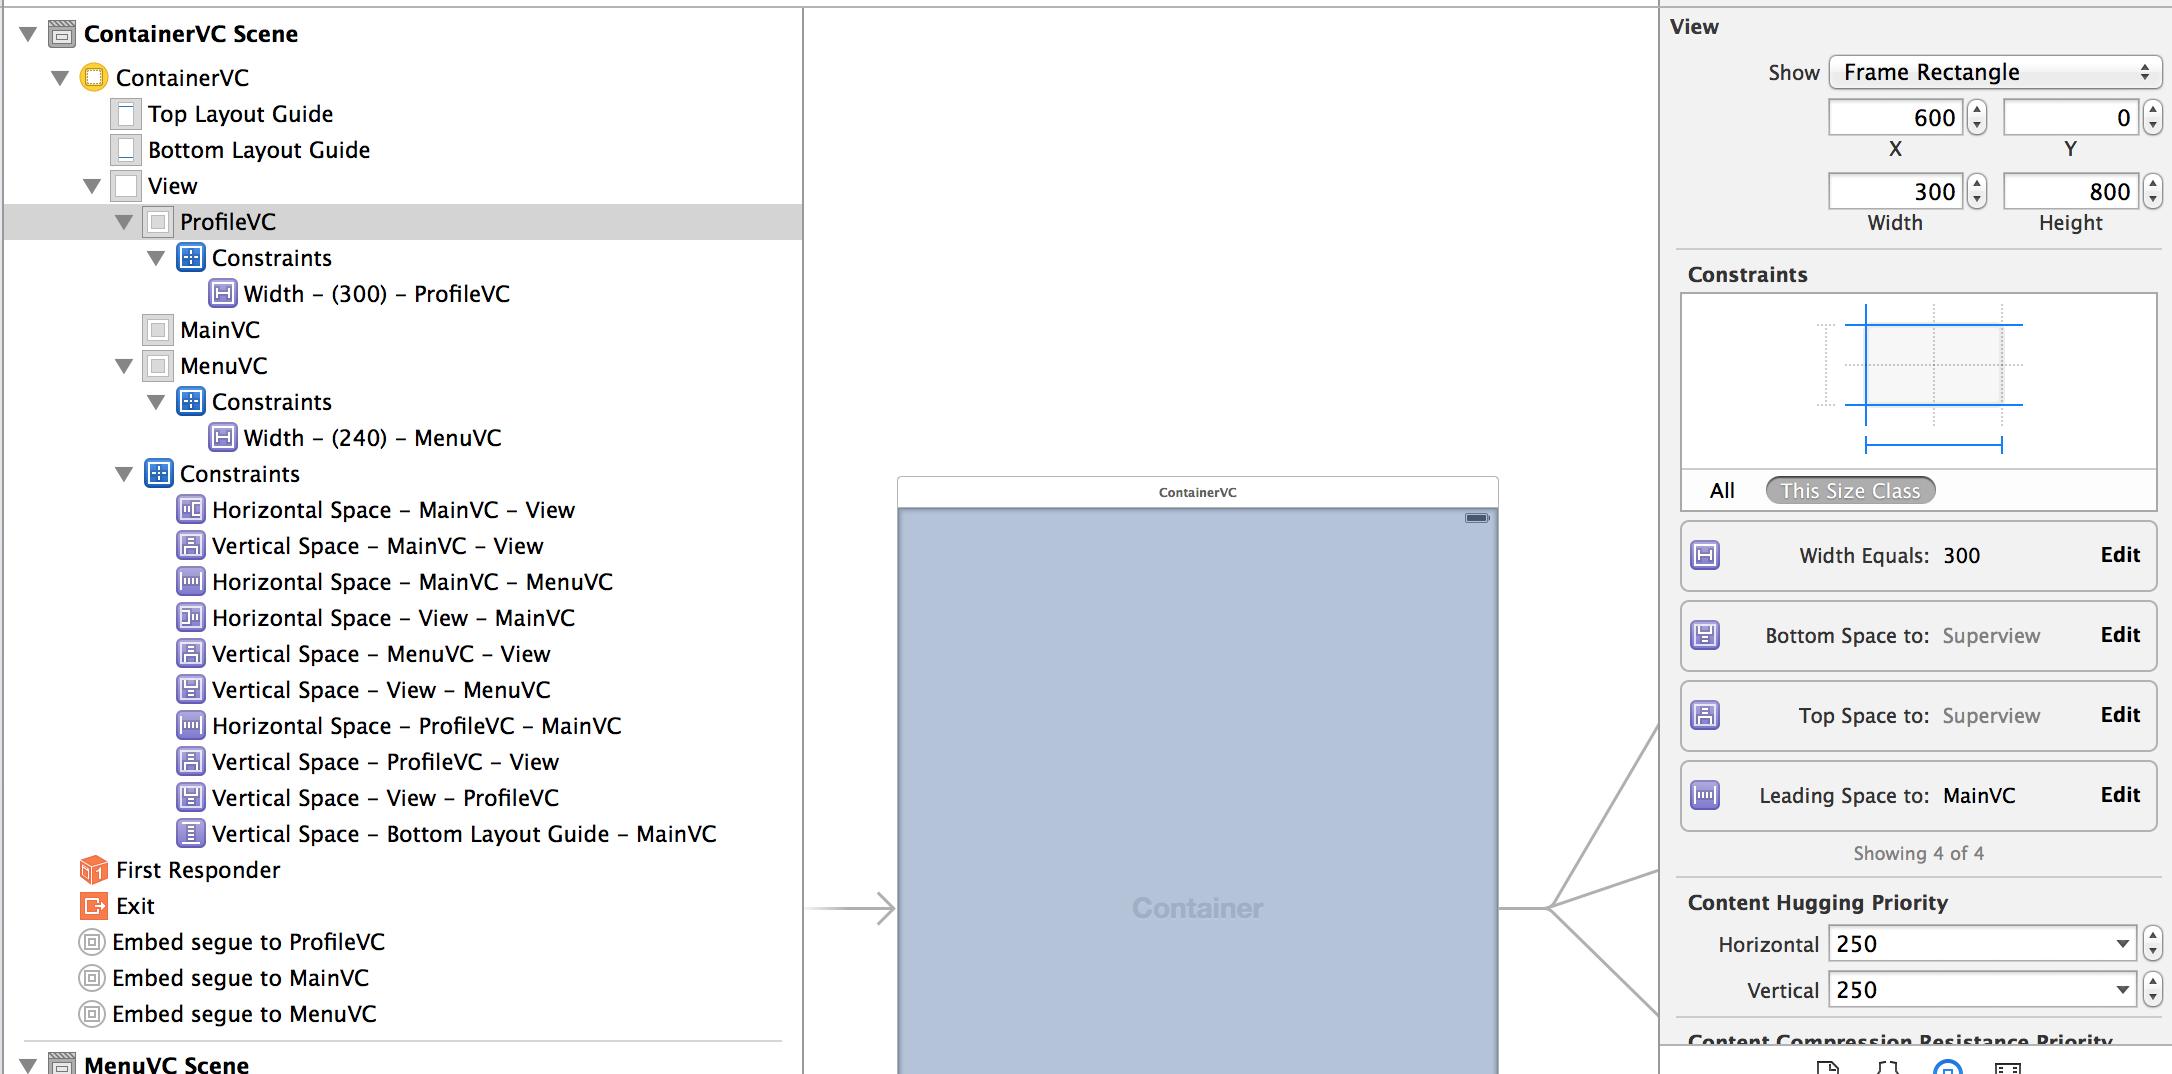
#constrainsをつける
参考程度にしておいてください
##MainVC
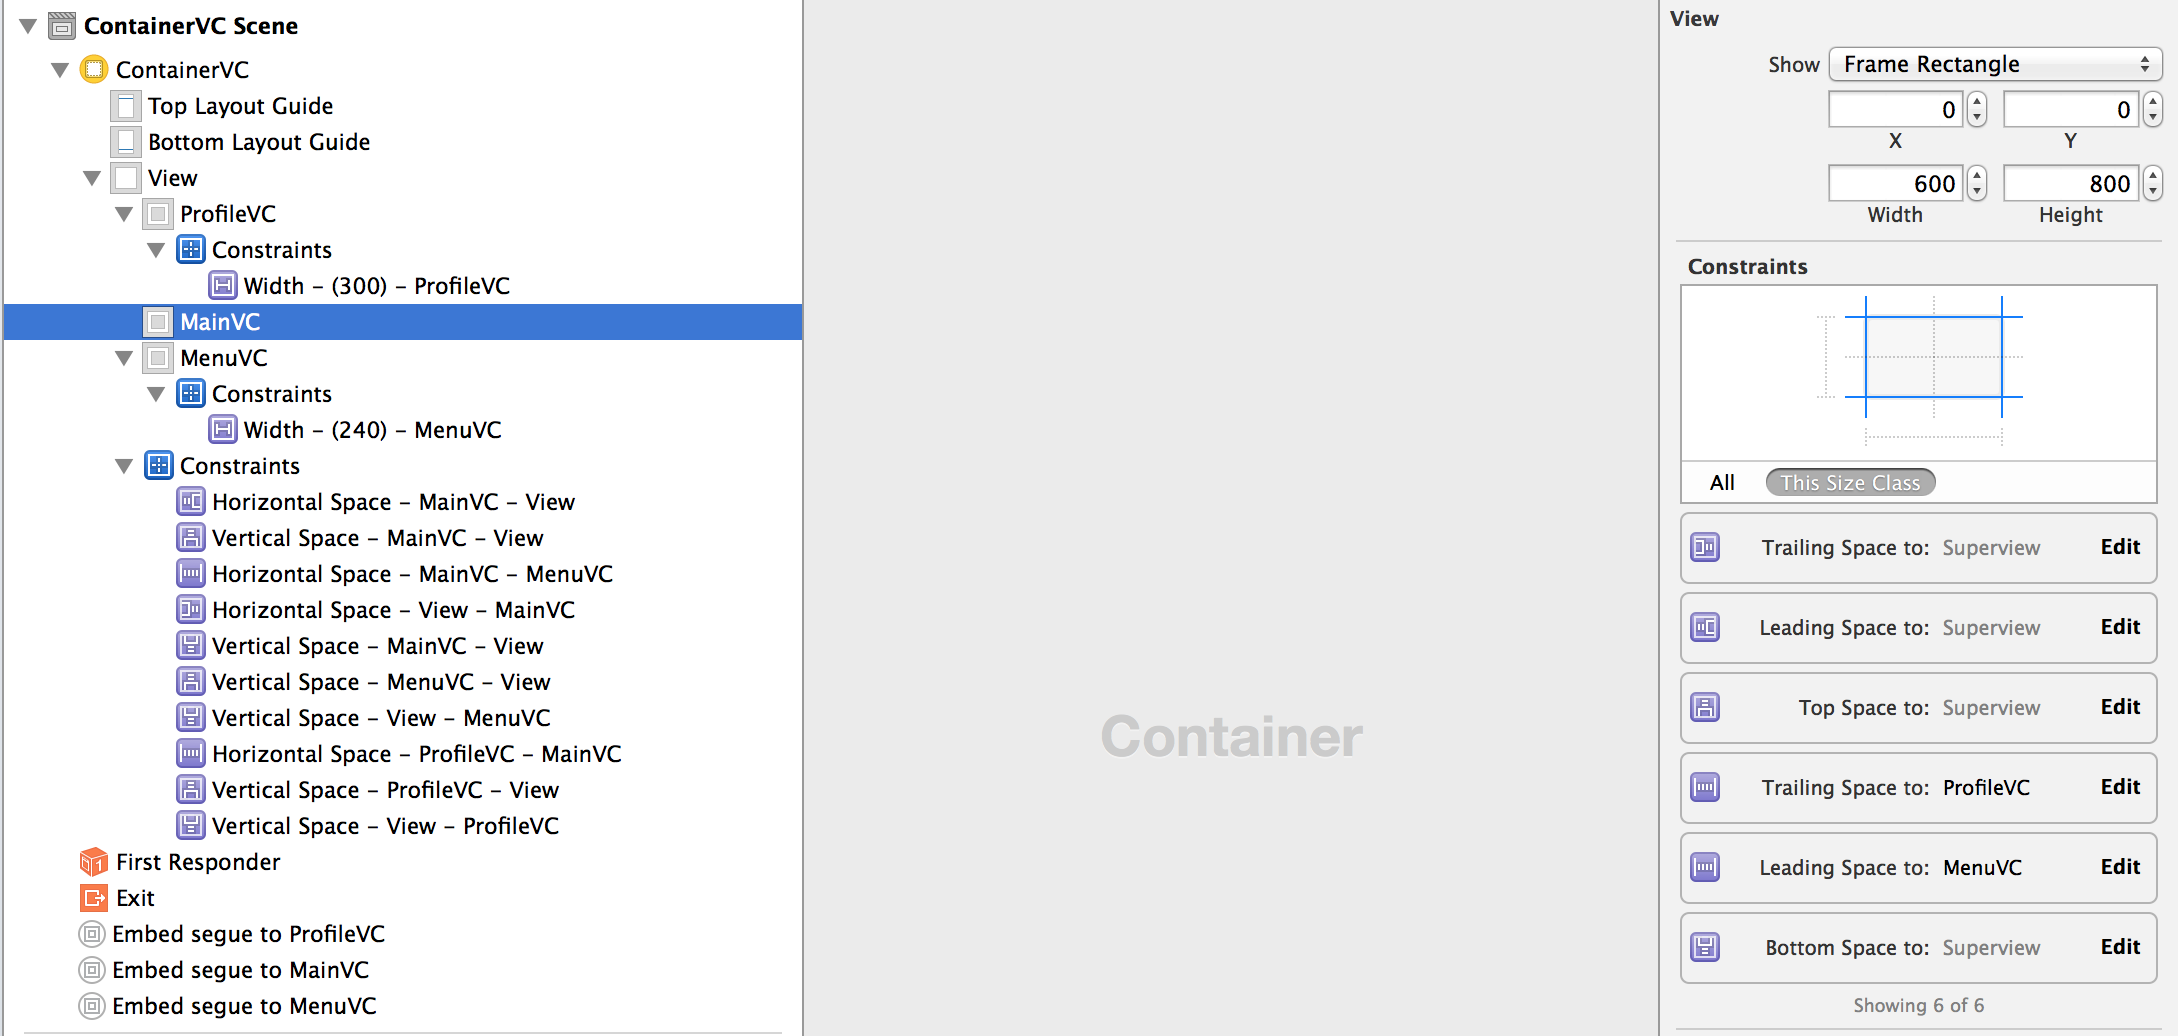
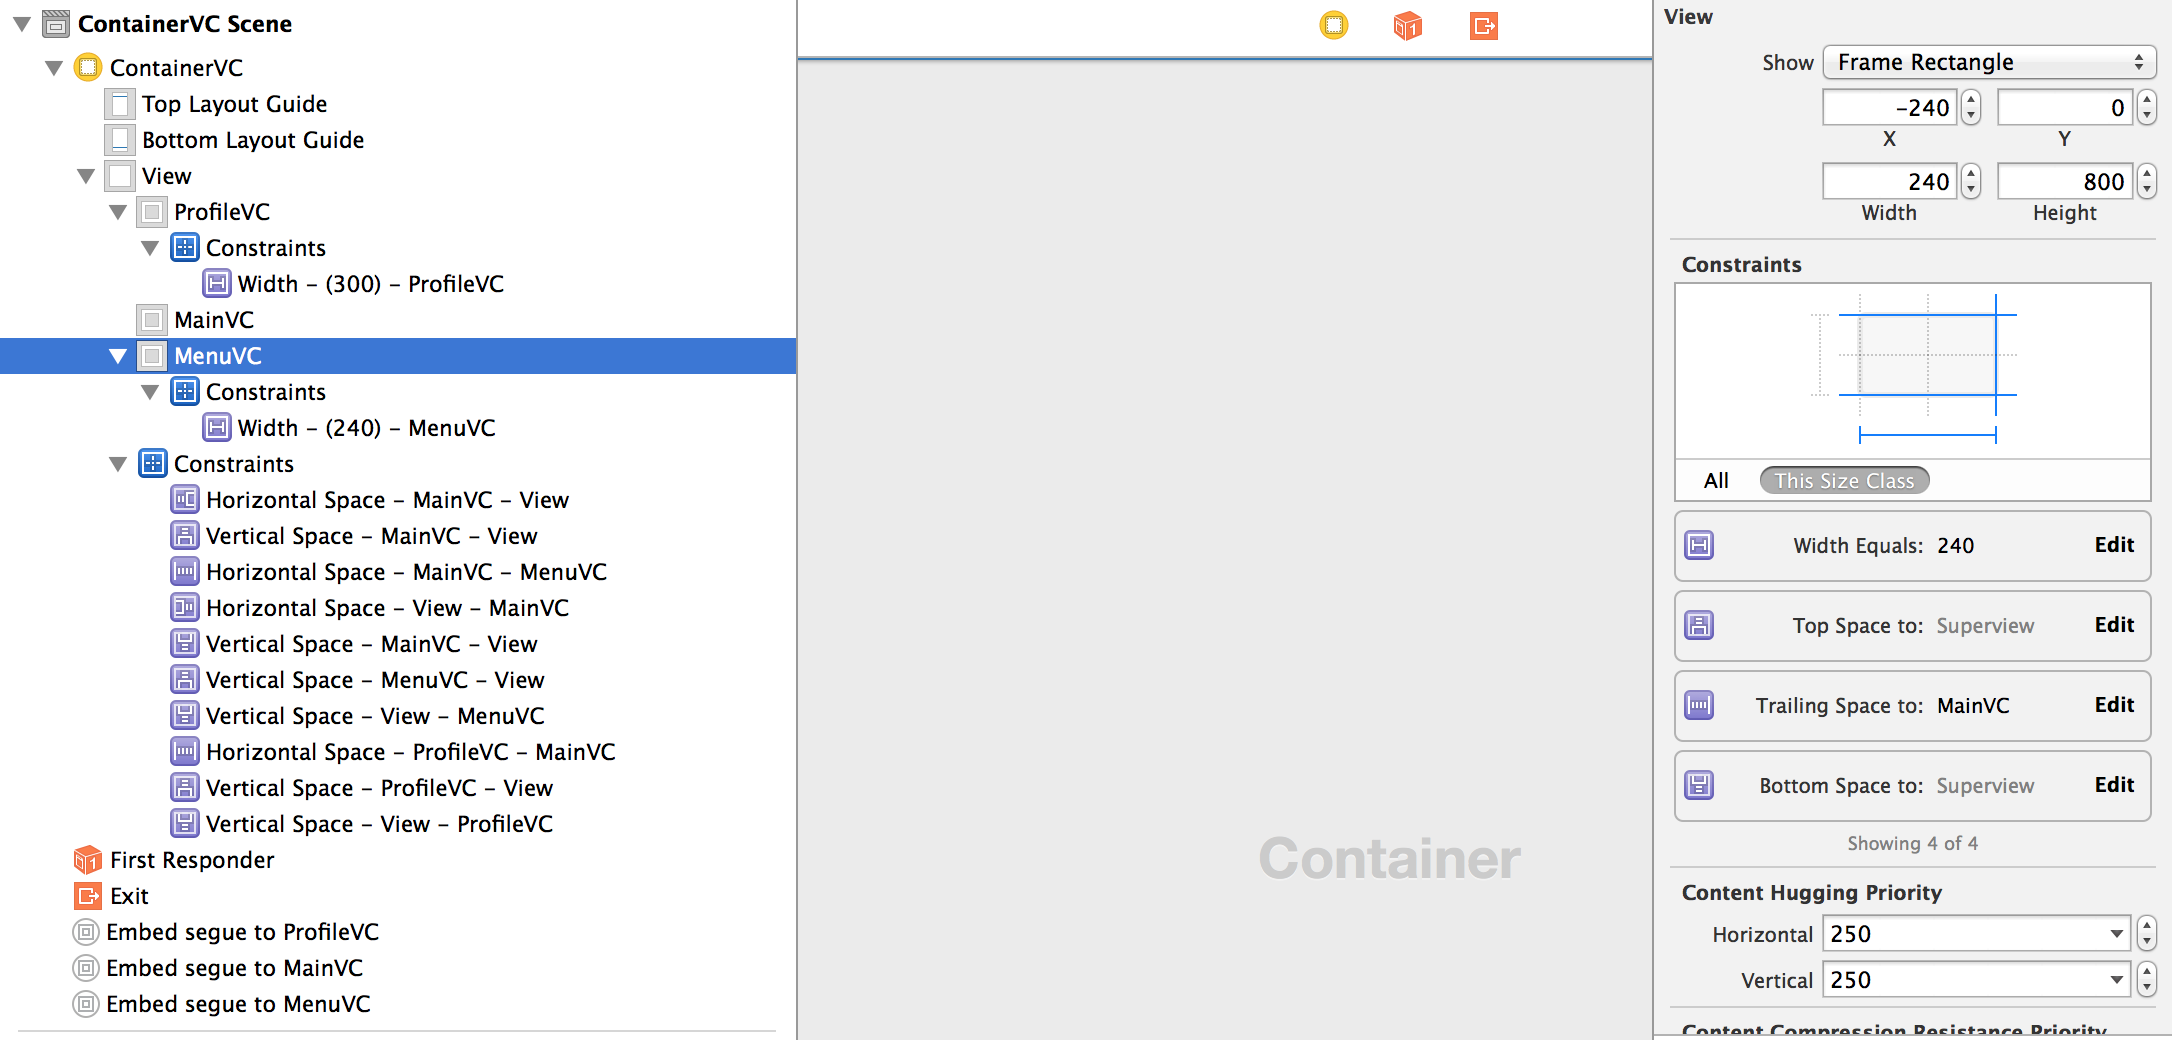
##MenuVC
constrains
##ProfileVC
constrains
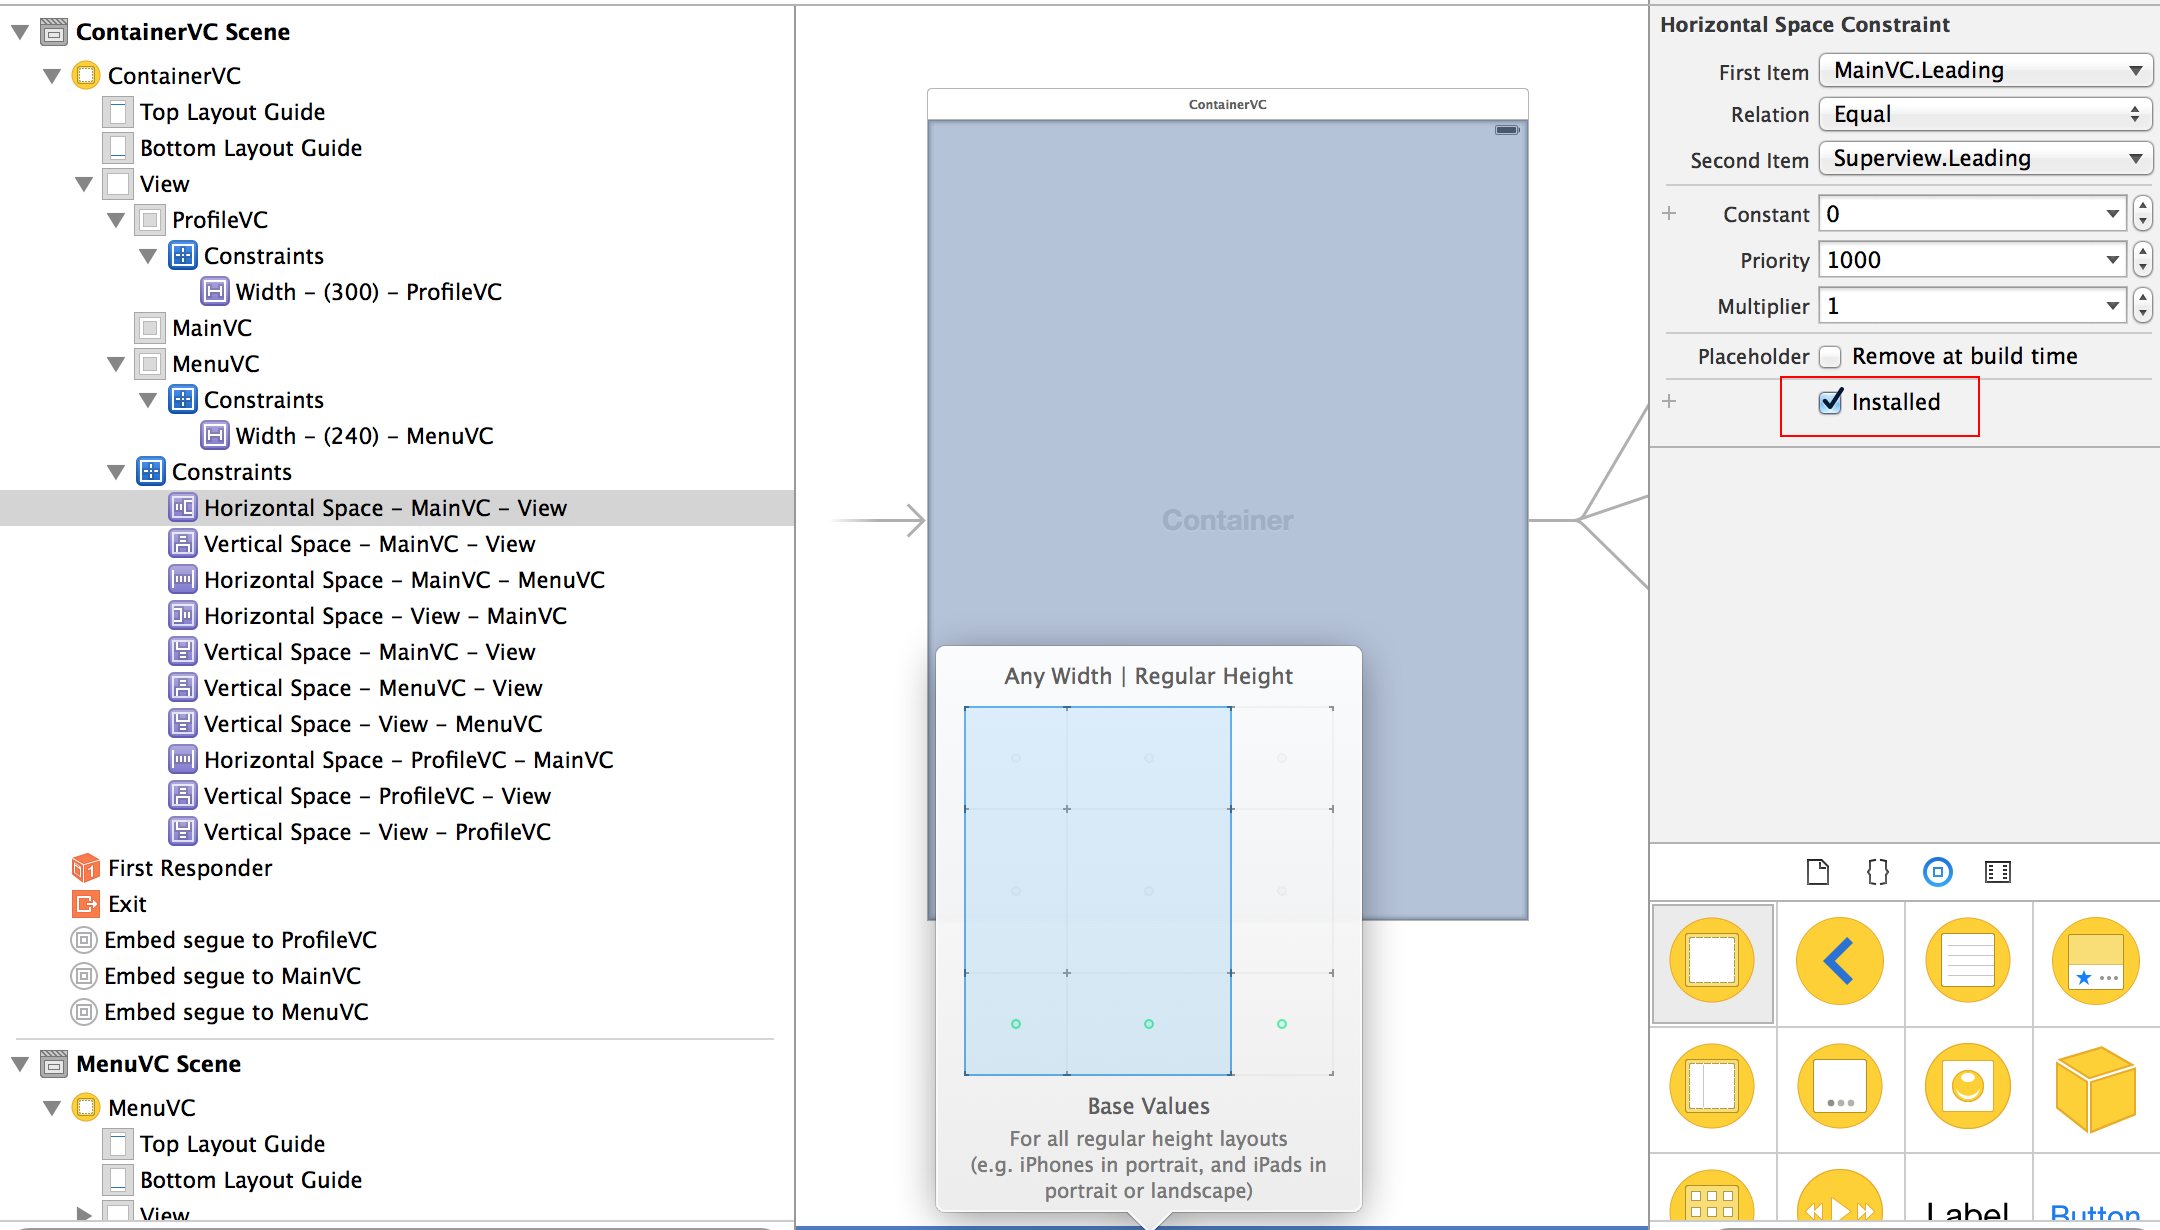
#Add Class Size Customization
※ここではざっと触れるだけに
デフォルトでは設定したサイズ別に有効になっていますので、全般的に設定を有効にする方がらくちんです。
#参考URL
How to Use Container View Controller
http://mobileoop.com/how-to-use-container-view-controller
Swiftコーディング規約@Wantedly
http://qiita.com/susieyy/items/f71435cc962e70d81b37
#さいごに
ControllerView外からクラスを参照するのが手間で、Qiitaの記事に助けられた感じです。
コード補完で補えるところと、swiftの仕様に置き換えなければいけないところが分かりました。
オリジナルのコードは、iPhoneのサイズがイロイロ変わることを想定していないものだったので、アニメーションのコードとconstrainsの設定を追記しています。
ただ、全画面対応を狙って苦戦している状態ですので、constrainsの設定については後ほど別記事で・・・