はじめに
rpmでインストールした場合にconfigureが変更できず、makeから、と調べていくと、RPMをビルドすることができるSRPMがあることがわかりました。
ゴールはnginxのconfigureオプションの追加削除と結果の確認です。
注意
こちらに書いてあるのは壊してもいい環境での履歴であり、他のユーザとの共有サーバでの操作は慎重に行っていただく必要があります。
環境
sakuraVPSにMacからターミナルで接続
作業手順
rpm用のユーザ作成
rpmbuildを使うにあたっては、rootとかでやっちゃダメとか
普段使いのところで入れるとごちゃごちゃするとかあり、別ユーザを作成します
$ sudo useradd rpmbuilder
$ sudo passwd rpmbuilder
rpmbuildの準備
$ sudo su - rpmbuilder
$ mkdir -p ~/rpm/{BUILD,RPMS,SOURCES,SPECS,SRPMS}
rpmmacrosを設定
echo '%_topdir %(echo $HOME)/rpm' > ~/.rpmmacros
rpmを作成
$ cd ~/
$ wget http://nginx.org/packages/centos/6/SRPMS/nginx-1.4.7-1.el6.ngx.src.rpm
$ rpm -ivh nginx-1.4.7-1.el6.ngx.src.rpm
$ cd ~/rpm/SRPMS/
$ vim nginx.spec
ここらへんを修正
%build
./configure \
        --prefix=%{_sysconfdir}/nginx \
        --sbin-path=%{_sbindir}/nginx \
        --conf-path=%{_sysconfdir}/nginx/nginx.conf \
        --error-log-path=%{_localstatedir}/log/nginx/error.log \
        --http-log-path=%{_localstatedir}/log/nginx/access.log \
        --pid-path=%{_localstatedir}/run/nginx.pid \
        --lock-path=%{_localstatedir}/run/nginx.lock \
        --http-client-body-temp-path=%{_localstatedir}/cache/nginx/client_temp \
        --http-proxy-temp-path=%{_localstatedir}/cache/nginx/proxy_temp \
        --http-fastcgi-temp-path=%{_localstatedir}/cache/nginx/fastcgi_temp \
        --http-uwsgi-temp-path=%{_localstatedir}/cache/nginx/uwsgi_temp \
        --http-scgi-temp-path=%{_localstatedir}/cache/nginx/scgi_temp \
        --user=%{nginx_user} \
        --group=%{nginx_group} \
        --with-http_ssl_module \
        --with-http_realip_module \
        --with-http_addition_module \
        --with-http_sub_module \
        --with-http_dav_module \
        --with-http_flv_module \
        --with-http_mp4_module \
        --with-http_gunzip_module \
        --with-http_gzip_static_module \
        --with-http_random_index_module \
        --with-http_secure_link_module \
        --with-http_stub_status_module \
        --with-file-aio \
        --with-ipv6 \
        --with-debug \
        --with-cc-opt="%{optflags} $(pcre-config --cflags)" \
$ rpmbuild -ba nginx.spec
ここでエラーに表示された依存するファイルを追加します
$ sudo yum install openssl-devel zlib-devel pcre-devel
$ rpmbuild -ba nginx.spec
/home/rpmbuilder/rpm/RPMS/x86_64/にrpmが作成されました。
先にインストールしていたものを消します。
$ sudo rpm -e nginx-release-centos-6-0.el6.ngx.noarch
nginx全てなくなっているのを確認
$ rpm -qa | grep nginx
作成したrpmをインストール
$ sudo rpm -ivh /home/rpmbuilder/rpm/RPMS/x86_64/nginx-1.4.7-1.el6.ngx.x86_64.rpm
インストールしたconfigureを確認
$ nginx -V
参考URL
いまさら聞けないrpmbuildことはじめ
http://blog.tnmt.info/2011/04/29/rpmbuild-for-beginner/
さくらのVPS 乗り換え備忘録 (Nginx インストール rpmbuild 編)
http://code-life.net/?p=2404
Rebuild a Source RPM
http://wiki.centos.org/HowTos/RebuildSRPM
RPMパッケージをインストール/アンインストールするには
http://www.atmarkit.co.jp/flinux/rensai/linuxtips/049instrpm.html
さいごに
おまじない的に書いていると分からないことが多いです。
個人的にsrcからのmake派なのでrpmでのオプションの意味を調べるところ
からrpm -ivhと rpm -Uvhから、rpmで追加したパッケージの削除などの理解が必要でした。
このあとの作業では証明書の設定やserviceでの起動などを行います。
その辺りはここら辺に記載していますので割愛しています。
おまけ
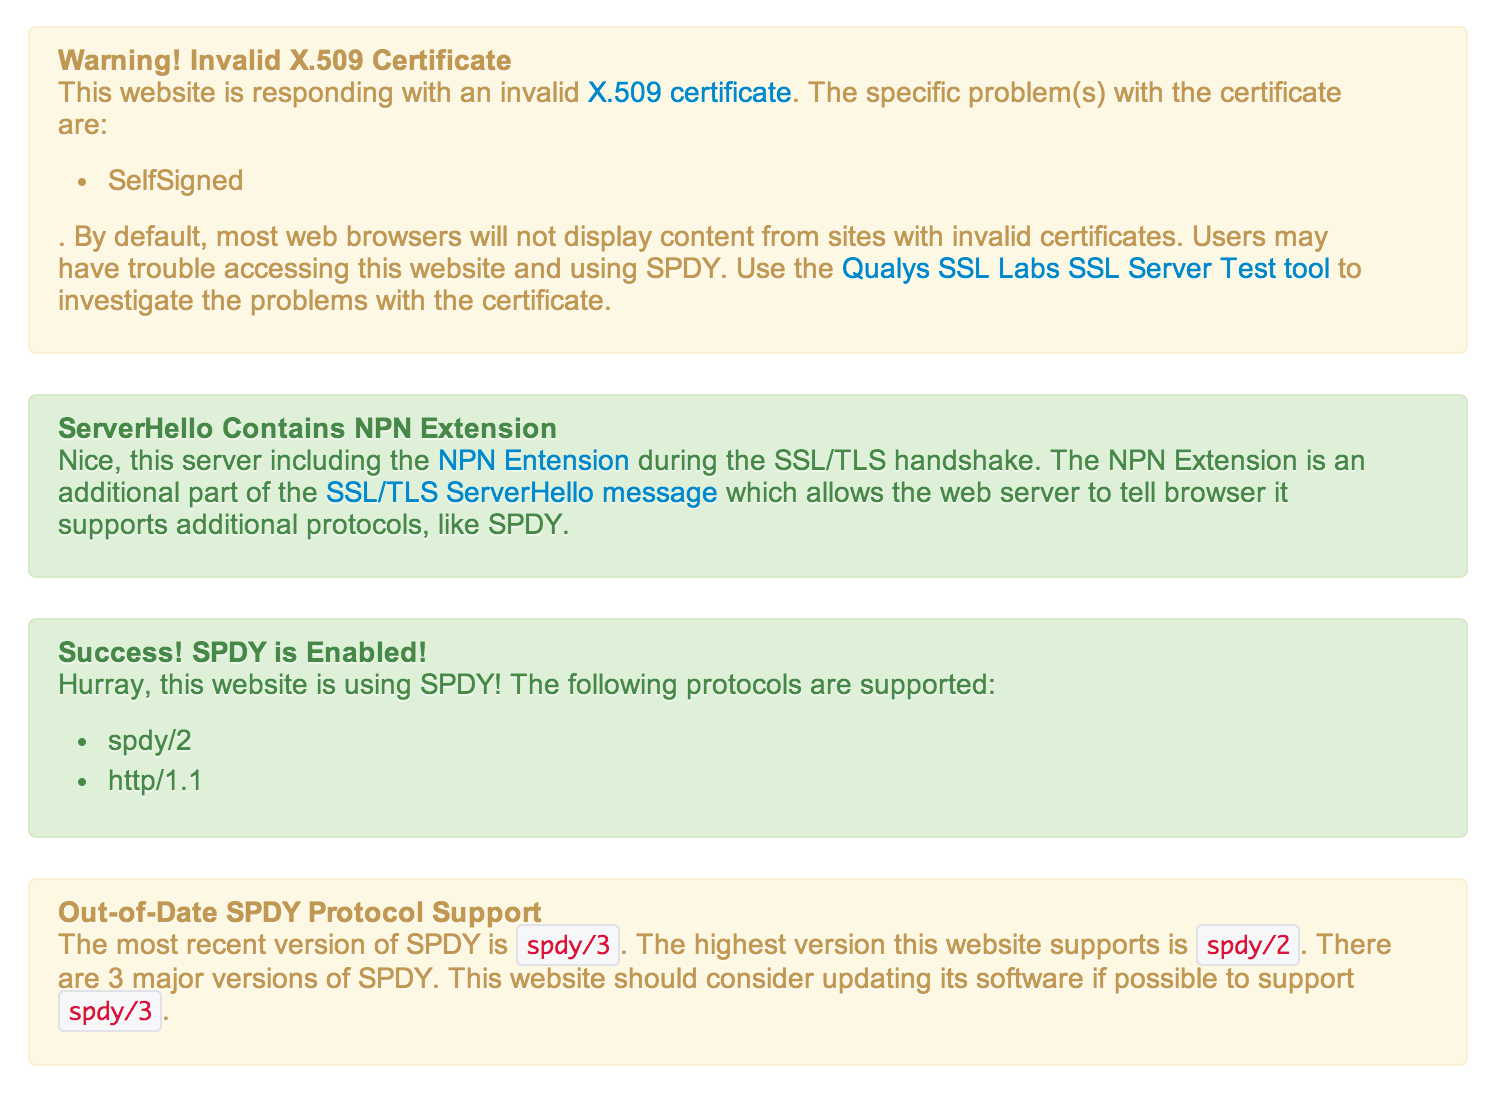
spdyの確認方法
firefoxのプラグイン
https://addons.mozilla.org/ja/firefox/addon/spdy-indicator/
や
chromeのURLスキーマ(でいいのかな・・・)を使う方法
chrome://net-internals/#spdy
が多かったので、チェックサイトを使ってみました。
オレオレ証明書使ってます
spdy/2は今さらダセーからspdy/3使え
など、的確な診断をしてくれます。