22
20

Delete article

Deleted articles cannot be recovered.

Draft of this article would be also deleted.

Are you sure you want to delete this article?

More than 5 years have passed since last update.

NetBeansでのxdebug設定方法

Last updated at Posted at 2015-01-30

NetBeansでのxdebug設定方法

開発環境:Windows7 php5.5.19

自分の環境にあったxdebug.dllを探す方法

  • 下記ソースでphpinfoを表示する。
     <?php phpinfo() php?>

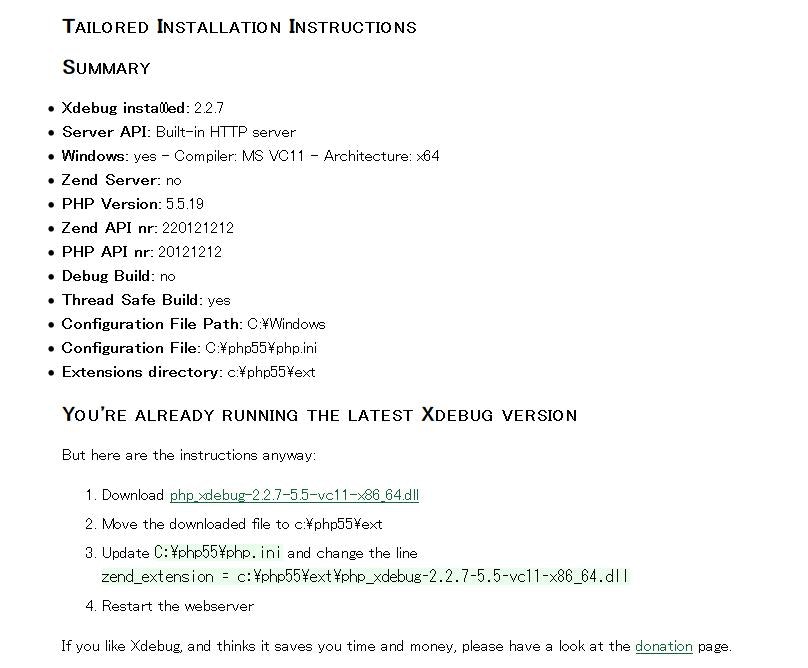
  • http://xdebug.org/wizard.phpへ出力されたphpinfoをコピーして貼り付け、実行すると下記画面のようになる。
    1.jpg

  • 出力画面のdllダウンロードリンクからダウンロードして、記載の場所へdllを格納する。

  • php.iniファイルを変更する。

  • php.iniファイルの変更箇所(下記項目を追加した)
    [XDebug] zend_extension="C:\php55\ext\php_xdebug-2.2.7-5.5-vc11-x86_64.dll" xdebug.remote_enable=1 xdebug.remote_host="127.0.0.1" xdebug.remote_port=9000 xdebug.remote_handler="dbgp" xdebug.idekey="netbeans-xdebug" xdebug.profiler_output_dir="C:\php55\tmp"

NetBeansでの変更箇所

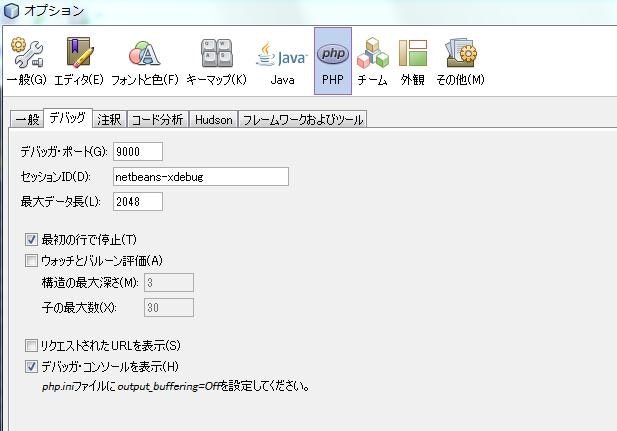
  • [ツール]-[オプション]-[php]を選択し、デバッグタブを選択する。(下記画面参照)
  • デバッグポート、セッションIDをphp.iniへ記載したものへ変更する。
    2.jpg

NetBeansプロジェクトを「PHP組込みWebサーバー」で実行する場合はアパッチの再起動は不要でNetBeansの再起動でOK。ローカルにインストールしたアパッチで動かす場合はアパッチ再起動が必要。
3.jpg

22
20
0

Register as a new user and use Qiita more conveniently

  1. You get articles that match your needs
  2. You can efficiently read back useful information
  3. You can use dark theme
What you can do with signing up
22
20

Delete article

Deleted articles cannot be recovered.

Draft of this article would be also deleted.

Are you sure you want to delete this article?