環境
- Xcode 8.1
- Swift 3.0.1
- えるたそ (OS X 10.11.6)
- iOS10
準備
念のため Photos.framework を追加
Info.plist に Privacy - Photo Library Usage Description を追加しておきましょう!
画面設計
UICollectionView があって、 UICollectionViewCell のIdentifierがCellになっています。
また、セルのクラスは CameraRollCollectionViewCell としています。
ソースコード
ViewController.swift
import UIKit
import Photos

class ViewController: UIViewController {

    @IBOutlet weak var collectionView: UICollectionView!

    var photoAssets: Array! = [PHAsset]()

    override func viewDidLoad() {
        super.viewDidLoad()
        setup()
        libraryRequestAuthorization()
    }

    override func didReceiveMemoryWarning() {
        super.didReceiveMemoryWarning()
    }

    fileprivate func setup() {
        collectionView.dataSource = self

        // UICollectionViewCellのマージン等の設定
        let flowLayout: UICollectionViewFlowLayout! = UICollectionViewFlowLayout()
        flowLayout.itemSize = CGSize(width: UIScreen.main.bounds.width / 3 - 4,
                                     height: UIScreen.main.bounds.width / 3 - 4)
        flowLayout.sectionInset = UIEdgeInsets(top: 8, left: 0, bottom: 0, right: 0)
        flowLayout.minimumInteritemSpacing = 0
        flowLayout.minimumLineSpacing = 6

        collectionView.collectionViewLayout = flowLayout
    }

    // カメラロールへのアクセス許可
    fileprivate func libraryRequestAuthorization() {
        PHPhotoLibrary.requestAuthorization({ [weak self] status in
            guard let wself = self else {
                return
            }
            switch status {
            case .authorized:
                wself.getAllPhotosInfo()
            case .denied:
                wself.showDeniedAlert()
            case .notDetermined:
                print("NotDetermined")
            case .restricted:
                print("Restricted")
            }
        })
    }

    // カメラロールから全て取得する
    fileprivate func getAllPhotosInfo() {
        let assets: PHFetchResult = PHAsset.fetchAssets(with: .image, options: nil)
        assets.enumerateObjects({ [weak self] (asset, index, stop) -> Void in
            guard let wself = self else {
                return
            }
            wself.photoAssets.append(asset as PHAsset)
        })
        collectionView.reloadData()
    }

    // カメラロールへのアクセスが拒否されている場合のアラート
    fileprivate func showDeniedAlert() {
        let alert: UIAlertController = UIAlertController(title: "エラー",
                                                         message: "「写真」へのアクセスが拒否されています。設定より変更してください。",
                                                         preferredStyle: .alert)
        let cancel: UIAlertAction = UIAlertAction(title: "キャンセル",
                                                  style: .cancel,
                                                  handler: nil)
        let ok: UIAlertAction = UIAlertAction(title: "設定画面へ",
                                              style: .default,
                                              handler: { [weak self] (action) -> Void in
                                                guard let wself = self else {
                                                    return
                                                }
                                                wself.transitionToSettingsApplition()
        })
        alert.addAction(cancel)
        alert.addAction(ok)
        present(alert, animated: true, completion: nil)
    }

    fileprivate func transitionToSettingsApplition() {
        let url = URL(string: UIApplicationOpenSettingsURLString)
        if let url = url {
            UIApplication.shared.open(url, options: [:], completionHandler: nil)
        }
    }
}

extension ViewController : UICollectionViewDataSource {
    func collectionView(_ collectionView: UICollectionView, numberOfItemsInSection section: Int) -> Int {
        return photoAssets.count
    }

    func collectionView(_ collectionView: UICollectionView, cellForItemAt indexPath: IndexPath) -> UICollectionViewCell {
        let cell = collectionView.dequeueReusableCell(withReuseIdentifier: "Cell", for: indexPath) as! CameraRollCollectionViewCell
        cell.setConfigure(assets: photoAssets[indexPath.row])
        return cell
    }
}
CameraRollCollectionViewCell.swift
import UIKit
import Photos

class CameraRollCollectionViewCell: UICollectionViewCell {

    @IBOutlet weak var photoImageView: UIImageView!

    override func awakeFromNib() {
        super.awakeFromNib()
    }

    // 画像を表示する
    func setConfigure(assets: PHAsset) {
        let manager = PHImageManager()

        manager.requestImage(for: assets,
                             targetSize: frame.size,
                             contentMode: .aspectFill,
                             options: nil,
                             resultHandler: { [weak self] (image, info) in
                                guard let wself = self, let outImage = image else {
                                    return
                                }
                                wself.photoImageView.image = image
        })
    }
}
結果
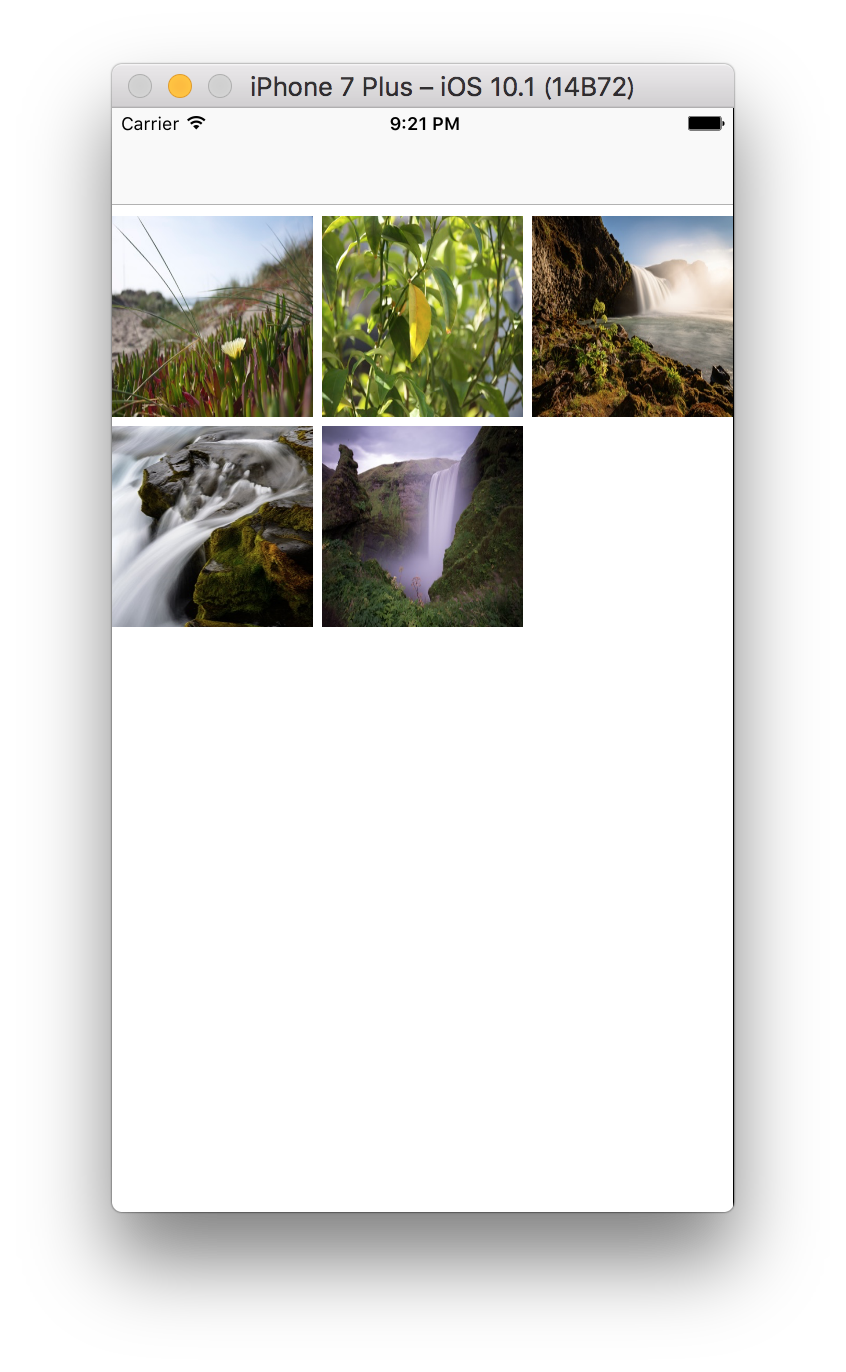
シミュレータのカメラロールには5つしか画像がないのですが、表示できました!
補足
上記リンクのコメントにあるようにカメラロールから画像を取得する時に時間がかかるのでそこは考慮しないといけません!コメントくださった @takabosoft さんありがとうございます![]()
最後に
削除とか検索条件を加えたりできるらしいのですが、いつか実装してみたいです。
参考
