どうも、相も変わらず流行っているものには手を出さないNな人です。
今回、v2くらいから愛用していたriot.jsがv4になっていたので、1から学び直してみようと思います!
環境準備
好きなPCをもて!
あと、なんかlocalサーバ立てて!!
PHPがインストールされてると、プロジェクトフォルダまでcdして、
php -S localhost:8080みたいな感じで、サーバが立ち上がるよ!!!
所管(読み飛ばし推奨)
ここの項目に対する苦情は一切受け付けません。
読み飛ばし推奨。
「単一ファイルコンポーネント」を使うにはいちいちコンパイルしないといけない。
なんて面倒なのでしょうか。
riotはそんな必要ありません!
端からコンポーネント!それがコンポーネント指向!
さあ、この暴動に、あなたも巻き込まれましょう!
こんにちは暴動の世界!
早速始めていきましょう。
環境はめんどいのでCDN使います。
2つファイルを用意しましょう。
「index.html」と「hello-world.riot」ファイルです。

hello-world.riot
まず、rito.jsといえば「カスタムタグ」機能です。
好きな機能をもたせたオリジナルのHTMLタグっぽいものが作れます。
今回は「hello-world」タグを作ってみましょう。
<hello-world>
    hello, riot world!
</hello-world>
index.html
では、実際に「hello-world」タグを呼び出すベースのHTMLです。
兎にも角にも、コピペしてみましょう。
<html>
<head>
</head>
<body>

    <hello-world></hello-world>

    <script src="./hello-world.riot" type="riot"></script>
    <script src="//cdn.jsdelivr.net/npm/riot@4.0.0-rc.1/riot+compiler.min.js"></script>
    <script>
    (async function main() {
      await riot.compile()

      riot.mount('hello-world');
    }())
    </script>
</body>
</html>
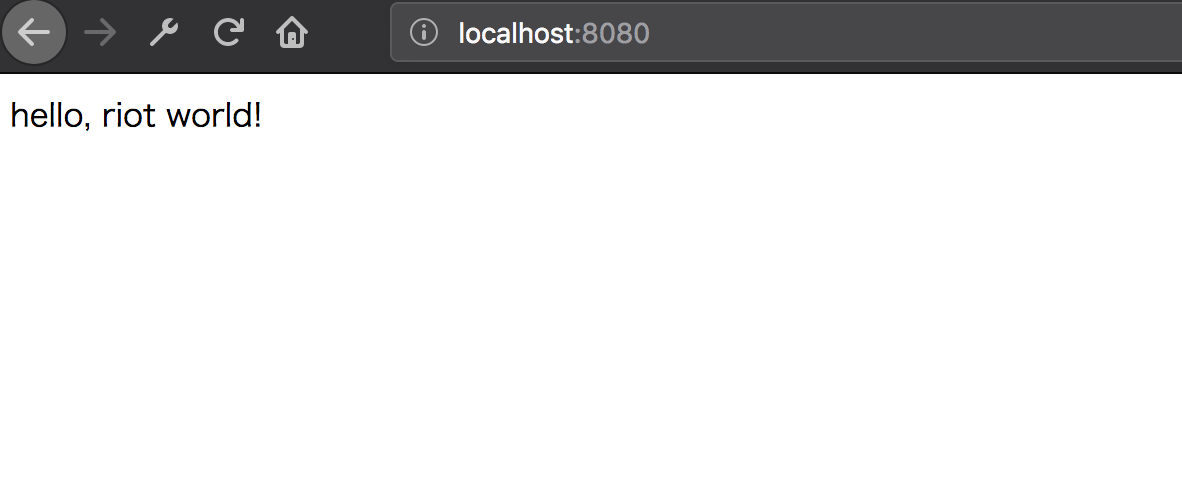
実行結果

ご覧のように、<hello-world></hello-world>タグが実行され、
中身の「hello, riot world!」が表示されていますね!
簡単です!
ちょっと解説
index.htmlの中身でriotの特有の部分があるので、解説していきます。
JSのインポート
<script src="./hello-world.riot" type="riot"></script>
↑作ったカスタムタグ、「hello-world」を読み込んでいます。
<script src="//cdn.jsdelivr.net/npm/riot@4.0.0-rc.1/riot+compiler.min.js"></script>
↑riotjsのCDNです。
この中にcompilerが含まれているので、事前にコンパイル(プリコンパイル?)していなくても、
直でカスタムタグを実行できちゃうわけですね。簡単!!
<script>
    (async function main() {
      await riot.compile()

      riot.mount('hello-world');
    }())
</script>
↑カスタムタグをブラウザが実行できる形式にコンパイルします。
カスタムタグ = 実際は存在しないタグなので、
それをブラウザがわかる形式に変換し、
「今からhello-worldというタグを使うので、コンパイルして使えるようにしますね!」
という処理をしてくれています。
コンポーネントに処理を書いてみる
では、実際にコンポーネントに処理を書いてみましょう。
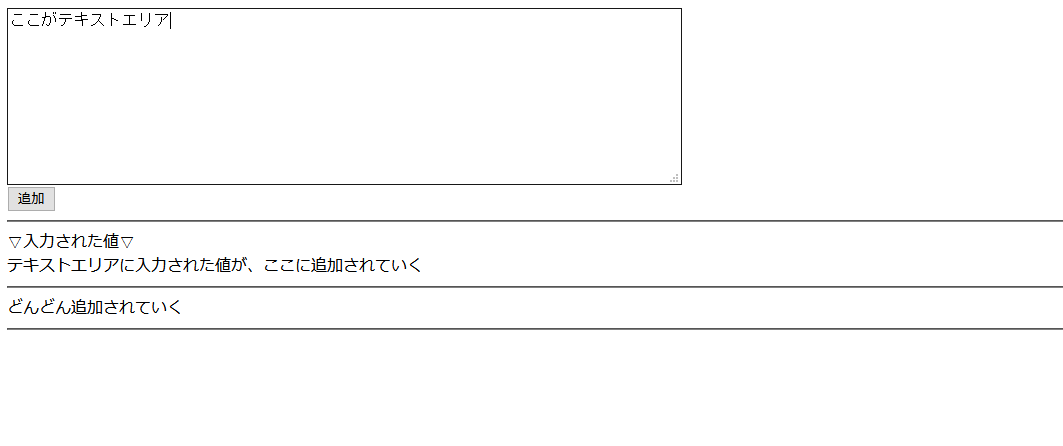
作る画面
↑テキストエリアに文字を入力して、「追加」ボタンを押すと、
どんどんテキストエリアに入力した文字が画面に追加されていくというサンプルを作ります。
フォルダ構成
index.htmlと、コントは「<text-form>タグ」を作りましょう。
index.html
<html>
<head>
</head>
<body>

    <text-form></text-form>


    <script src="./text-form.riot" type="riot"></script>
    <script src="//cdn.jsdelivr.net/npm/riot@4.0.0-rc.1/riot+compiler.min.js"></script>
    <script>
    (async function main() {
      await riot.compile()

      riot.mount('text-form');
    }())
    </script>
</body>
</html>
text-form.riot
<text-form>
    <textarea name="name" rows="8" cols="80"></textarea>
    <br>
    <button type="button" onclick="{ click }">追加</button>

    <hr>

    ▽入力された値▽<br>
    <div each="{ item in state.textAreaTexts }">
        { item }
        <hr>
    </div>


    <script>
        export default {
            /**
             * マウント前に実行されます。
             * 全体で使いたい変数などを定義しておきます
             */
            onBeforeMount(state, props) {
                // どこからでもアクセスできる変数「state」
                this.state = {
                    textAreaTexts: [],         // テキストエリアのテキストを格納する配列
                };
            },

            /**
             * 「追加」ボタンが押されたときの処理
             * @param e イベント
             */
            click(e) {
                // テキストエリアの内容を取得
                const text = this.$('textarea').value;

                // どこからでもアクセスできる変数の中に、テキストを入れる
                this.state.textAreaTexts.push(text);

                // 画面を更新する
                this.update({
                    'textAreaTexts': this.state.textAreaTexts
                });

                // テキストエリアの中身を空っぽにする
                this.$('textarea').value = '';
            }
        }
    </script>
</text-form>
チョット解説
index.htmlの解説は、ほぼ先ほどと同じなので割愛します。
text-from.riot
<button type="button" onclick="{ click }">追加</button>
↑onclick="{ click }"で、<script>タグ内に定義されているclickメソッドとクリックイベントをバインドします。
要は、「ボタンがクリックされたらclickメソッドを実行しましょう」とブラウザに教えます。
▽入力された値▽<br>
<div each="{ item in state.textAreaTexts }">
   { item }
   <hr>
</div>
↑state.textAreaTexts配列変数の中身をひとつずつ取り出し、item変数に入れます。
HTML側でこの変数を呼び出す際は「this」は不要です。
{ item }で、item変数の中身をHTMLにプリントします。
この処理で、
<div>
   { item }
   <hr>
</div>
が、配列の個数分出力されることになります。
divの中身だけでなく、divごと出力されるのがポイントです。
/**
 * マウント前に実行されます。
 * 全体で使いたい変数などを定義しておきます
 */
onBeforeMount(state, props) {
    // どこからでもアクセスできる変数「state」
    this.state = {
        textAreaTexts: [],         // テキストエリアのテキストを格納する配列
    };
},
↑コンパイル後実行されるメソッドです。
全体で使う変数などを定義しておきます。
他にも、onMounted, onUpdatedなどがあります。
これらは呼び出される順序があり、「ライフサイクル」といいます。
/**
 * 「追加」ボタンが押されたときの処理
 * @param e イベント
 */
click(e) {
    // テキストエリアの内容を取得
    const text = this.$('textarea').value;

    // どこからでもアクセスできる変数の中に、テキストを入れる
    this.state.textAreaTexts.push(text);

    // 画面を更新する
    this.update({
        'textAreaTexts': this.state.textAreaTexts
    });

    // テキストエリアの中身を空っぽにする
    this.$('textarea').value = '';
}
↑クリックイベントを定義しております。
イベント名(今回はclick)は、好きな名前で定義できます。
this.$('textarea')のように、this.$('CSSセレクタ')で、riotタグ内のDOMにアクセスできます。
なので、例えばthis.$('#hoge-id')のように指定することもできます。
ただし、$は単一の要素の取得なので、クラスでの取得など、複数のDOMを取得したい場合は$$を使います。
例:this.$$('textarea')
this.update({
   'textAreaTexts': this.state.textAreaTexts
});
↑riotは双方向バインドではないため、変数の中身を画面に描画したい場合は、
上記のようにupdateをしてあげないといけません。
一見不便に見えますが、変数をワチャワチャいじってるときに画面が更新されないので、負荷が少なくなりそうな予感もしますね。
おわりに
今回は以上です!
vueだ!Reactだ!cyclejsだ!とみなさんなりがちではありますが、
ぜひriotの素晴らしさを体験してみてください!

