はじめに
Pythonという言語には,デフォルトでインターフェースを作成するツールキット「Tkinter」というものが備わっています.
このTkinterは,簡単なGUIを無駄にプラグインを追加したりせず作成できるので便利なのですが,なかなかに解説サイトがありません.
なので,私が必要にかられて調べまわった部分をまとめていこうと思います.
Tkinterについて
PythonのTkinterを使ってみるで基礎は書いてみましたので,興味があればどうぞ.
読まなくとも作成できるようには書いていきます.
Tkinterを使ってみる
簡単にTkinterの使い方を.
詳しくはご自身で調べていただくか,「PythonのTkinterを使ってみる」をお読みください.
#!/usr/bin/env python
# -*- coding: utf8 -*-
import sys
import Tkinter

#
# GUI設定
#
root = Tkinter.Tk()
root.title(u"TkinterのCanvasを使ってみる")
root.geometry("800x450")   #ウインドウサイズ(「幅x高さ」で指定)


#
# GUIの末端
#
root.mainloop()
TkinterのCanvasを使ってみる
本編はここからとなります.
基本コピペで動くように書いていくつもりですが,Tkinterの基本についてはあまり触れませんのでご了承ください.
詳細についてはご自身で調べていただくか,「PythonのTkinterを使ってみる」をお読みください.
Canvasの定義
Canvasは,Tkinterの他のオブジェクト(ボタン,エントリなど)と同様に,GUI処理の中に書きます.
実際のサンプルを御覧ください.
#!/usr/bin/env python
# -*- coding: utf8 -*-
import sys
import Tkinter

#
# GUI設定
#
root = Tkinter.Tk()
root.title(u"TkinterのCanvasを使ってみる")
root.geometry("800x450")

#キャンバスエリア
canvas = Tkinter.Canvas(root, width = 800, height = 450)

#キャンバスバインド
canvas.place(x=0, y=0)


#
# GUIの末端
#
root.mainloop()
これで,800px * 450pxのCanvasが作成され,(x,y) = (0,0)に配置されました.
内容として,
canvas = Tkinter.Canvas(root, width = 800, height = 450)
この処理でCanvasが作成され,
canvas.place(x=0, y=0)
この処理で画面上にCanvasが配置されます.
これだけですと分かりにくいと思うので,
canvas.create_rectangle(0, 0, 800, 450, fill = 'green', stipple = 'gray25')
を入れてみます.
#!/usr/bin/env python
# -*- coding: utf8 -*-
import sys
import Tkinter

#
# GUI設定
#
root = Tkinter.Tk()
root.title(u"TkinterのCanvasを使ってみる")
root.geometry("800x450")

#キャンバスエリア
canvas = Tkinter.Canvas(root, width = 800, height = 450)#Canvasの作成
canvas.create_rectangle(0, 0, 800, 450, fill = 'green')#塗りつぶし

#キャンバスバインド
canvas.place(x=0, y=0)#Canvasの配置


#
# GUIの末端
#
root.mainloop()
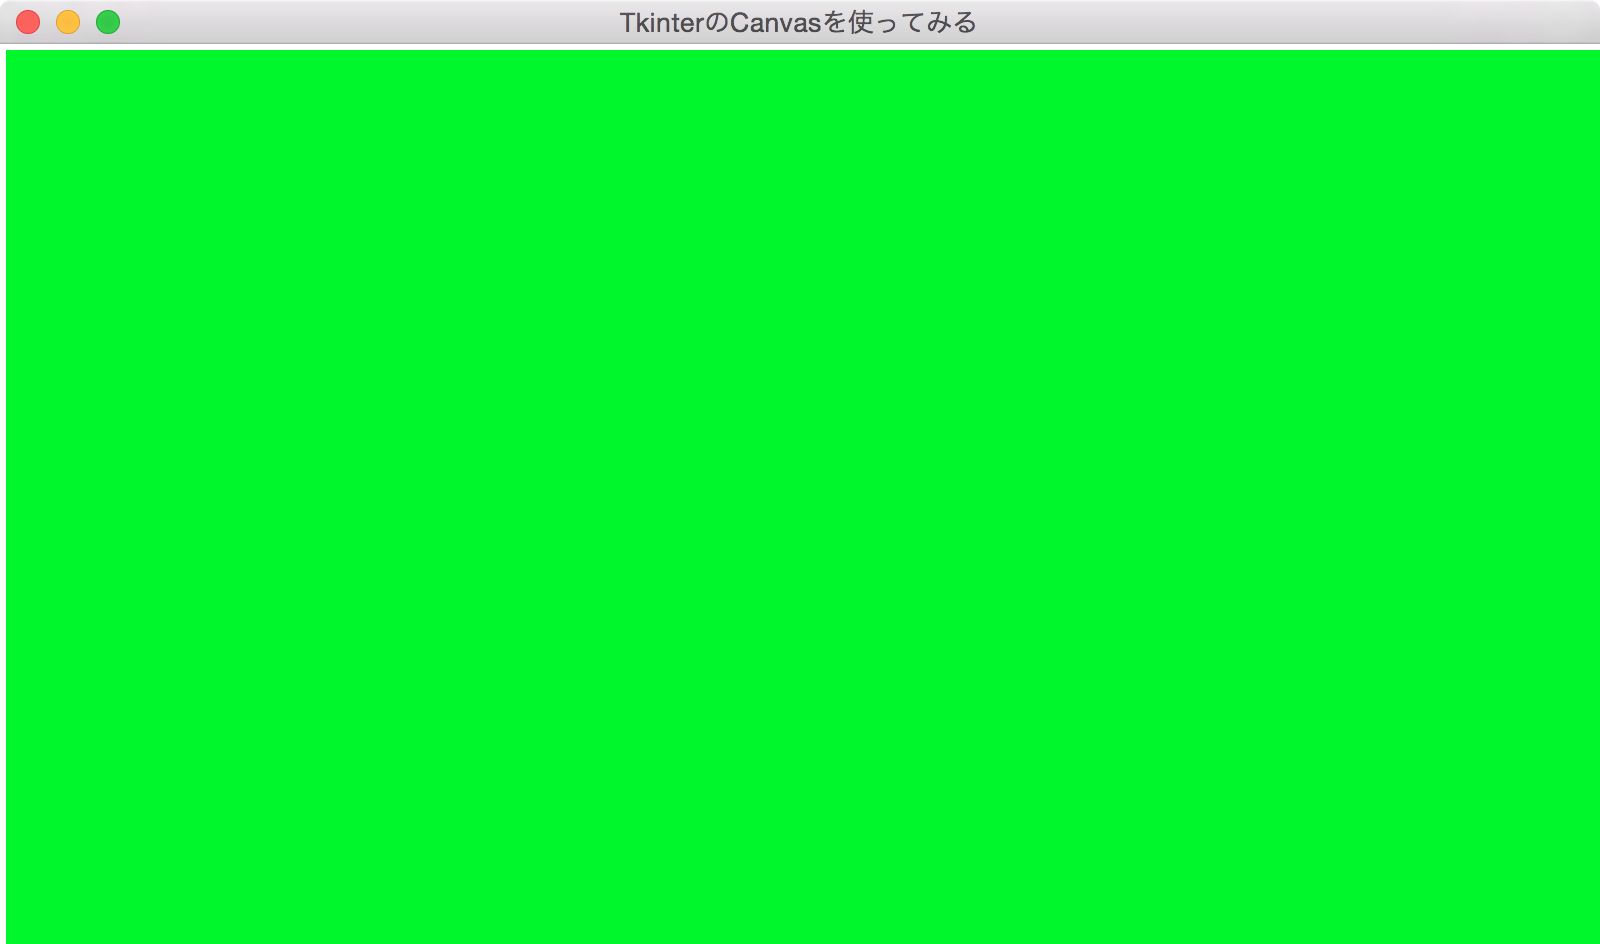
上記のサンプルを実行すると,800px * 450pxの大きさのウインドウが作成され,画面いっぱいの緑の四角形が表示されると思います.

追加したのは
canvas.create_rectangle(0, 0, 800, 450, fill = 'green')
の一行で,これはCanvasの指定した部分を特定の色で塗りつぶします.
このように,作成したCanvasも,作成ポイントからバインドポイントまでの間に処理を書きます.
Canvasで描ける物
お気楽 Python/Tkinter 入門様に詳細が記載されておりますが,こちらでも引用を.
| 関数 | 説明 |
|---|---|
| create_line() | 直線(折れ線) |
| create_oval() | 楕円 |
| create_arc() | 円弧(楕円の円周の一部) |
| create_rectangle() | 矩形 |
| create_polygon() | 多角形 |
| create_image() | イメージ |
| create_bitmap() | ビットマップ |
| create_text() | 文字列 |
更に,よく使われるオプションも紹介します.
| 処理 | 説明 |
|---|---|
| fill = 色 | 内部を塗りつぶす色 |
| stipple = ビットマップ | 内部を塗りつぶすときの模様になるビットマップ |
| outline = 色 | 枠の色 |
| width = 幅 | 枠の幅(デフォルトは 1.0) |
オブジェクトにタグ付け(描いた後に消してみる)
各オブジェクトには「tag」というものがあります.
このtagを指定しておくと,描いた後に消すことができます.
#!/usr/bin/env python
# -*- coding: utf8 -*-
import sys
import Tkinter

#
# GUI設定
#
root = Tkinter.Tk()
root.title(u"TkinterのCanvasを使ってみる")
root.geometry("800x450")


#「描く」ボタンが押されたら
def draw(event):
	canvas.create_oval(10, 10, 140, 140, tag="oval")


#「消す」ボタンが押されたら
def erase(event):
	canvas.delete("oval")


#キャンバスエリア
canvas = Tkinter.Canvas(root, width = 800, height = 300)

#円を描く
canvas.create_oval(10, 10, 140, 140, tag="oval")

#キャンバスバインド
canvas.place(x=0, y=0)


# 「描く」ボタン
button_draw = Tkinter.Button(root, text=u'描く',width=15)
button_draw.bind("<Button-1>",draw)
button_draw.place(x=100,y=350)


# 「消す」ボタン
button_draw = Tkinter.Button(root, text=u'消す',width=15)
button_draw.bind("<Button-1>",erase)
button_draw.place(x=350,y=350)


#
# GUIの末端
#
root.mainloop()
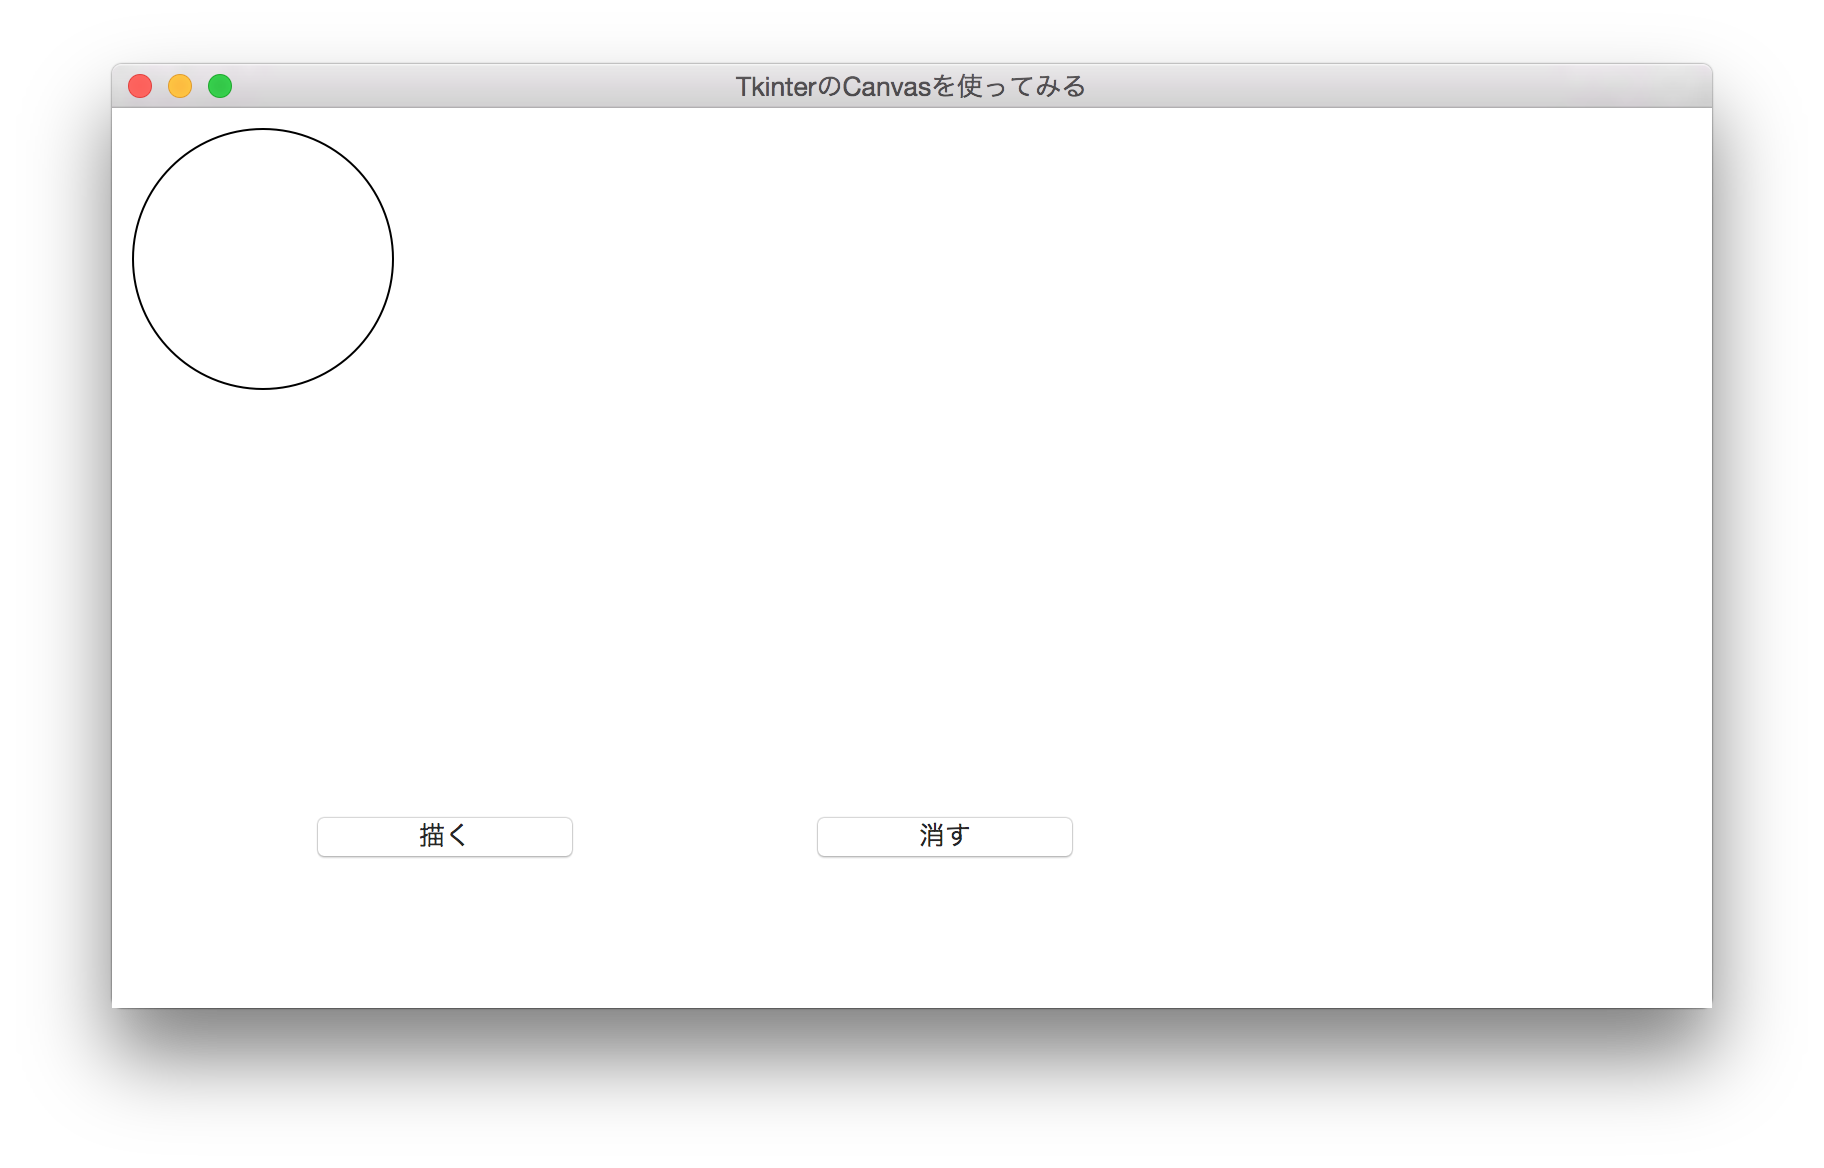
「消す」ボタンを押すと円が消え,「描く」ボタンを押すと円が再度描画されます.
この時に,
canvas.create_oval(10, 10, 140, 140, tag="oval")
で,tag="oval"のように描くオブジェクトに「tag」属性を指定しておけば,
canvas.delete("oval")
のように,任意のtag属性を持つオブジェクトを削除することができます.
とりあえずここまでです.
