Pref.
TeX個人的備忘録ノートです。
勉強がてら書き足していきます...
間違っていたら、コメントを頂けると幸いです。
基本書式
まず一番最初に\documentclass{jsarticle}を記述してから、文章を書き始める。
jsarticleとは文章をタイプセットするときに使用するクラスファイルで、最近ではjsarticleを利用される場合が多い。因みにクラスファイルは自作可能。
またパッケージの読み込みも\usepackage{xxxxx}を利用することで可能。include的なもの(?)
\documentclass{jsarticle}
\begin{document}

This is TeX Sample.

\end{document}
| ドキュメントクラス | パッケージの読み込み |
|---|---|
| \documentclass{jsarticle} | \usepackage{xxxxx} |
余白設定
| コマンド |
|---|
| \usepackage[top=20truemm,bottom=20truemm,left=20truemm,right=20truemm]{geometry} |
上記のusepackeageコマンドを記述することで余白の設定が行える.
20という数値を変更することで幅が変えられる.
日付,宛名などの記述
書類の右上にある日付や書いた人の名前,宛名などの記述方法です.
以下のコマンドを用いることで右寄せ,中央寄せ,左寄せなどといったことが可能です.
| コマンドはじめ部分 | コマンドおわり部分 | できること |
|---|---|---|
| \begin{flushright} | \end{flushright} | 右寄せ |
| \begin{flushleft} | \end{flushleft} | 左寄せ |
| \begin{center} | \end{center} | 中央寄せ |
以下例です.
\documentclass{jsarticle}
\begin{document}

\begin{flushright}
2018年5月15日
\end{flushright}

\begin{flushleft}
株式会社 HogeHoge\\
Hoge部 HogeHage様
\end{flushleft}

\begin{flushright}
株式会社 (`・д・´)\\
○○部 my name
\end{flushright}

\begin{center}
\Large{某資料送付のご案内}
\end{center}

\end{document}
上記のように記述することで以下のようになります.

文章を書き始める
\documentclass{jsarticle}を記述した後、\begin{document}を記述することから文章を書き始める。
\begin{xxxxx}から開始したらhtmlのタグのように\end{xxxxx}が必要。
{document}というのはmain関数的なもの(?)
\documentclass{jsarticle}
\begin{document}

ここに文章を書く。

\end{document}
章タイトル、節、項を書く
文章を書く時に必要な章タイトル、節、項を書くときには以下のコマンドを利用。
この3つのコマンドは\end{xxxxx}のような閉じるコマンドは不要
| 章タイトル | 節 | 項 |
|---|---|---|
| \section | \subsection | \subsubsection |
\documentclass{jsarticle}
\begin{document}

\section{章タイトル}
\subsection{節}
\subsubsection{項}

ここに1.1.1の内容を記述

\end{document}
ラベルの利用
ラベルを利用することで後からn章でも記述したがのような記述を行う時のnの数字を自動的にタイプセット時に割り振ることが可能。
\ref{xxxxx}を利用することで章の番号などを代入することができる。xxxxxは\label{xxxxx}のものと合わせる。
| ラベル | ラベルの参照 |
|---|---|
| \label{xxxxx} | \ref{xxxxx} |
以下のように使う。
\documentclass{jsarticle}
\begin{document}

\section{動物}
\subsection{犬}
\label{ss:dog}
\subsubsection{柴犬}
\label{sss:shiba}

\subsection{猫}
\subsubsection{シャム}

\ref{sss:shiba}項に記述した....

\end{document}
と記述すると以下のように出力される。

特殊文字の記述
プログラミングでお決まりの特殊文字を文字列としての入力方法
| 文字 | 表記方法 | 文字 | 表記方法 | |
|---|---|---|---|---|
| # | \# | ^ | \textasciicircum | |
| $ | \$ | |\textbackslash | ||
| % | \% | { | \{ | |
| & | \& | } | \} | |
| _ | \_ | | | \textbar | |
| < | \textless | |||
| > | \textgreater |
数式の記述
TeXで文章を書く時の強みである、数式を書く方法。
\begin{equation}コマンドを利用。{equation}というのが重要。このように記述することでタイプセット時に数式として出力される。
閉じるときも\end{equation}の記述を忘れずに...
\label{eqn:xxxxx}でラベルをつけることで、章番号などと同様に、後から参照可能。
複数行の{eqnarray}では\\で改行、&を用いることで、整列可能。
| 数式はじめ | 数式おわり | 複数行の数式はじめ | 複数行の数式おわり | |
|---|---|---|---|---|
| \begin{equation} | \end{equation} | \begin{eqnarray} | \end{eqnarray} |
\documentclass{jsarticle}
\begin{document}

\begin{equation}
\label{eqn:yx2}
y=x^2
\end{equation}

\begin{eqnarray}
y &=& (x-3)(x+2) \\
&=& x^2 -x -6
\end{eqnarray}

\end{document}
箇条書きの方法
\begin{enumerate}で箇条書きがはじまる。
\itemコマンドを用いることで要素を追加。
| 記号 | 箇条書きのはじめ | 箇条書きのおわり | 箇条書きの要素 |
|---|---|---|---|
| ・ | \begin{itemize} | \end{itemaize} | \item |
| 1. | \begin{enumerate} | \end{enumerate} | \item |
\documentclass{jsarticle}
\begin{document}

\begin{itemize}
\item 歩く
\item 自転車降りる
\item 階段のぼる
\end{itemize}

\end{document}
itemizeの結果が以下
\documentclass{jsarticle}
\begin{document}

\begin{enumerate}
\item 歩く
\item 自転車降りる
\item 階段のぼる
\end{enumerate}

\end{document}
enumerateの結果が以下
\begin{enumerate}の次の行に以下のコマンドを入力することで
1). 歩く といったような括弧を出力することも可能
\renewcommand{\labelenumi}{\arabic{enumi}).}
表の挿入
\begin{table}で表開始
\centeringで中央に表を揃える
\caption{xxxxx}で表にタイトルをつける
\begin{tablar}{xxxxx}表本体の開始。xxxxxに入るものはlなら左寄せ、cなら中央寄せ、rなら右寄せになる。
\\で改行、&でセルを区切る。
今まで通りに\label{xxxxx}を付けることも可能。
| 表の設定開始 | 表の設定終了 | 表の中央寄せ | 表のタイトル | |
|---|---|---|---|---|
| \begin{table} | \end{table} | \centering | \caption{xxxxx} |
| 表本体の開始 | 表本体の終了 | 改行 | セルの区切り |
|---|---|---|---|
| \begin{tablar}{xxxxx} | \end{tablar} | \\ | & |
\documentclass{jsarticle}
\begin{document}
\begin{table}
\centering
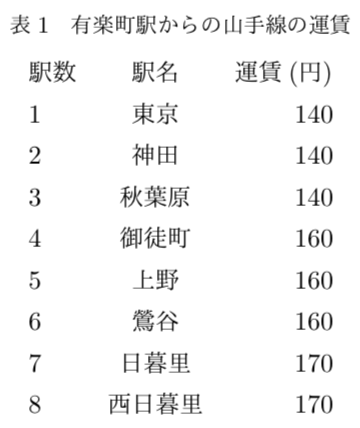
\caption{有楽町駅からの山手線の運賃}
\label{tab:begin}
\begin{tabular}{lcr}
駅数 & 駅名 & 運賃(円) \\
1 & 東京 & 140 \\
2 & 神田 & 140 \\
3 & 秋葉原 & 140 \\
4 & 御徒町 & 160 \\
5 & 上野 & 160 \\
6 & 鶯谷 & 160 \\
7 & 日暮里 & 170 \\
8 & 西日暮里 & 170
\end{tabular}
\end{table}
\end{document}
写真の挿入
画像をtexと同じディレクトリなどに配置する。
\usepackage[dvipdfmx]{graphicx}の追加を忘れずに...
\usepackage[dvipdfmx]{graphicx}

:
:

\begin{figure}[htbp]
\begin{center}
\includegraphics[width=100mm]{hoge.jpg}
\caption{caption}
\end{center}
\end{figure}