はじめに
Nexus Repository Manager3 の Docker コンテナを HTTPS 化では、自己証明書を使ってイントラネット内に HTTPS 化した Nexus コンテナを立ち上げたが、これを DockerHub のプライベートリポジトリ(ミラーレジストリ)にする。
Nexus の設定
まず Nexus サーバーの設定を行う。サーバーは以下の設定で動いているとする。
- host.example.com (10.20.230.17) で稼動しているとする。
- すでに 8081/tcp で HTTP サービスが、8082/tpc で HTTPS サービスで動作しているとする。
- 管理アカウントは admin/admin123 とする。
Docker Proxy リポジトリの作成
Nexus にアクセスし、リポジトリを作成する。
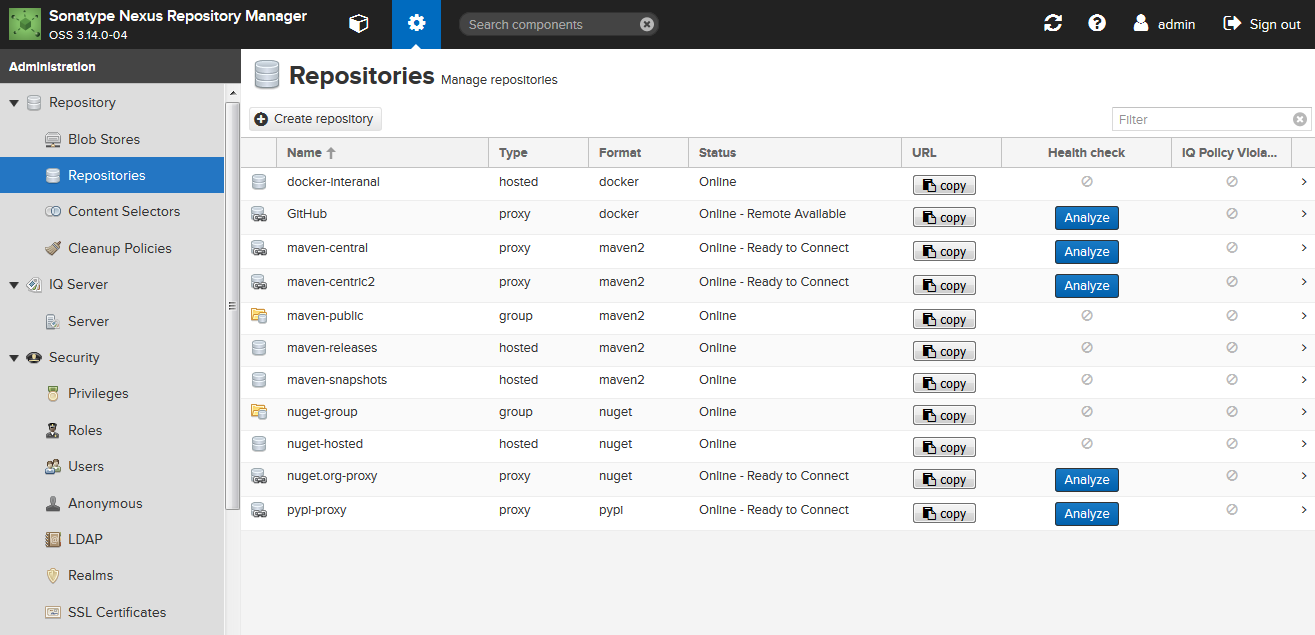
Nexus に管理カウントでログインし、メニューバーの歯車をアイコンをクリックすると Administratorion 画面に移動する。
左メニューの Repository > Repositories を選択した後に、「Create repository」ボタンを押す。
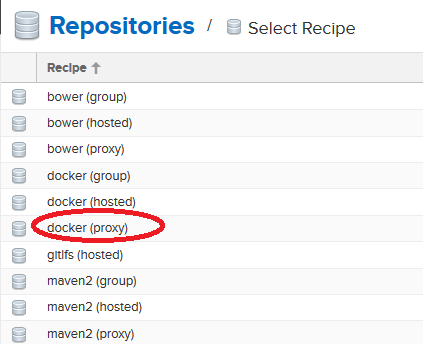
下の図のように作成可能なリポジトリの一覧が表示されるので「docker(proxy)」を選択する。
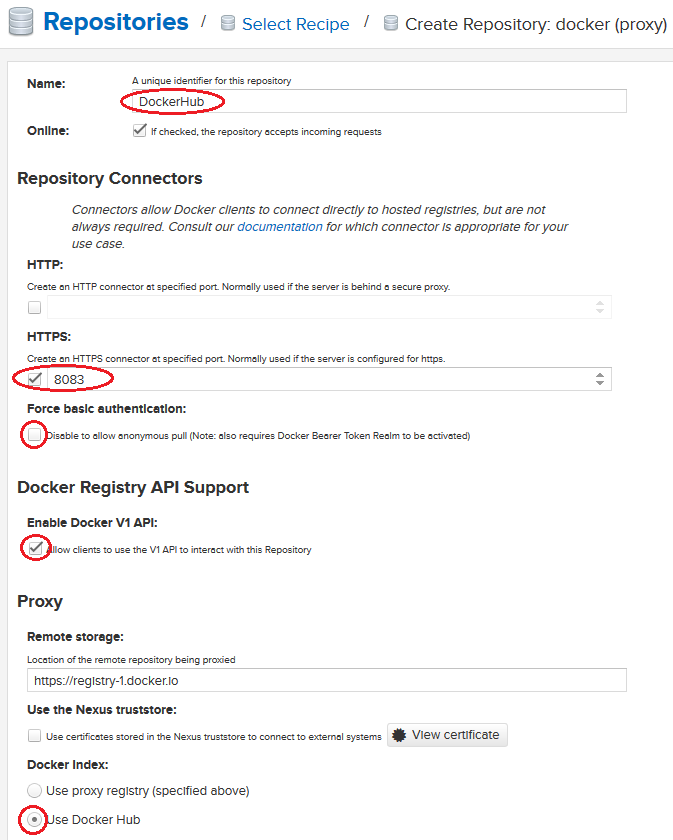
- 「Name」は他のリポジトリと重複しないものを自由につけてよい。
- HTTPS にチェックを付けて新しいポートを付ける。Nexus サーバーは 8081 と 8082 を使っているので、8083 とする。これは Docker をコンテナ運用する場合は、docker run 時にこのポートも公開しておく必要がある。
- このプライベート Docker リポジトリに認証なし(Anonymous化)でアクセスするには「Force basic authentication」の「Disable to allow anonymous pull」のチェックを外しておく。
- 「Docker Registry API Support」の「Enable Docker V1 API」の「Allow clients to use the V1 API to interact with this Repository」のチェックする。
- 「Proxy」の「Remote Storage」には
https://registry-1.docker.ioを指定する。また「Docker Index」のラジオボタンをUse Docker Hubを選択する。
全てを選択したら一番下にある「Create Repository」ボタンを押すと作成完了。
アカウントの作成
プライベート Docker リポジトリにアクセスする専用アカウントを作成した場合は、左メニューの Security > Users を選択し適当なアカウントを作成する。これは Docker リポジトリ以外の Maven や yum のリポジトリとも共用できる。
Anonymous 化
プライベート Docker リポジトリに認証なしでアクセスしたい場合には、以下のような手順を行う。
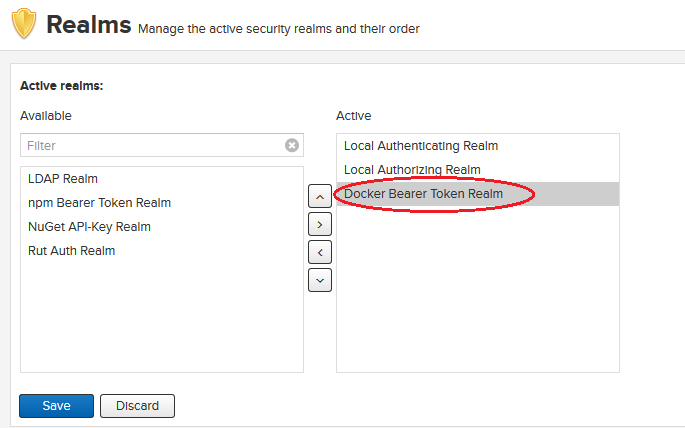
左メニューの Security > Realms を選択し、Acitve realms に「Docker Bearer Token Realm」を Active 化に移動する。
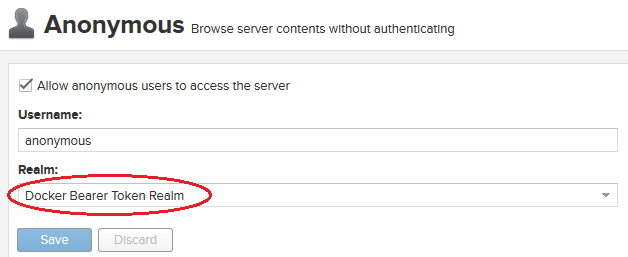
さらに左メニューの Security > Anonymous を選択し、Realm を Docker Bearer Token Realm を選択する。
SSL サーバー証明書の作成
host.example.com が自己証明書で運用するために、これを使う Docker クライアント側に登録するための SSL サーバー署名書を用意しておく必要がある。
$ keytool -printcert -sslserver host.example.com:8083 -rfc > ca.crt
作成した ca.crt を保存しておき後で使う。
Docker クライアント側の設定
イントラネットの Linux サーバーで作成した Nexus サーバーのプライベート Docker リポジトリを使用する場合、いろいろおまじないが必要となる。
まずプライベート Docker リポジトリを使用したい全ての Linux サーバーの中で以下のようなディレクトリを作成し、ca.crt を格納する。
# mkdir -p /etc/docker/certs.d/host.example.com:8083
# cp ca.crt /etc/docker/certs.d/host.example.com:8083/
この設定の後は、プライベート docker リポジトリにアクセスするには Security > Users で作成したアカウントでログインする。Anonymous 化が成功していればログインは不要である。
# docker login host.example.com:8083
この後は DockerHub.com のプロキシとしてコンテナを pull することができる。
# docker pull host.example.com:8083/debian
参考
- Sonatype Support | Using Self-Signed Certificates with Nexus Repository Manager and Docker Daemon
- Docker Documentation | Verify repository client with certificates
