目的
WEBとアプリの比較から自分のやりたい方向性を掴む。
今日やること
- widgetを使ってアプリのUIをつくる
widgetとは
Flutterで使われる大小様々なUIの構成要素
widgetに慣れる。
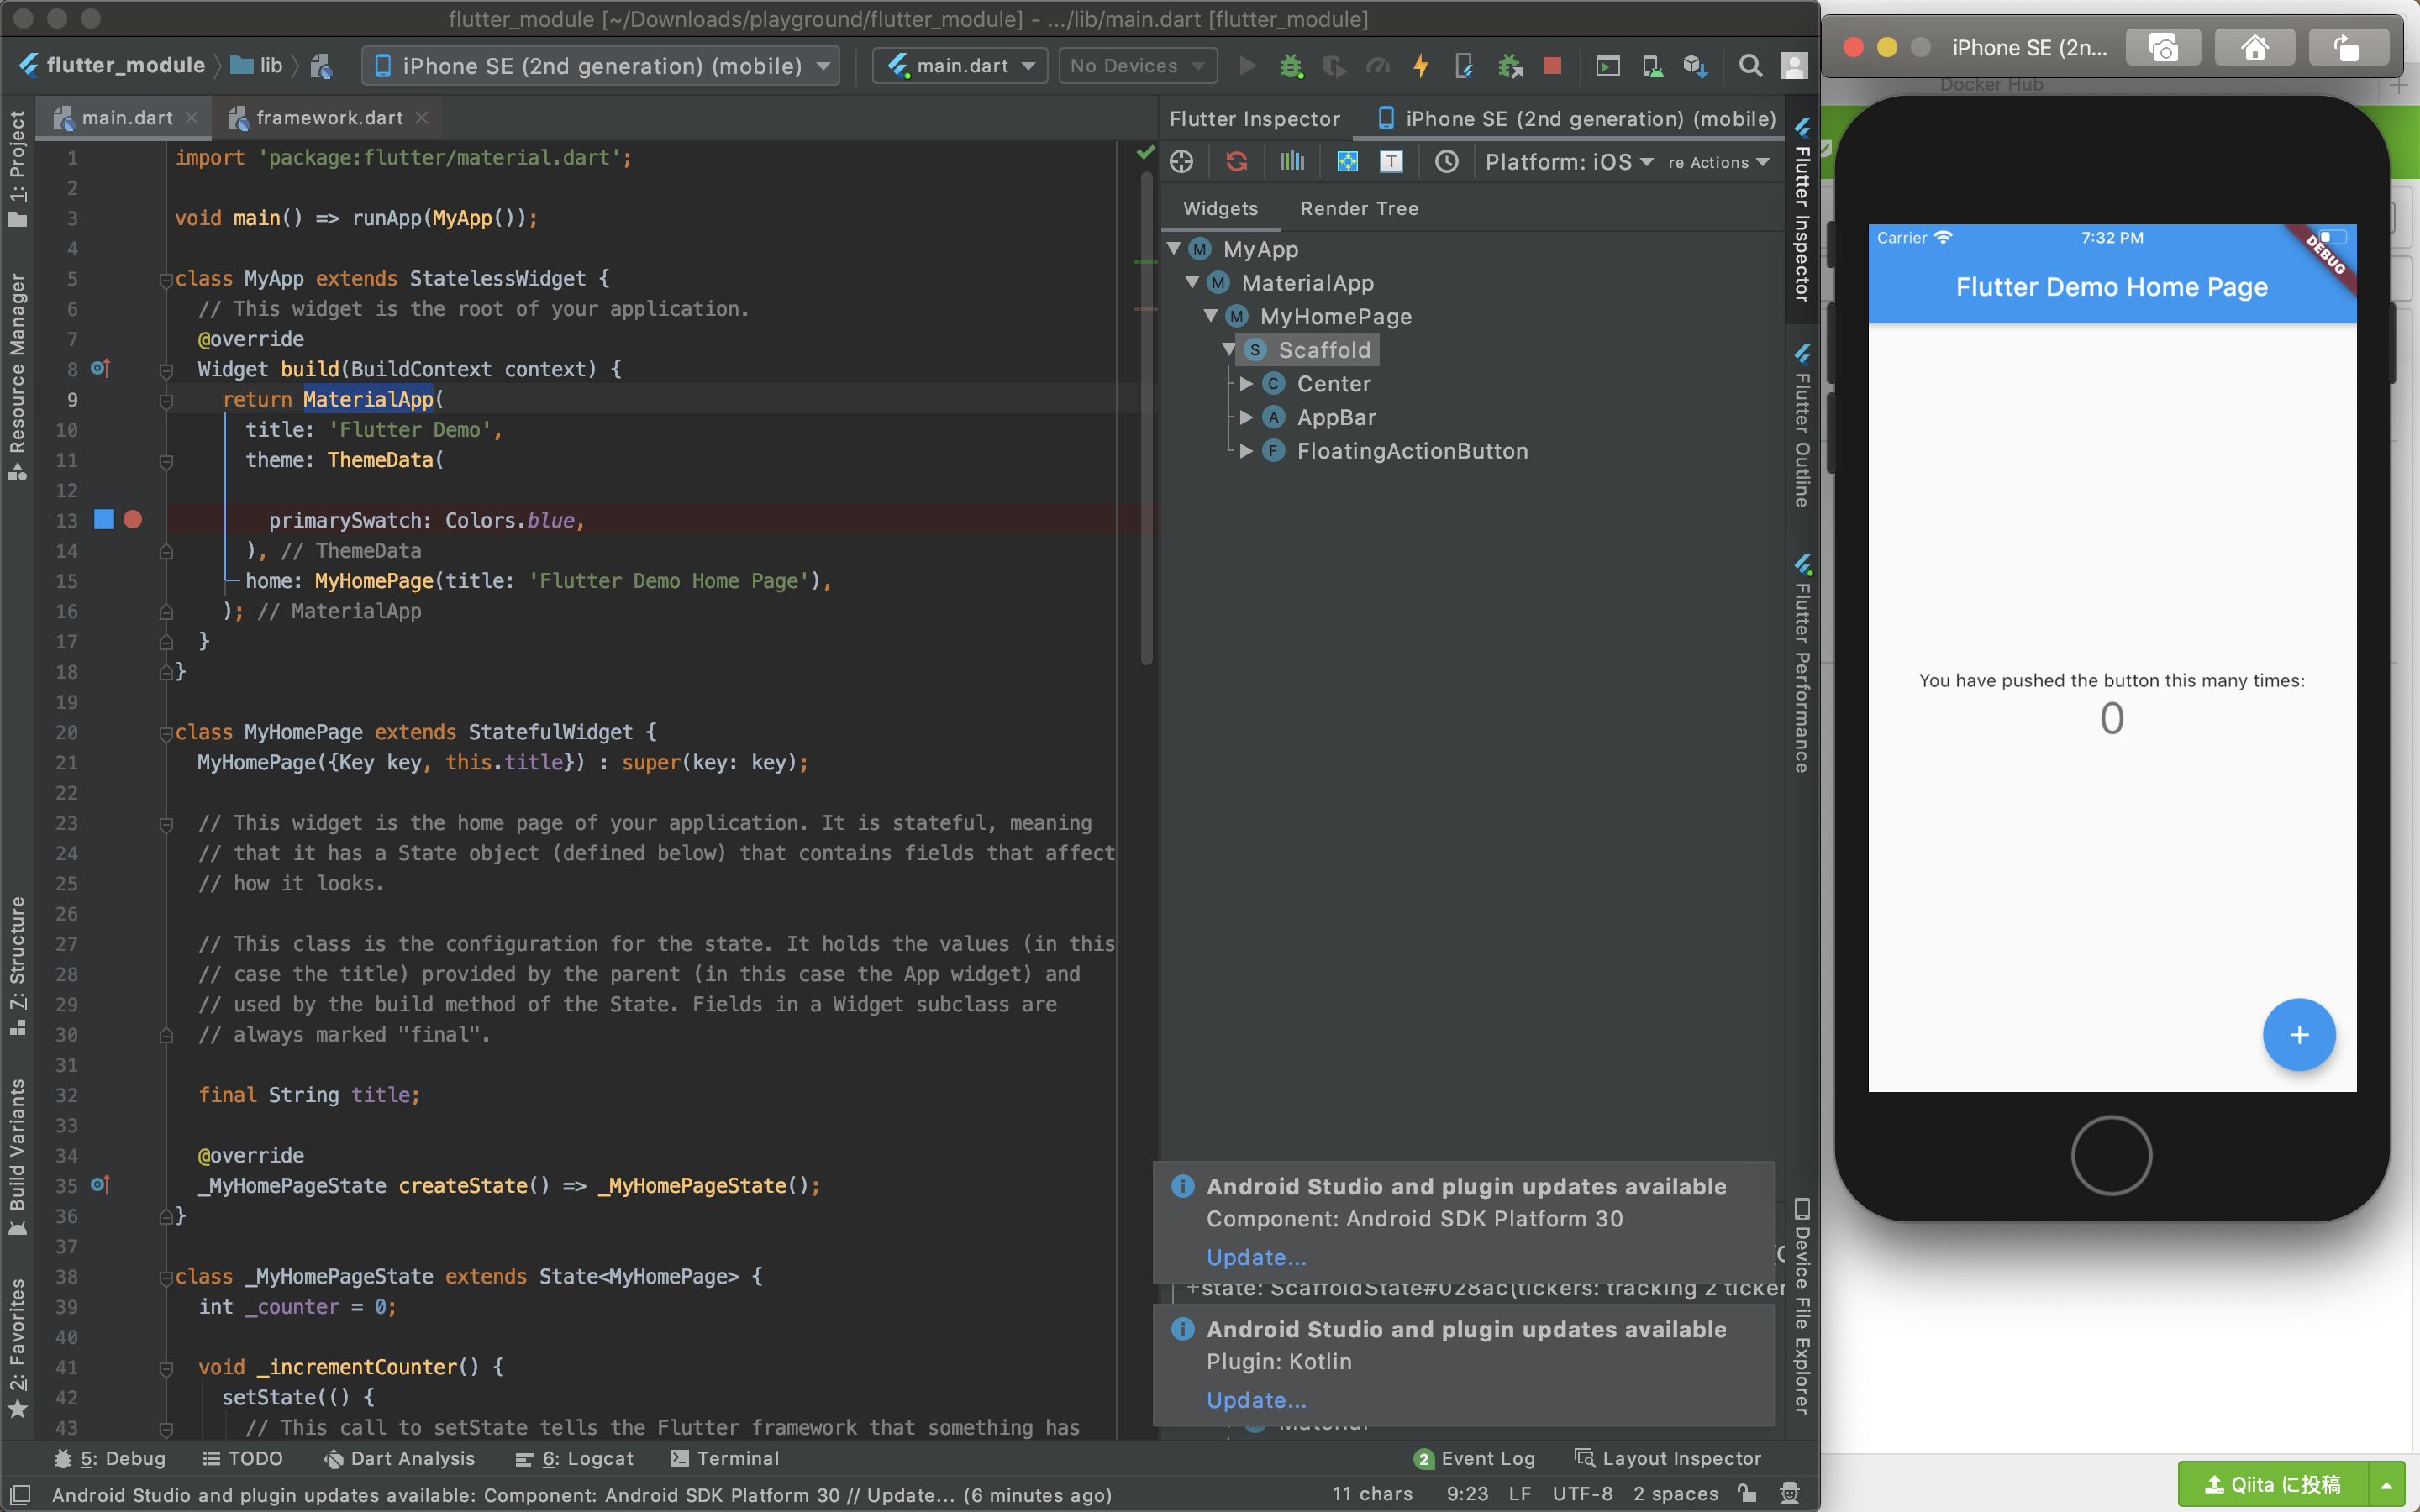
プロジェクトのメインファイルはlib/main.dartのよう。
main.dartの内容はこんな感じ
import 'package:flutter/material.dart';

void main() {
  runApp(MyApp());
}

class MyApp extends StatelessWidget {
  // This widget is the root of your application.
  @override
  Widget build(BuildContext context) {
    return MaterialApp(
      title: 'Flutter Demo',
      theme: ThemeData(
        // This is the theme of your application.
        //
        // Try running your application with "flutter run". You'll see the
        // application has a blue toolbar. Then, without quitting the app, try
        // changing the primarySwatch below to Colors.green and then invoke
        // "hot reload" (press "r" in the console where you ran "flutter run",
        // or simply save your changes to "hot reload" in a Flutter IDE).
        // Notice that the counter didn't reset back to zero; the application
        // is not restarted.
        primarySwatch: Colors.blue,
        // This makes the visual density adapt to the platform that you run
        // the app on. For desktop platforms, the controls will be smaller and
        // closer together (more dense) than on mobile platforms.
        visualDensity: VisualDensity.adaptivePlatformDensity,
      ),
      home: MyHomePage(title: 'Flutter Demo Home Page'),
    );
  }
}

class MyHomePage extends StatefulWidget {
  MyHomePage({Key key, this.title}) : super(key: key);

  // This widget is the home page of your application. It is stateful, meaning
  // that it has a State object (defined below) that contains fields that affect
  // how it looks.

  // This class is the configuration for the state. It holds the values (in this
  // case the title) provided by the parent (in this case the App widget) and
  // used by the build method of the State. Fields in a Widget subclass are
  // always marked "final".

  final String title;

  @override
  _MyHomePageState createState() => _MyHomePageState();
}

class _MyHomePageState extends State<MyHomePage> {
  int _counter = 0;

  void _incrementCounter() {
    setState(() {
      // This call to setState tells the Flutter framework that something has
      // changed in this State, which causes it to rerun the build method below
      // so that the display can reflect the updated values. If we changed
      // _counter without calling setState(), then the build method would not be
      // called again, and so nothing would appear to happen.
      _counter++;
    });
  }

  @override
  Widget build(BuildContext context) {
    // This method is rerun every time setState is called, for instance as done
    // by the _incrementCounter method above.
    //
    // The Flutter framework has been optimized to make rerunning build methods
    // fast, so that you can just rebuild anything that needs updating rather
    // than having to individually change instances of widgets.
    return Scaffold(
      appBar: AppBar(
        // Here we take the value from the MyHomePage object that was created by
        // the App.build method, and use it to set our appbar title.
        title: Text('Hello Flutter!'),
      ),
      body: Center(
        // Center is a layout widget. It takes a single child and positions it
        // in the middle of the parent.
        child: Column(
          // Column is also a layout widget. It takes a list of children and
          // arranges them vertically. By default, it sizes itself to fit its
          // children horizontally, and tries to be as tall as its parent.
          //
          // Invoke "debug painting" (press "p" in the console, choose the
          // "Toggle Debug Paint" action from the Flutter Inspector in Android
          // Studio, or the "Toggle Debug Paint" command in Visual Studio Code)
          // to see the wireframe for each widget.
          //
          // Column has various properties to control how it sizes itself and
          // how it positions its children. Here we use mainAxisAlignment to
          // center the children vertically; the main axis here is the vertical
          // axis because Columns are vertical (the cross axis would be
          // horizontal).
          mainAxisAlignment: MainAxisAlignment.center,
          children: <Widget>[
            Text(
              'You have pushed the button this many times:',
            ),
            Text(
              '$_counter',
              style: Theme.of(context).textTheme.headline4,
            ),
          ],
        ),
      ),
      floatingActionButton: FloatingActionButton(
        onPressed: _incrementCounter,
        tooltip: 'Increment',
        child: Icon(Icons.add),
      ), // This trailing comma makes auto-formatting nicer for build methods.
    );
  }
}
ながい・・・。
クラスごとの役割の違い、値の受け渡し方はいまいちわかっていない・・。
myApp内に、MyHomePageや(MyHomePage内にある)_MyHomePageStateがある。
myAppが根となるツリー構造のように見える。
そして、SetStateなどあるので値の管理にもクラスを使うみたい?
いろいろ触ってみる。
右の画面は、ディレクトリごとではなくウィジェットごとみたい
AppBarはヘッダーのwidget
タイトルを変更してみる。
widget.titleで29行目を呼び出しているみたい。
なので、直接値Hello Flutter!をいれてみる。

Reactと同じでHot Reloadなのでctr+sでシュミレーターに反映されるのはいい!
Iconもwidget
タイトルの横にアイコンを追加してみる。Iconもwidget。
  @override
  Widget build(BuildContext context) {
    return Scaffold(
      appBar: AppBar(
        title: Text('Hello Flutter!'),
        actions:<Widget>[
          Icon(Icons.add),
          Icon(Icons.share),
        ]
      ),
+とシェアマークが追加された。

公式でサポートされているのでIcons.(Icon名)で表示できる。
参考) https://material.io/resources/icons/?style=baseline
columnは縦に並べるためのwidget
body: Center(
 child:Column(
    Text('You have pushed the button this many times:',
   ),
    Text('YEAR!'),
    Text('YEAR!'),
    Text('YEAR!'),
    Text('YEAR!'),
    .
    .
    .

Rowは横に並べるためのwidget
body: Center(
 child:Row(
    Text('You have pushed the button this many times:',
   ),
    Text('YEAR!'),
    Text('YEAR!'),
    Text('YEAR!'),
    Text('YEAR!'),
    .
    .
    .
ちぎれたけれど横にならんだ!(ちゃんと教えてくれるのいいね!)

Container
背景色をつけたりpaddingやmarginをつけることができる。
Navigationする(画面遷移)
Flutterでは画面遷移をする時は、別のページに書くらしい。
Reactと似ていて、このモジュールは必要みたい。
(ReactみたいにReact自体をimportする必要はなさそうだけど)
import package:flutter/cupertino.dart
クパチーノでもよいし
import 'package:flutter/material.dart';
マテリアルでもよい。
こんな感じで次のページを作る。StatelessWidgetはwidgetが入っているクラスらしい
※StatelessWidgetとStatefulWidgetがある。
import 'package:flutter/material.dart';

class NextPage extends StatelessWidget {
  @override
  Widget build(BuildContext context) {
    return Scaffold(
      appBar: AppBar(
          title: Text('Hello NextPage!'),
      ),
        body: Container(
              )
    );
  }
}
body: Center(
        child:RaisedButton(
          child:Text('つぎへ'),
          onPressed: () {
            Navigator.push(
              context,
              MaterialPageRoute(builder: (context) => NextPage()),
            );
          },
        )
      ),
ここで、エラー発生
lib/main.dart:83:55: Error: The method 'NextPage' isn't defined for the class '_MyHomePageState'.
- '_MyHomePageState' is from 'package:flutter_app/main.dart' ('lib/main.dart').
Try correcting the name to the name of an existing method, or defining a method named 'NextPage'.
MaterialPageRoute(builder: (context) => NextPage()),
^^^^^^^^
NextPageを、MyHomePageStateで定義しなければならないらしい?
main.dartにNaxtPageクラスをつくることで解決した。

参考)https://itome.team/blog/2019/12/flutter-advent-calendar-day10/