前置き
自分は普段AndroidエンジニアとしてKotlinをメインに書いている人間です。
サーバーサイドの実装が必要で技術選定のために参考のために作成。
SpringBootを使ってRestAPIを作ってみた。
環境、バージョンなど
OS: macOS Mojave v10.14.5
IDE: InteliJ 2019.2 Ultimate Edition (無料期間)
言語: Kotlin v1.2.71 Java 1.8
DB: MySQL ver 8.0.17 for osx10.14 on x86_64(Homebrew)
この記事で最終的に出来ること
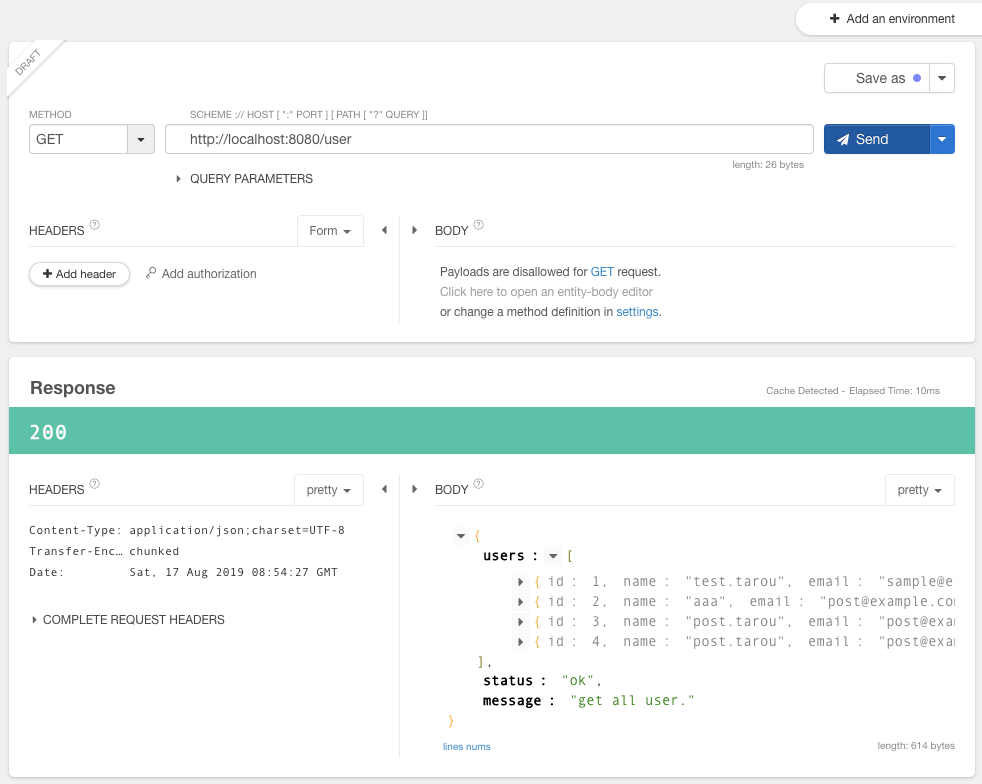
GETリクエスト
/userにGetリクエストすることで
データベースから取得した、ユーザー一覧をJsonで取得できること
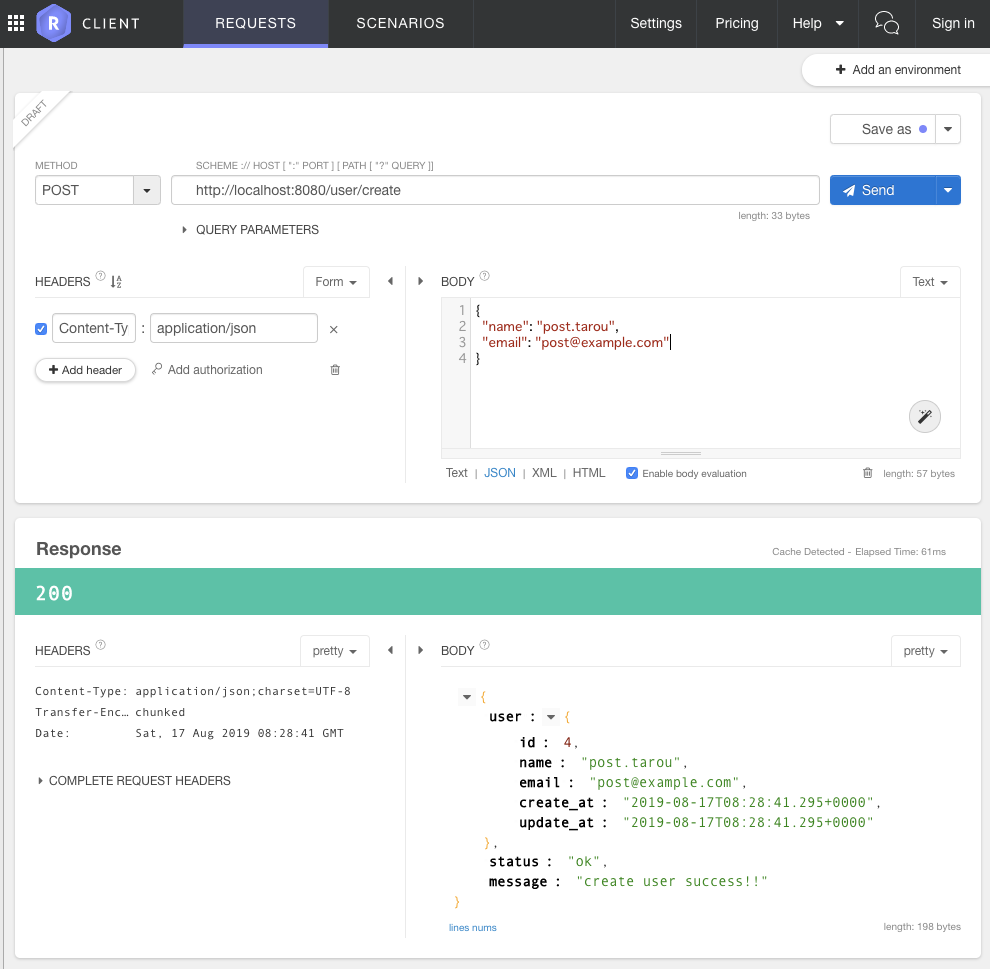
POSTリクエスト
/user/createにPOSTリクエストすることで、
データベースへユーザー情報をInsertすることができ、結果をJsonで取得できること
MySQLの準備
構築に関しては割愛します。
ローカルで動作する、Mysqlサーバーに下記データベースとユーザーを作成。
ベース名: sample_db
ユーザー名: web_app
パスワード: hogehoge
CREATE DATABASE sample_db;
CREATE USER web_app IDENTIFIED BY 'hogehoge';
GRANT ALL PRIVILEGES ON sample_db.* TO 'web_app'@'%';
下記コマンドでログインできれば問題ないと思います。
mysql -h localhost -P 3306 -u web_app -phogehoge
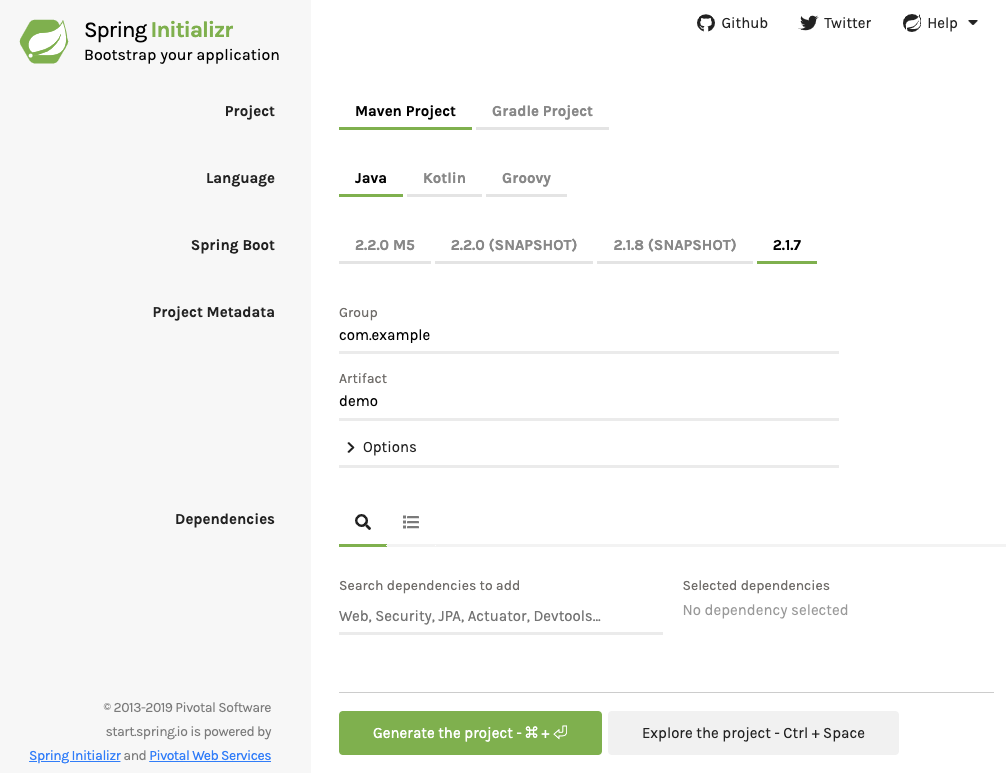
Spring Initializr
SpringBootのプロジェクトを作成してくれるWebサービスです。
上から
- project :
Gradle Project - Language :
Kotlin - Spring Boot :
2.1.7 - Project Metadata:
- Group :
com.example - Artifact :
restapisample - Options :
- Packaging :
Jar - Java :
8
- Packaging :
- Group :
- Dependencies:
Spring boot DevToolsSpring Web StarterSpring Data JPAMySQL Driver
※ 不要なDependenciesも追加してしまっていますがご愛嬌ということでお願いします!
上記を設定してGenerate the projectをクリックするとプロジェクトがダウンロードされます。
IntelliJでImportしてGradleを指定しプロジェクトを開きます。
設定など
src>main>resourcesのapplication.properitiesを開き下記を追記する
spring.datasource.url=jdbc:mysql://localhost:3306/sample_db
spring.datasource.username=web_app
spring.datasource.password=hogehoge
spring.jpa.database=MYSQL
spring.jpa.hibernate.ddl-auto=update
実装
src>main>kotlin>com.example.restapisampleにUserController.ktを作成
UserController クラス
アノテーションが強力すぎて何をやっているかよくわからないですが、
-
@RestController- これをつけるとreturnした値をいい感じにJSONで返してくれるコントローラーになるようです。
-
@GetMapping,@PostMapping-
@RequestMappingではなく通常はこちらを使うようです。 - 指定したPathにリクエストが来ればこのメソッドが呼ばれます。
-
-
@PostConstruct- 初期化時に呼ばれます。
-
@RequestBody- PostリクエストのBody部のデータをオブジェクト化して引数として渡してくれる
@RestController
class UserController constructor(private val userRepository: UserRepository) {

    @GetMapping("/user")
    fun get(): UserListResponse {
        return UserListResponse(userRepository.findAll(), "ok", "get all user.")
    }

    @PostMapping("/user/create")
    fun create(@RequestBody user: User): UserCreateResponse {
        return UserCreateResponse(userRepository.save(user), "ok", "create user success!!")
    }

    @PostConstruct
    fun init() {
        createSeed()
    }

    private fun createSeed() {
        if (userRepository.findAll().isEmpty()) {
            userRepository.save(
                    User(name = "test.tarou", email = "sample@example.com")
            )
        }
    }
}
Entity, Repository
-
@Entity- 下記のように書けば勝手にテーブル生成してくれます。
- 今回だと
userテーブルが生成されます。
-
@Repository- DBを操作するメソッドが自動で生成されます。
- insert, update, delete, selectなど自動生成!!
- userRepository.findAll()でユーザーのリストが取得できたりします。
@Entity
@Table(name = "user")
data class User(
        @Id
        @GeneratedValue(strategy = GenerationType.IDENTITY)
        var id: Int? = 0,
        var name: String? = null,
        var email: String? = null,
        var create_at: Date = Date(),
        var update_at: Date = Date()
)

interface UserRepository : JpaRepository<User, Long>
レスポンスのDataクラス
レスポンスのデータ構造体です。
-
Usersは/userにGETリクエストが来たときのレスポンスの構造体です - Android, iOSのことを考えて、ルートに配列を持たないように作った!!
data class UserListResponse(
        val users: List<User>,
        val status: String,
        val message: String
)
-
UserCreateResponseは/user/createにPOSTリクエストが来た時のレスポンスの構造体です。
data class UserCreateResponse(
        val user: User,
        val status: String,
        val message: String
)
結果参考画像
サンプルソース
今回使用したコードは下記に置いてあります。
https://github.com/t-nakata/spring-boot-restapi-sample
修正履歴
2019/08/18 : 指摘をいただき修正をしました。
-
@Autowired省略できるとのことなので削除しました。 -
@RequestMappingあまり使わないとのことなので、それぞれ@GetMapping,@PostMappingへ変更 - 初期化処理は
ContextRefreshedEventではなく@PostConstructを使用するとのことなので変更 - 当記事では
@Repositoryが不要。 - 不要な依存関係、
Rest Repositoriesを削除


