IoTのサービスを試したいが手元にRaspberry Piがないため、EC2でいろいろ触るための環境を構築したときの自分用メモ
(参考)AWS IoT GreengrassV2の使用を開始する
※英語のページを日本語訳した方が読みやすかった
(参考)最新バージョンのAWS CLI をAmazon Linux 2 にインストールしてみた
(参考)GreengrassCLIをインストールできません
構成イメージ
EC2作成
- 「Amazon Linux 2」を選択

-
「t2.micro」を選択

-
本インスタンスへのアクセス元(Cloud9)と同じVPCとサブネットを選択

-
ボリュームタイプ「gp3」を選択

-
コンソール画面で分かりやすいようにNameタグを追加(名前は任意)

-
今回は作成済みのSGを利用

SG設定は以下(Cloud9用のSGが付与されているインスタンスからのSSHを許可)

-
「起動」ボタンを押下

-
今回は作成済みのキーペアを利用

-
「IAMロールを変更」を選択

以下のようなロールを設定
※「AmazonSSMManagedInstanceCore」はセッションマネージャー用(任意)

IAMポリシー「greengrass-test-policy」は以下とした(詳細な権限は未確認)
{
"Version": "2012-10-17",
"Statement": [
{
"Sid": "VisualEditor0",
"Effect": "Allow",
"Action": [
"iam:",
"iot:",
"greengrass:"
],
"Resource": ""
}
]
}
# EC2設定
## ログイン確認
1. Cloud9にてpemファイルを作成
1. touchコマンドでファイル作成後、ローカルのpemファイルの中身を貼り付けて保存
- 以下コマンドでpemファイルの権限を制限
```
chmod 600 ./for-greengrass-test.pem
```
- 以下期待値

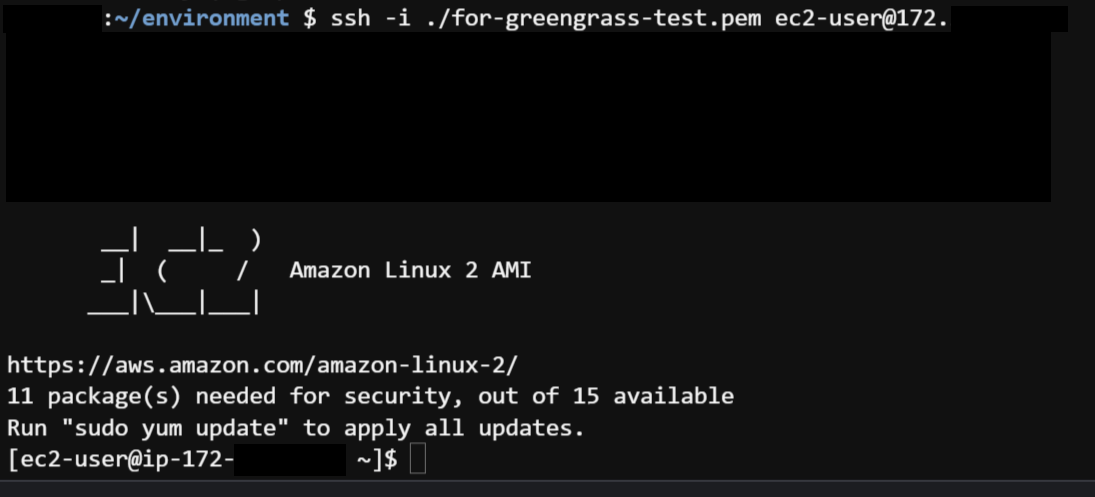
- 以下コマンドで先ほど作成したインスタンスにログイン
プライベートIPはEC2のコンソール画面から確認
```
ssh -i ./for-greengrass-test.pem ec2-user@(プライベートIP)
```
期待値は以下
## AWSCLIの更新
1. 「AWS CLI V1の最小バージョン:v1.18.197」以上が必要なので更新が必要
```
[ec2-user@ip-172-xx-xx-xx ~]$ aws --version
aws-cli/1.18.147 Python/2.7.18 Linux/5.10.82-83.359.amzn2.x86_64 botocore/1.18.6
```
- 以下コマンドで更新
```
sudo yum install python3 -y
sudo pip3 install awscli --upgrade
```
- インストールされたことを確認
デフォルトとパスが異なり、新旧両方存在する
awsコマンドはデフォルトのバージョンのまま
```
[ec2-user@ip-172-xx-xx-xx ~]$ /usr/local/bin/aws --version
aws-cli/1.22.41 Python/3.7.10 Linux/5.10.82-83.359.amzn2.x86_64 botocore/1.23.41
[ec2-user@ip-172-xx-xx-xx ~]$ /usr/bin/aws --version
aws-cli/1.18.147 Python/2.7.18 Linux/5.10.82-83.359.amzn2.x86_64 botocore/1.18.6
[ec2-user@ip-172-xx-xx-xx ~]$ aws --version
aws-cli/1.18.147 Python/2.7.18 Linux/5.10.82-83.359.amzn2.x86_64 botocore/1.18.6
```
- パスを変更
```
[ec2-user@ip-172-xx-xx-xx ~]$ export PATH=/usr/local/bin/aws:$PATH
[ec2-user@ip-172-xx-xx-xx ~]$
```
- パスが変更されていることを確認
```
[ec2-user@ip-172-xx-xx-xx ~]$ aws --version
aws-cli/1.22.41 Python/3.7.10 Linux/5.10.82-83.359.amzn2.x86_64 botocore/1.23.41
[ec2-user@ip-172-xx-xx-xx ~]$
```
- 「aws configure」を設定(リージョンのみ設定)
```
[ec2-user@ip-172-xx-xx-xx ~]$ aws configure
AWS Access Key ID [None]:
AWS Secret Access Key [None]:
Default region name [None]: ap-northeast-1
Default output format [None]:
[ec2-user@ip-172-xx-xx-xx ~]$
```
## javaインストール
1. 以下コマンドでインストール
```
sudo yum install java-11-amazon-corretto
```
- インストールされたことを確認
```
[ec2-user@ip-172-xx-xx-xx ~]$ java -version
openjdk version "11.0.13" 2021-10-19 LTS
OpenJDK Runtime Environment Corretto-11.0.13.8.2 (build 11.0.13+8-LTS)
OpenJDK 64-Bit Server VM Corretto-11.0.13.8.2 (build 11.0.13+8-LTS, mixed mode)
[ec2-user@ip-172-xx-xx-xx ~]$
```
# インストール
1. 以下コマンドにてインストーラーを準備
```
curl -s https://d2s8p88vqu9w66.cloudfront.net/releases/greengrass-nucleus-latest.zip > greengrass-nucleus-latest.zip
unzip greengrass-nucleus-latest.zip -d GreengrassInstaller && rm greengrass-nucleus-latest.zip
```
- 展開されていることを確認
```
[ec2-user@ip-172-xx-xx-xx ~]$ ls -al
total 12
drwx------ 4 ec2-user ec2-user 101 Jan 23 06:11 .
drwxr-xr-x 3 root root 22 Jan 23 05:04 ..
-rw-r--r-- 1 ec2-user ec2-user 18 Jul 15 2020 .bash_logout
-rw-r--r-- 1 ec2-user ec2-user 193 Jul 15 2020 .bash_profile
-rw-r--r-- 1 ec2-user ec2-user 231 Jul 15 2020 .bashrc
drwxrwxr-x 5 ec2-user ec2-user 114 Jan 23 06:11 GreengrassInstaller
drwx------ 2 ec2-user ec2-user 29 Jan 23 05:04 .ssh
```
- 以下コマンドにてインストールを実行
```
sudo -E java -Droot="/greengrass/v2" -Dlog.store=FILE \
-jar ./GreengrassInstaller/lib/Greengrass.jar \
--aws-region ap-northeast-1 \
--thing-name MyGreengrassCore \
--thing-group-name MyGreengrassCoreGroup \
--thing-policy-name MyGreengrassV2IoTThingPolicy \
--tes-role-name MyGreengrassV2TokenExchangeRole \
--tes-role-alias-name MyGreengrassCoreTokenExchangeRoleAlias \
--component-default-user ggc_user:ggc_group \
--provision true \
--setup-system-service true \
--deploy-dev-tools true
```
- コアデバイスにデプロイされていることを確認
```
[ec2-user@ip-172-xx-xx-xx ~]$ aws greengrassv2 list-effective-deployments --core-device-thing-name MyGreengrassCore
{
"effectiveDeployments": [
{
"deploymentId": "caf6711d-abe5-4685-bb76-9c6e02da9a6e",
"iotJobId": "0a0325c4-418a-47a9-8731-2826e6442caf",
"targetArn": "arn:aws:iot:ap-northeast-1:(AWSアカウントID):thing/MyGreengrassCore",
"coreDeviceExecutionStatus": "COMPLETED",
"reason": "SUCCESSFUL",
"creationTimestamp": 1642598634.634,
"modifiedTimestamp": 1642598634.634
}
]
}
```
- GreengrassCLIがインストールされていることを確認
```
[ec2-user@ip-172-xx-xx-xx ~]$ /greengrass/v2/bin/greengrass-cli help
Usage: greengrass-cli [-hV] [--ggcRootPath=<ggcRootPath>] [COMMAND]
Greengrass command line interface
--ggcRootPath=<ggcRootPath>
The AWS IoT Greengrass V2 root directory.
-h, --help Show this help message and exit.
-V, --version Print version information and exit.
Commands:
help Show help information for a command.
component Retrieve component information and stop or restart
components.
deployment Create local deployments and retrieve deployment status.
logs Analyze Greengrass logs.
get-debug-password Generate a password for use with the HTTP debug view
component.
[ec2-user@ip-172-xx-xx-xx ~]$
```
## コアデバイスにデプロイされていない場合
- 以下コマンドで手動デプロイできるらしい(未確認)
```
[ec2-user@ip-172-xx-xx-xx ~]$ aws greengrassv2 create-deployment \
> --target-arn "arn:aws:iot:ap-northeast-1:(AWSアカウントID):thing/MyGreengrassCore" \
> --components '{
> "aws.greengrass.Cli": {
> "componentVersion": "2.5.3"
> }
> }'
{
"deploymentId": "37e49969-5564-41e8-9b14-79d7af84e158"
}
[ec2-user@ip-172-xx-xx-xx ~]$
```
## GreengrassCLIがインストールされていない場合
- 以下の結果の場合はインストールされていない
```
[ec2-user@ip-172-xx-xx-xx ~]$ /greengrass/v2/bin/greengrass-cli help
-bash: /greengrass/v2/bin/greengrass-cli: No such file or directory
```
デプロイしているモノグループに既にコアデバイスが属している場合に発生するらしい
※2回目以降にコアデバイスを使いまわす場合は発生する
コアデバイスにデプロイされていない状態でGreengrassCLIをインストールした場合も発生
※デプロイされるまで待つ必要がある
### 手動でのGreengrassCLI手順
1. グループの確認
今回はwheelとggc_groupを指定する(10と992)
```
[ec2-user@ip-172-xx-xx-xx ~]$ cat /etc/group
root:x:0:
bin:x:1:
daemon:x:2:
・
・
・
wheel:x:10:ec2-user
・
・
・
ec2-user:x:1000:
ggc_user:x:993:
ggc_group:x:992:ggc_user
[ec2-user@ip-172-xx-xx-xx ~]$
```
- 以下内容のファイルを作成
```
[ec2-user@ip-172-xx-xx-xx ~]$ touch deployment.json
[ec2-user@ip-172-xx-xx-xx ~]$ vim deployment.json
[ec2-user@ip-172-xx-xx-xx ~]$ cat deployment.json
{
"targetArn":"arn:aws:iot:ap-northeast-1:(AWSアカウントID):thing/MyGreengrassCore",
"components": {
"aws.greengrass.Cli": {
"componentVersion": "2.5.3",
"configurationUpdate": {
"merge": "{\"AuthorizedPosixGroups\":\"10,992\",\"AuthorizedWindowsGroups\":\"10,992\"}"
}
}
}
}
[ec2-user@ip-172-xx-xx-xx ~]$
```
- 以下コマンドを実行
```
[ec2-user@ip-172-xx-xx-xx ~]$ aws greengrassv2 create-deployment --cli-input-json file:///home/ec2-user/deployment.json
{
"deploymentId": "408ee2ab-2b64-480d-b49f-cd5919c43b14"
}
[ec2-user@ip-172-xx-xx-xx ~]$
```
- インストールされていることを確認
```
[ec2-user@ip-172-xx-xx-xx ~]$ /greengrass/v2/bin/greengrass-cli help
Usage: greengrass-cli [-hV] [--ggcRootPath=<ggcRootPath>] [COMMAND]
Greengrass command line interface
--ggcRootPath=<ggcRootPath>
The AWS IoT Greengrass V2 root directory.
-h, --help Show this help message and exit.
-V, --version Print version information and exit.
Commands:
help Show help information for a command.
component Retrieve component information and stop or restart
components.
deployment Create local deployments and retrieve deployment status.
logs Analyze Greengrass logs.
get-debug-password Generate a password for use with the HTTP debug view
component.
[ec2-user@ip-172-xx-xx-xx ~]$
```
# 感想
- 日本語の手順書はきれいに訳されておらず読めなかった
- まだサービスの全体像が分かっていないので理解していきたい