概要
Vue.jsを使って、テーブルの選択した行のデータを編集フォームに表示し、
フォームで編集したデータをテーブルの対象行に戻す(更新する)といった機能の実装をしたので、
その時のメモ。
環境
- Vue.js 2.6.10
実装機能概要
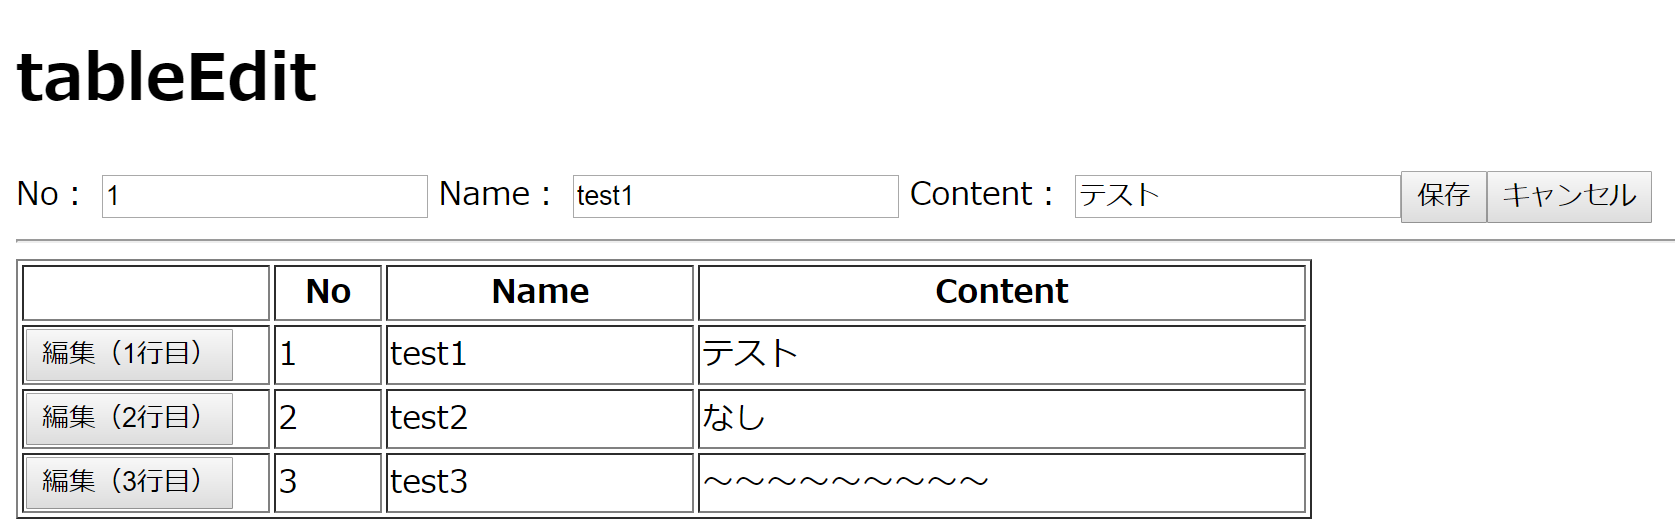
編集ボタンを押すと、
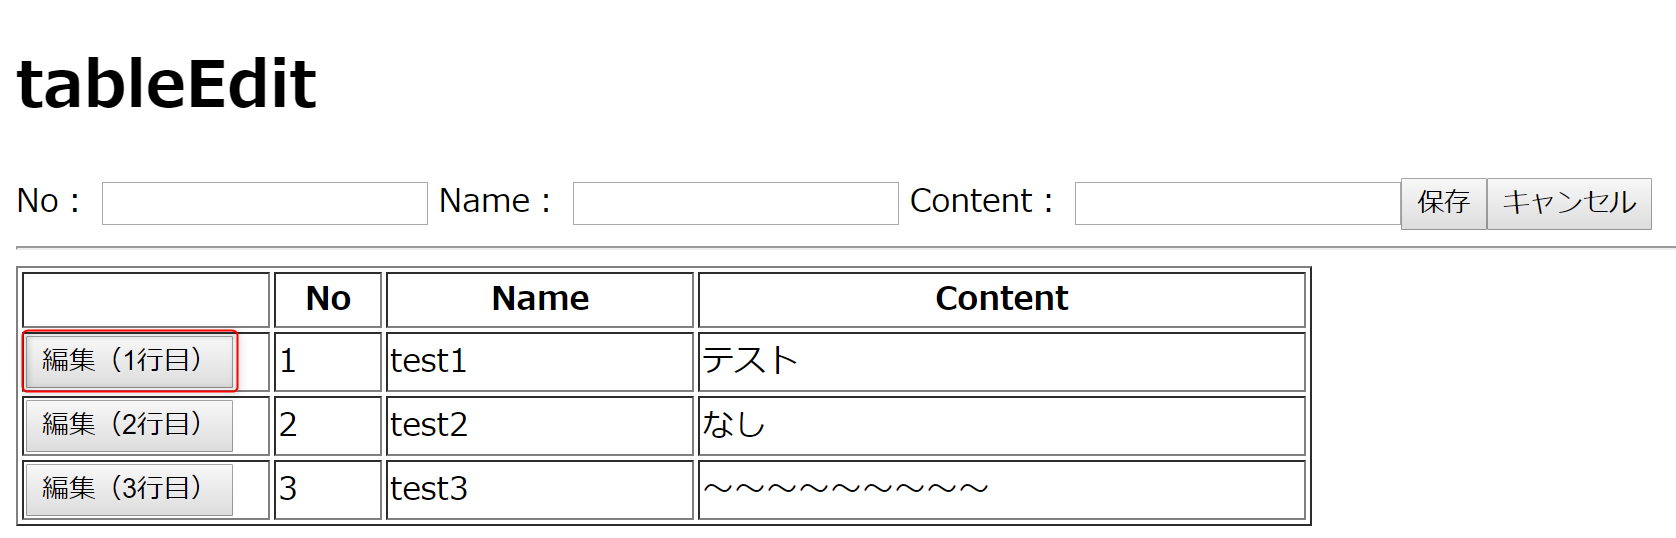
対象行のデータを抽出し、
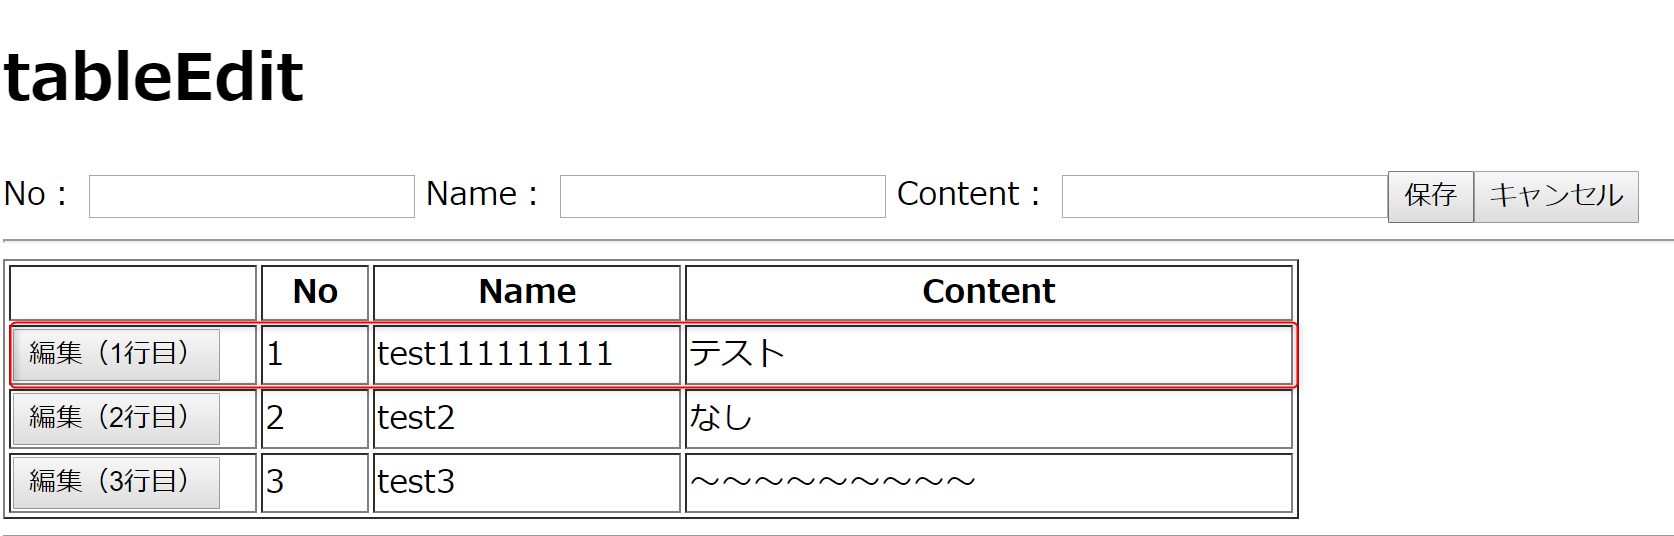
保存ボタンを押すと、
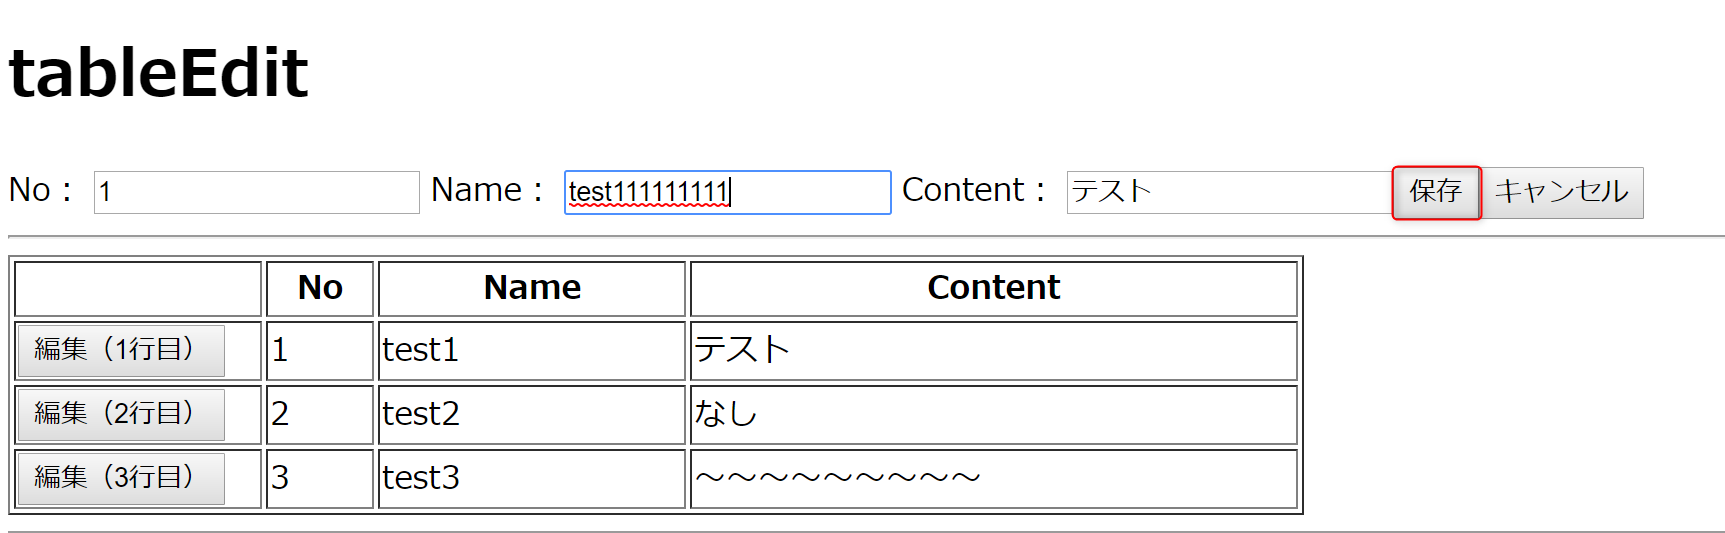
抽出してきた行のデータを入力内容で更新する。
詳細
実装したコードのサンプルは以下のコードになります。
ポイントとしては、
- 編集開始時に、編集対象のインデックスを保持
- 編集フォームのデータとテーブルデータのオブジェクトの参照を分離するため、
Object.assign()を使って、別オブジェクトとしてデータを作成している -
splice()を使い、編集対象のインデックスのデータのみを更新する
といったところだと思います。
<template>
  <div>
    <div class="detail">
      <label>
        No:
        <input type="number" v-model.number="form.no" />
      </label>
      <label>
        Name:
        <input type="text" v-model="form.name" />
      </label>
      <label>
        Content:
        <input type="text" v-model="form.content" />
      </label>
      <button type="button" @click="onSave">保存</button>
      <button type="button" @click="onCancel">キャンセル</button>
    </div>
    <hr />
    <div class="table">
      <table border="1">
        <thead>
          <tr>
            <th style="width:120px;"></th>
            <th style="width:50px;">No</th>
            <th style="width:150px;">Name</th>
            <th style="width:300px;">Content</th>
          </tr>
        </thead>
        <tbody>
          <tr v-for="(d,index) in data" :key="index">
            <td>
              <button type="button" @click="onEdit(index)">編集({{ index + 1 }}行目)</button>
            </td>
            <td>{{ d.no }}</td>
            <td>{{ d.name }}</td>
            <td>{{ d.content }}</td>
          </tr>
        </tbody>
      </table>
    </div>
  </div>
</template>

<script>
export default {
  data() {
    return {
      form: {},
      data: [
        { no: 1, name: "test1", content: "テスト" },
        { no: 2, name: "test2", content: "なし" },
        { no: 3, name: "test3", content: "~~~~~~~~~" }
      ]
    };
  },
  methods: {
    onSave() {
      this.data.splice(
        this.currentTargetIndex,
        1,
        Object.assign({}, this.form)
      );
      this.form = {};
    },
    onCancel() {
      this.form = {};
    },
    onEdit(index) {
      this.currentTargetIndex = index;
      this.form = Object.assign({}, this.data[index]);
    }
  }
};
</script>

<style>
</style>
まとめ
そんなに複雑な実装でもないし、あまり使いどころはないかもしれないけど、
実際に作った機能なのでメモとして残しておこうと思う。
複数のデータを一括で登録・編集するといった機能を実装するときには使えるかもしれない。