はじめに
Stripeという決済プラットフォームをGASで使えたら、スプレッドシートをデータベースにしたり、メールアドレスの入力を無くしたり、全部無料でできるから良いな〜と思ったので、実験しました。
YouTubeでの解説:https://youtu.be/oNNvwa4u9zI
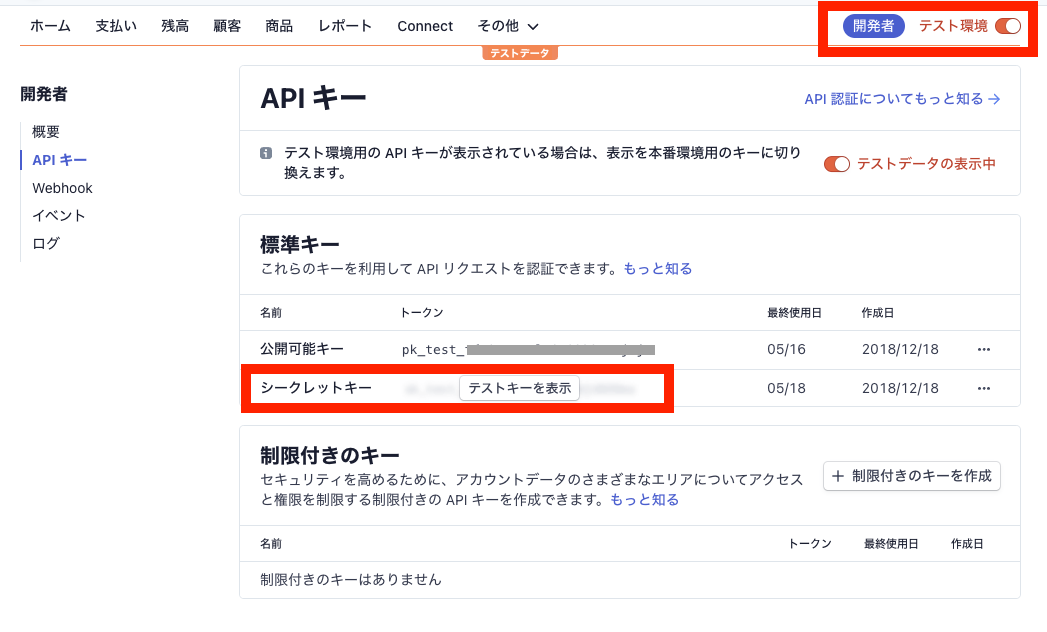
API キーの発行
テスト環境にチェックを入れて、開発者のボタンを押し、左側の「API キー」からAPIの発行ができます。
スプレッドシートの準備
空のスプレッドシートを開き、1行目にそれぞれ
- A列に「メールアドレス」
- B列に「金額」
- C列に「日付」
としておきます。
そうしたら、ツールからスクリプトエディタを開きます。

GASの中身
***公開可能キー*** と ***シークレットキー*** の2つのキーを使います。
下記のコードの該当箇所に書き換えてご使用ください。
今回は コード.gs と index.html の2つのファイルを使います。
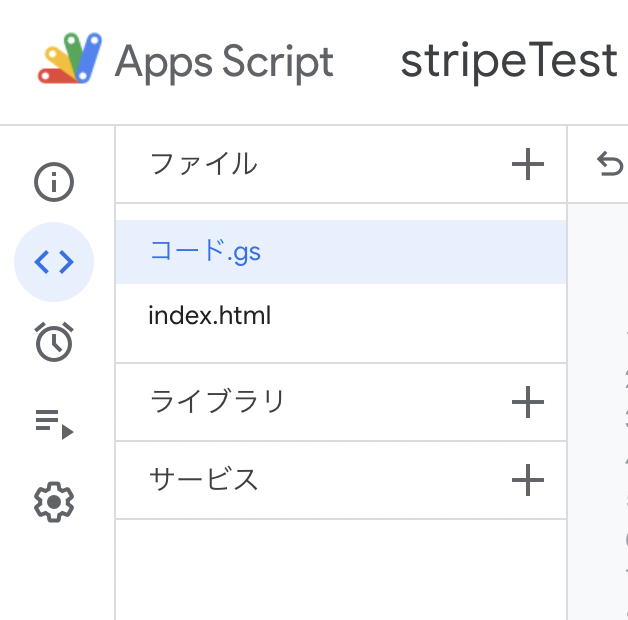
コード.gs
const SHEET = SpreadsheetApp.getActiveSheet()
const PRICE = '2000'

function doGet(e) {
  const STRIPE_PUBLISH_KEY = "***公開可能キー***"
  const html = HtmlService.createTemplateFromFile('index')
  html.price = PRICE
  html.url = ScriptApp.getService().getUrl()
  html.email = Session.getActiveUser().getEmail()
  html.STRIPE_PUBLISH_KEY = STRIPE_PUBLISH_KEY
  return html.evaluate()
}

// Stripeでの決済処理
function doPost(e) {

  const STRIPE_SECRET_KEY = "***シークレットキー***"
  const stripeToken = e.parameter.stripeToken
  const stripeEmail = e.parameter.stripeEmail
  const UserData = findUser(stripeEmail)
  let htmlOutput = ''

  if (typeof UserData === "undefined") {
    UrlFetchApp.fetch("https://api.stripe.com/v1/charges", {
      'method' : 'post',
      'payload' : {
        'amount': PRICE,
        'currency': "JPY",
        'description': "テストです",
        'source': stripeToken
      },
      'headers' : {'Authorization' : " Basic " + Utilities.base64Encode(STRIPE_SECRET_KEY + ':')}
    })
    // スプレッドシートにデータを保存
    SHEET.appendRow([stripeEmail, PRICE, Utilities.formatDate(new Date(), "JST", "yyyy/MM/dd HH:mm:ss")])
    htmlOutput = `${stripeEmail} での購入が完了しました。`
  } else {
    htmlOutput = `購入に失敗しました。${stripeEmail} では ${UserData} に既に購入済みです。`
  }

  return HtmlService.createHtmlOutput(htmlOutput)

}

// ユーザー検索
function findUser(uid) {
  return getUserData().reduce(function(uuid, row) { return uuid || (row.key === uid && row.value) }, false) || undefined
}

// ユーザー情報取得
function getUserData() {
  const data = SHEET.getDataRange().getValues()
  return data.map(function(row) { return {key: row[0], value: row[2]} })
}
index.html
<!DOCTYPE html>
<html>
  <head>
    <meta charset="utf-8">
    <base target="_top">
    <script type="text/javascript" src="https://js.stripe.com/v3/"></script>
    <title>Stripe Checkout Test</title>
  </head>
  <body>
    <p>ようこそ! <?= email?></p>
    <form action="<?= url ?>" method="POST">
    <script
      src = "https://checkout.stripe.com/checkout.js"
      class = "stripe-button"
      data-key = "<?= STRIPE_PUBLISH_KEY?>"
      data-amount = "<?= PRICE?>"
      data-email = "<?= email?>"
      data-currency = "JPY"
      data-name = "決済テスト"
      data-description = "テストです"
      data-image = "https://stripe.com/img/documentation/checkout/marketplace.png"
      data-locale = "ja"
      data-zip-code = "true">
    </script>
    </form>
  </body>
</html>
デプロイ
コピペが完了したら、右上の「デプロイ」というボタンがあります。
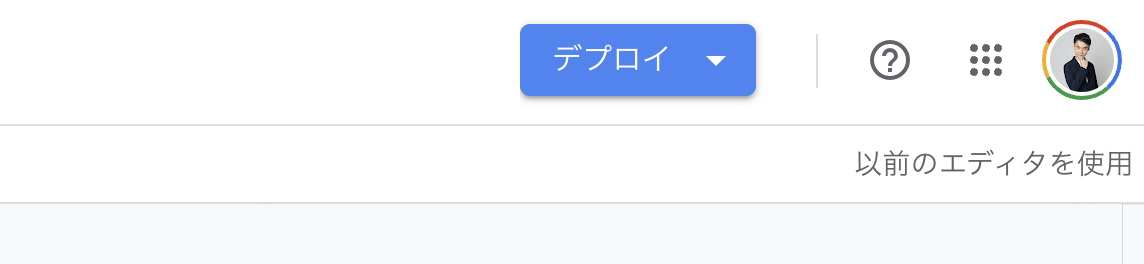
「新しいデプロイ」から⚙(歯車マーク)を押し、下記の設定でデプロイをします。
- 説明:任意に名前を入力
- ウェブアプリ(次のユーザーとして実行):自分
- ウェブアプリ(アクセスできるユーザー):全員
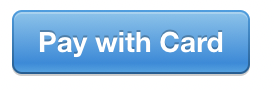
デプロイして発行されたウェブアプリのURLを開き、下記のボタンが押せる画面が立ち上がります。
通常モードでは、メールアドレスが既に入力されています。
シークレットモードやGoogleでログインされていないブラウザでは、自分でメールアドレスを入力する必要があります。
テストモードでは、クレジットカード番号「4242 4242 4242 4242」で決済することができます。
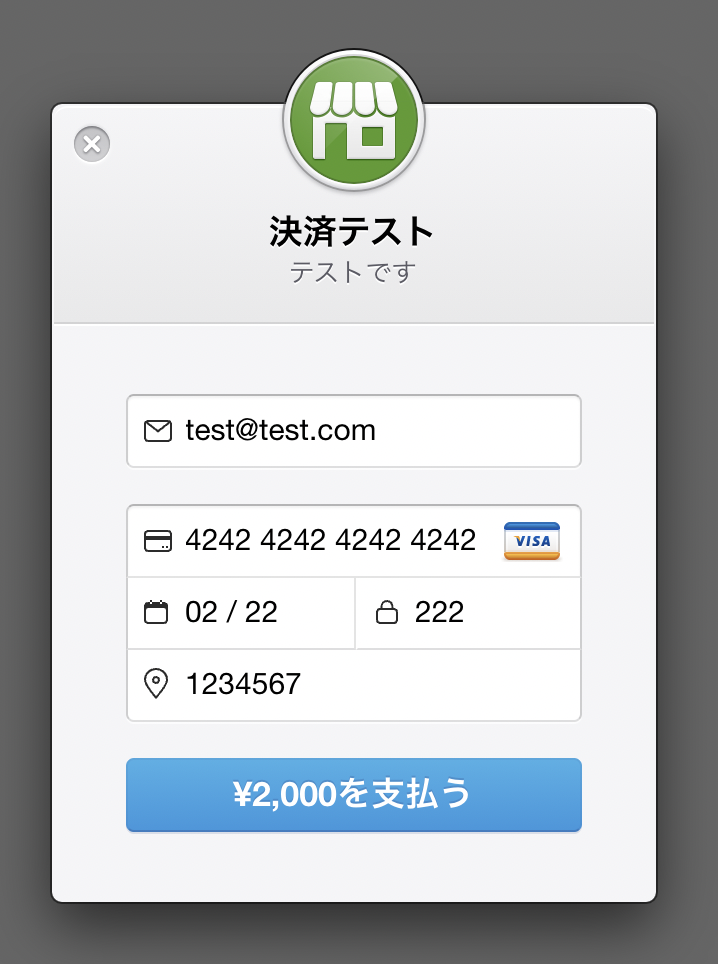
スプレッドシートに記入されれば、成功です。
あとは、Stripeのダッシュボードに戻り、テスト環境から本番環境に変えて、もう一度***公開可能キー*** と ***シークレットキー*** の2つのAPIキーを本番環境で発行すれば、実際に誰でも決済することができます。
念のため、二重決済対応はしておきました。
使用するにあたり、大変恐縮ですが、今回は決済機能なので、法律とかの問題や不都合が起きたりしても、自己責任でお願いします。