諸注意
2025年3月31日にLine Notify はサービスを終了します。
下準備(LINE Notifyのトークンを取得)
LINE側の設定をまずはしていく必要があります。
下準備①
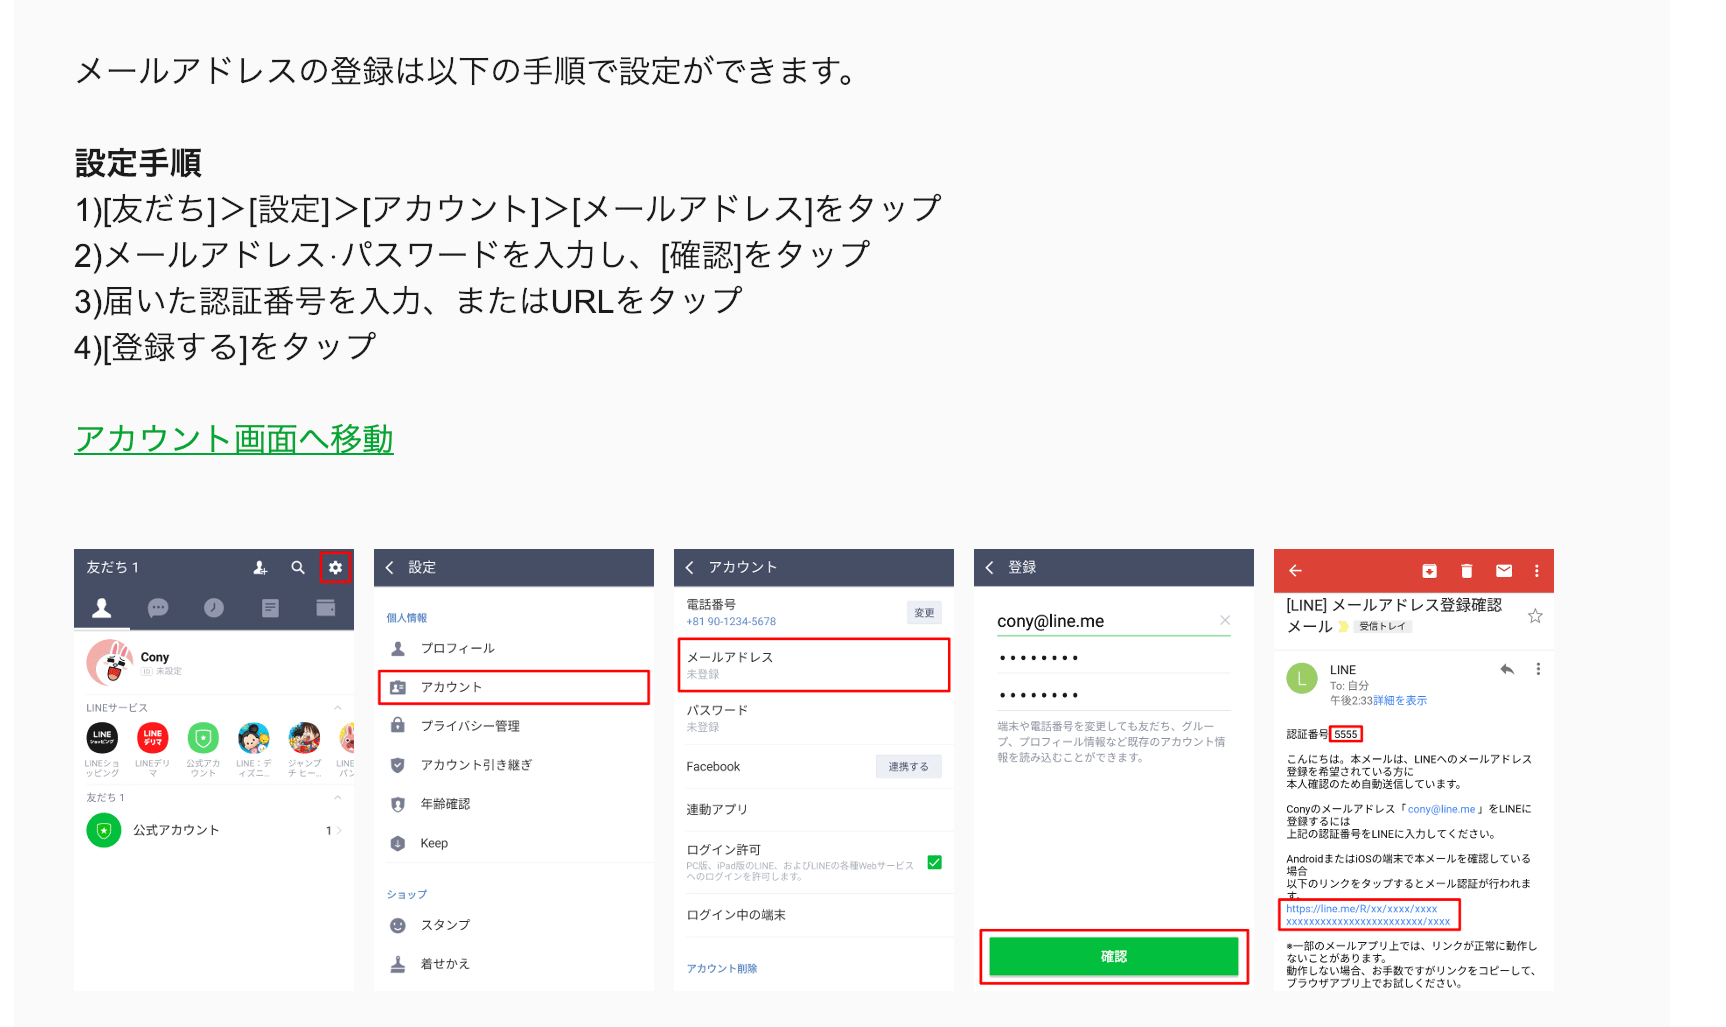
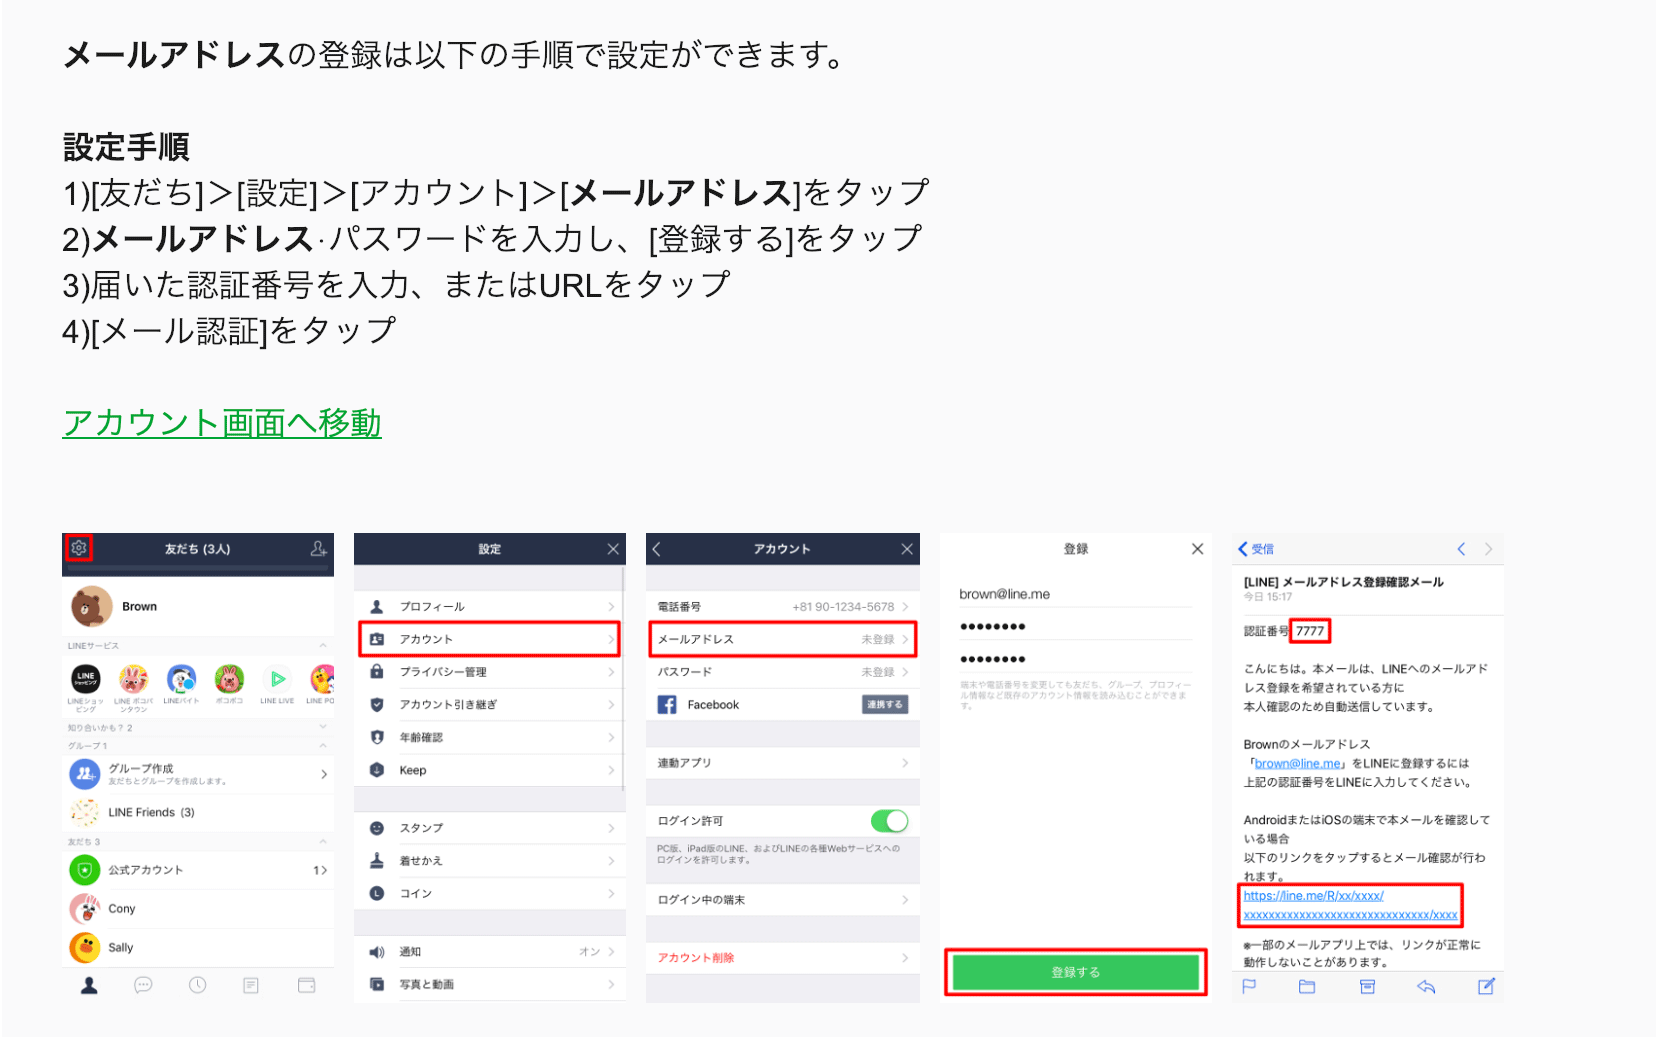
自分のLINEを開いて、メールアドレスとパスワードを設定しておいてください。
※設定済みの方は手続き不要です
iPhoneの場合
Androidの場合
下準備②
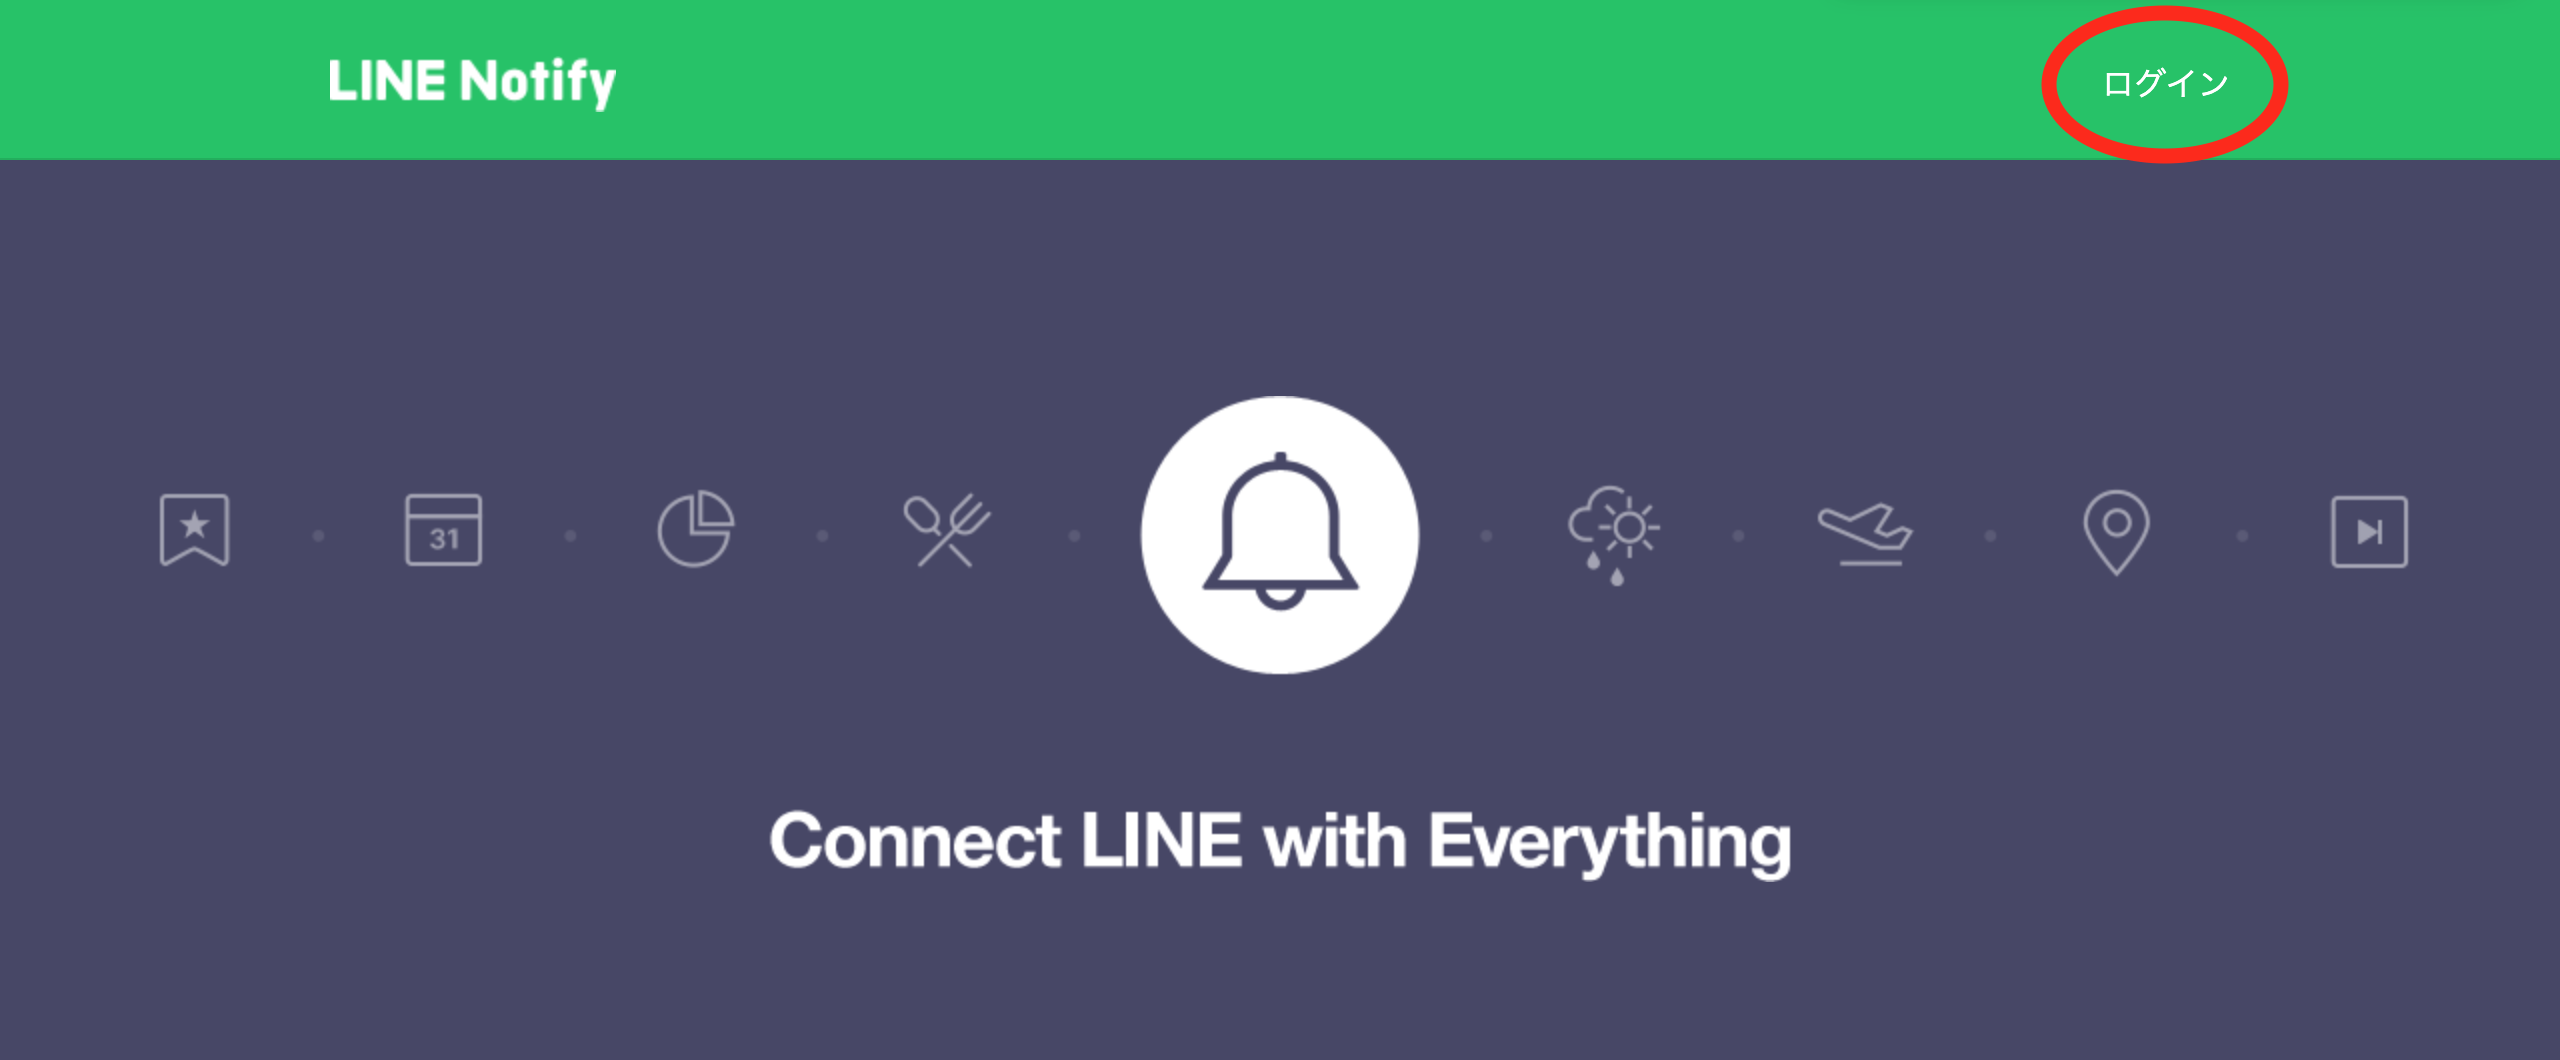
LINE Notifyにアクセスして、ログインできるかチェック。
Googleスプレッドシートを開いて、スクリプトシートを開く(コンテナバインドスクリプト)
新しくスプレッドシートを開く。

ツールのスクリプトエディタを選択すると、下記の画面になる。

ここにコードを書いていきます。
ソースコード
code.js
// ここに発行したアクセストークンを書く
const token = "*********";

// ここにカレンダーIDとカレンダー名を書く。ここに書いたカレンダーのみリマインド対象になる
const calendarTitleMap = {
  "********@gmail.com" : "****のカレンダー",
  "********@group.v.calendar.google.com" : "****のカレンダー" // 例: "ja.japanese#holiday@group.v.calendar.google.com" : "日本の祝日"
};

const weekday = ["日", "月", "火", "水", "木", "金", "土"];

function notifyEvent() {
  const calendars = CalendarApp.getAllCalendars();
  const dt = new Date();// dateオブジェクトの生成
  dt.setDate(dt.getDate() + 1); //明日をdtにセット
  const tomorrow = Utilities.formatDate(dt, `JST`, `M/d (${weekday[dt.getDay()]})`);

  let message = ` ${tomorrow}\n\n`;
  let dayText = "";

  // 取得した予定の数だけfor文でまわす
  for(i in calendars) {

    const calendar = calendars[i];
    const calendarName = calendarTitleMap[calendar.getId()]
    if ( calendarName == undefined ) {
      continue; // カレンダー名が設定されてなければパス
    }

    let events = calendar.getEventsForDay(dt);
    if( events.length == 0 ) {
      continue;
    }

    // カレンダー名を添えたい場合
    dayText += `< ${calendarName} >\n`;

    // イベントの数だけfor文でまわす
    for(e in events) {
      dayText += toDayText(events[e]);
    }
    dayText += "\n"
  }

  if ( dayText == "") {
      dayText += "予定はありません\n\n";
  }
  message += dayText;

  console.log(message);

  // LINE送信
  sendToLine(message);
}

function sendToLine(message){
  const options = {
    "method"  : "post",
    "headers" : {"Authorization" : "Bearer "+ token},
    "payload" : "message=" + message
  };

  // API
  UrlFetchApp.fetch("https://notify-api.line.me/api/notify", options);
}

function toDayText(event) {
  return toTimeText(event.getStartTime()) + ' - ' + toTimeText(event.getEndTime()) + " " + event.getTitle() + '\n';
}

function toTimeText(str){
  return Utilities.formatDate(str, 'Asia/Tokyo', 'HH:mm');
}
発行したトークンと、適切なメールアドレスを入力してあげて実行を押すと、通知が行きます。

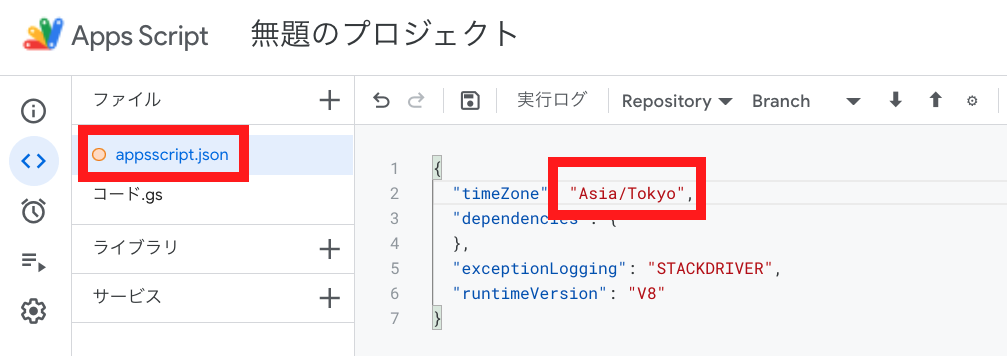
日付がおかしい場合
下記の設定を変更すればOK
(デフォルトのタイムゾーンが「GMT-05:00」で設定されているので、日本標準時である「GMT+09:00」に設定する必要あり)
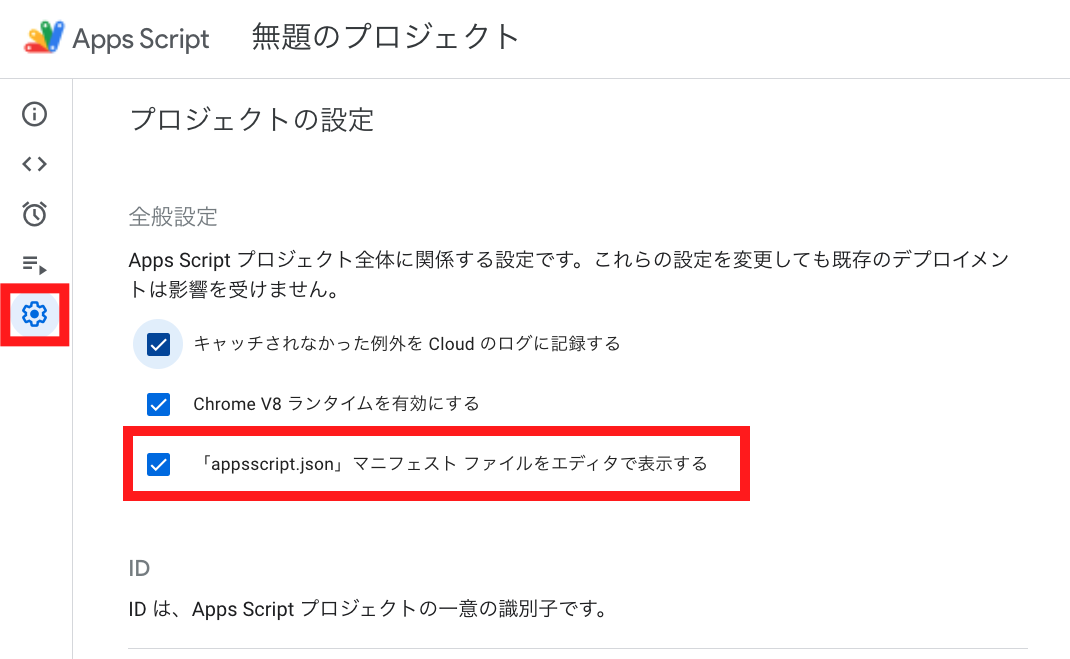
ファイルに新しく appsscript.jsonが新しく表示されてるので、下記のコードに変更
appsscript.json
{
  "timeZone": "Asia/Tokyo",
  "dependencies": {
  },
  "exceptionLogging": "STACKDRIVER",
  "runtimeVersion": "V8"
}
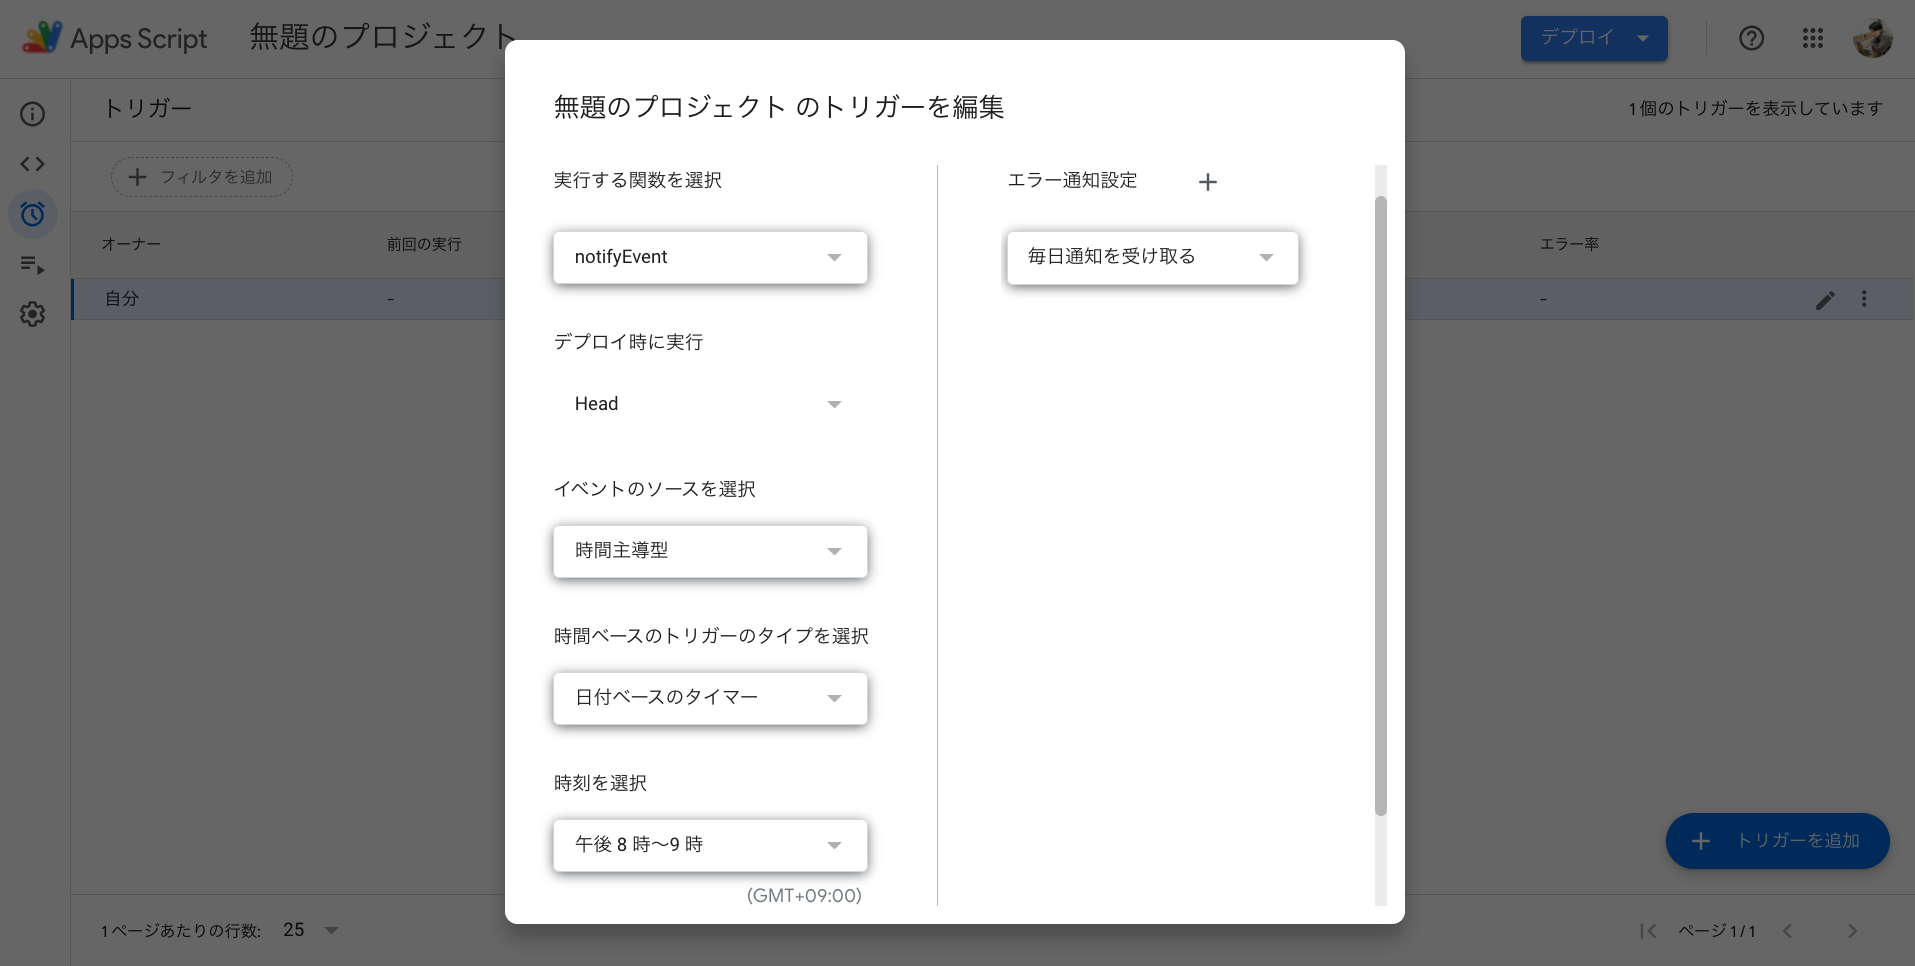
トリガー設定の例
毎日LINEに通知するために、トリガー設定をGoogle側で設定することができます。
例えば、毎晩午後8時〜9時に明日の通知を送る設定にする場合、下記の設定でトリガーを追加することができます。
実行する関数:notifyEvent
デプロイ時に実行:Head
イベントのソース:時間手動型
時間ベースのトリガーのタイプ:日付ベースのタイマー
時間:午後8時〜9時
解説
用語解説
- 関数
- ソースコードの内容が書かれた箱のようなもの
- 引数
- 関数に与えるパラメータのこと
使ってる関数の説明
-
CalendarApp.getAllCalendars()
- 自分のGoogleカレンダーに共有されている全カレンダーのリストを取得
-
new Date()
- 日付を扱うためのオブジェクトを作成
-
.setDate()
- 指定された日付のローカルタイムに沿って、その月の日を設定します。
-
.getDate()
- 指定された日付のローカルタイムに沿って、その月の日を返します。
-
Utilities.formatDate(引数1, 引数2, 引数3)
- 指定した書式で日時を取得。引数は、オブジェクト名、タイムゾーン(JST等)、書式、の順で。
- “JST”とは、Japan Standard Time の頭文字を取った略語で、日本標準時のこと。
-
getEventsForDay(日付オブジェクト)
- 指定した日付に登録されている予定イベントをすべて取得
作成している関数の概要説明
-
sendToLine()
- LINE送る。引数にメッセージ
-
toDayText()
- 予定を指定の書式に変換する
-
toTimeText()
- 日時を指定の書式に変換する
YouTube: https://youtu.be/umIsXEkiDpQ