Swift初心者ですが、どんどん発信していこうと思います。
今回は、「アラートを表示」させてみました。
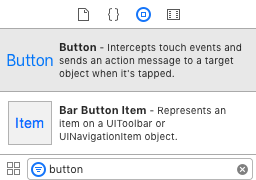
まず、ボタンをMain.storyboardに作ります。
(Xcodeの右下で"button"と検索すれば、すぐ見つかります。)
「アラートを表示」という名前にしてみました。
次に、Xcode右上の○が2つ重なっているボタン
"Show the assistant editor"をクリック
ViewControllerの一番下らへんにコネクトします。
(「アラートを表示」からcontrolを押しながらドラッグ&ドロップです。)
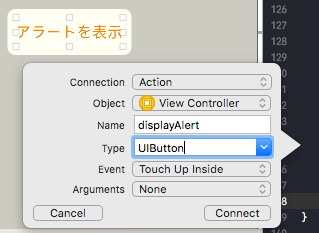
Connection: Action
Name: displayAlert
Type: UIButton
Event: Touch Up Inside
Arguments: None
に設定します。
次に、その中身を編集していきます。
ViewController.swift
import UIKit

class ViewController: UIViewController {
    //@IBOutlet weak var imageView: UIImageView!

    override func viewDidLoad() {
        super.viewDidLoad()
        // Do any additional setup after loading the view, typically from a nib.

    }

    override func didReceiveMemoryWarning() {
        super.didReceiveMemoryWarning()
        // Dispose of any resources that can be recreated.
    }

    // 今回の「アラートを表示」はここから
    @IBAction func displayAlert() {
        let title = "アラートテスト"
        let message = "タップしてくれてサンクス."
        let okText = "ok"

        let alert = UIAlertController(title: title, message: message, preferredStyle: UIAlertControllerStyle.alert)
        let okayButton = UIAlertAction(title: okText, style: UIAlertActionStyle.cancel, handler: nil)
        alert.addAction(okayButton)

        present(alert, animated: true, completion: nil)
    }
    // 今回の「アラートを表示」はここまで
}
最後に、Xcodeの左上の実行ボタンでビルドしてみましょう。

しっかり、アラートは表示されましたか?^_^