[MERN①] Express & MongoDB Setup
https://qiita.com/niyomong/private/3281af84486876f897f7
[MERN②]User API Routes & JWT Authentication
https://qiita.com/niyomong/private/c11616ff7b64925f9a2b
[MERN③] Profile API Routes
https://qiita.com/niyomong/private/8cff4e6fa0e81b92cb49
[MERN④] Post API
https://qiita.com/niyomong/private/3ce66f15375ad04b8989
[MERN⑤] Getting Started With React & The Frontend
https://qiita.com/niyomong/private/a5759e2fb89c9f222b6b
[MERN⑥] Redux Setup & Alerts
https://qiita.com/niyomong/private/074c27259924c7fd306b
[MERN⑦] React User Authentication
https://qiita.com/niyomong/private/37151784671eff3b92b6
[MERN⑧] Dashboard & Profile Management
https://qiita.com/niyomong/private/ab7e5da1b1983a226aca
[MERN⑨] Profile Display
https://qiita.com/niyomong/private/42426135e959c7844dcb
[MERN⑩] Posts & Comments
https://qiita.com/niyomong/private/19c78aea482b734c3cf5
[MERN11] デプロイ
https://qiita.com/niyomong/private/150f9000ce51548134ad
1. Creating a Redux Store
boilerplate code(定型コード)
①src/store.jsファイルを生成 -> 定型コードを追加
import { createStore, applyMiddleware } from 'redux';
import { composeWithDevTools } from 'redux-devtools-extension';
import thunk from 'redux-thunk';
import rootReducer from './reducers'; //reducersフォルダを全てimport

const initialState = {};
const middleware = [thunk];
const store = createStore(
  rootReducer,
  initialState,
  composeWithDevTools(applyMiddleware(...middleware))
);

export default store;
②src/reducersフォルダを生成 -> src/reducers/index.jsファイルを生成
③App.jsに定型コードを追加。
import React, { Fragment } from 'react';
import { BrowserRouter as Router, Route, Switch } from 'react-router-dom';
import Navbar from './components/layout/Navbar';
import Landing from './components/layout/Landing';
import Register from './components/auth/Register';
import Login from './components/auth/Login';
+ //Redux
+ import { Provider } from 'react-redux';
+ import store from './store';

import './App.css';

const App = () => (
+   <Provider store={store}>
    <Router>
      <Fragment>
...
      </Fragment>
    </Router>
+   </Provider>
);
④reducers/index.jsに定型コードを追加。
import { combineReducers } from 'redux';

export default combineReducers({});
⑤GoogleChromeの拡張機能(Reduxのdevtools)
・Reduxのdevtools追加前
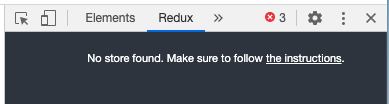
・devtools追加後

2. Alert Reducer, Action & Types
Reduxの仕組みはアラート機能が一番わかりやすいのでAlert機能から進める。
①Alert Reducerファイルを生成 -> reducers/index.jsにimport
import { combineReducers } from 'redux';
+ import alert from './alert';
export default combineReducers({});
②Alert Reducerファイル生成。
import { SET_ALERT, REMOVE_ALERT } from '../actions/types';

const initialState = [];

export default function (state = initialState, action) {
  const { type, payload } = action;

  switch (type) {
    case SET_ALERT:
      return [...state, payload];
    case REMOVE_ALERT:
      return state.filter((alert) => alert.id !== payload);
    default:
      return state;
  }
}
③Actionフォルダ生成 -> actions/types.jsファイルを生成
export const SET_ALERT = 'SET_ALERT';
export const REMOVE_ALERT = 'REMOVE_ALERT';
④AlertActionファイル生成
(1) uuid(Universally Unique ID)をインストール
$ npm i uuid
https://www.npmjs.com/package/uuid
(2) Registerコンポで記述したアラート内容とAlertType(CSSから呼び出すCSSデザイン)をtype(SET_ALERT)に乗せてdispatch->Reducer
(1) import { v4 as uuidv4 } from 'uuid';
import { SET_ALERT, REMOVE_ALERT } from './types';

export const setAlert = (msg, alertType, timeout = 5000) => (dispatch) => {
  const id = uuidv4();
  dispatch({
    type: SET_ALERT,
(2)    payload: { msg, alertType, id },
  });

  setTimeout(() => dispatch({ type: REMOVE_ALERT, payload: id }), timeout);
};
3. Alert Component & Action Call
①Register.jsにエラー時のAlert発火装置を設置
(1) Connect設置:Action{setAlert}の呼び出しのみ、Stateの呼び出し(mapStateToProps)はAlertコンポーネントで呼び出す。
・export default connect(A, B)(コンポーネント)
A: State、 B: Action
(2) PropTypesの設定: コンポーネントの props の型チェック
impt(ショートカット) -> import PropTypes from 'prop-types';
ptfr(ショートカット)= -> PropTypes.func.isRequired
*f->function, a->array, b->object
(3) Actionで記述したsetAlert(Action発火装置)を設置
import React, { Fragment, useState } from 'react';
(1)+ import { connect } from 'react-redux';
import { Link } from 'react-router-dom';
(3)+ import { setAlert } from '../../actions/alert';
(2)+ import PropTypes from 'prop-types';

(3)+ const Register = (setAlert) => {
  const [formData, setFormData] = useState({
    name: '',
    email: '',
    password: '',
    password2: '',
  });
...
  const onSubmit = (e) => {
    e.preventDefault();
    if (password !== password2) {
(3)+      setAlert('Passwords do not match', 'danger');
    } else {
..
  return (
...
(2)+ Register.propTypes = {
+   setAlert: PropTypes.func.isRequired,
+ };

(1)+ export default connect(null, { setAlert })(Register);
② Alertコンポーネント
racfp(ショートカット) -> 'Enter'
(1) connect設置:Stateの呼び出し(mapStateToProps)のみ、ActionはRegister.jsで発火されるので、ここではnull。
(2) PropTypesの設定: コンポーネントの props の型チェック
(3) mapStateToProps: StateからPropsにデータ(エラーメッセージ)を渡す
(4) nullではない。
(5) array(エラー項目)が0ではない(何かしらのエラーがある)
(6) JSX(HTML風に書けるJS拡張構文) -> エラーメッセージを配列する
 -> alertType: Register.jsで'danger'を設定
 -> CSSに `alert alert-danger`(赤色ハイライト等)を記述している
 -> `xxx-${ダイナミック}` <- これダイナミック(動的)っていうらしい。

```components/layout/Alert.js
import React from 'react';
(2) import PropTypes from 'prop-types';
(1) import { connect } from 'react-redux';

const Alert = ({ alerts }) =>
(4)  alerts !== null &&
(5)  alerts.length > 0 &&
(6)  alerts.map((alert) => (
    <div key={alert.id} className={`alert alert-${alert.alertType}`}>
      {alert.msg}
    </div>
  ));

(2) Alert.propTypes = {
  alerts: PropTypes.array.isRequired,
};

(3) const mapStateToProps = (state) => ({
  alerts: state.alert,
});

(1) export default connect(mapStateToProps)(Alert);
```


③Alertコンポーネントは<Switch>の上に持ってくる。

 全ての画面に`Alertコンポーネント`が常にある状態。要は、エラーが発生した時に、`Navbarコンポーネント`よりは`下`、コンポーネント(今回は`Registerコンポーネント`)より上に表示される。

```src/App.js
...
import Login from './components/auth/Login';
+ import Alert from './components/layout/Alert';
//Redux
import { Provider } from 'react-redux';
...
const App = () => (
  <Provider store={store}>
    <Router>
      <Fragment>
        <Navbar />
        <Route exact path="/" component={Landing} />
        <section className="container">
+          <Alert />
          <Switch>
...
```