概要
- Raspberry Pi + Rasbian 環境に raspi2png をインストールしてスクリーンショット画像ファイルを生成する
- 他のスクリーンショット撮影アプリ KSnapshot と scrot と比較する
- 今回の環境: Raspberry Pi 3 Model B + Raspbian GNU/Linux 10 (buster)
raspi2png とは
raspi2png は Raspberry Pi のスクリーンショットを撮影することができるコマンドアプリケーション。
DispmanX という API を使用しているため、 GPU 描画されたウィンドウの中身もスクリーンショットに撮ることができる。
また SSH 越しに Raspberry Pi にログインして CUI でコマンドを実行してスクリーンショットを撮ることが可能。
raspi2png のインストール
シェルスクリプトによるインストーラが用意されている。
中身を見ると必要なライブラリを apt-get でインストールしてから、make コマンドで raspi2png のビルドとインストールをしているのがわかる。
sudo apt-get -y install libpng12-dev git-core
cd ~
git clone https://github.com/AndrewFromMelbourne/raspi2png.git
cd raspi2png
make
sudo make install
cd ..
rm -fr raspi2png
raspi2png -H
インストーラ実行例。
$ curl -sL https://raw.githubusercontent.com/AndrewFromMelbourne/raspi2png/master/installer.sh | bash -
(中略)
install -m 755 raspi2png /usr/bin/raspi2png
Usage: raspi2png [--pngname name] [--width <width>] [--height <height>] [--compression <level>] [--delay <delay>] [--display <number>] [--stdout] [--help]

    --pngname,-p - name of png file to create (default is snapshot.png)
    --height,-h - image height (default is screen height)
    --width,-w - image width (default is screen width)
    --compression,-c - PNG compression level (0 - 9)
    --delay,-d - delay in seconds (default 0)
    --display,-D - Raspberry Pi display number (default 0)
    --stdout,-s - write file to stdout
    --help,-H - print this usage information
/usr/bin/raspi2png にインストールされる。
$ which raspi2png
/usr/bin/raspi2png
raspi2png でスクリーンショットを撮る
raspi2png コマンドで画面全体のスクリーンショットを撮ることができる。
オプションを何も指定しない場合は snapshot.png というファイル名で画像が保存される。
$ raspi2png
また、以下のようなエイリアスを設定しておくと、ファイル名を変えて保存しやすくなる。
$ alias r2p='raspi2png -p $(date -u +%Y%m%d_%H%M%S_%3N).png'
他のアプリケーションとの比較
Raspberry Pi でスクリーンショットを撮るアプリケーションとして他に KSnapshot や scrot (SCReen shOT) がある。 raspi2png はこれらのアプリと比べて機能は少ないが、優れている点として GPU 描画の結果を撮ったり SSH 接続越しに使うことができる。
KSnapshot
KSnapshot によるスクリーンショット画像。 GPU 描画をしていると思われる Minecraft Pi Edition のウィンドウが真っ黒になってしまう。
また、 SSH で Raspberry Pi にログインして KSnapshot を起動しようとするとエラーが出てしまう。
$ ksnapshot
W: The ksnapshot utility has been deprecated in favor of spectacle
W: Starting spectacle ...
qt.qpa.screen: QXcbConnection: Could not connect to display
Could not connect to any X display.
scrot
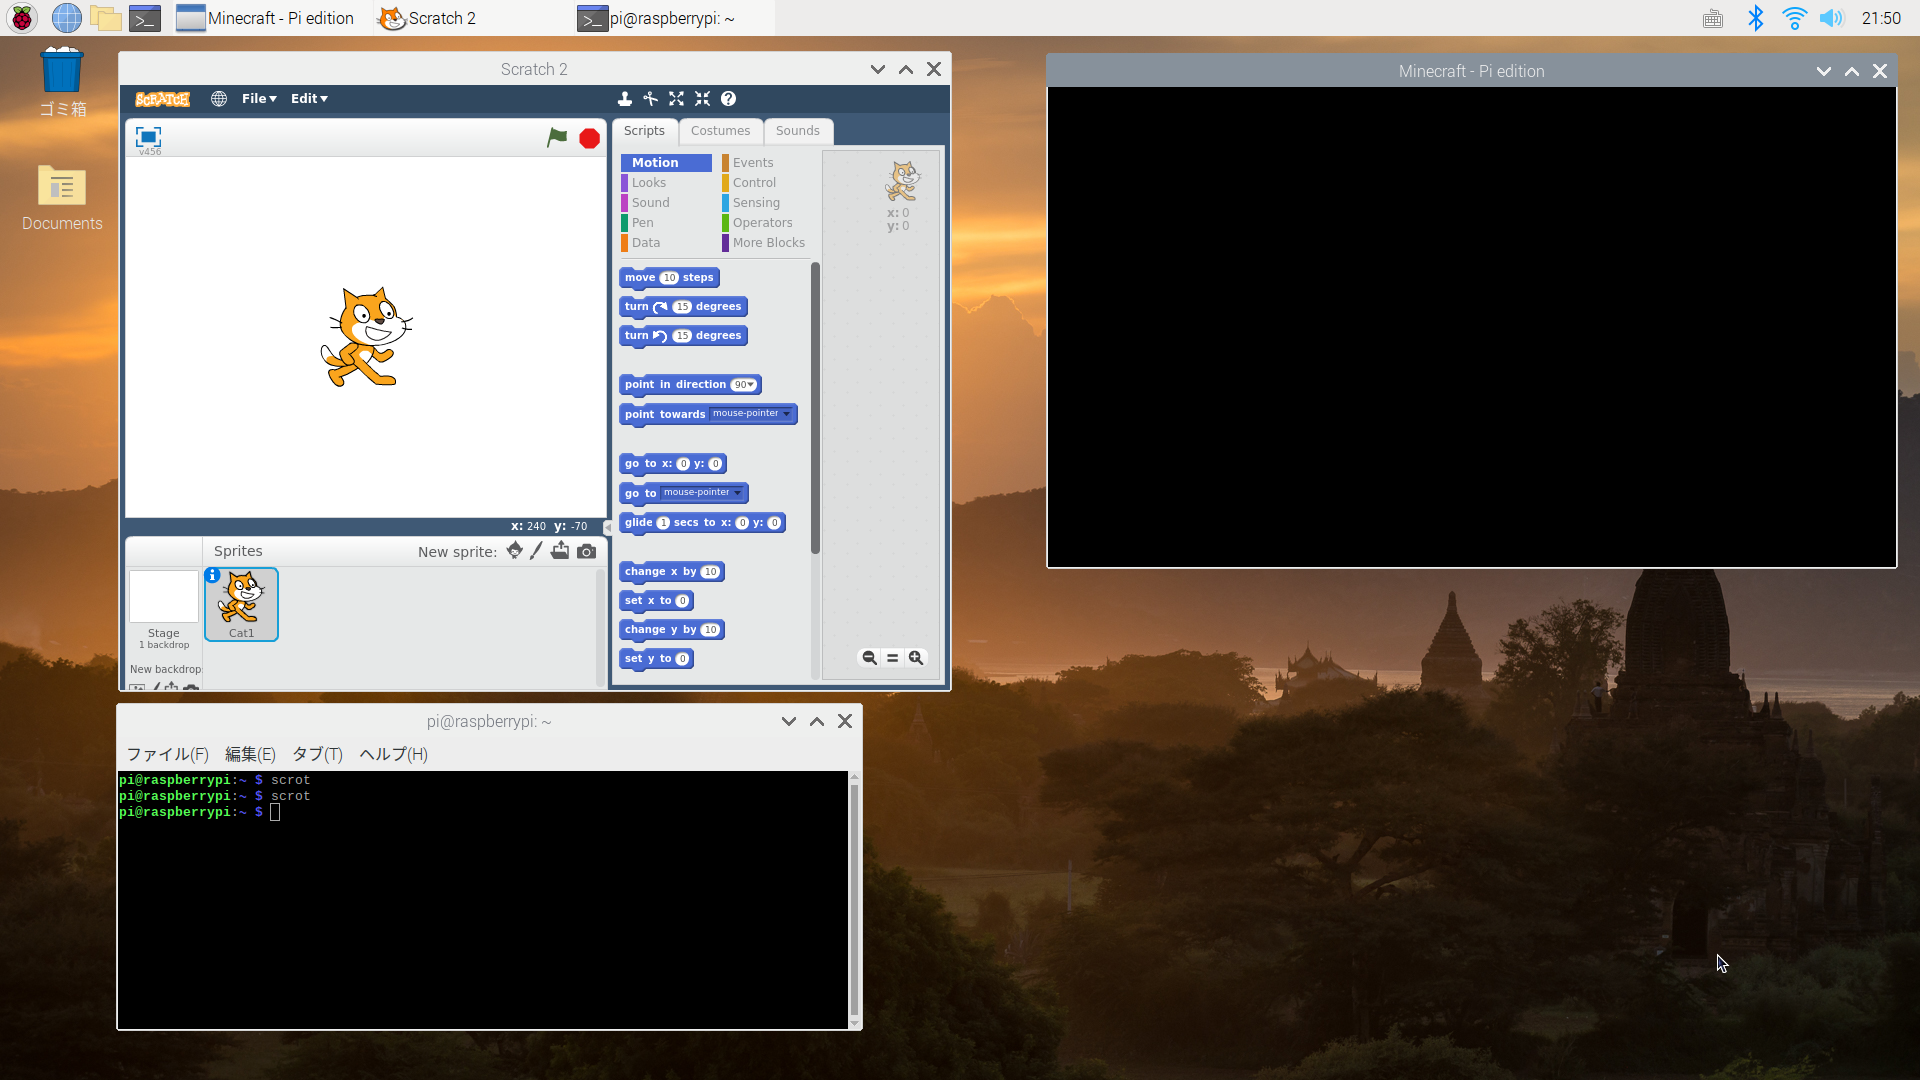
scrot によるスクリーンショット画像。 GPU 描画をしていると思われる Minecraft Pi Edition のウィンドウが真っ黒になってしまう。

また、 SSH で Raspberry Pi にログインして scrot コマンドを実行するとエラーが出てしまう。
$ scrot
giblib error: Can't open X display. It *is* running, yeah?
raspi2png
raspi2png によるスクリーンショット画像。 GPU 描画をしていると思われる Minecraft Pi Edition のウィンドウ内の画像も取得できている。
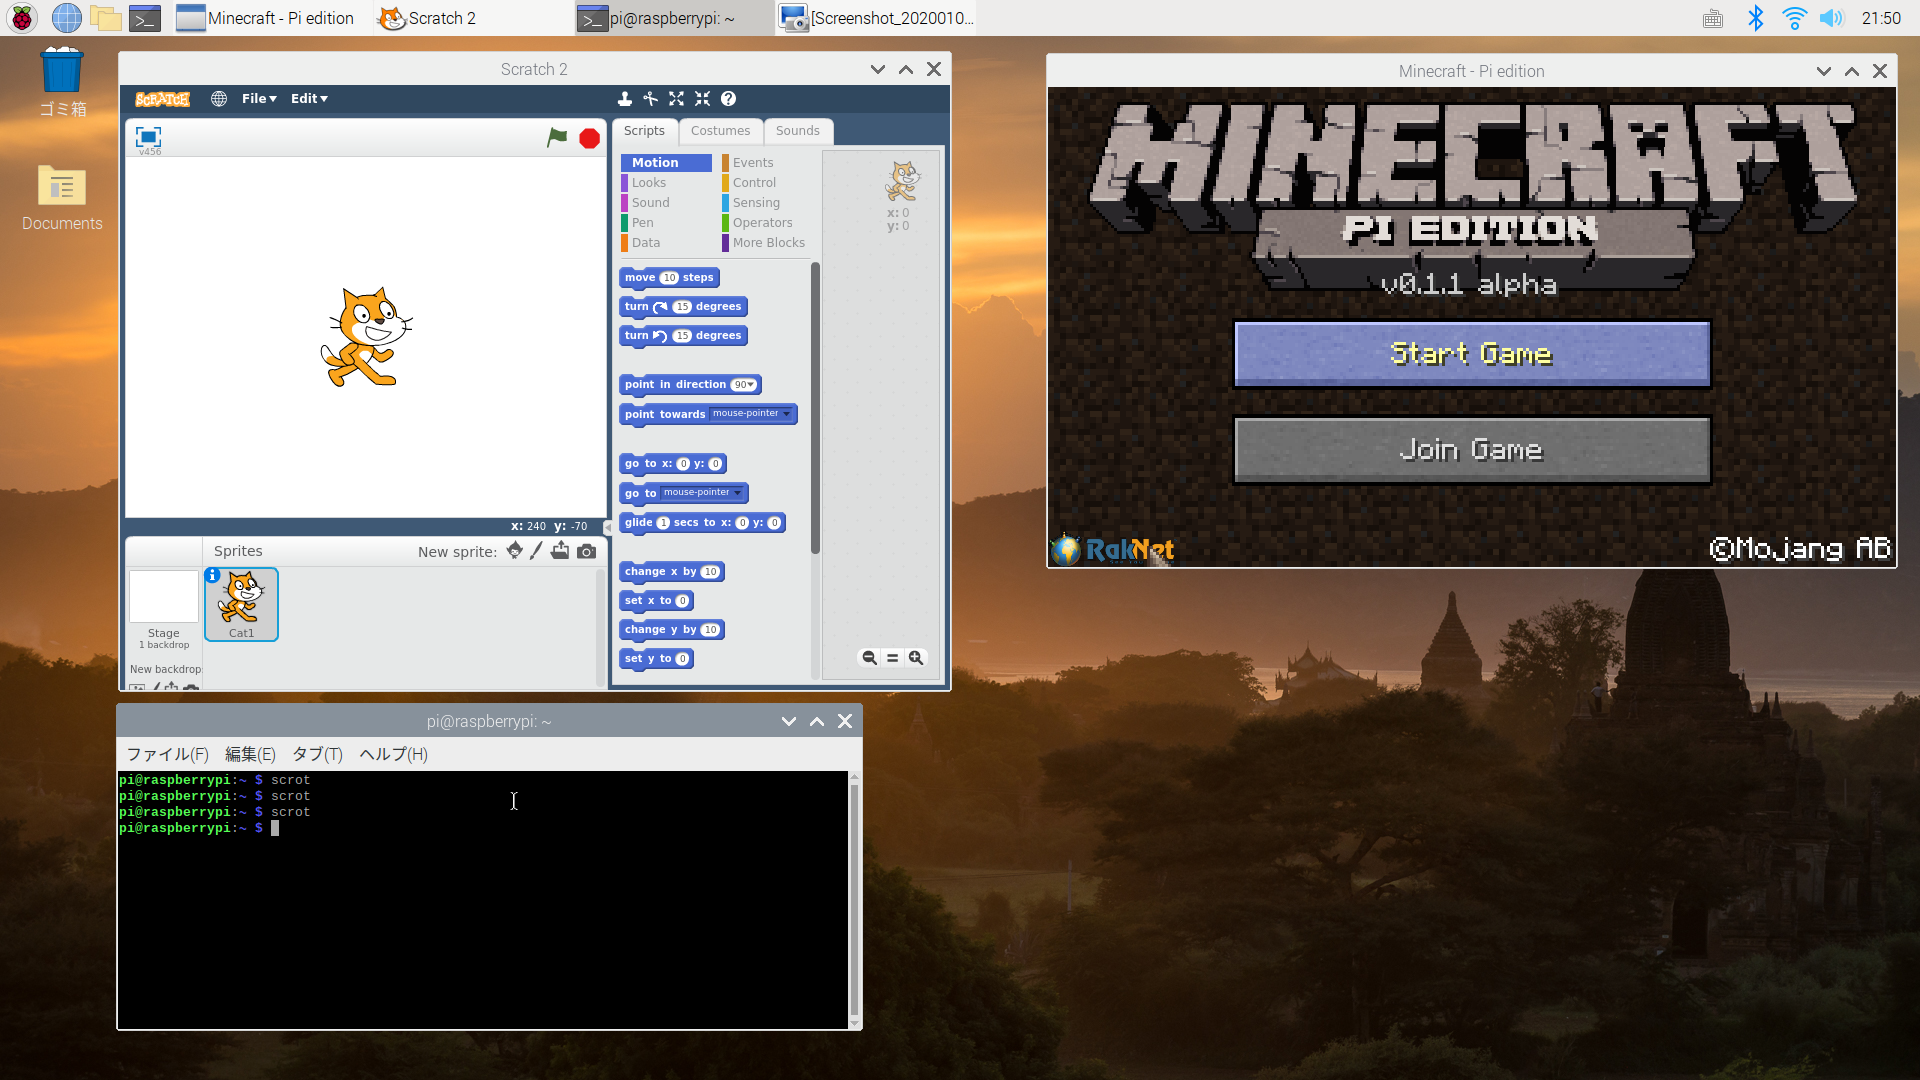
また、 SSH で Raspberry Pi にログインして raspi2png コマンドを実行してもエラーは発生せず、スクリーンショットを撮ることができている。
$ raspi2png
DispmanX とは
raspi2png は DispmanX という API を使用しているため、 GPU 描画結果を取得することができている。
DispmanX は GPU 描画に関わる API のようだ。
DispmanX に関する詳細なドキュメントが少ないらしく情報があまりない。
Dispmanx is the lowest level of programming the RPi's GPU.
Dispmanx is the layer between EGL and the Broadcom GPU. We just looked at enough to supply that bridge.
参考資料
- GitHub - AndrewFromMelbourne/raspi2png: Utility to take a snapshot of the Raspberry Pi screen and save it as a PNG file
- Raspberry Piのスクリーンショット | S2
- Raspberry Pi でスクリーンショット | Raspberry Pi
- Dispmanx on the Raspberry Pi
- GitHub - AndrewFromMelbourne/raspidmx: Some examples using the DispmanX API on the Raspberry Pi