前回のコメント投稿と削除はremote trueをリンクボタンに設定して実装しました。
【Rails】Ajax(非同期通信)でコメント投稿、削除
今回はコメントの編集をajax関数を使用して実装していきます。
注))前回からの続きです
環境
Rails 5.2.3
mysql 5.7.28
gem jquery-rails
→application.jsでrequireしておく。
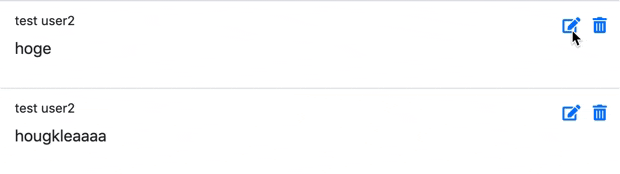
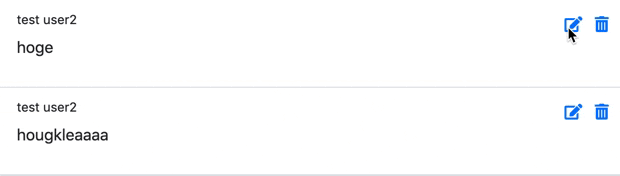
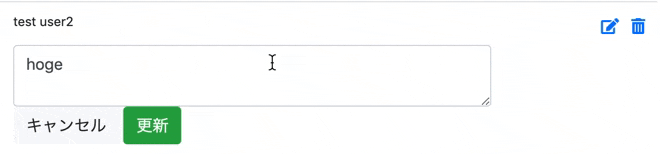
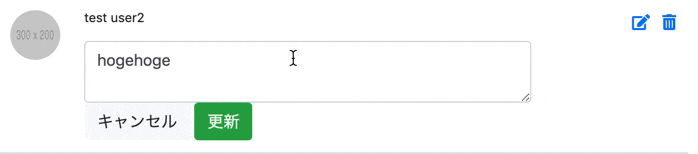
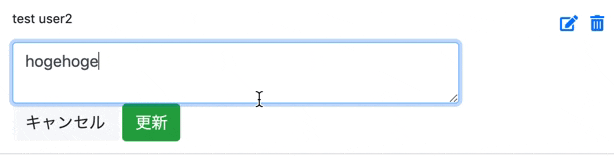
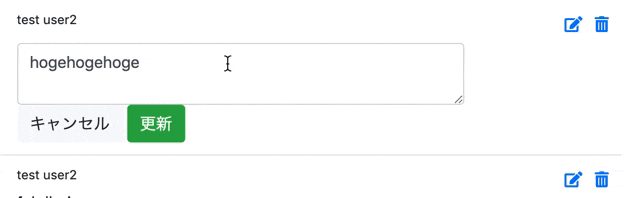
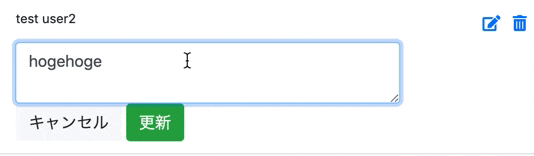
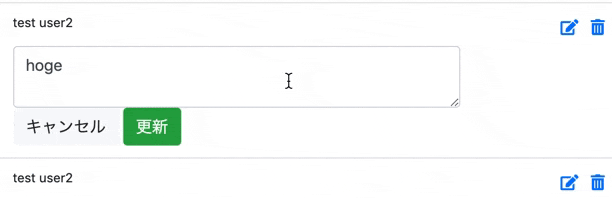
完成デモ
実装
機能を四つに分けて実装していきます。
- 編集ボタンクリックでラベル非表示、コメントエリアとボタン表示
- キャンセルボタンクリックでラベル表示、コメントエリアとボタン非表示
- 更新ボタンクリック成功でDB更新、ラベル表示、コメントエリアとボタン非表示
- 更新ボタンクリック失敗でエラーメッセージ表示
1. 編集ボタンクリックでラベル非表示、コメントエリアとボタン表示
<span data-comment-id=<%= comment.id %> class="js-edit-comment-button">
  <i class="fas fa-edit text-primary"></i>
</span>
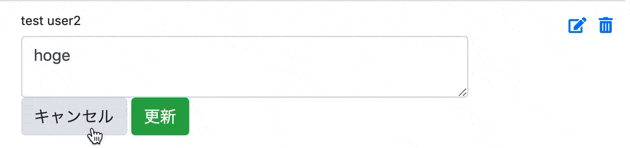
<div id="js-comment-<%= comment.id %>">
  <p id="js-comment-label-<%= comment.id %>"><%= comment.body %></p>
  <p id="js-comment-post-error-<%= comment.id %>" class="text-danger"></p>
  <textarea style="display: none;" id="js-textarea-comment-<%= comment.id %>" class="form-control comment-post-error"><%= comment.body %></textarea>
  <div id="js-comment-button-<%= comment.id %>" style="display: none;">
    <button data-cancel-id=<%= comment.id %> type="button" class="btn btn-light comment-cancel-button">キャンセル</button>
    <button data-update-id=<%= comment.id%> type="submit" class="btn btn-success comment-update-button">更新</button>
  </div>
</div>
# コメント編集エリア表示
$(function () {
  $(.js-edit-comment-button).on("click", function () {              # ①クリックイベント
    const commentId = $(this).data('comment-id');                   # ②一意のcomment.idを代入
    const commentLabelArea = $('#js-comment-label-' + commentId);   # ③一意のラベルを代入
    const commentTextArea = $('#js-textarea-comment-' + commentId); # ④一意のコメントエリアを代入
    const commentButton = $('#js-comment-button-' + commentId);     # ⑤一意のボタンエリアを代入

    commentLabelArea.hide(); # ③を非表示
    commentTextArea.show();  # ④を表示
    commentButton.show();    # ⑤を表示
  });
});
① js-edit-comment-buttonをクリックしたら中身を処理する条件定義。
② data属性を使用してdata-comment-idに設定したcomment.idを取得。ラベル、コメントエリア、ボタンエリアの各要素をそれぞれ一意にしないとjs-edit-comment-buttonをクリックした際に各コメントの全ての各要素が反応してしまいます。そのため各要素は一意にする必要があり、③~⑤で実装していくための前段階としてcomment.idを取得しておきます。
③ id属性js-comment-label-に、②で定義したcomment.idを渡します。
④ id属性js-textarea-comment-に、②で定義したcomment.idを渡します。
⑤ id属性js-comment-button-に、②で定義したcomment.idを渡します。
それ以下の処理がわからない方はProgate jQuery編でハンズオンできるのでやってみてください。
ただ、この①の記述だと問題点があります。後にコメントを追加した時にリロードしないと編集ボタンを押しても反応しません。これは追加されたコメントにはイベントが設定されないことが原因です。
# $(.js-edit-comment-button).on("click", function () {
$(document).on("click", ".js-edit-comment-button", function () {
こう記述することでHTMLをスクリプト(js)で追加した後に追加要素にもイベントを設定することができます。
つまり、追加した要素の編集ボタンも動作します!
変数の中身確認
application.jsの中で理解が難しいのが②の部分だと思います。
本当にcomment-idが取得できるのか試してみます。
# コメント編集エリア表示
$(function () {
  $(.js-edit-comment-button).on("click", function () {
    const commentId = $(this).data('comment-id');
    console.log(commentId);
    ・
    ・
    ・
  });
});
この状態でいくつかコメントを作ってjs-edit-comment-buttonをクリックしてビューの検証ツールを開いてみましょう。
command + option + iで検証ツールを開いてConsoleタブに移動すると
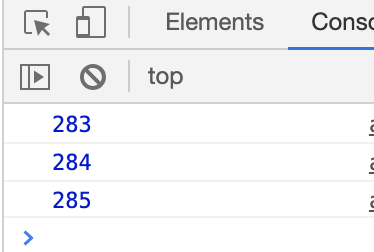
こんな感じでクリックのたびに一意な数字が表示されていればidが取得できてるなーと確認が取れます。
2. キャンセルボタンクリックでラベル表示、コメントエリアとボタン非表示
<div id="js-comment-<%= comment.id %>">
  <p id="js-comment-label-<%= comment.id %>"><%= comment.body %></p>
  <p id="js-comment-post-error-<%= comment.id %>" class="text-danger"></p>
  <textarea style="display: none;" id="js-textarea-comment-<%= comment.id %>" class="form-control comment-post-error"><%= comment.body %></textarea>
  <div id="js-comment-button-<%= comment.id %>" style="display: none;">
    # キャンセルボタン↓
    <button data-cancel-id=<%= comment.id %> type="button" class="btn btn-light comment-cancel-button">キャンセル</button>
    <button data-update-id=<%= comment.id%> type="submit" class="btn btn-success comment-update-button">更新</button>
  </div>
</div>
# コメント編集エリア非表示
$(function () {
  $(document).on("click", ".comment-cancel-button", function () {
    const commentId = $(this).data('cancel-id');
    const commentLabelArea = $('#js-comment-label-' + commentId);
    const commentTextArea = $('#js-textarea-comment-' + commentId);
    const commentButton = $('#js-comment-button-' + commentId);
    const commentError = $('#js-comment-post-error-' + commentId);

    commentLabelArea.show();
    commentTextArea.hide();
    commentButton.hide();
    commentError.hide();
  });
});
キャンセルボタン(comment-cancel-button)をクリックしたら中身を処理する条件定義をして、中身は編集ボタンと同じような内容なので割愛します。
3. 更新ボタンクリック成功でDB更新、ラベル表示、コメントエリアとボタン非表示
ここからが今回の実装の肝であるajax関数を使った処理になります。
先に言っておくとコメント投稿と削除と同じようにremote trueを使用しても実装できますが、もっと複雑な処理の場合はajax関数を使用しての実装になるので慣れるという意味でajax関数を使用します。
<div id="js-comment-<%= comment.id %>">
  <p id="js-comment-label-<%= comment.id %>"><%= comment.body %></p>
  <p id="js-comment-post-error-<%= comment.id %>" class="text-danger"></p>
  <textarea style="display: none;" id="js-textarea-comment-<%= comment.id %>" class="form-control comment-post-error"><%= comment.body %></textarea>
  <div id="js-comment-button-<%= comment.id %>" style="display: none;">
    <button data-cancel-id=<%= comment.id %> type="button" class="btn btn-light comment-cancel-button">キャンセル</button>
    <button data-update-id=<%= comment.id%> type="submit" class="btn btn-success comment-update-button">更新</button>
    # 更新ボタン↑
  </div>
</div>
# コメント更新ボタン
$(function () {
  $(document).on("click", ".comment-update-button", function () {
    const commentId = $(this).data('update-id');
    const textField = $('#js-textarea-comment-' + commentId); # ①
    const body = textField.val();                             # ②textFieldの内容を取得
  # console.log(body);

    $.ajax({                         # ③ajax関数
      url: '/comments/' + commentId, # ④comments/updateアクションにリクエスト
      type: 'PATCH',                 # ⑤HTTP通信の種類: updateアクションなので'PATCH'と記述
      data: {                        # ⑥commentモデルのbodyカラムに変数bodyを格納
        comment: {
          body: body
        }
      }
    })
  });
});
①までは割愛します。わからない方はもう一度記事を読み返してみてください。
②はコメントエリアの内容を変数bodyの中へ代入しています。
この下にconsole.log(body);と記述してコメントエリアに何かしら記述して更新ボタンを押してみてください。打ち込んだ内容が検証ツールのConsoleに表示されているはずです。
③からがajax関数を使った通信内容です。
④任意のアクションへのURIを記述。(今回はcomment/updateアクション)
⑥パラメーターとして送りたいデータを記述。
これで更新ボタンがクリックされたらcomments/updateアクションへパラメーターがリクエストされる状態まで記述ができました。
次はcomments_controllerでの処理に移ります。
class CommentsController < ApplicationController
  before_action :set_comment, only: %i[update destroy]

def update
  # binding.pry
    @comment.update!(comment_params)
end


private

  def set_comment
    @comment = current_user.comments.find(params[:id])
  end

  def comment_params
    params.require(:comment)
          .permit(:body)
          .merge(board_id: params[:board_id])
  end

end
とりあえずbinding.pryしてここまでパラメーターきてるか確認しておきました。
さあ、やってみよう!
当然ダメですね。
まだまだやることがたくさんあります。
一つずつ潰していきます。
まずレスポンスで何が返ってきてるか調べてみます。検証ツール → Network → Responseを開くとバリデーションに失敗しました: Boardを入力してくださいとの表示。
これは
def comment_params
  params.require(:comment)
        .permit(:body)
        .merge(board_id: params[:board_id])
end
comment_paramsでboard_idがパラメーターで渡ってくる想定でいるのにないんだけどどういうこと?Boardを入力してくださいと怒ってるわけです。
でもコメント投稿の時点で投稿とコメントは紐づいてるから今回はboard_idいらないんだよね。
というわけで、
def update
    @comment.update!(comment_update_params)
end

# 追加
def comment_update_params
  params.require(:comment)
        .permit(:body)
end
新たにメソッド作っちゃいましょう。
これで再チャレンジ!
ん〜〜〜
クリックしても反映されません。
リロードすると反映されるのでupdateメソッドは成功しているみたいですね。
これは現段階での更新ボタンがクリックされてからのJsファイルの処理は、変数を定義して、comments/updateアクションにパラメーターをリクエストしただけなので、ラベルを表示させたり、コメントエリアを非表示にさせたりという処理を書いてないからです。
次はJsファイルにこれらの記述をしていきます。
# コメント更新ボタン
$(function () {
  $(document).on("click", ".comment-update-button", function () {
    const commentId = $(this).data('update-id');
    const textField = $('#js-textarea-comment-' + commentId);
    const body = textField.val();
  # console.log(body);

    $.ajax({
      url: '/comments/' + commentId,
      type: 'PATCH',
      data: {
        comment: {
          body: body
        }
      }
    })
# 追加
      .done(function () { # ①ajax通信が成功した時の処理
        const commentLabelArea = $('#js-comment-label-' + commentId);
        const commentTextArea = $('#js-textarea-comment-' + commentId);
        const commentButton = $('#js-comment-button-' + commentId);
        const commentError = $('#js-comment-post-error-' + commentId); # ②

        commentLabelArea.show();
        commentLabelArea.text(???); # ③データベースにupdateされたbodyのvalueが欲しい
        commentTextArea.hide();
        commentButton.hide();
        commentError.hide();
      })
# 追加
  });
});
①.doneの中では、コントローラーでの処理が成功した時、この中の処理を実行する。
②までは今までと同じような処理なので割愛。
③ラベルにはコメントエリアに記述した内容(body)をtextとして差し替えれば良さそう。
では③をどうやって取得すれば良いか。
これは.doneに返ってきた時、引数にcommentインスタンスを渡してもらってbody要素を取り出せば良さそうです。
なので、
# 変更点のみ記述
.done(function (data) {

  commentLabelArea.text(data.body);

})
こう書いたら良さそうです。
再チャレンジ!
ターミナルを見に行くとステータスコード204が返ってきていた。
204エラー引用
204 No Content
訳すると内容なし。HTTPステータスコードとして204を返すのなら、その名の通りレスポンスボディーは何も返さないのが正解
とのこと。
レスポンスボディーに何も入っていない?
あっ...controllerから渡してあげないとダメか。
検証ツールのResponseを見に行くと見事に空っぽでした。
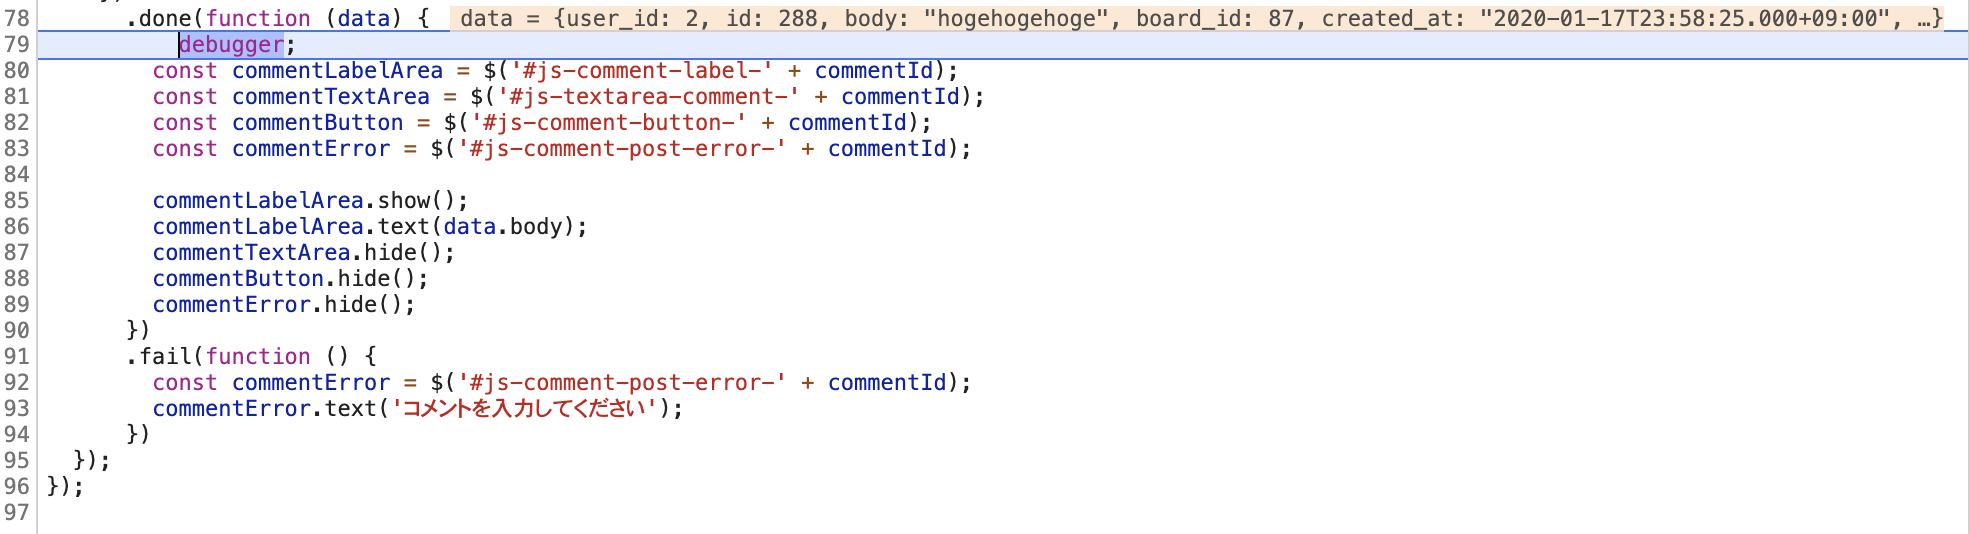
一応デバックして先ほどの引数の中身を見てみます。
.done(function (data) {
# 追加
 debugger;

・
・
・

})
検証ツールを開いてから更新ボタンを押すと、

上段の右側に注目、data = undefinedとなっておりdataが渡ってきていないことが確認できました。
def update
    @comment.update!(comment_update_params)
  # 追加
    render @comment
end
これでうまくいくかなあ...
ダメでした。この書き方だと何やらオブジェクトそのものがdataに入っているようでした。
なのでハッシュに近いjson形式にしてデータを取り出せるようにします。
def update
    @comment.update!(comment_update_params)
    render json: @comment
end
再チャレンジ!

成功!!!
一応デバックしてdataの中身も見てみました。
しっかりデータが入ってることが確認できました。
4.更新ボタンクリック失敗でエラーメッセージ表示
先ほどは.doneで成功時の処理を記述しました。
失敗時には.failという書き方をします。
# .doneの処理の下に追加
.fail(function () {
  const commentError = $('#js-comment-post-error-' + commentId); # ①コメントエラー用の空タグ
  commentError.text('コメントを入力してください');                       # ②空タグにメッセージを書き換える
})
①こちらは前もって一意のコメントに用意しておいた空のpタグです。
下記の3行目に用意してありました。
<div id="js-comment-<%= comment.id %>">
  <p id="js-comment-label-<%= comment.id %>"><%= comment.body %></p>
  <p id="js-comment-post-error-<%= comment.id %>" class="text-danger"></p>
  <textarea style="display: none;" id="js-textarea-comment-<%= comment.id %>" class="form-control comment-post-error"><%= comment.body %></textarea>
  <div id="js-comment-button-<%= comment.id %>" style="display: none;">
    <button data-cancel-id=<%= comment.id %> type="button" class="btn btn-light comment-cancel-button">キャンセル</button>
    <button data-update-id=<%= comment.id%> type="submit" class="btn btn-success comment-update-button">更新</button>
  </div>
</div>
チャレンジ!
うまくいきました!!
余談 doneとfailについて
ajax関数はリクエストの成功ならdoneを、失敗ならfailを実行するようになっていますが、この成功失敗は何をもって判断しているのか。
これはHTTPステータスコードで判断します。
全て試したわけじゃないですが、200番台ならdoneへ、400番台ならfailへ処理が流れます。(500番台もいくつかfailへ処理が流れました。)
def update
    @comment.update!(comment_update_params)
    render json: @comment
end
記事の中で使用したこのアクション内でupdate!とエクスクラメーションをつけているのはupdateに失敗した時にfalseではなくエラーを返してほしいからです。
今回の場合は失敗すると422番のステータスコードが返っていたのでfailへ処理が流れました。
【失敗時に任意のステータスコードを返すやり方】
def update
  if @comment.update(comment_update_params)
    render json: @comment
  else
    head :bad_request # ①ステータスコードを400番で返す
  end
end
ステータスコードはHTTPレスポンスのステータス行に格納されて返ってきます。
head :hogehogeのように記載するとhogehoge部分に対応したステータスコードを返すことができます。
HTTPメッセージ資料:https://itsakura.com/network-http-get-post
ステータスコード資料:https://developer.mozilla.org/ja/docs/Web/HTTP/Status
まとめ
今回の実装は非常に苦労しました。
というのも今までデバックはそこまでしてこなかったですしHTTPを意識して実装もしてきませんでしたので。
今回そのあたりの知識が少しはついたかなと思います。
Webの基礎的な部分の勉強でわかりやすいYouTubeチャンネルがあったので初学者の方はぜひ見てみてください!
https://www.youtube.com/channel/UCTmF42qi_LeT81fGdzoCn0w