SpotifyのNowPlayingを作りたい!って言う人は結構いると思うのですが(僕とか)意外と記事が少ないので今回はPythonでSpotifyのNowPlayingをTwitterに自動ツイートするプログラムを書いていこうと思います。
一番最後に完成形があるので完成形をみたい方はそちらへどうぞ~
前提
Spotifyの無料又は有料アカウントを持っている
「Pythonかんぜんにりかいした」といえる
使用するライブラリ
SpotifyAPIを直で叩いてもいいのですが、公式サイトを見ていたらいろんな言語のライブラリが掲載されていたので今回はここに書いてある、Spotipyを使ってみようと思います。
SpotipyのほうがStarが圧倒的に多く、共同開発なので安定していると考え今回はSpotipyを使用することにしました。
Readmeなどを見て自分にあうものを使ったらいいと思います。
ライブラリの製作者を見ていたら公式サイトに書いてあるライブラリ、どちらも同じ人が作ってますね^^Spotipyは共同開発、Tekoreは個人開発っぽいです。
アプリケーションの登録をする
SpotifyAPIを使用するにはDashboardからアプリケーションを登録する必要があります。
ここから登録してください。
https://developer.spotify.com/dashboard/applications/
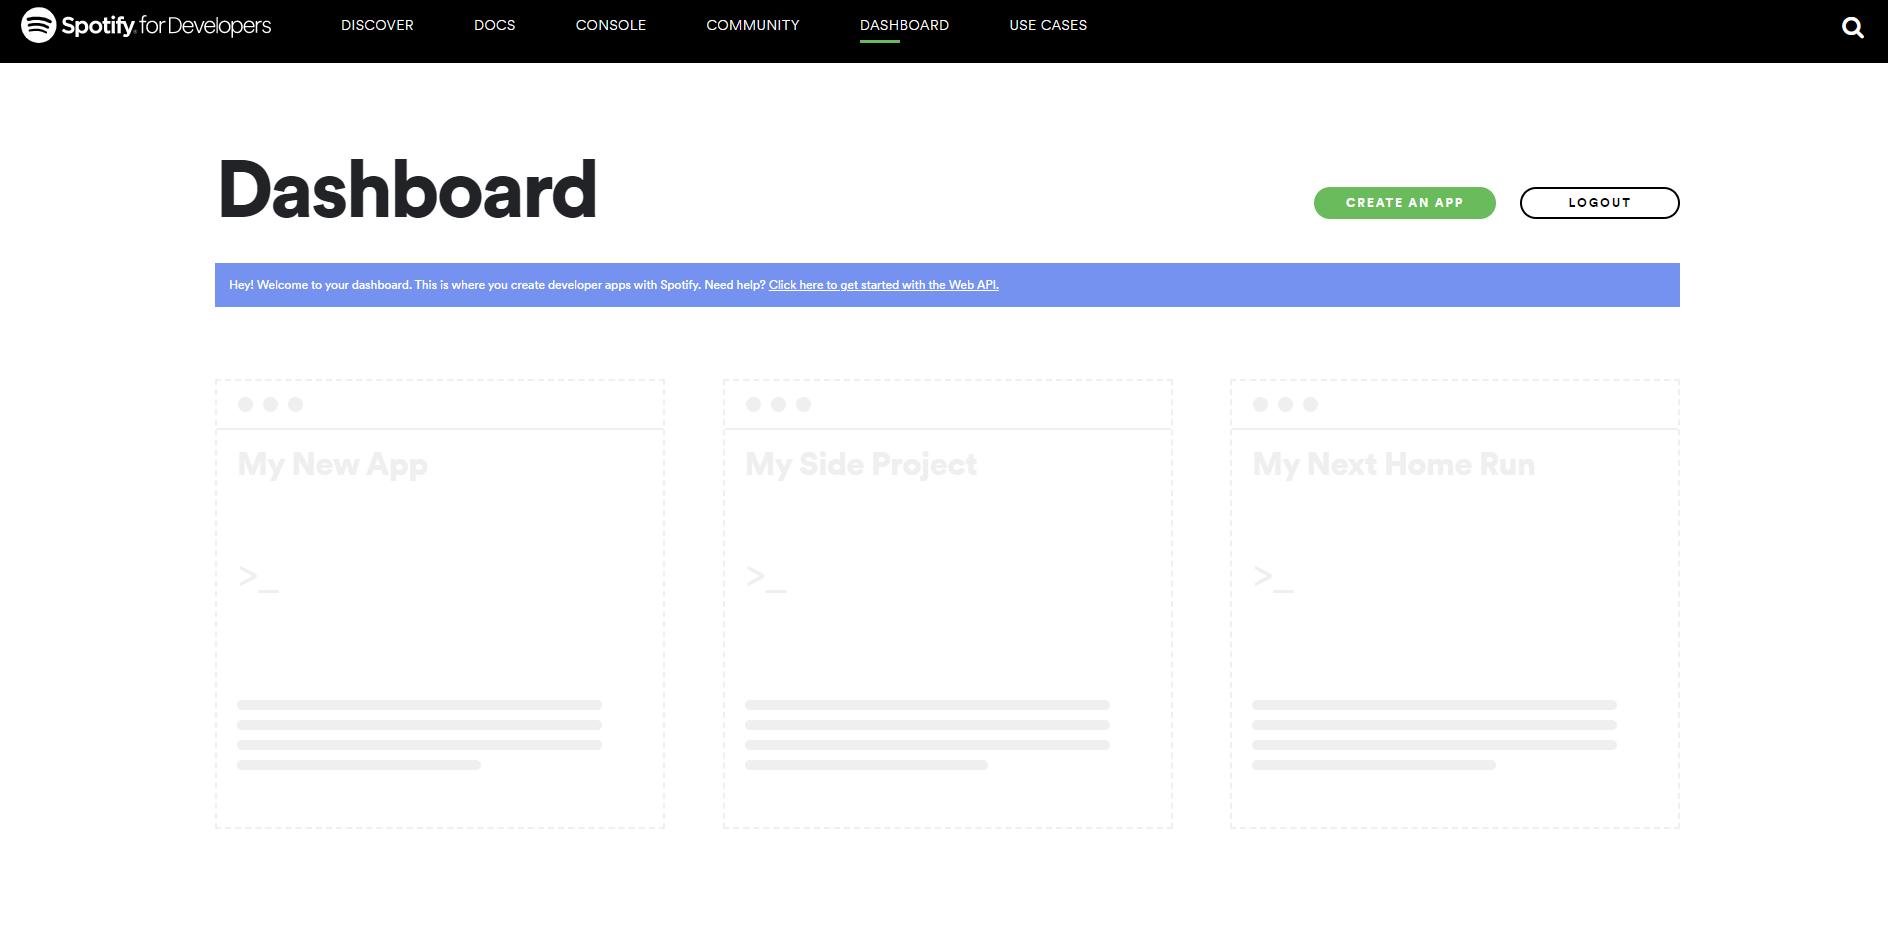
CREATE AN APPをクリックし、作成をします。
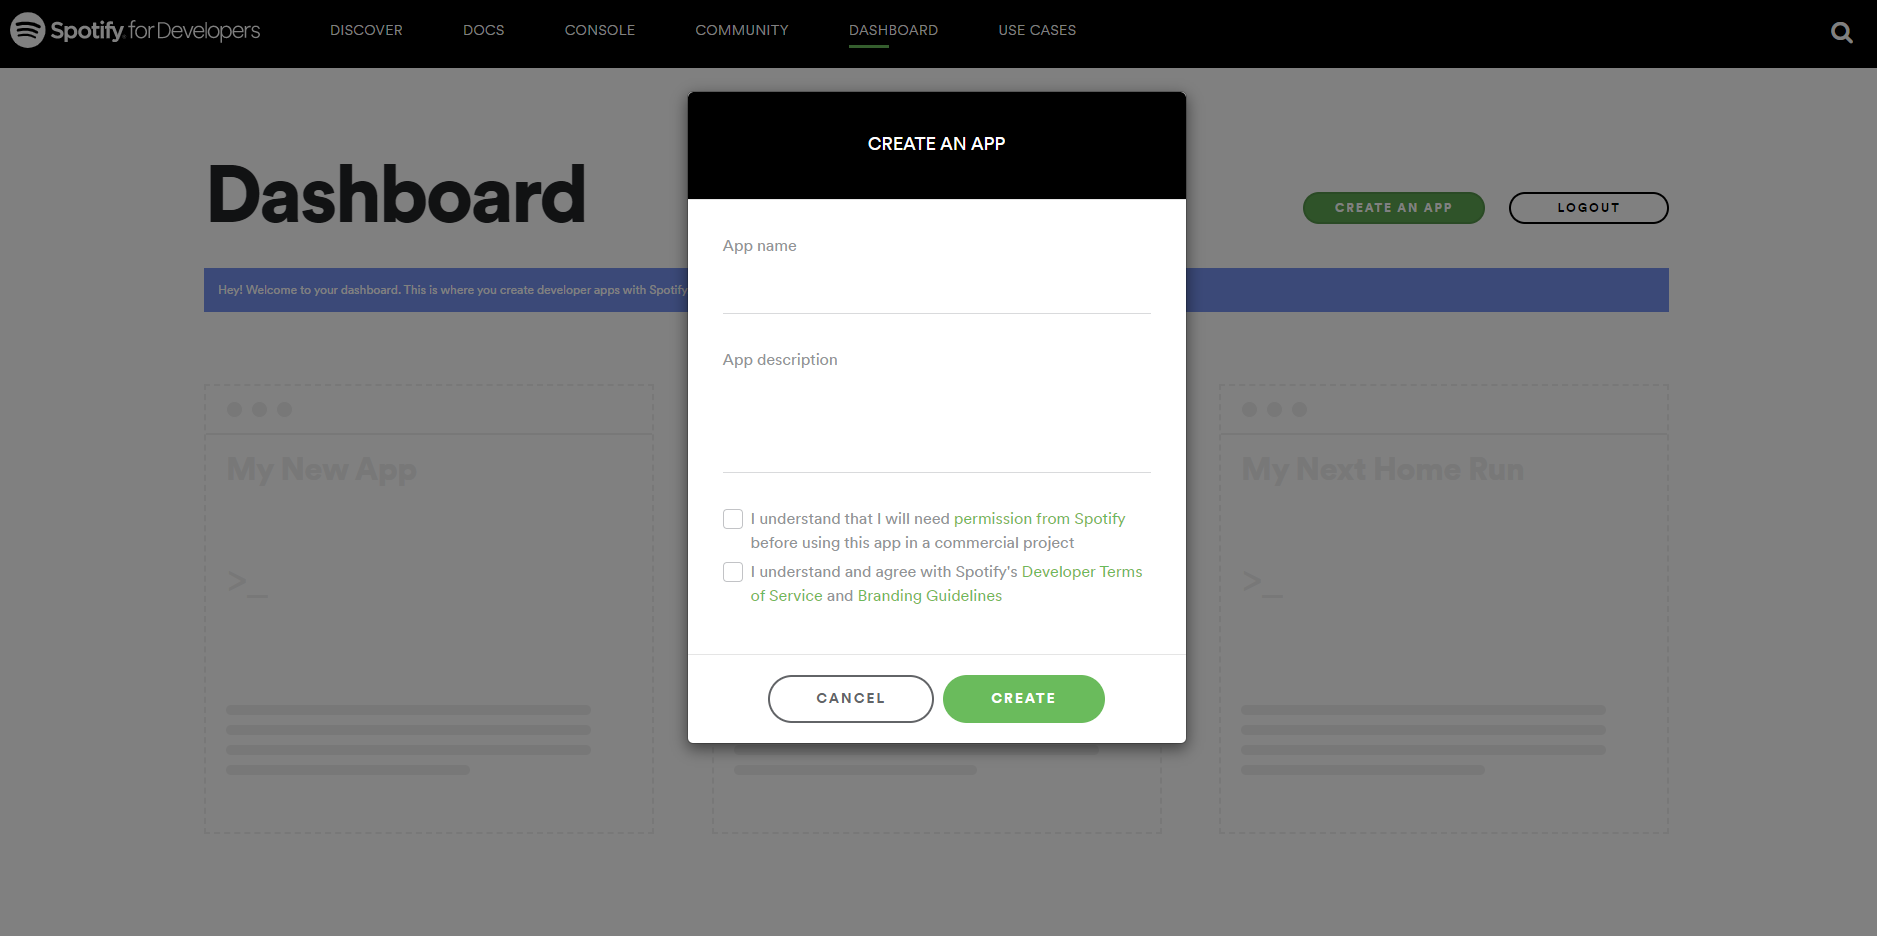
アプリケーションの名前と説明を入力し、利用規約に同意しアプリケーションを作成します。
アプリケーションを作成すると、**Your application 'アプリケーション名' has been successfully created.**と表示され、なんかかっけーページが開くと思います。
Client IDとClient Secretをメモしておいてください。
Spotipyをインストールする
PIPでインストールすることができるのでpip install spotipyでインストールします。
試しにSpotipyを使って作曲者のサムネイル画像を取得してみる
今回は名前検索でGuianoさんのアイコンURLを取得してみます。
Guianoさんの曲ぜひぜひぜひぜひ聞いてください。
import spotipy
import sys

client_id = 'クライアントID'
client_secret = 'クライアントシークレットID'
client_credentials_manager = spotipy.oauth2.SpotifyClientCredentials(client_id, client_secret)
spotify = spotipy.Spotify(client_credentials_manager=client_credentials_manager)

if len(sys.argv) > 1:
    name = ' '.join(sys.argv[1:])
else:
    name = 'Guiano'

results = spotify.search(q='artist:' + name, type='artist')
items = results['artists']['items']
if len(items) > 0:
    artist = items[0]
    print(artist['name'], artist['images'][0]['url'])
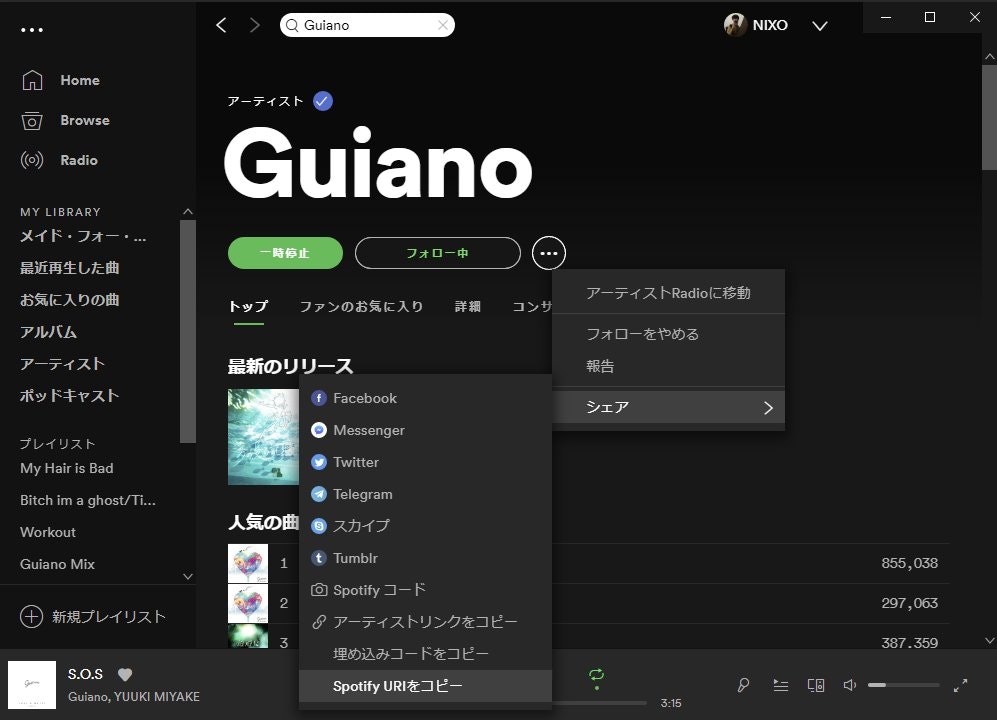
また、ID指定でアイコンを取得することも出来ます。
アーティストのIDを取得するには、アーティストのプロフィールページに行き、...→シェア→SpotifyURLをコピーで取得することが出来ます。
現在再生中の曲を取得する
現在再生中(個人ユーザーでの情報を取得する)の音楽の情報を取得するには自分のユーザー名と〇〇が必要なので取得していきます。
アカウント情報にアクセスし、ユーザー名をメモしておきます。
普通のアカウントの名前とは違うようなので注意してください。
import spotipy

client_id = 'クライアントID'
client_secret = 'クライアントシークレットID'
client_credentials_manager = spotipy.oauth2.SpotifyClientCredentials(client_id, client_secret)
spotify = spotipy.Spotify(client_credentials_manager=client_credentials_manager)

token = spotipy.util.prompt_for_user_token(
    username = "ユーザー名",
    scope = "user-read-currently-playing",
    client_id = client_id,
    client_secret = client_secret,
    redirect_uri = "https://example.com/callback/"
)
spotify = spotipy.Spotify(auth=token)
current_playing = spotify.current_user_playing_track()

print(current_playing)
このままではコードを実行した際にINVALID_CLIENT: Invalid redirect URIと怒られてしまうので、Spotify DashboardからリダイレクトURLを設定します。
今回はコード内のリダイレクトURL(厳密にはURI)に**example.com/callback/と設定しているので、Spotify Dashboardにもexample.com/callback/を設定します。
Spotify Dashboardを開き、アプリケーション、SETTINGをクリックし、Redirect URIsにhttps://example.com/callback/**と入力し、保存します。
example.comのまま行うとセキュリティ的にまずいかもしれないので自分のドメインにしたほうがいいかもしれません。
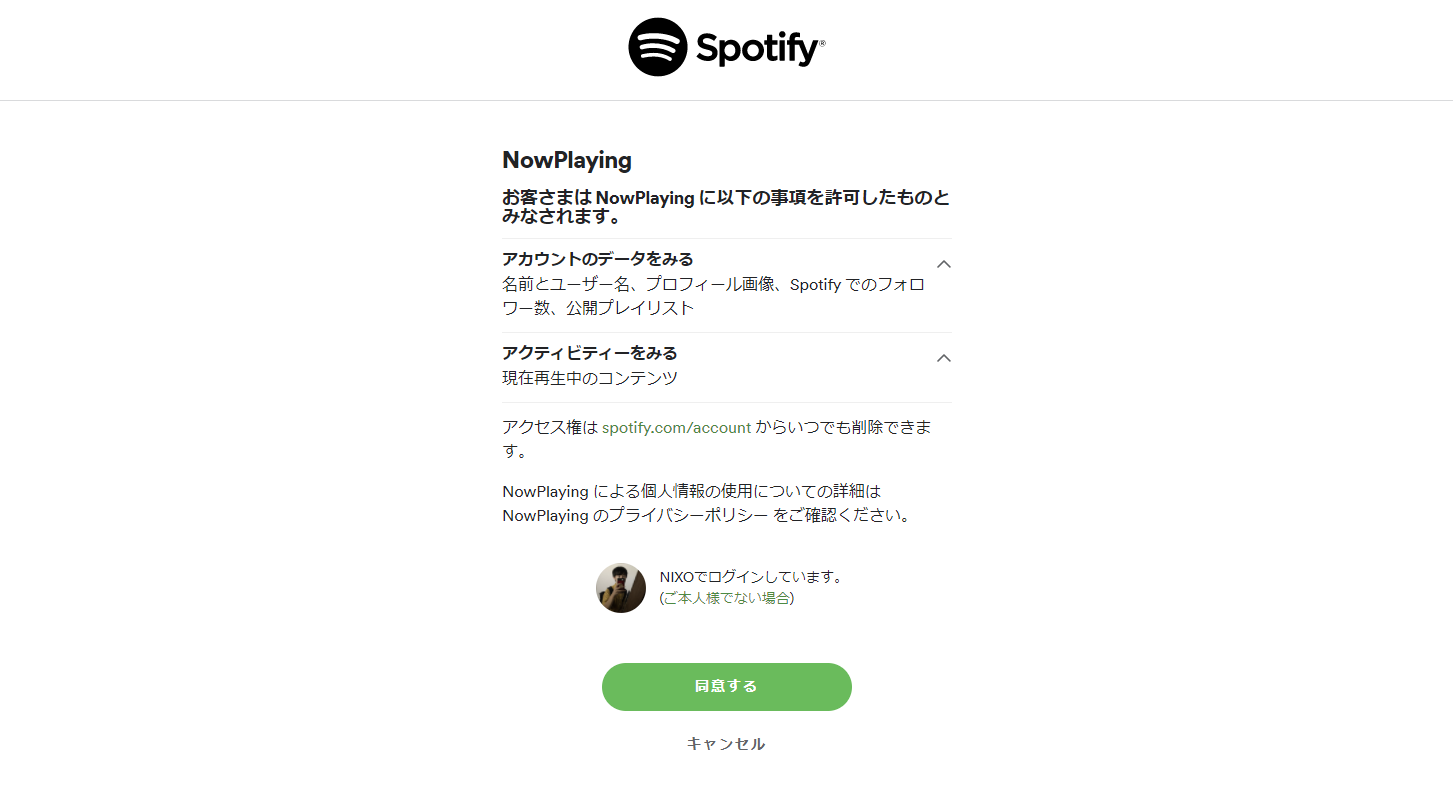
これでもう一度実行するとaccounts.spotify.com/なんちゃらかんちゃらに飛ぶのでアプリケーションを認証します。
そしたらもう一度実行してみます。
するとコンソールに
Couldn't read cache at: .cache-xxxxxxxxxx
Enter the URL you were redirected to:
と表示され、webページが開かれるので、そのURLをそのままコピーし、コンソールに貼り付けます。
そんでEnter!!!!!!
すると、な、な、なんと!
コンソールに再生中、又は前回再生した曲が!?
jsonみたいな形で返されるので['item']['name']みたいな感じで取り出します。
そのコードがこちら。
import spotipy

client_id = 'クライアントID'
client_secret = 'クライアントシークレットID'
client_credentials_manager = spotipy.oauth2.SpotifyClientCredentials(client_id, client_secret)
spotify = spotipy.Spotify(client_credentials_manager=client_credentials_manager)

token = spotipy.util.prompt_for_user_token(
    username = "ユーザー名",
    scope = "user-read-currently-playing",
    client_id = client_id,
    client_secret = client_secret,
    redirect_uri = "https://example.com/callback/"
)
spotify = spotipy.Spotify(auth=token)
current_playing = spotify.current_user_playing_track()

print(current_playing['item']['name'])
これで実行すると~!
再生中の曲のタイトルが表示されると思います。
C:\Users\nixo\anaconda3\python.exe C:/Users/nixo/Desktop/NowPlaying/main.py
無題
こんな感じ。
NowPlaingハッシュタグをつけてツイートする
今回は定番のTweepyを使ってツイートを行います。
Tweepyの使い方はこちらTweepyのいろいろ。ま♡と♡め♡
import spotipy
import tweepy

# SpotifyとTwitterへのAPI認証
client_id = 'クライアントID'
client_secret = 'クライアントシークレットID'
client_credentials_manager = spotipy.oauth2.SpotifyClientCredentials(client_id, client_secret)
spotify = spotipy.Spotify(client_credentials_manager=client_credentials_manager)

CK = "ここにConsumer Key"
CS = "ここにConsumer Secret"
AT = "ここにAccess Token"
ATS = "ここにAccess Token Secret"
auth = tweepy.OAuthHandler(CK, CS)
auth.set_access_token(AT, ATS)
api = tweepy.API(auth)
# 認証おわり

token = spotipy.util.prompt_for_user_token(
    username = "ユーザー名",
    scope = "user-read-currently-playing",
    client_id = client_id,
    client_secret = client_secret,
    redirect_uri = "https://example.com/callback/"
)
spotify = spotipy.Spotify(auth=token)
current_playing = spotify.current_user_playing_track()

print(current_playing['item']['name'])
api.update_status(current_playing['item']['name'] + " #NowPlaying")
こうすることでNowPlayingをツイートすることが出来ます。
でもこれだけでは味気ないので、
画像生成をしよう!(「Pythonかんぜんにりかいした」方向け)
Pythonかんぜんにりかいした方向けに、cloudinaryというOGPの自動生成でお世話になっているサービスを使用します。
URLに文字を入力するとその画像を生成してくれるやつです。
海外のサービスですが珍しく日本語対応です!!!
まずは土台画像をつくる
最近ペンタブを買ったのでCLIP STUDIOでかきました!!!!!!!
今回はこの画像を土台に文字を載せます。
あ、この画像自由に使っていいからね(1920x1080)
Cloudinaryのアカウントをツクール
はい。作ってログインしてダッシュボードに行ってください。
そんでMedia Libraryに行って土台の画像をドラッグ・アンド・ドロップします
そしたらこんな感じで表示されます

画像にカーソルを合わせるとCopyURLみたいなの出てくるのでそれクリックしてコピーします。
今回の画像はこんなURL
https://res.cloudinary.com/nixo/image/upload/v1609762642/%E3%81%AA%E3%81%86%E3%81%B7%E3%82%8C%E3%83%BC_vjxior.png
文字を入れるにはhttps://res.cloudinary.com/nixo/image/upload/ここ/v1609762642/%E3%81%AA%E3%81%86%E3%81%B7%E3%82%8C%E3%83%BC_vjxior.pngに色々書きます。
Catnoseさんの雑記ブログがわかりやすいと思います。
是非参考に。https://catnose99.com/cloudinary-dynamic-ogp-image/
uploadとvなんちゃらかんちゃらの間にl_text:Sawarabi%20Gothic_50_bold:{music_title},co_rgb:333,w_1300,c_fitと入力します。
完全なURLはこれ
https://res.cloudinary.com/nixo/image/upload/l_text:Sawarabi%20Gothic_50_bold:{music_title},co_rgb:333,w_1300,c_fit/v1609762642/%E3%81%AA%E3%81%86%E3%81%B7%E3%82%8C%E3%83%BC_vjxior.png
Pythonコードに組み込んでいく
ファイルを保存し、ツイートするようにします。(URL直指定はできない)
ちなみにURLに空白があるとURLにアクセスできなくなるのでスペースは除去するようにしています。
あとURLに日本語を含ませるのに数時間苦戦したので皆さんお気をつけて。
import spotipy
import tweepy
import urllib.request
import urllib

# SpotifyとTwitterへのAPI認証
client_id = 'クライアントID'
client_secret = 'クライアントシークレットID'
client_credentials_manager = spotipy.oauth2.SpotifyClientCredentials(client_id, client_secret)
spotify = spotipy.Spotify(client_credentials_manager=client_credentials_manager)

CK = "ここにConsumer Key"
CS = "ここにConsumer Secret"
AT = "ここにAccess Token"
ATS = "ここにAccess Token Secret"
auth = tweepy.OAuthHandler(CK, CS)
auth.set_access_token(AT, ATS)
api = tweepy.API(auth)
# 認証おわり

token = spotipy.util.prompt_for_user_token(
    username = "ユーザー名",
    scope = "user-read-currently-playing",
    client_id = client_id,
    client_secret = client_secret,
    redirect_uri = "https://example.com/callback/"
)
spotify = spotipy.Spotify(auth=token)
current_playing = spotify.current_user_playing_track()

music_title = current_playing['item']['name']
artist_name = current_playing['item']['artists'][0]['name']
music_title = music_title.replace(' ', '') #スペースがあると画像生成でエラー出るのでなくす。全角半角どっちとも。
music_title = music_title.replace(' ', '')
artist_name = artist_name.replace(' ', '')
artist_name = artist_name.replace(' ', '')

img_url = 'https://res.cloudinary.com/nixo/image/upload/l_text:Sawarabi%20Gothic_120_bold:' + urllib.parse.quote_plus(music_title, encoding='utf-8') + "-" + urllib.parse.quote_plus(artist_name, encoding='utf-8') + ',co_rgb:333,w_1300,c_fit/v1609768419/nowplay_kzuxtk.png'
img_url = img_url.replace(' ', '') #スペースがあると画像生成でエラー出るのでなくす
img_url = img_url.replace(' ', '')
img_save_name = "music.png"
urllib.request.urlretrieve(str(img_url), img_save_name)

api.update_with_media(filename = "./music.png", status = f"SongTitle: {music_title}\nArtist: {artist_name}\n \n#NowPlaying")
画像生成をしよう!(天才プログラマ向け)
今回はPillowを使用し、画像付きツイートにします。
申し訳ございません現在書いてる途中です。
定期的にツイートする(time.sleepを使用)
Cloudinaryのやつがベースです。
scheduleライブラリを使用してもいいのですがこの場合一つ、かつtime.sleepのほうが直感的に短く処理できるので今回はtime.sleepを使用します。
Spotipyのドキュメントを探してみたのですが、曲が変わったとき、というイベントが無いようなので今回は曲の平均時間を指定します。
カラオケで独りよがりにならないために~1曲の平均時間はどれくらい?~によるとJPOPは平均4分から5分、ボカロは3分46秒が平均らしいので今回は4分15秒間隔に指定します。
これはシンプルにwhile Trueで囲って最後にtime.sleepするだけでいいのですが前回と曲が変わっていない場合はツイートしないようにします。
import spotipy
import tweepy
import urllib.request
import urllib

# SpotifyとTwitterへのAPI認証
client_id = 'クライアントID'
client_secret = 'クライアントシークレットID'
client_credentials_manager = spotipy.oauth2.SpotifyClientCredentials(client_id, client_secret)
spotify = spotipy.Spotify(client_credentials_manager=client_credentials_manager)

CK = "ここにConsumer Key"
CS = "ここにConsumer Secret"
AT = "ここにAccess Token"
ATS = "ここにAccess Token Secret"
auth = tweepy.OAuthHandler(CK, CS)
auth.set_access_token(AT, ATS)
api = tweepy.API(auth)
# 認証おわり

music_title = ""
msc = " "

while True:
    try:
        token = spotipy.util.prompt_for_user_token(
            username="ユーザー名",
            scope="user-read-currently-playing",
            client_id=client_id,
            client_secret=client_secret,
            redirect_uri="https://example.com/callback/"
        )

        spotify = spotipy.Spotify(auth=token)
        current_playing = spotify.current_user_playing_track()

        music_title = current_playing['item']['name']
        artist_name = current_playing['item']['artists'][0]['name']

        music_title = music_title.replace(' ', '')  # スペースがあると画像生成でエラー出るのでなくす。全角半角どっちとも。
        music_title = music_title.replace(' ', '')
        artist_name = artist_name.replace(' ', '')
        artist_name = artist_name.replace(' ', '')
        if music_title == msc:
            print("曲同じやんけ!")
            time.sleep(15)
        else:
            msc = music_title

            img_url = 'https://res.cloudinary.com/nixo/image/upload/l_text:Sawarabi%20Gothic_120_bold:' + urllib.parse.quote_plus(music_title, encoding='utf-8') + "-" + urllib.parse.quote_plus(artist_name, encoding='utf-8') + ',co_rgb:333,w_1300,c_fit/v1609768419/nowplay_kzuxtk.png'
            img_url = img_url.replace(' ', '') #スペースがあると画像生成でエラー出るのでなくす
            img_url = img_url.replace(' ', '')
            img_save_name = "music.png"
            urllib.request.urlretrieve(str(img_url), img_save_name)

            api.update_with_media(filename = "./music.png", status = f"SongTitle: {music_title}\nArtist: {artist_name}\n \n#NowPlaying")

            time.sleep(255)#4分15秒
    except Exception as e:
        print("エラーが発生しました")
        print(e)
        time.sleep(15)
    time.sleep(60)
ループ開始時はおなじになってはいけないのでmscにスペースを代入したものを最初に準備しています。
おわり
今回はこのへんで終わらせていただきます。
わからないところやここおかしくね?という所があればTwitterのDMやコメントで気軽に教えていただけるとありがたいです。