1
0

Delete article

Deleted articles cannot be recovered.

Draft of this article would be also deleted.

Are you sure you want to delete this article?

More than 5 years have passed since last update.

ベジェ曲線が苦手でもOK!Illustratorで和風な雲を作る

Last updated at Posted at 2020-04-14

eyecatchptn2.png

和テイストのデザインを作成する時に、雲の模様が添えられているだけで、雅な雰囲気がぐんとアップします。
きれいなベジェ曲線が描けないという方でも簡単にできるので、試してみてください!

1.適当な直線を引く

1_直線を引く.png

直線ツールで水平方向の直線を適当に引きます。

2.線幅と線端を設定

2_選の太さ、線端.png

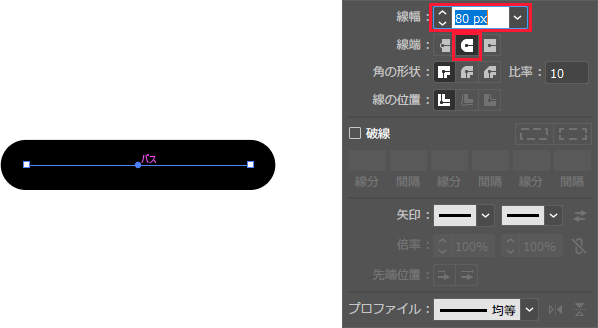
線幅(線の太さ)をお好みの太さに、線端を「丸形線端」にします。

3.1~2を繰り返す

3_繰り返す.png

1.~2.の手順で同様のパーツを2つ以上のお好みの数だけ作ります。

4.アウトライン化する

4_アウトライン化.png

作ったパーツを全て選択し、オブジェクト(O) > パス(P) > パスのアウトライン(U)を選択します。

5.雲に見えるように配置する

5_配置.png

バランスを見ながら配置を変えていきます。
わざと不規則でアンバランスな配置にすると雲っぽくなります。

6.パーツを合体させる

6_合体.png

パーツを全て選択し、パスファインダーの「合体」で1つのパーツにします。

7.塗りや線を調整

塗りや線を好みで調整します。
無地でも良いですが、塗りを透明にして枠線だけにしたり、控え目なパターンで塗りつぶしたりしても可愛いです。

雲のサンプル.png

1
0
0

Register as a new user and use Qiita more conveniently

  1. You get articles that match your needs
  2. You can efficiently read back useful information
  3. You can use dark theme
What you can do with signing up
1
0

Delete article

Deleted articles cannot be recovered.

Draft of this article would be also deleted.

Are you sure you want to delete this article?