よみとばしてください
限界派遣SESのnikawamikanです。どうも。
アドベントカレンダーもあと少しですね。
ひとりアドカレ23日目です。
また遅れました。ネタが思いつかなくて・・・。
RustからPythonを呼び出せるPyO3
PyO3はRustでPythonの拡張モジュールを書くためのライブラリです。
これを使えば、ちょっと遅いPythonくんの処理を高速でイケイケなRustくんにおもたーい処理を任せることができます。
そんなわけで、FastAPIで作ったエンドポイントの処理をRustで書いた拡張モジュールを使って簡単な画像の合成処理を高速化してみたいと思います。
ちなみに筆者はRustに慣れてないので、かなり苦戦しました。
環境構築
今回はRustとPythonの環境が必要なため、DevContainerでDockerfileを書いて環境を作っていきます。
FROM mcr.microsoft.com/devcontainers/rust:1-1-bookworm

# 必要なパッケージをインストール
RUN apt update -y && apt install -y \
    wget \
    build-essential \
    libssl-dev \
    zlib1g-dev \
    libncurses5-dev \
    libncursesw5-dev \
    libreadline-dev \
    libsqlite3-dev \
    libgdbm-dev \
    libdb5.3-dev \
    libbz2-dev \
    libexpat1-dev \
    liblzma-dev \
    tk-dev \
    libffi-dev \
    libgdbm-compat-dev

RUN wget https://www.python.org/ftp/python/3.12.0/Python-3.12.0.tgz && \
    tar xzf Python-3.12.0.tgz && \
    cd Python-3.12.0 && \
    ./configure --enable-optimizations && \
    make -j$(nproc) && \
    make altinstall && \
    cd .. && \
    rm -rf Python-3.12.0 Python-3.12.0.tgz

RUN ln -s /usr/local/bin/python3.12 /usr/bin/python && \
    ln -s /usr/local/bin/pip3.12 /usr/bin/pip
apt installでPythonのインストールをしてもいいのですが、バージョンが古めになってしまうため、ソースからビルドしています。
ビルドする場合は色々とパッケージが必要になってしまうので、それらをインストールしています。
またdevcontainer.jsonは以下のようになります。
{
	"name": "pyo3",
	"build": {
		"dockerfile": "Dockerfile",
	},
	"customizations": {
		"vscode": {
			"extensions": [
				"ms-python.vscode-pylance",
				"ms-python.python"
			]
		}
	},
    "postCreateCommand": "source .venv/bin/activate && pip install -r requirements.txt",
}
Pythonの拡張機能のms-python.pythonとms-python.vscode-pylanceをインストールしています。
また、postCreateCommandで仮想環境の有効化と必要なライブラリのインストールをしています。
それらについては後述します。
次にvenvを作成して、プロジェクトを作成します。
python -m venv .venv
source .venv/bin/activate
次にPythonのライブラリをインストールします。
| ライブラリ | 用途 |
|---|---|
| FastAPI | APIサーバーを作成するため |
| uvicorn | FastAPIのサーバーを起動するため |
| maturin | PyO3のビルドツール |
pip install fastapi "uvicorn[standard]" maturin
最後にpip freeze > requirements.txtでライブラリのリストを保存します。
DevContainer自体が仮想環境なのですが、venvで仮想環境を作成しているのは、maturinがvenvを前提としているためです。
Rustのプロジェクトを作成
次にRustのプロジェクトを作成します。
cargo new --lib rust_image
Cargo.tomlにpyo3と、画像生成に必要なクレートを追加します。
[dependencies]
pyo3 = { version = "0.23.3", features = ["extension-module"] }
image = "0.25.5"
imageproc = "0.25.0"
rusttype = "0.9.2"
ab_glyph = "0.2.29"
なお、私は画像生成に必要なライブラリの互換性の問題で1時間ほど悩みましたが、cargo treeで依存関係を確認すれば問題ないという学びを得ました。
次にsrc/lib.rsに画像生成の処理を書いていきます。
とりあえず全体像は以下のようになります。
use ab_glyph::PxScale;
use imageproc::drawing::{draw_text_mut, text_size};
use pyo3::prelude::*;

#[pyclass]
struct ImageGenerator {
    font_data: Vec<u8>,
}

#[pymethods]
impl ImageGenerator {
    #[new]
    pub fn new(font_path: &str) -> PyResult<Self> {
        let font_data = std::fs::read(font_path)
            .map_err(|e| PyErr::new::<pyo3::exceptions::PyIOError, _>(e.to_string()))?;
        Ok(Self { font_data })
    }

    pub fn generate_image(&self, image_path: &str, text: &str) -> PyResult<Vec<u8>> {
        let mut img = image::open(image_path)
            .map_err(|e| PyErr::new::<pyo3::exceptions::PyIOError, _>(e.to_string()))?
            .to_rgb8();
        let font = ab_glyph::FontRef::try_from_slice(&self.font_data)
            .map_err(|e| PyErr::new::<pyo3::exceptions::PyRuntimeError, _>(e.to_string()))?;

        // スケールを設定
        let scale = PxScale::from(20.0);

        let (w, h) = img.dimensions();

        // テキストのサイズを取得
        let (text_width, _) = text_size(scale, &font, text);

        // テキスト幅と画像の幅が一致するようにスケールを調整
        let scale = PxScale::from((w as f32 / text_width as f32) * 20.0);

        // テキストのサイズを再取得
        let (text_width, text_height) = text_size(scale, &font, text);

        // テキストを中央に配置
        let center_x = (w as f32 - text_width as f32) / 2.0;
        let center_y = (h as f32 - text_height as f32) / 2.0;

        draw_text_mut(
            &mut img,
            image::Rgb([255u8, 255u8, 255u8]),
            center_x as i32,
            center_y as i32,
            scale,
            &font,
            &text.replace('_', " "),
        );

        // 画像をバイト配列として返す
        let mut buf = Vec::new();
        let mut cursor = std::io::Cursor::new(&mut buf);
        img.write_to(&mut cursor, image::ImageFormat::Png)
            .map_err(|e| PyErr::new::<pyo3::exceptions::PyRuntimeError, _>(e.to_string()))?;
        Ok(buf)
    }
}

#[pymodule]
fn rust_image(m: &Bound<'_, PyModule>) -> PyResult<()> {
    m.add_class::<ImageGenerator>()?;
    Ok(())
}
順に説明します。
エントリーポイント
#[pymodule]
fn rust_image(m: &Bound<'_, PyModule>) -> PyResult<()> {
    m.add_class::<ImageGenerator>()?;
    Ok(())
}
#[pymodule]でモジュールを定義しています。
このm.add_class::<ImageGenerator>()?;でPythonから呼び出せるクラスを追加しています。
struct ImageGenerator
#[pyclass]
struct ImageGenerator {
    font_data: Vec<u8>,
}
ImageGeneratorという構造体を定義しています。
#[pyclass]でPythonから呼び出せるクラスとして定義しています。
impl ImageGenerator::new
#[pymethods]
impl ImageGenerator {
    #[new]
    pub fn new(font_path: &str) -> PyResult<Self> {
        let font_data = std::fs::read(font_path)
            .map_err(|e| PyErr::new::<pyo3::exceptions::PyIOError, _>(e.to_string()))?;
        Ok(Self { font_data })
    }
}
#[pymethods]でメソッドし、#[new]でコンストラクタを定義しています。
これはPythonでいう
class ImageGenerator:
    def __init__(self, font_path: str):
        self.font_data = open(font_path, "rb").read()
と同じです。
impl ImageGenerator::generate_image
    pub fn generate_image(&self, image_path: &str, text: &str) -> PyResult<Vec<u8>> {
        let mut img = image::open(image_path)
            .map_err(|e| PyErr::new::<pyo3::exceptions::PyIOError, _>(e.to_string()))?
            .to_rgb8();
        let font = ab_glyph::FontRef::try_from_slice(&self.font_data)
            .map_err(|e| PyErr::new::<pyo3::exceptions::PyRuntimeError, _>(e.to_string()))?;

        // スケールを設定
        let scale = PxScale::from(20.0);

        let (w, h) = img.dimensions();

        // テキストのサイズを取得
        let (text_width, _) = text_size(scale, &font, text);

        // テキスト幅と画像の幅が一致するようにスケールを調整
        let scale = PxScale::from((w as f32 / text_width as f32) * 20.0);

        // テキストのサイズを再取得
        let (text_width, text_height) = text_size(scale, &font, text);

        // テキストを中央に配置
        let center_x = (w as f32 - text_width as f32) / 2.0;
        let center_y = (h as f32 - text_height as f32) / 2.0;

        draw_text_mut(
            &mut img,
            image::Rgb([255u8, 255u8, 255u8]),
            center_x as i32,
            center_y as i32,
            scale,
            &font,
            &text.replace('_', " "),
        );

        // 画像をバイト配列として返す
        let mut buf = Vec::new();
        let mut cursor = std::io::Cursor::new(&mut buf);
        img.write_to(&mut cursor, image::ImageFormat::Png)
            .map_err(|e| PyErr::new::<pyo3::exceptions::PyRuntimeError, _>(e.to_string()))?;
        Ok(buf)
    }
画像をこねこねしています。
この、画像をこねこねする作業ですが、Rustのライブラリではimageとimageprocとab_glyphを使うという仕様で、それぞれの依存関係があるためCargo.tomlでは喧嘩しないように一つのターゲットに合わせたバージョンを指定する必要があります。
Pythonから呼び出された際の引数として、画像のパスとテキストを受け取り、テキストを画像に描画してバイト配列として返しています。
モジュールのビルド
次にモジュールをビルドします。
maturin develop
これでtargetディレクトリにlibrust_image.soが生成されます。
また、.venvのsite-packagesにrust_imageというディレクトリが生成され、その中に__init__.pyとrust_image.cpython-39-x86_64-linux-gnu.soが生成されます。
そのため、Python側からはimport rust_imageでモジュールを読み込むことができます。
FastAPIでAPIを作成
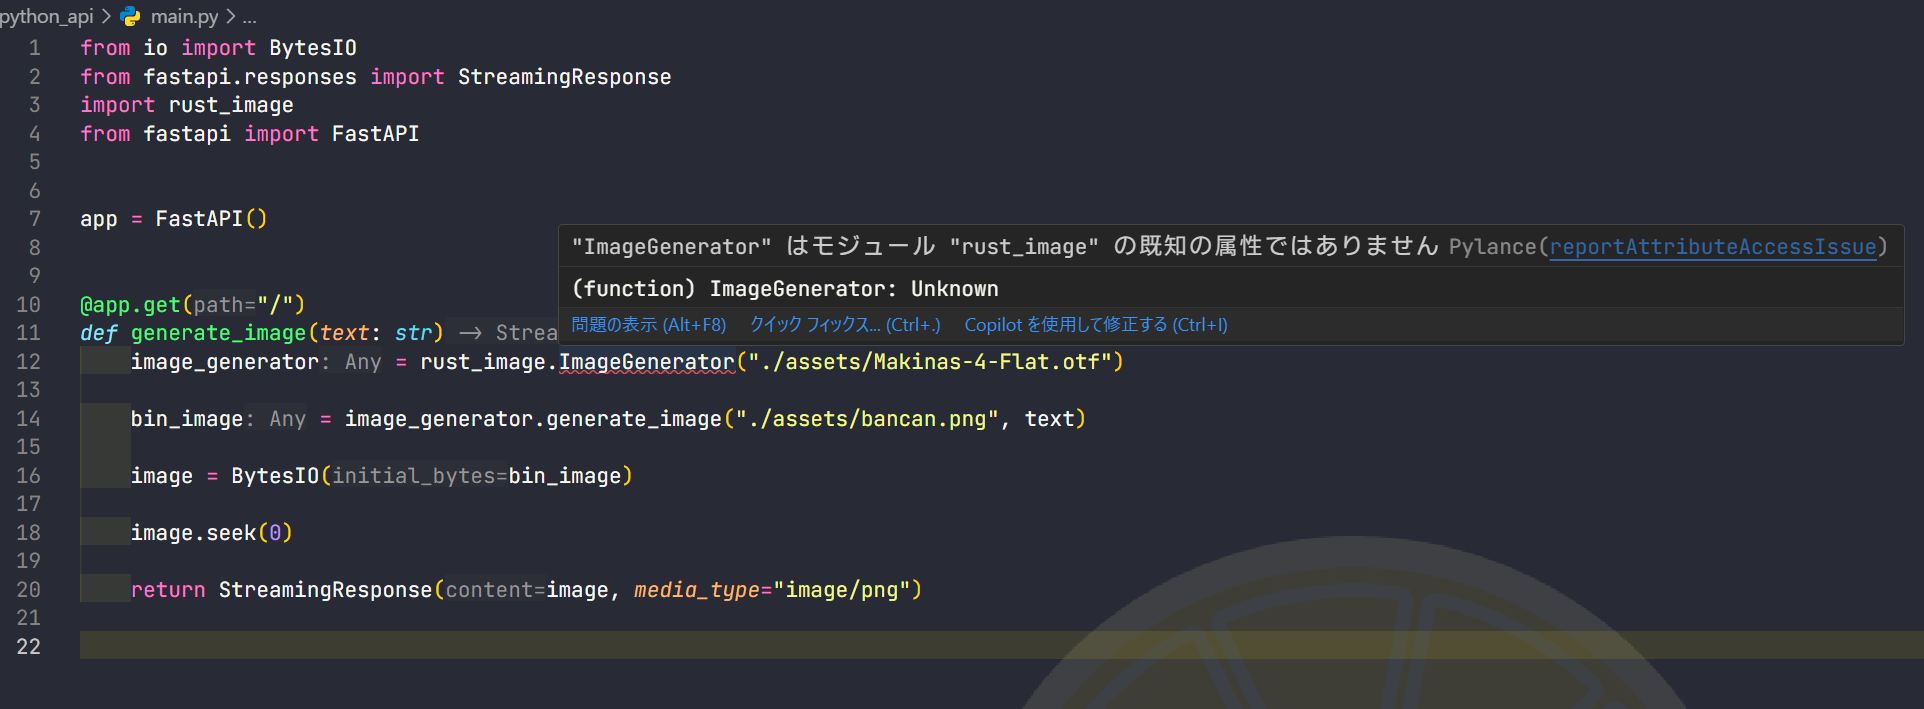
次にFastAPIでAPIを作成します。
from io import BytesIO
from fastapi.responses import StreamingResponse
import rust_image
from fastapi import FastAPI


app = FastAPI()


@app.get("/")
def generate_image(text: str):
    image_generator = rust_image.ImageGenerator("./assets/Makinas-4-Flat.otf")

    bin_image = image_generator.generate_image("./assets/bancan.png", text)

    image = BytesIO(bin_image)

    image.seek(0)

    return StreamingResponse(image, media_type="image/png")
コード量が少なくて安心しますね(?)
rust_imageは先ほどビルドしたモジュールです。
ImageGeneratorクラスをインスタンス化して、generate_imageメソッドを呼び出して画像を生成しています。
byte配列が返ってくるので、BytesIOでバッファに書き込んで、StreamingResponseで画像を返しています。
ちなみにMakinasはフリーフォントでめちゃくちゃかわいいのでみんな使いましょう。
サーバーの起動
最後にサーバーを起動します。
uvicorn main:app --reload
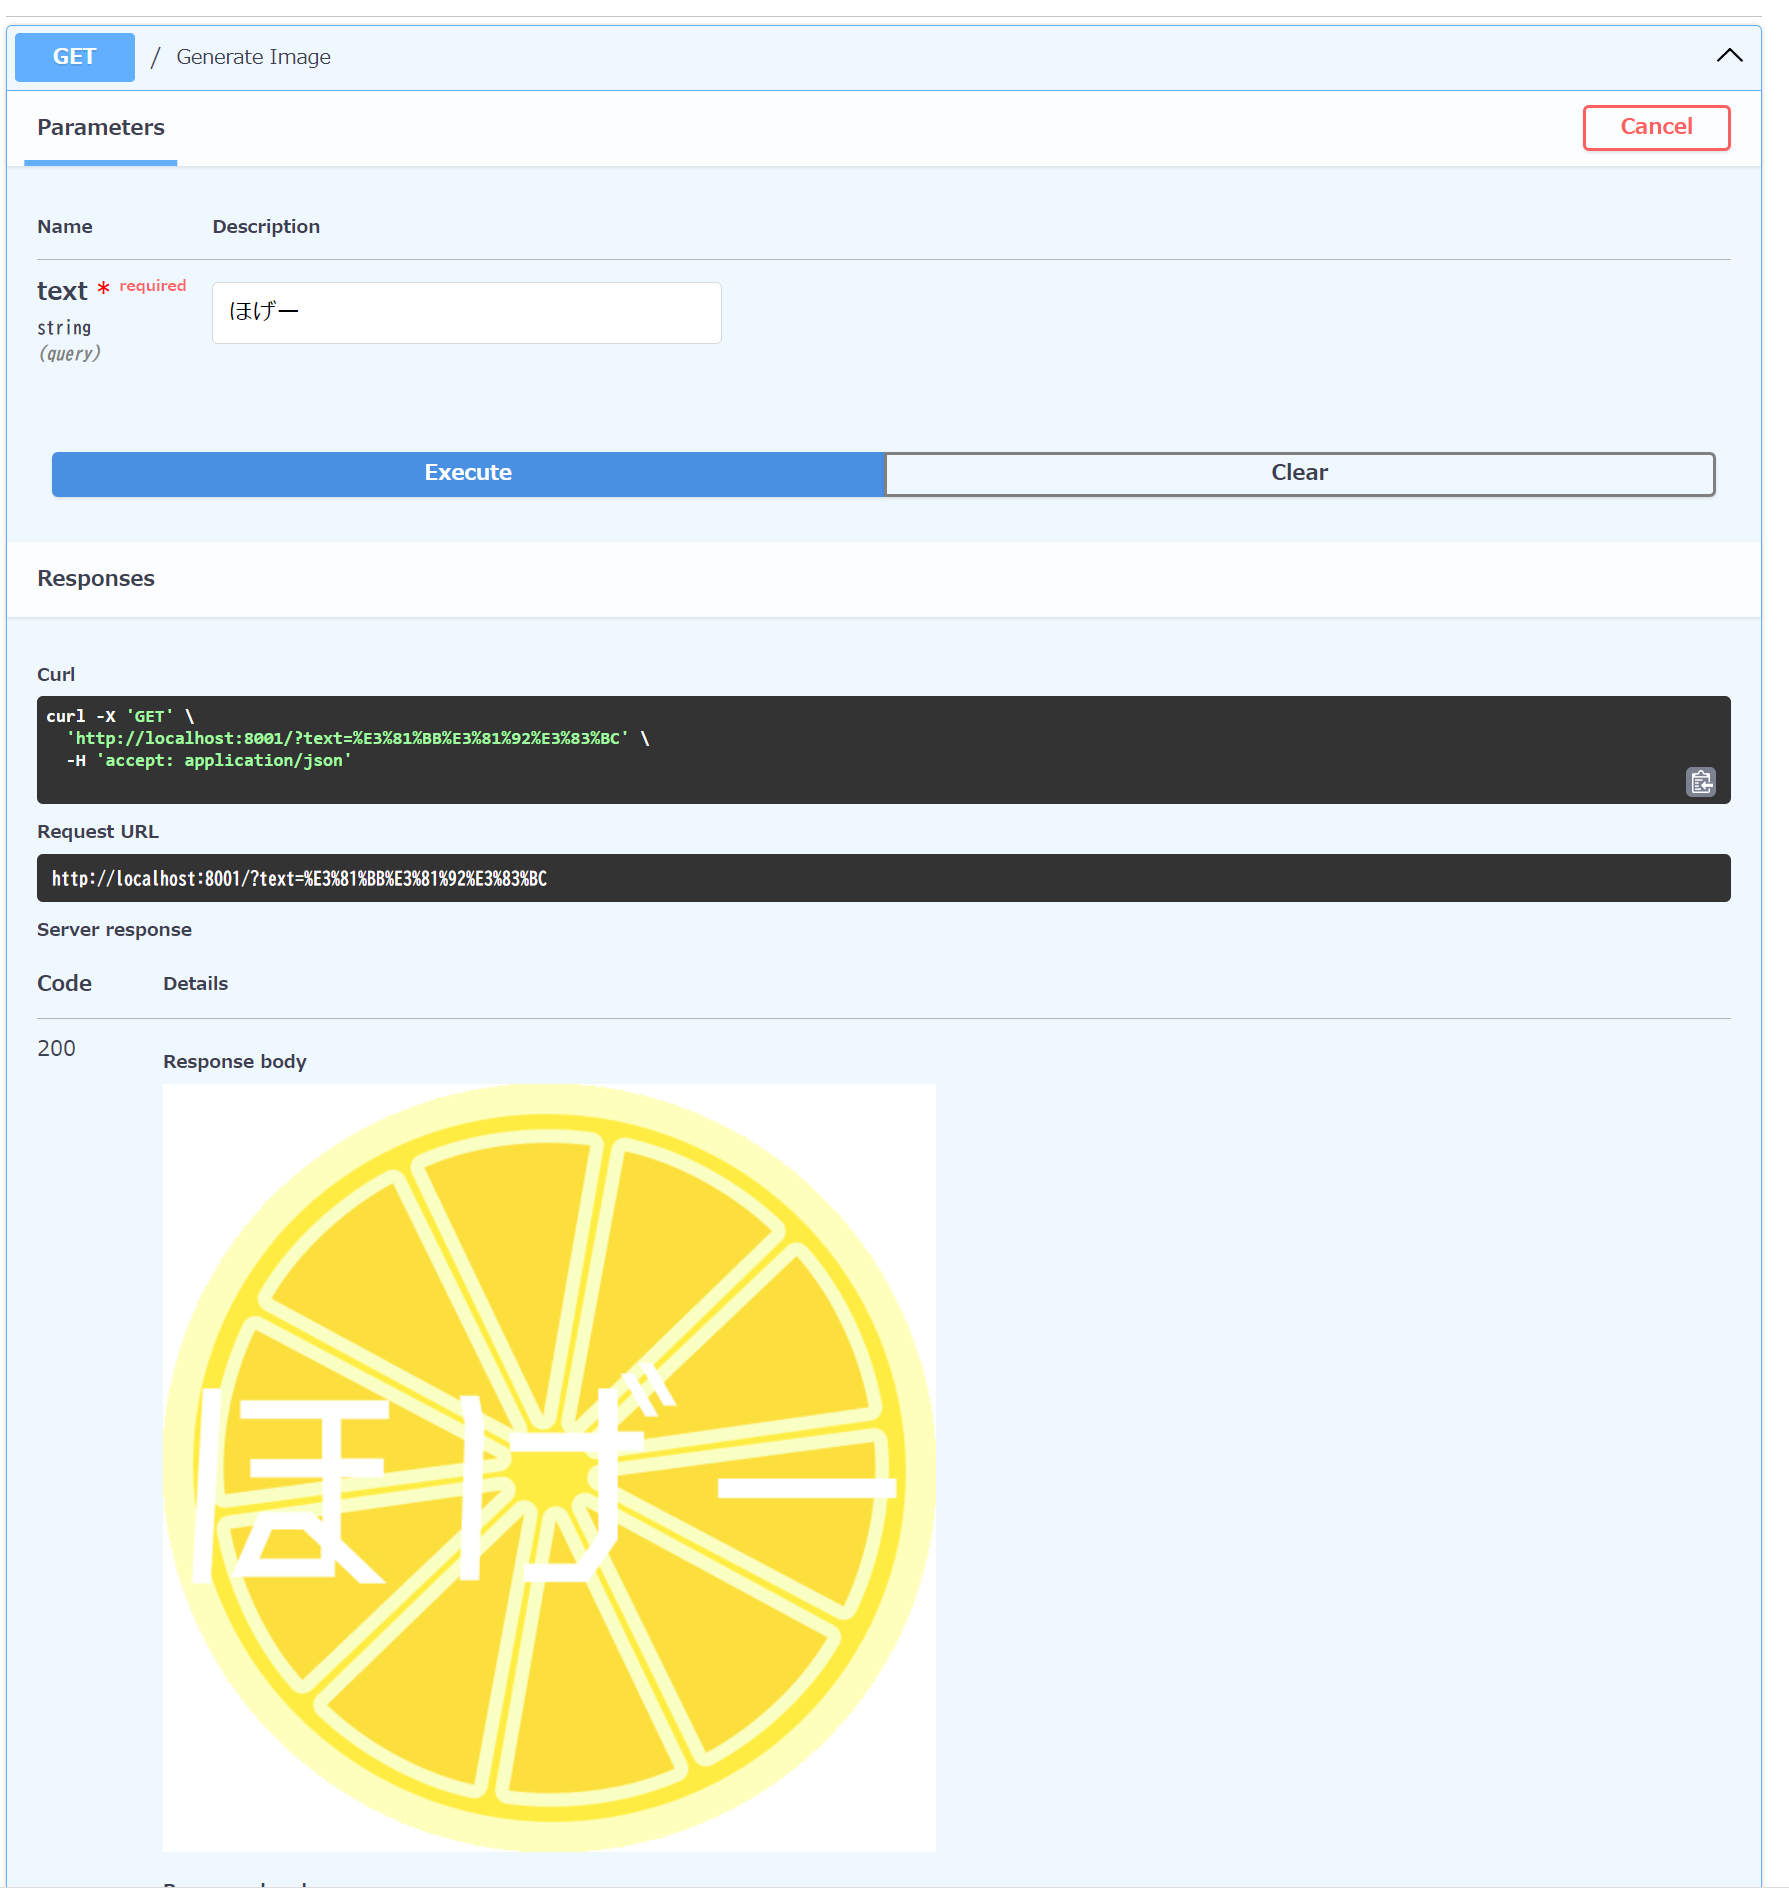
http://localhost:8000/docsにアクセスして、テキストを入力して画像を生成してみましょう。
ほげーとしてますね。
気になる点
Python側のコードではrust_image配下のクラスなどの型がわからないため、IDEが補完をしてくれません。
pyiを作成して型を定義することで補完が効くようになるそうですが、自動で生成してくれないとこれは不便かなぁーと思いました。
まとめ
PyO3を使ってRustでPythonの拡張モジュールを作成して、FastAPIでAPIを作成してみました。
正直、Rust単体でAPIまで作成しまっても問題ない気がしますが、Pythonのライブラリを使いたい場合などは画像生成部分のみをRustで書くことにより高速化できるかもしれません。(未検証です。すみません。時間がなかったので・・・。おそらくそのうち検証します。)
また、Rustのライブラリの互換性についても学べたので、良い経験になりました。
参考

