はじめに
360 度動画再生時に空間上にプレイヤーの UI 出して HMD で操作したいと言われたので、
空間上のカスタム UI で WebVR 対応だったら Babylon.js 使えそうだなと思い、
Babylon.js での 360度動画再生について調査していました ![]()
そして調査の結果、既に Babylon.js にはそういった仕組み があり、
良い意味で大してやることなく実装可能であることが分かりました ![]()
そこで今回は Babylon.js を使用して、
360度動画プレイヤーを作るための方法についてまとめてみました ![]()
本記事の動作確認は 1. Babylon.js の開発環境を構築する のやり方で進めてます ![]()
基本 JS 等 Web 関連のファイルをホスティングする環境を構築しているだけなので、
それが出来ればどんなやり方でも問題ありません ![]()
立体視でない 360度動画を再生する
Babylon.js には既に VideoDome という 360動画再生用のクラスが存在します ![]()
VideoDome クラスはデフォで一般的な 360 動画フォーマットに対応しており、
WebVR モードにした際などにはフォーマットに応じて自動で立体視に移行します ![]()
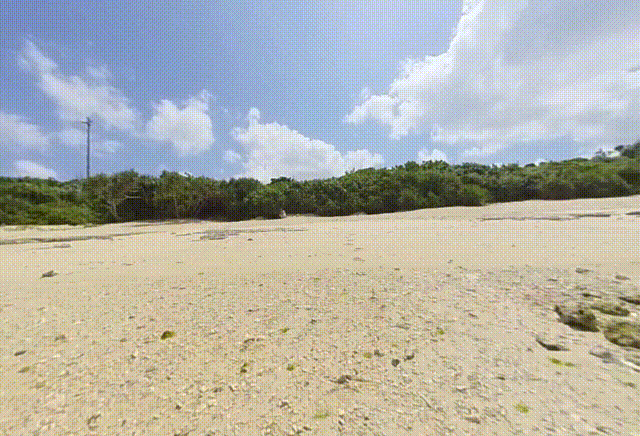
まずは、VideoDome を利用して一般的な立体視でない 360 動画を再生してみます ![]()
今回の立体視でない 360度動画の再生検証には 360あーる・てぃー・しー さんの
名もない静かなビーチがある沖縄県読谷村波平 No.1 を利用させていただきました ![]()
<!DOCTYPE html>
<html lang="ja">

<head>
    <meta charset="UTF-8">
    <!-- Babylon.js のスクリプトをインポートする -->
    <script src="https://cdnjs.cloudflare.com/ajax/libs/babylonjs/4.0.3/babylon.js"></script>
    <!-- CSS を適用して Babylon.js でのレンダリング内容を全画面表示になるようにする -->
    <style>
        html,
        body {
            overflow: hidden;
            width: 100%;

            height: 100%;
            margin: 0;
            padding: 0;
        }

        #renderCanvas {
            width: 100%;
            height: 100%;
            touch-action: none;
        }
    </style>
</head>

<body>
    <!-- Babylon.js のレンダリング内容を表示するための Canvas タグ-->
    <canvas id="renderCanvas"></canvas>
    <script>
        // Babylon.js が描画する内容を WebGL などの低レイヤーな層に
        // 橋渡しするための Engine を描画対象の canvas エレメントで初期化する
        const canvas = document.getElementById('renderCanvas');
        const engine = new BABYLON.Engine(canvas, true);

        // Engine で描画する Scene を作成する関数
        const createScene = function () {
            const scene = new BABYLON.Scene(engine);

            // つねに原点を中心として回転するカメラを作成する
            const camera = new BABYLON.ArcRotateCamera('Camera', 1, 1, 1, new BABYLON.Vector3(0, 0, 0), scene);

            // カメラの視野角を 90 度に設定 (人間の視野角を想定)
            const cameraFovRadian = 90 * (Math.PI / 180);
            camera.fov = cameraFovRadian

            // Camera の操作を canvas 上で可能にする
            camera.attachControl(canvas, true);

            // 原点に自然光を設置する
            const light = new BABYLON.HemisphericLight('Light', new BABYLON.Vector3(0, 0, 0), scene);

            // 360 動画をレンダリングするための VideoDome を生成する
            // 第二引数には video エレメントか動画の URL or Path を指定する
            const videoDome = new BABYLON.VideoDome(
                'VideoDome',
                '../videos/yomitannamihira_001.mp4',
                {},
                scene
            );

            // 描画する準備の整った Scene を返却する
            return scene;
        };

        // 動画再生を行うための Scene を生成する
        const scene = createScene();

        // Scene をレンダリングループの中で描画する
        engine.runRenderLoop(() => {
            scene.render();
        });

        // ブラウザのリサイズ処理をした際に適切に描画内容がリサイズされるようにする
        window.addEventListener('resize', function () {
           engine.resize();
        });
    </script>
</body>
</html>
![]() の html ファイルを読み込んだ際に
の html ファイルを読み込んだ際に ![]() のように動画が再生されていれば成功です
のように動画が再生されていれば成功です ![]()
(gif だと分かりづらいかもしれませんが木や雲が動いています ![]()
![]() )
)
立体視の 360度動画を再生する
本記事で言う立体視の 360動画とは Google VR の Webページに記載されている、
Common formats という項目の Stereo 360 uses two stacked panos. のフォーマットに準拠したパノラマ動画を指します![]()
いわゆる トップアンドボトム と呼ばれる形式になります。
ちなみに英語だと一般的に Stereoscopic panorama と呼ばれているようです ![]()
VideoDome クラスには videoMode というプロパティが用意されています。
videoMode プロパティを変更することで立体視の 360動画を再生することが可能です。
また今回は立体視で 360 動画が再生出来ていそうか確認するため、
WebVR モードへの移行を可能にしておきます ![]()
<!DOCTYPE html>
<html lang="ja">

<head>
    <meta charset="UTF-8">
    <script src="https://cdnjs.cloudflare.com/ajax/libs/babylonjs/4.0.3/babylon.js"></script>
    <style>
        html,
        body {
            overflow: hidden;
            width: 100%;

            height: 100%;
            margin: 0;
            padding: 0;
        }

        #renderCanvas {
            width: 100%;
            height: 100%;
            touch-action: none;
        }
    </style>
</head>

<body>
    <canvas id="renderCanvas"></canvas>
    <script>
        const canvas = document.getElementById('renderCanvas');
        const engine = new BABYLON.Engine(canvas, true);

        const createScene = function () {
            const scene = new BABYLON.Scene(engine);

            const camera = new BABYLON.ArcRotateCamera('Camera', 1, 1, 1, new BABYLON.Vector3(0, 0, 0), scene);

            const cameraFovRadian = 90 * (Math.PI / 180);
            camera.fov = cameraFovRadian
            camera.attachControl(canvas, true);

            const light = new BABYLON.HemisphericLight('Light', new BABYLON.Vector3(0, 0, 0), scene);

            // トップアンドボトム形式の mp4 ファイルを指定します (↓のようなフォーマットです)
            // https://github.com/googlearchive/vrview/blob/master/examples/video/congo_2048.mp4
            const videoDome = new BABYLON.VideoDome(
                'VideoDome',
                '../videos/stereoscopic_panorama.mp4',
                {},
                scene
            );
            // トップアンドボトム形式の 360動画を視聴するために viewMode を変更する
            videoDome.videoMode = BABYLON.VideoDome.MODE_TOPBOTTOM;

            return scene;
        };

        const scene = createScene();

        // WebVR モードを有効にする
        const vrHelper = scene.createDefaultVRExperience();
        vrHelper.enableInteractions();

        engine.runRenderLoop(() => {
            scene.render();
        });

        window.addEventListener('resize', function () {
           engine.resize();
        });
    </script>
</body>
</html>
再度ページにアクセスしてみます ![]()

画面右下に表示されているボタンをクリックすることで全画面表示になり、
左右で異なる映像が表示されていれば成功です ![]()
![]()
HLS 形式の 360動画を再生する
VideoDome クラスは初期化時に URL や Path ではなく、
描画したい video エレメントを引数に渡すことも可能です。
また VideoDome は video エレメントを扱うことが可能なため、
他のライブラリと連携させることで様々な動画フォーマットが再生可能になります ![]()
今回は試しに hls.js と連携させることで、
HLS フォーマットの 360度動画を再生してみます ![]()
<!DOCTYPE html>
<html lang="ja">

<head>
    <meta charset="UTF-8">
    <!-- HLS形式の動画再生を行うため利用する hls.js のインポート -->
    <script src="https://cdn.jsdelivr.net/npm/hls.js@latest"></script>
    <script src="https://cdnjs.cloudflare.com/ajax/libs/babylonjs/4.0.3/babylon.js"></script>
    <style>
        html,
        body {
            overflow: hidden;
            width: 100%;

            height: 100%;
            margin: 0;
            padding: 0;
        }

        #renderCanvas {
            width: 100%;
            height: 100%;
            touch-action: none;
        }
    </style>
</head>

<body>
    <canvas id="renderCanvas"></canvas>
    <video id="video"></video>
    <script>
        const canvas = document.getElementById('renderCanvas');
        const engine = new BABYLON.Engine(canvas, true);

        // 引数に video エレメントを受け取れるよう改修
        const createScene = function (videoElem) {
            const scene = new BABYLON.Scene(engine);

            // カメラの向きが 360度動画の中心を向くように設定
            // https://babylonjsguide.github.io/basics/Cameras#arc-rotate-camera
            const camera = new BABYLON.ArcRotateCamera('Camera', -1, 0, 1, new BABYLON.Vector3(0, 0, 0), scene);

            camera.setTarget(BABYLON.Vector3.Zero());
            camera.attachControl(canvas, true);

            const light = new BABYLON.HemisphericLight('Light', new BABYLON.Vector3(0, 0, 0), scene);

            // 第二引数に video エレメントを使用するよう改修
            const videoDome = new BABYLON.VideoDome(
                'VideoDome',
                videoElem,
                {},
                scene
            );

            return scene;

        };

        var videoElem = document.getElementById('video');

        // 指定した video エレメントの内容を描画するための Scene 作成
        const scene = createScene(videoElem);

        // VideoDome で再生している動画の再生/一時停止を切り替えるための関数
        const playPauseVideoDome = () => {
            const videoDome = scene.getNodeByName('VideoDome');
            const video = videoDome.videoTexture.video;
            video.paused ? video.play() : video.pause();
        }

        // スペースキー押下時に動画の再生/一時停止を切り替えられるようにする
        scene.onKeyboardObservable.add(e => {
            switch (e.event.type) {
                case 'keydown':
                    if (e.event.key === ' ') {
                        playPauseVideoDome();
                    }
                    break;
            }
        })

        const vrHelper = scene.createDefaultVRExperience();
        vrHelper.enableInteractions();

        // コントローラー搭載の HMD であればトリガー入力時に、
        // 動画の再生/一時停止を切り替えられるようにする
        vrHelper.onControllerMeshLoaded.add((webVRController) => {
            var controllerMesh = webVRController.mesh;
            webVRController.onTriggerStateChangedObservable.add(() => {
              playPauseVideoDome();
            });
        });

        engine.runRenderLoop(() => {
            scene.render();
        });

        window.addEventListener('resize', function () {
            engine.resize();
        });

        // 動画再生を行うための関数
        // getNodeByName で VideoDome を取得し、
        // VideoDome に設定されている video エレメント経由で動画を再生する
        const playVideoDome = () => {
            const videoDome = scene.getNodeByName('VideoDome')
            videoDome.videoTexture.video.play()
        }

        // hls.js を使用して HLS 動画を読み込む
        // HLS 動画ファイルの読み込みが完了すると playerVideoDome 関数が呼ばれる
        if (Hls.isSupported()) {
            const hls = new Hls({ autoStartLoad: false });
            hls.loadSource('https://bitmovin-a.akamaihd.net/content/playhouse-vr/m3u8s/105560.m3u8');
            hls.attachMedia(video);
            hls.on(Hls.Events.MANIFEST_PARSED, playVideoDome);
            hls.startLoad();
        } else if (videoElem.canPlayType('application/vnd.apple.mpegurl')) {
            videoElem.src = 'https://bitmovin-a.akamaihd.net/content/playhouse-vr/m3u8s/105560.m3u8';
            video.addEventListener('loadedmetadata', playVideoDome)
        }
    </script>


</body>

</html>
ページにアクセスすると HLS が再生されることが確認できます ![]()
また今回からスペースキー押下時に再生/一時停止を切り替えられるようにしました ![]()
ちなみに mpeg-dash も dash.js を使用すれば普通に再生できそうでした ![]()
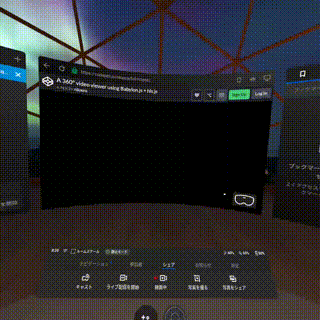
Oculus ブラウザーから動画再生出来るか確認する
HMD 内ブラウザで見られるようにしたいとのことだったので、
Quest の Oculus ブラウザーから動作検証進めていきます ![]()
実は既に Codepen にコードはアップ済みなので、
Oculus ブラウザーから https://codepen.io/nikaera/full/KOpdaJ にアクセスすれば、
挙動について確認することが可能です ![]()
実際にアクセスしてみた様子が ![]() です。
です。
コントローラーのトリガーで入力を行うことで動画の再生/一時停止を行えます ![]()
(眼鏡っぽいのが近くに来た時に一時停止して見た時は結構迫力ありました ![]() )
)
パフォーマンスの問題でめっちゃカクついてましたが再生は出来てました ![]()
恐らく画質は 1080p 程度までは落としたほうが良さそうです ![]()
動画プレイヤーのコントロールを VR 上で出来るようにする
Babylon.js には 3D の GUI 作成用ライブラリ が存在します。
こちらを利用して動画再生プレイヤーを VR 上に構築していきます ![]()
最低限プレイヤーに必要と思われる、再生時間及びシークバー、
一時停止/再生の切り替えボタンについて作成しました ![]()
<!DOCTYPE html>
<html lang="ja">
<head>
<meta charset="UTF-8">
<script src="https://cdn.jsdelivr.net/npm/hls.js@latest"></script>
<script src="https://cdnjs.cloudflare.com/ajax/libs/babylonjs/4.0.3/babylon.js"></script>
<!-- Babylon.js の GUI ライブラリをインポート -->
<script src="https://preview.babylonjs.com/gui/babylon.gui.min.js"></script>
<style>
html,
body {
overflow: hidden;
width: 100%;
height: 100%;
margin: 0;
padding: 0;
}
#renderCanvas {
width: 100%;
height: 100%;
touch-action: none;
}
</style>
</head>
<body>
<canvas id="renderCanvas"></canvas>
<video id="video"></video>
<script>
const canvas = document.getElementById('renderCanvas');
const engine = new BABYLON.Engine(canvas, true);
const createScene = function (videoElem) {
const scene = new BABYLON.Scene(engine);
const camera = new BABYLON.ArcRotateCamera('MainCamera', -1, 0, 1, new BABYLON.Vector3(0, 0, 0), scene);
camera.setTarget(BABYLON.Vector3.Zero());
camera.attachControl(canvas, true);
const light = new BABYLON.HemisphericLight('Light', new BABYLON.Vector3(0, 0, 0), scene);
const videoDome = new BABYLON.VideoDome(
'VideoDome',
videoElem,
{},
scene
);
return scene;
};
// 動画プレイヤーのコントローラー作成
const createPlayerControl = (scene, videoElem) => {
// 空間上に UI を表示し、それらのイベントを管理するためのインスタンス生成
const manager = new BABYLON.GUI.GUI3DManager(scene);
// 再生/一時停止の切り替えボタンを作成する
const playPauseButton = new BABYLON.GUI.Button3D('PlayPauseButton');
playPauseButton.scaling = new BABYLON.Vector3(0.05, 0.05, 0.05);
// playPauseButton を操作した際にイベントが発火するように設定
manager.addControl(playPauseButton);
// コントローラーの親 Mesh を定義する。最初は画面に表示しない。
// (コントローラーの各 UI パーツを一括で隠す場合に便利なため)
const playerControl = new BABYLON.AbstractMesh('PlayerControl', scene);
playerControl.setEnabled(false);
// 再生/一時停止の切り替えボタンの Transform をリンクさせる Node として
// PlyaerControl Node を設定する
playPauseButton.linkToTransformNode(playerControl);
playPauseButton.position = new BABYLON.Vector3(-1.8, 0.5, 3.5);
// 再生/一時停止の切り替えボタンにテキストを設定する
const playPauseButtonText = new BABYLON.GUI.TextBlock();
playPauseButtonText.text = 'Play';
playPauseButtonText.color = 'white';
playPauseButtonText.fontSize = 24;
playPauseButton.content = playPauseButtonText;
// 再生時間をコントロールするためのシークバーを作成する
const playerSeekBar = BABYLON.MeshBuilder.CreatePlane('SeekBar', { width: 2, height: 0.1 }, scene);
playerSeekBar.position = new BABYLON.Vector3(0.1, 0.5, 3.5);
// シークの値に応じて GLSL で描画内容を変更するため ShaderMaterial を設定する
// GLSL の詳細は後述する
const seekBarMaterial = new BABYLON.ShaderMaterial('SeekBar', scene, './shaders/seekbar');
playerSeekBar.material = seekBarMaterial;
// PlayerControl を親に設定する (コントローラーの各 UI パーツを一括で隠す場合に便利なため)
playerSeekBar.setParent(playerControl);
// 動画の再生/一時停止を切り替えるための関数
const playPauseVideoDome = () => {
const videoDome = scene.getNodeByName('VideoDome');
const video = videoDome.videoTexture.video;
video.paused ? video.play() : video.pause();
}
// 再生/一時停止の切り替えボタンをクリックした際に、
// 動画の再生/一時停止を切り替える
playPauseButton.onPointerUpObservable.add(function () {
playPauseVideoDome();
});
// 動画の再生ステータスが '再生' になったら、
// 再生/一時停止の切り替えボタンのテキストを 'Pause' に設定する
videoElem.addEventListener('play', () => {
playPauseButtonText.text = 'Pause';
});
// 動画の再生ステータスが '一時停止' になったら、
// 再生/一時停止の切り替えボタンのテキストを 'Play' に設定する
videoElem.addEventListener('pause', () => {
playPauseButtonText.text = 'Play';
});
// 再生時間等のラベルに使用する font を定義する
const fontSize = 24;
const font = `${fontSize}px Arial`;
const planeHeight = 0.15;
const textureHeight = 1.5 * fontSize;
const ratio = planeHeight / textureHeight;
const tempTexture = new BABYLON.DynamicTexture('DynamicTexture', 64, scene);
const context = tempTexture.getContext();
context.font = font;
// 再生時間等を表示するラベルを作成するための関数
// ラベルの Mesh, Texture を返却する
// (texture も返却するのは時間を texture として設定したいため)
const createTimeLabel = (labelName, labelText) => {
const textureWidth = context.measureText(labelText).width + 8;
const planeWidth = textureWidth * ratio;
const dynamicTexture = new BABYLON.DynamicTexture(`${labelName}Texture`, { width: textureWidth, height: textureHeight }, scene, false);
const textureMaterial = new BABYLON.StandardMaterial('TextureMaterial', scene);
textureMaterial.diffuseTexture = dynamicTexture;
dynamicTexture.drawText(labelText, null, null, font, '#000000', '#ffffff', true);
const labelPlane = BABYLON.MeshBuilder.CreatePlane(labelName, { width: planeWidth, height: planeHeight }, scene);
labelPlane.material = textureMaterial;
return { plane: labelPlane, texture: dynamicTexture };
}
// 再生時間を表示するためのラベルを作成する
// position を PlayerControl の左端に設定する
// 親 Mesh に PlayerControl を設定する
const currentTimeLabel = createTimeLabel('CurrentTimeLabel', '00:00');
const currentTimePlane = currentTimeLabel.plane;
const currentTimeTexture = currentTimeLabel.texture;
currentTimePlane.position.x = playerSeekBar.position.x - currentTimePlane.scaling.x;
currentTimePlane.position.y = playerSeekBar.position.y - 0.3;
currentTimePlane.position.z = playerSeekBar.position.z;
currentTimePlane.setParent(playerControl);
// 全体の再生時間を表示するためのラベルを作成する
// position を PlayerControl の右端に設定する
// 親 Mesh に PlayerControl を設定する
const durationLabel = createTimeLabel('DurationLabel', '00:00');
const durationPlane = durationLabel.plane;
const durationTexture = durationLabel.texture;
durationPlane.position.x = playerSeekBar.position.x + durationPlane.scaling.x;
durationPlane.position.y = playerSeekBar.position.y - 0.3;
durationPlane.position.z = playerSeekBar.position.z;
durationPlane.setParent(playerControl);
// video element の currentTime や duration で取得した値を
// '00:00' のような表記で取得するための関数
const timeString = (time) => {
const minutes = '0' + String(Math.floor(time / 60));
const seconds = '0' + String(Math.floor(time % 60));
return `${minutes.slice(-2)}:${seconds.slice(-2)}`;
}
// 動画が再生可能な状態になった時、durationPlane のテキストに
// video element の duration を timeString 関数で取得して設定する
videoElem.addEventListener('canplaythrough', () => {
durationTexture.drawText(timeString(videoElem.duration), null, null, font, '#000000', '#ffffff', true)
});
// 動画が再生中/シーク中に currentTimePlane のテキストに
// video element の currentTime を timeString 関数で取得して設定する
videoElem.addEventListener('timeupdate', () => {
currentTimeTexture.drawText(timeString(videoElem.currentTime), null, null, font, '#000000', '#ffffff', true);
});
videoElem.addEventListener('seeking', () => {
currentTimeTexture.drawText(timeString(videoElem.currentTime), null, null, font, '#000000', '#ffffff', true);
});
}
// PlayerControl を表示するための関数
// showPlayerControl 関数を用いて PlayerControl を表示した場合、
// 表示後 3秒経過したら自動的に PlayerControl を隠す
// 表示後 3秒以内に showPlayerControl 関数が呼ばれたら、
// 更にその 3秒経過後に自動的に PlayerControl を隠す
var hidePlayerControlTimer;
const showPlayerControl = () => {
const playerSeekBar = scene.getNodeByName('SeekBar');
const playerControl = scene.getMeshByName('PlayerControl');
return () => {
playerControl.setEnabled(true);
if (hidePlayerControlTimer) {
clearTimeout(hidePlayerControlTimer);
}
hidePlayerControlTimer = setTimeout(() => {
playerControl.setEnabled(false);
}, 3 * 1000); // 3s
}
}
// Raycast でヒットした PickResult が SeekBar だった場合、
// ヒットしたポイントの値を元に動画をシークする関数
const seekVideoByPickResult = (pickResult) => {
if (pickResult.pickedMesh.id === 'SeekBar') {
const position = pickResult.pickedPoint;
const positionX = position.x + playerSeekBar.scaling.x - playerSeekBar.position.x;
const maximumX = playerSeekBar.getBoundingInfo().boundingBox.maximum.x;
const minimumX = playerSeekBar.getBoundingInfo().boundingBox.minimum.x;
const seekBarWidth = maximumX - minimumX;
const seekVal = positionX / seekBarWidth;
videoElem.currentTime = seekVal * videoElem.duration;
}
}
const videoElem = document.getElementById('video');
const scene = createScene(videoElem);
// PlayerControl 及びシークバーや再生時間を表示するためのラベルを作成する
createPlayerControl(scene, videoElem);
const vrHelper = scene.createDefaultVRExperience();
vrHelper.teleportationEnabled = false;
vrHelper.enableInteractions();
// ブラウザ上でマウスクリックした場所に Raycast して動画のシークを行う
window.addEventListener('click', function () {
showPlayerControl()();
const pickResult = scene.pick(scene.pointerX, scene.pointerY);
seekVideoByPickResult(pickResult);
});
// HMD のブラウザ上で右コントローラのメイントリガーを押した時に、
// 右コントローラの正面方向に Raycast して動画のシークを行う
vrHelper.onControllerMeshLoaded.add((webVRController) => {
webVRController.onTriggerStateChangedObservable.add((stateObject) => {
if (webVRController.hand === 'right') {
if (stateObject.value > 0) {
showPlayerControl()();
const ray = webVRController.getForwardRay(5);
const pickResult = scene.pickWithRay(ray);
if (pickResult.hit)
seekVideoByPickResult(pickResult);
}
}
});
});
// PlayerControl に設置したシークバーの進捗を
// video element の currentTime でアップデートする
const playerSeekBar = scene.getNodeByName('SeekBar');
engine.runRenderLoop(() => {
const seekVal = videoElem.currentTime / videoElem.duration;
playerSeekBar.material.setFloat('val', seekVal);
scene.render();
});
window.addEventListener('resize', function () {
engine.resize();
});
const playVideoDome = () => {
const videoDome = scene.getNodeByName('VideoDome')
videoDome.videoTexture.video.play()
}
if (Hls.isSupported()) {
const hls = new Hls({ autoStartLoad: false });
hls.loadSource('https://bitmovin-a.akamaihd.net/content/playhouse-vr/m3u8s/105560.m3u![error]()


8');
hls.attachMedia(video);
hls.on(Hls.Events.MANIFEST_PARSED, playVideoDome);
hls.startLoad();
} else if (videoElem.canPlayType('application/vnd.apple.mpegurl')) {
videoElem.src = 'https://bitmovin-a.akamaihd.net/content/playhouse-vr/m3u8s/105560.m3u8';
video.addEventListener('loadedmetadata', playVideoDome)
}
</script>
</body>
</html>
![]() の内容で
の内容で panorama.html をアップデートすると、
HMD で見た時に ![]() のようになります
のようになります ![]()
おわりに
今回は Babylon.js で 360度動画を再生する方法についてご紹介しました ![]()
今後は Babylon.js の GUI ライブラリを駆使して、
3D 空間上で操作可能な動画プレイヤーを作成していきます ![]()
VRM アバターを 360度動画空間内で活用することも検討中です ![]()
上記は対応次第、記事に追記する形でアプデかけていく予定です ![]()