ある日のことなんですが、無性にPHPでプログラミングしたくなった日がありまして、PSRとかComposerとかCIとかの勉強を兼ねてライブラリを作り、Packagistに登録までやってみたので、その時の手順を記します。
概要
- composer.jsonを作る
- ライブラリを作る
- Githubに上げる
- Travis CIと連携させる
- Packagistと連携させる
- GithubのサービスフックにPackagistを登録する
事前条件
- php5.6を使いました
- composerをインストールしておいてください。
- gitをインストールしておいてください。
- Githubのアカウントを作っておいてください。
- Githubにpush出来るように鍵の設定などを行っておいてください。
- Travis CIのアカウントを作っておいてください(Githubのアカウントでログインします)
- Packagistのアカウントを作っておいてください(Githubのアカウントでログインします)
手順
composer.jsonを作る
ライブラリのルートになるディレクトリで、composer init コマンドを実行してcomposer.jsonを生成します。
コマンドを実行すると、設定値について質問してくるので、入力していくと対話形式で設定していけるのですが、後でcomposer.jsonを直接編集できるので、デフォルト値のままENTERしてしまってもいいです。
ちなみに最初の質問で
Package name (<vendor>/<name>)と表示されますが、<vendor>はgithubのアカウント名、<name>はgithubのrepository名が対応しています(ライブラリ名になります)。
composer.jsonの編集
上記で作成した、composer.jsonをエディタで開いて以下のように編集します。
{
    "name": "niikunihiro/collection",
    "description": "Array Functions Wrapper",
    "type": "library",
    "license": "MIT",
    "authors": [
        {
            "name": "Nii Kunihiro",
            "email": "nii.kunihiro@gmail.com"
        }
    ],
    "minimum-stability": "dev",
    "require": {},
    "require-dev": {
        "phpunit/phpunit": "5.1.*"
    },
    "autoload": {
        "psr-4": {
            "Collection\\": "src/",
            "CollectionTest\\": "tests/"
        }
    }
}
オートロードはPSR-4に準拠させるので、autoloadにpsr-4を指定し、
テストでphpunitを使うので、require-devで指定しています。
githubにコミットする
gitbubにリポジトリを作成します。
コマンド例
git init
git remote add origin git@github.com:niikunihiro/collection.git
git pull origin master
composer.jsonをコミットしてpushします。
git add composer.json
git commit -m 'first message'
git push origin master
ライブラリの作成
プロジェクト直下にtestsディレクトリを作成します。
mkdir tests
composerでphpunitをインストールします
composer update
インストールに成功したらバージョンを確認しときます
vendor/bin/phpunit --version
phpunit.xml.distをライブラリのルートディレクトリに作成します。
<phpunit backupGlobals="false"
         backupStaticAttributes="false"
         bootstrap="tests/bootstrap.php"
         colors="false"
         convertErrorsToExceptions="true"
         convertNoticesToExceptions="true"
         convertWarningsToExceptions="true"
         processIsolation="false"
         stopOnFailure="false"
         syntaxCheck="false">
    <testsuites>
        <testsuite name="Collection Test Suite">
            <directory suffix="Test.php">./tests/</directory>
        </testsuite>
    </testsuites>

    <filter>
        <whitelist>
            <directory suffix=".php">./src/</directory>
        </whitelist>
    </filter>
</phpunit>
tests/bootstrap.phpをライブラリのルートディレクトリに作成します。
<?php
error_reporting(E_ALL | E_STRICT);
require __DIR__ . '/../vendor/autoload.php';
phpunitコマンドを実行して、テストがないぜというメッセージを確認します。
vendor/bin/phpunit
プロダクトコード(ダミー)の作成
プロダクトコードのsrcディレクトリを作成します
mkdir src
プロダクトコードを作成します。とりあえずテストを通すまではデータは決めうちです。
<?php

namespace Collection;

use Closure;

class Collection {

    private $items;

    public function __construct(array $items)
    {
        $this->items = $items;
    }

    public function select(Closure $callback, $flag = 0)
    {
        return $this;
    }

    public function map(Closure $callback)
    {
        return $this;
    }

    public function all()
    {
        return [120, 20, 22];
    }
}
テストコードを作成
<?php

namespace CollectionTest;

use Collection\Collection;

/**
 * Class CollectionTest
 * @package CollectionTest
 */
class CollectionTest extends \PHPUnit_Framework_TestCase {

    /**
     * @test
     */
    public function 配列の要素を10以上のものに絞り込んで2倍した配列を返す()
    {
        $data       = [1, 2, 4, 60, 8, 10, 11];
        $expected   = [120, 20, 22];
        $collection = new Collection($data);
        $actual     = $collection->select(function ($item) {
            return $item >= 10;
        })->map(function ($item) {
            return $item * 2;
        })->all();
        $this->assertEquals($expected, $actual);
    }
}
プロダクトコードの実装
プロダクトコードを実装します。
<?php

namespace Collection;

use Closure;

/**
 * Class Collection
 * @package Collection
 */
class Collection {

    private $items;

    public function __construct(array $items)
    {
        $this->items = $items;
    }

    public function select(Closure $callback, $flag = 0)
    {
        $this->items = array_filter($this->items, $callback, $flag);
        return new static($this->items);
    }

    public function map(Closure $callback)
    {
        $this->items = array_map($callback, $this->items);
        return new static($this->items);
    }

    public function all()
    {
        return array_merge($this->items);
    }
}
Githubにpushする
ここまでで作ったコード一式をGithubにpushします。
pushの前にtagをうっとくといいです。
git tag v1.0.0
Travis CIと連携させる
テストコードを作成してるので、Travis CIにログインしてGithubのリポジトリと連携させます。
Profile に Github のリポジトリ一覧がありますので、連携させるリポジトリの ![]() を
を ![]() に変更します。
に変更します。

Travis CIでの設定が終わったら、プロジェクト直下に.travis.ymlを作成してGithubにpushします。
language: php
php:
  - 5.6

before_script:
  - composer self-update
  - composer install

script:
  - vendor/bin/phpunit
Githubにpushすると、Travis CIでビルドが開始されます。ビルドが完了したらTravis CIからメールがきます。
ビルドすると、build status imageが出来るので、README.mdファイルに追加します。
# collection
php array functions wrapper
[](https://travis-ci.org/niikunihiro/collection)
Packagistに登録する
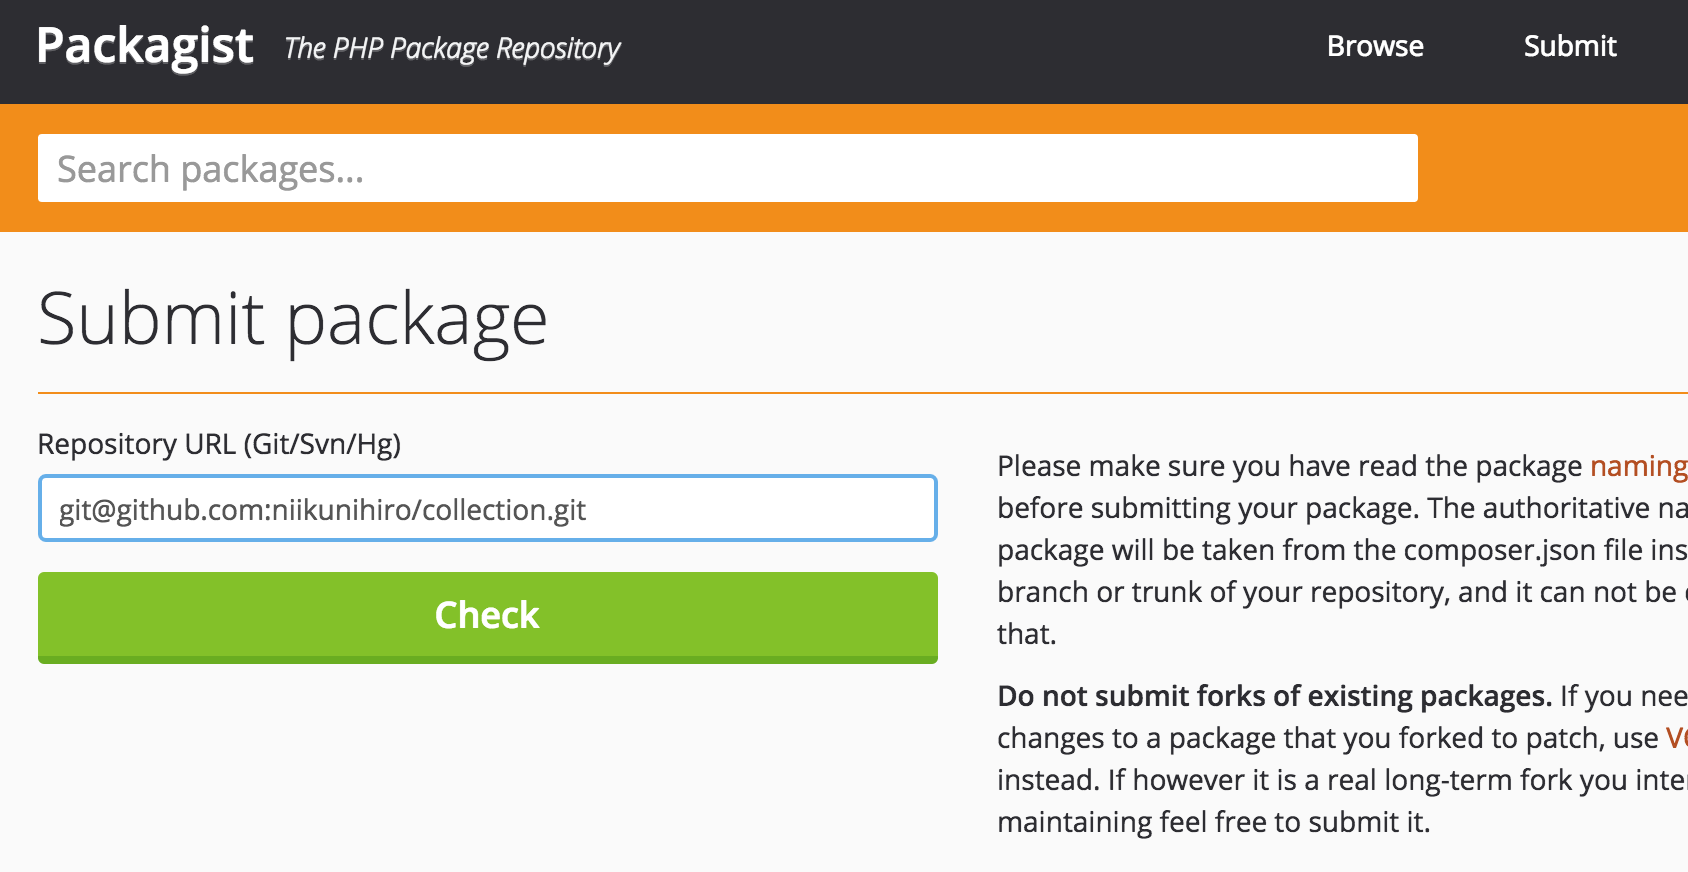
PackagistにGithubアカウントでログインして、リポジトリを登録します。
Repository URL(Git/Svn_Hg)欄にGithubのアドレスを入力して、Check -> Submitで登録完了です。
GithubのサービスフックにPackagistを登録する
GithubにpushしたらPackagistにも連携されるようにします。
PackagistのProfileページからAPI Tokenを取得します。
GithubのリポジトリのSettingsページから Integrations & services ページに移動して、User欄とToken欄を埋めて登録します。Domain欄はデフォルトのままでいいので空欄にします。
次にGithubにコミットしたときにPackagistにも連携されている事が確認できます。
以上です。
