LaravelのSchedulerにてonOneServerを使用したかったので、共通のキャッシュサーバーとしてAWSのElastic Cache Redisを使った時のメモ。
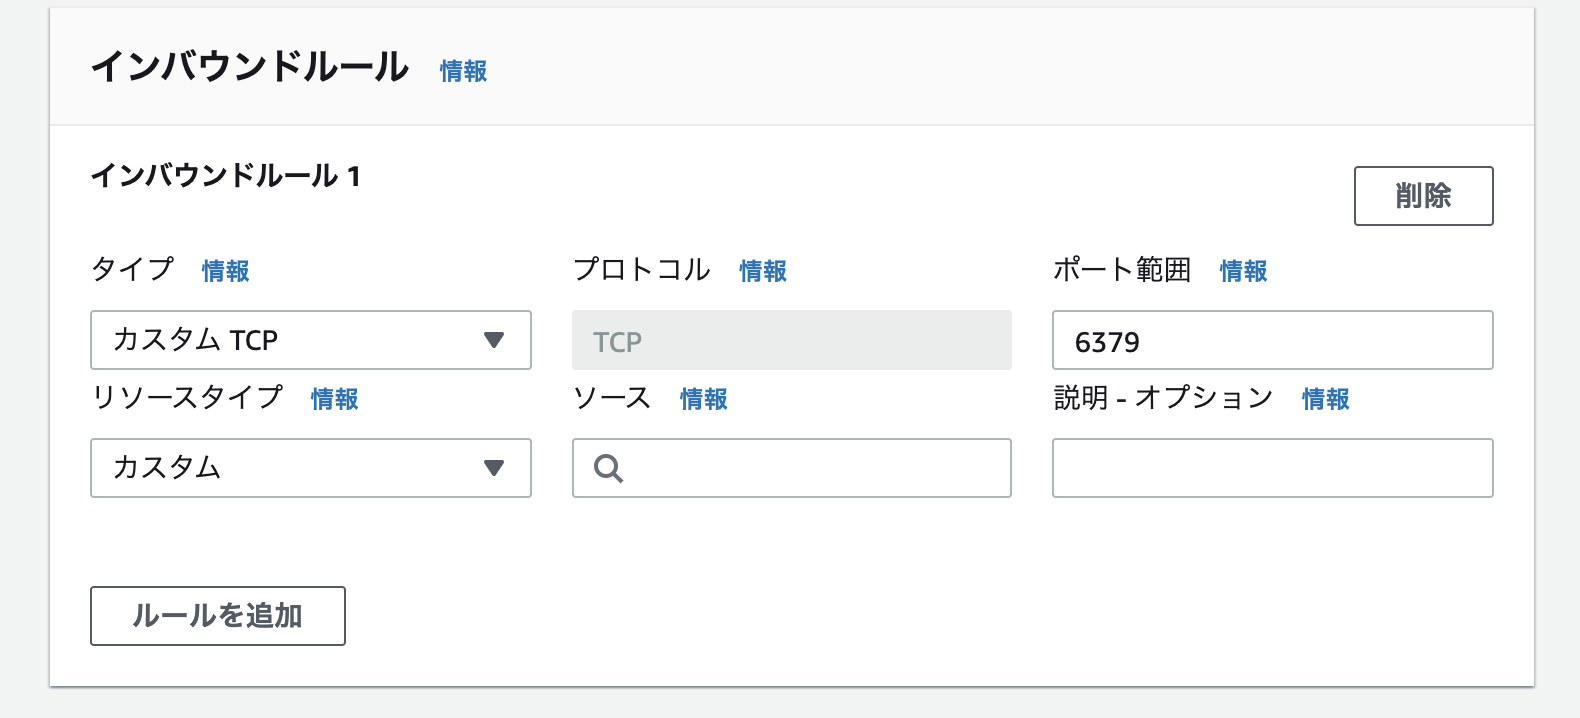
先にキャッシュサーバー用のセキュリティーグループを作成しておく。

port6379を開け、ソースにプライベートサブネットにおいたEC2のセキュリティグループを選択し保存
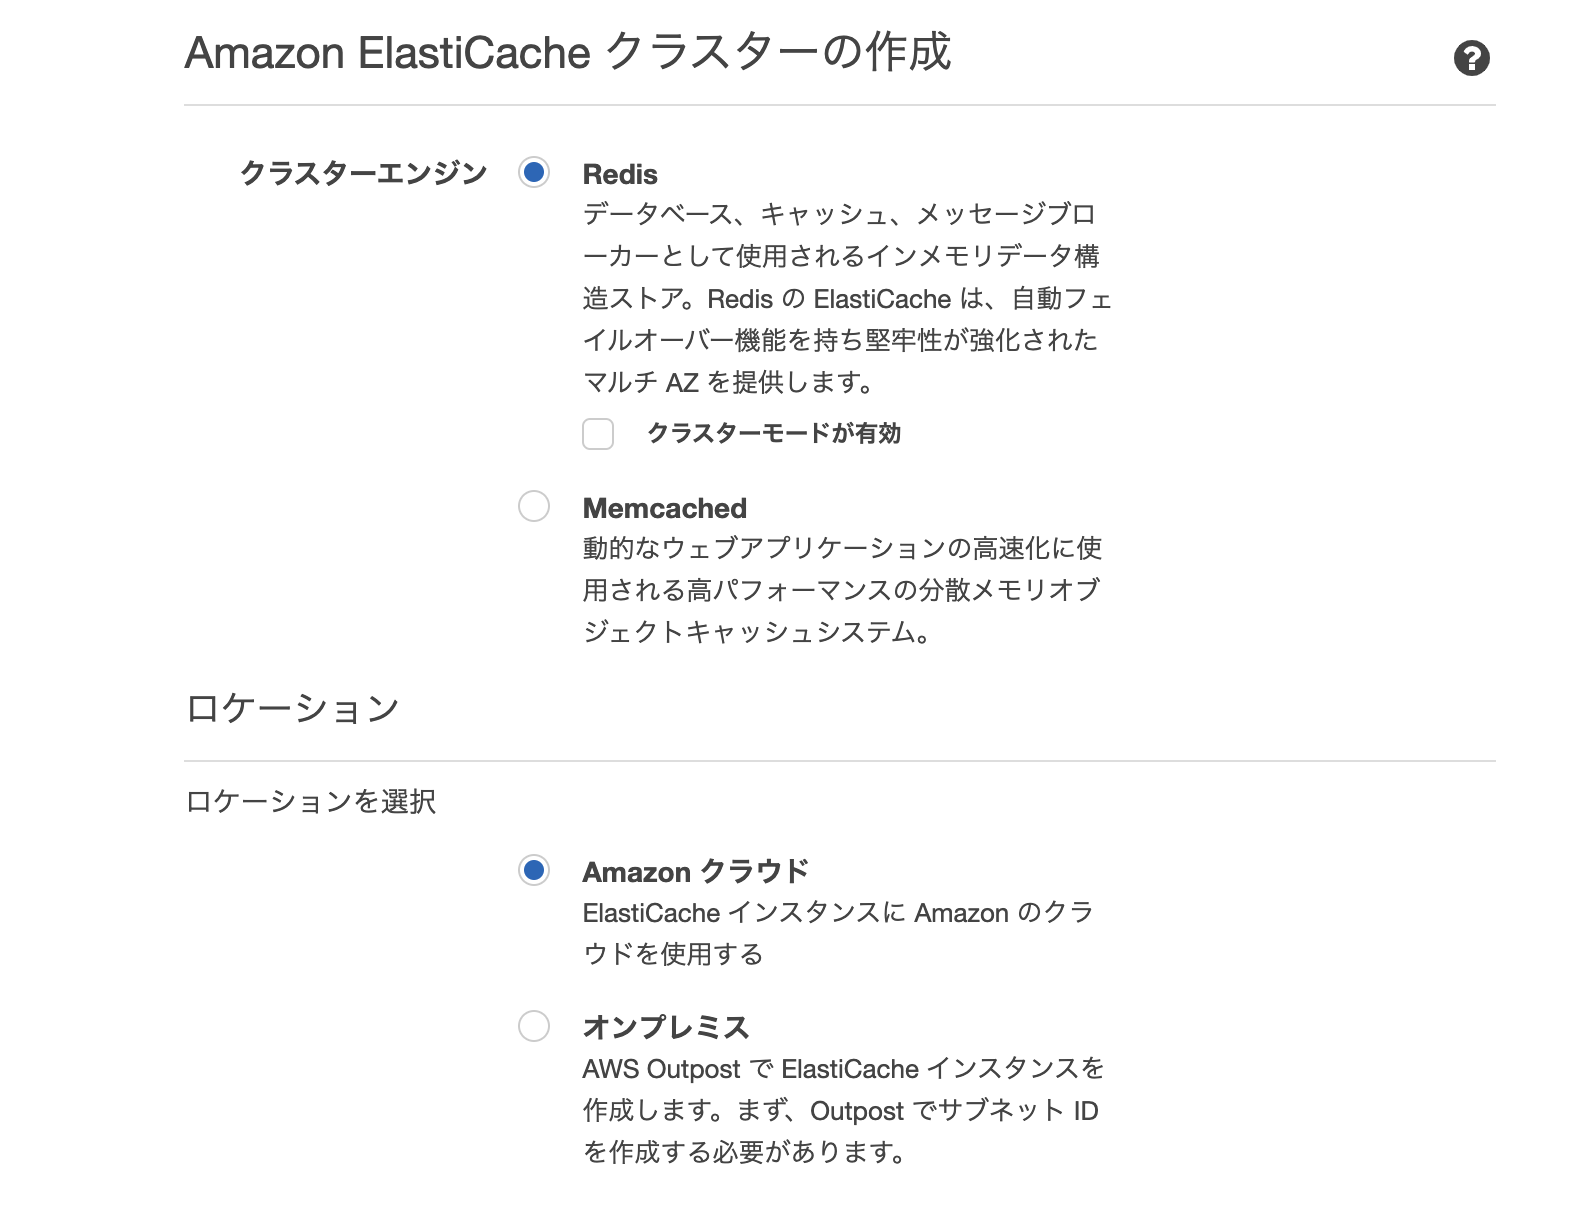
ElasticCacheのダッシュボードから作成をクリック

redisを選択。ロケーションはクラウド
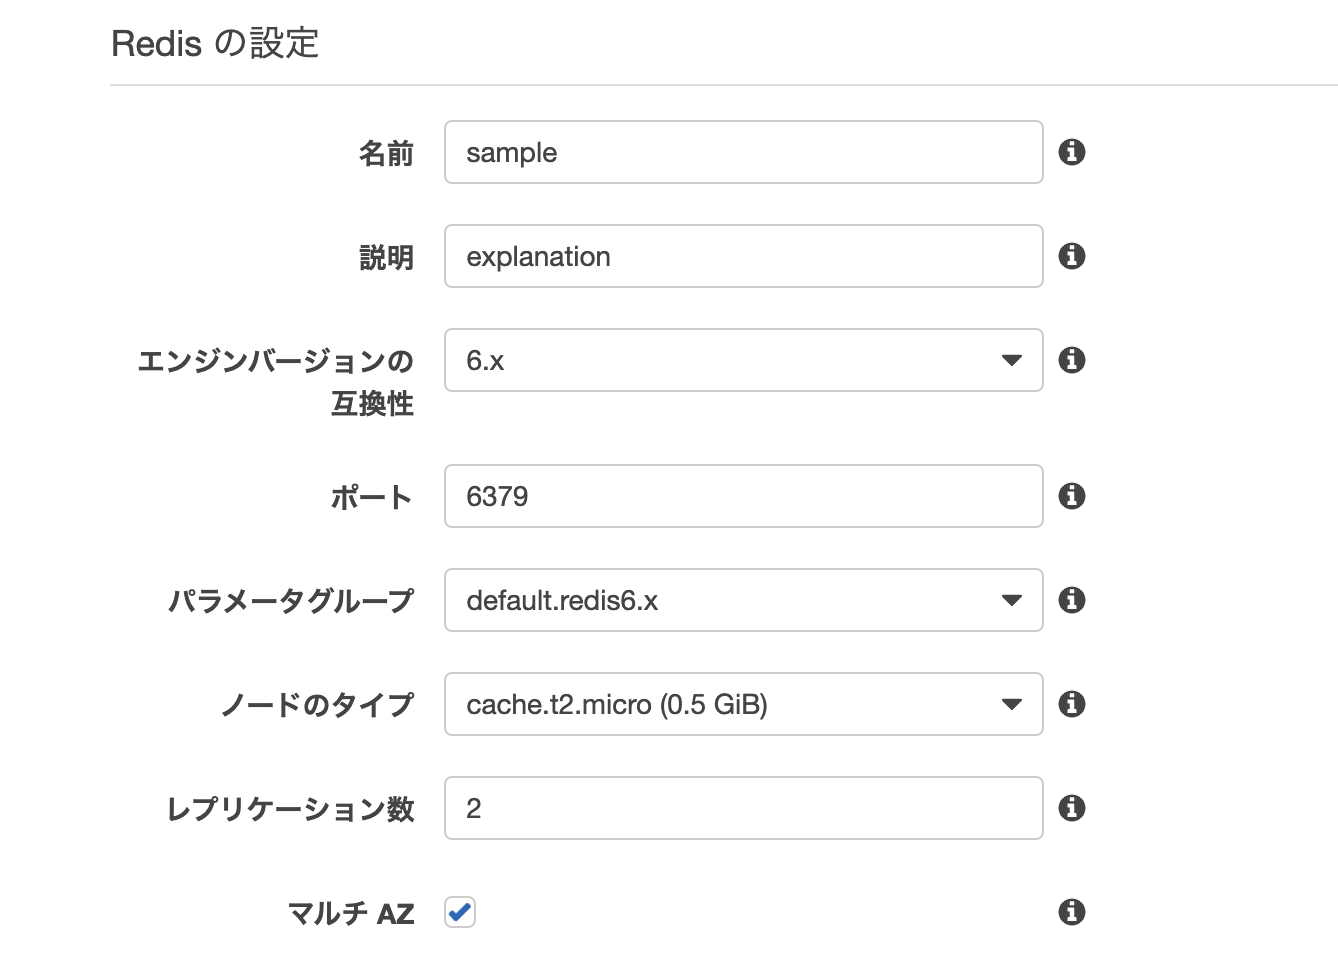
Redisの設定、エンジンバージョンの互換性とパラメータグループはデフォの設定
ノードのタイプは用途に合わせてサイズ選択。今回は極小。
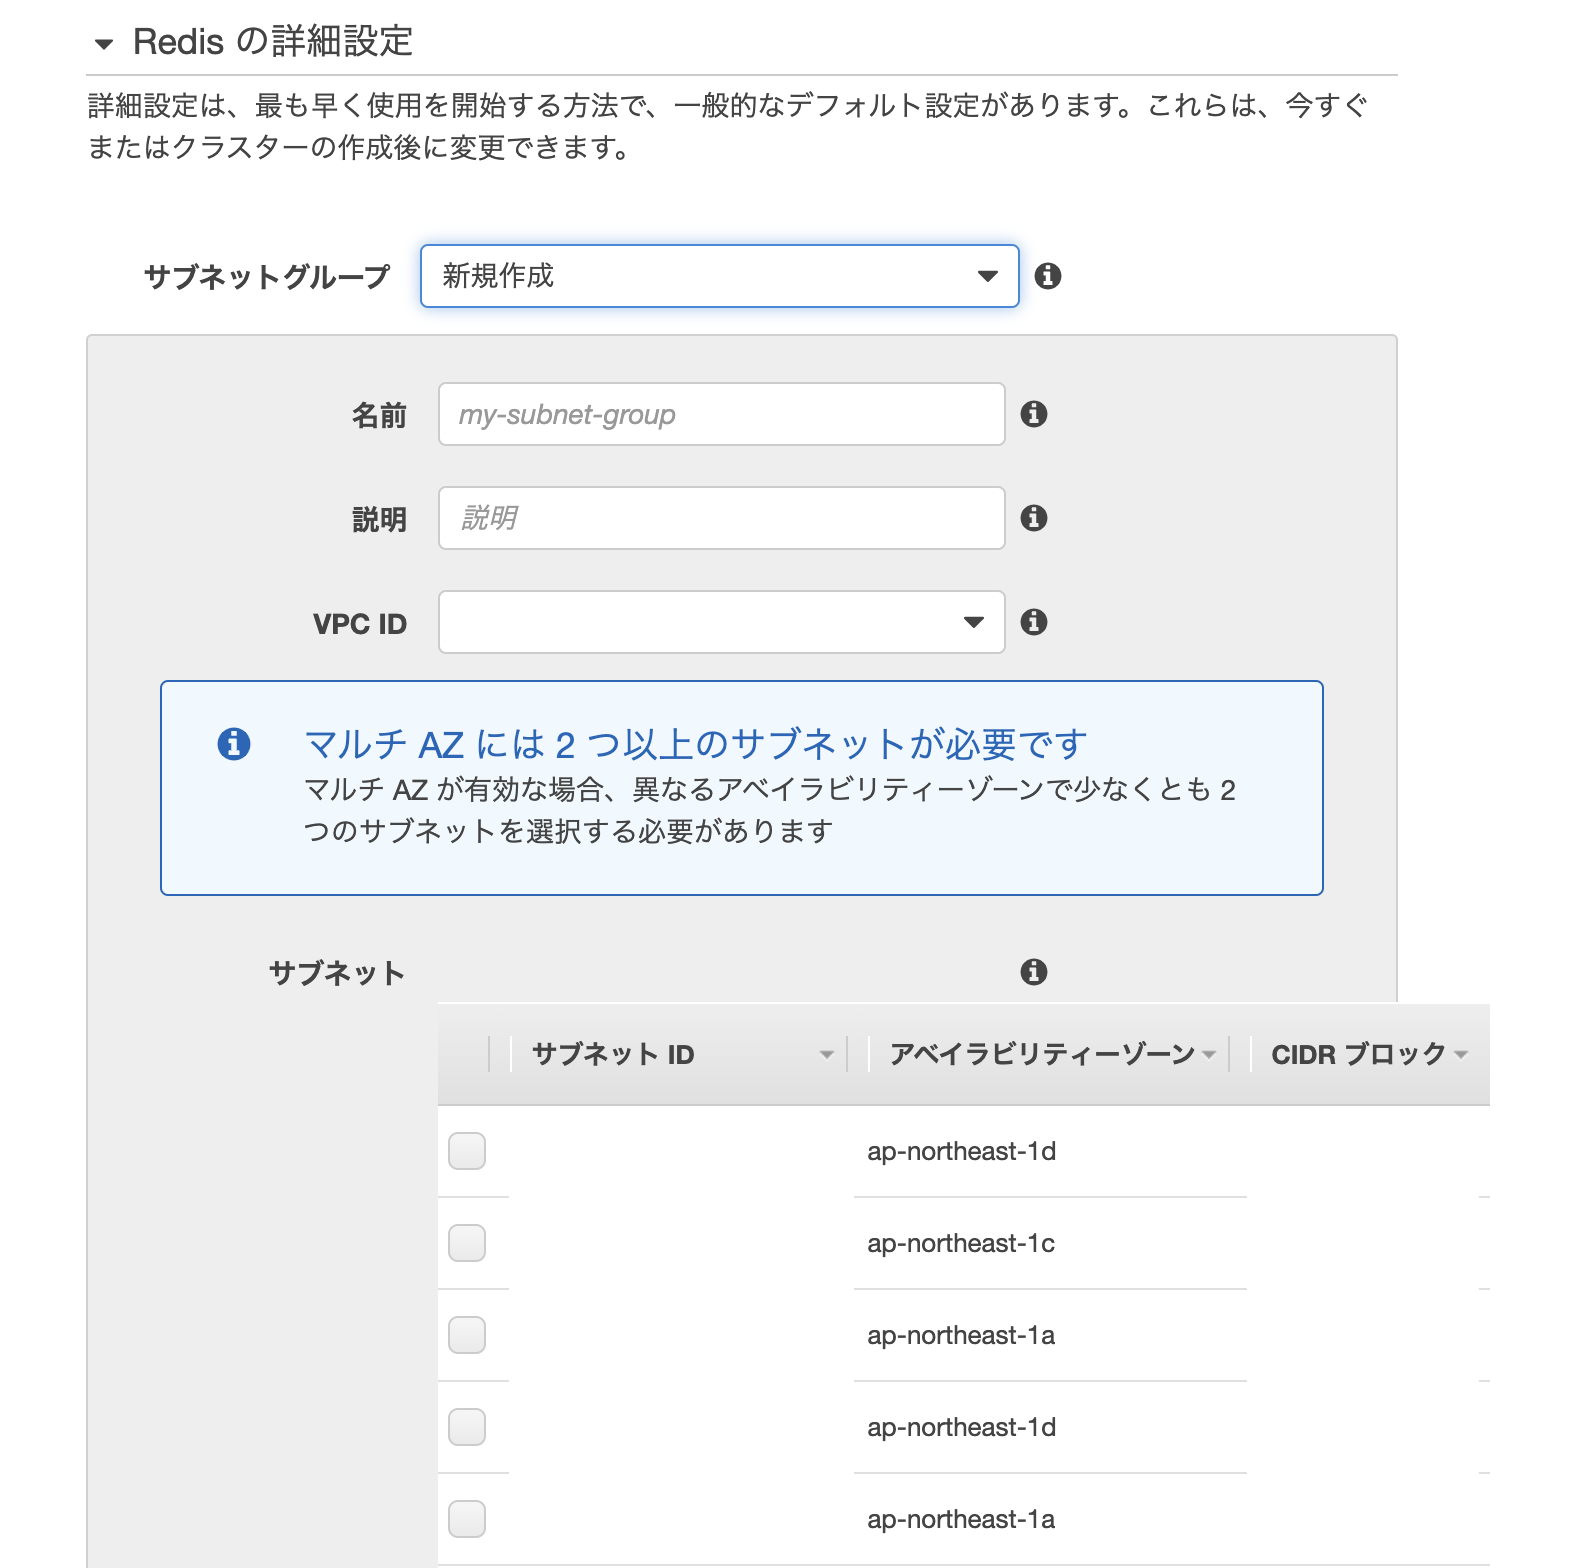
配置するVPCサブネットを選択しサブネットグループを作成
以下はとりあえずデフォ
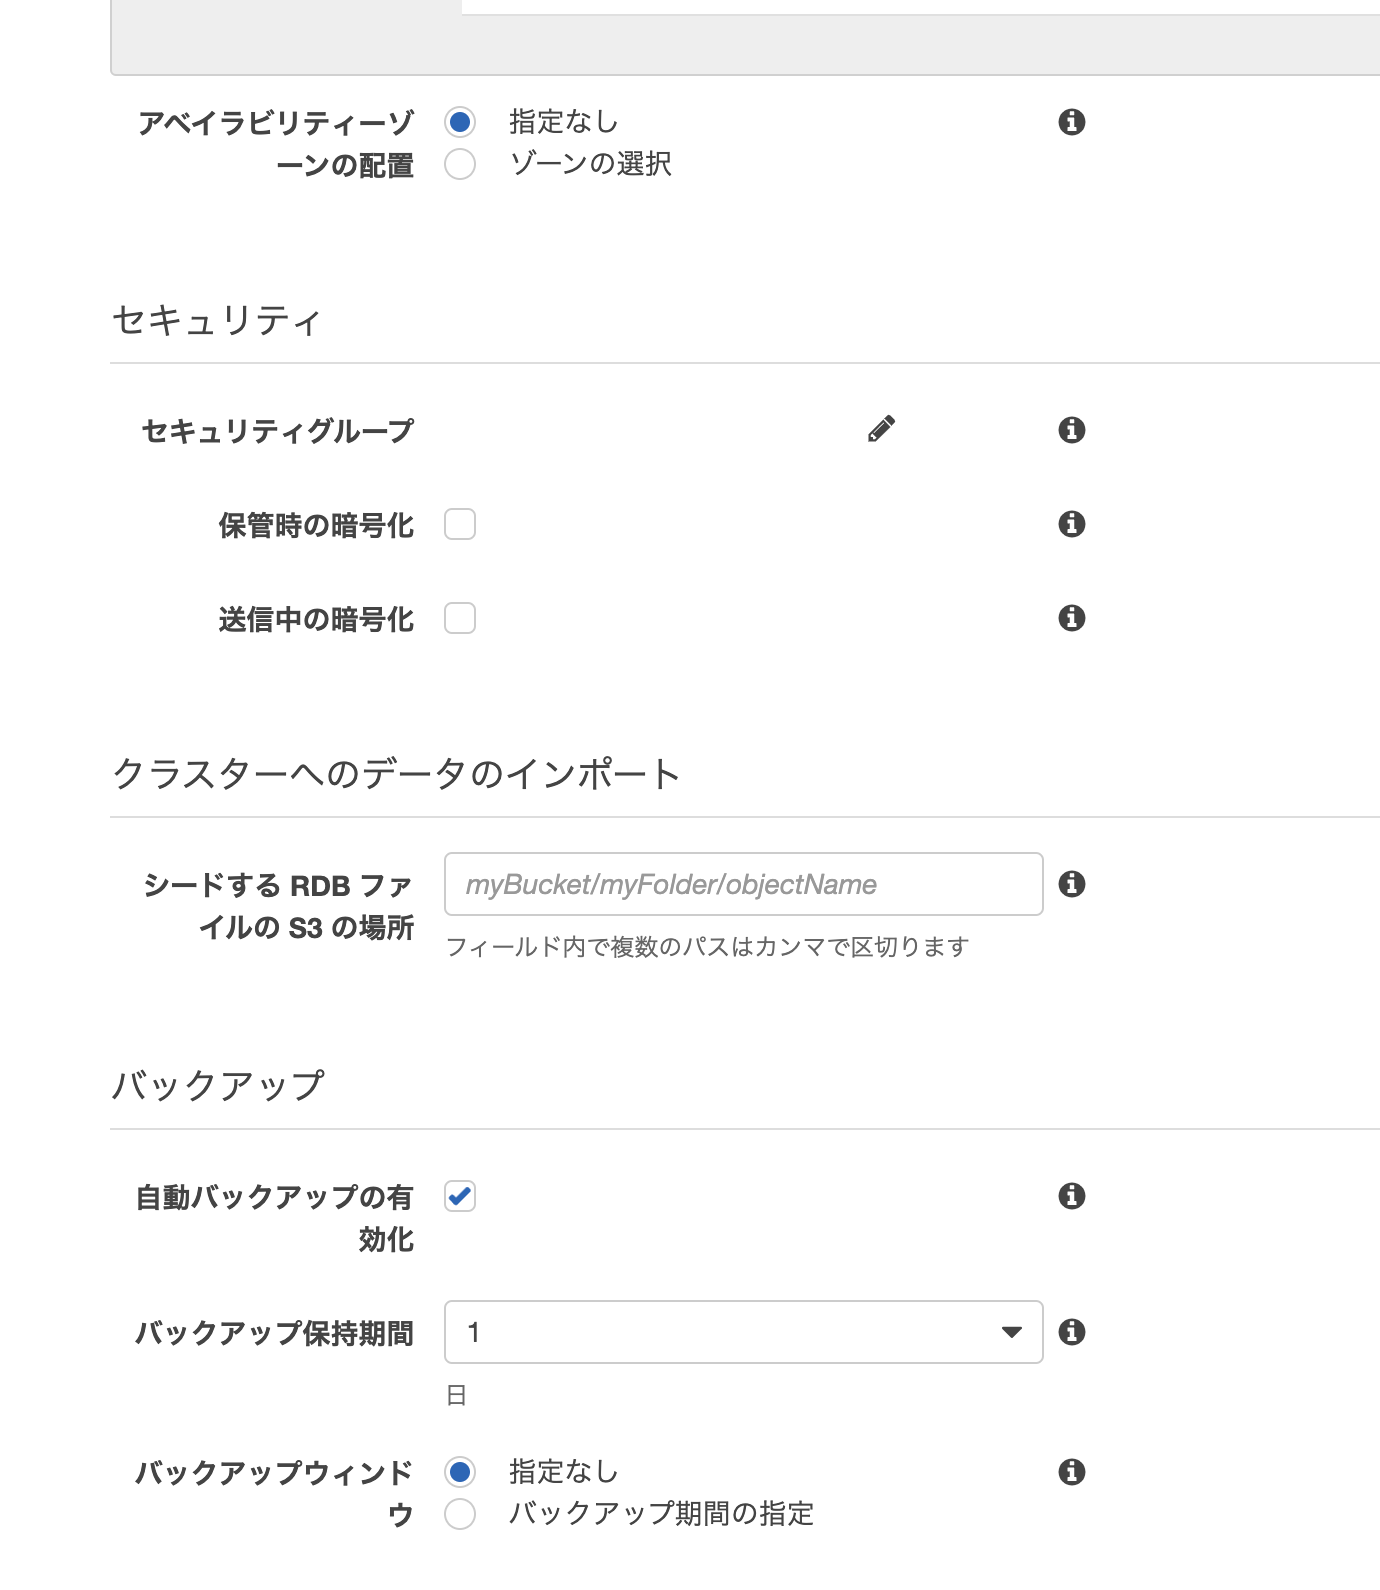
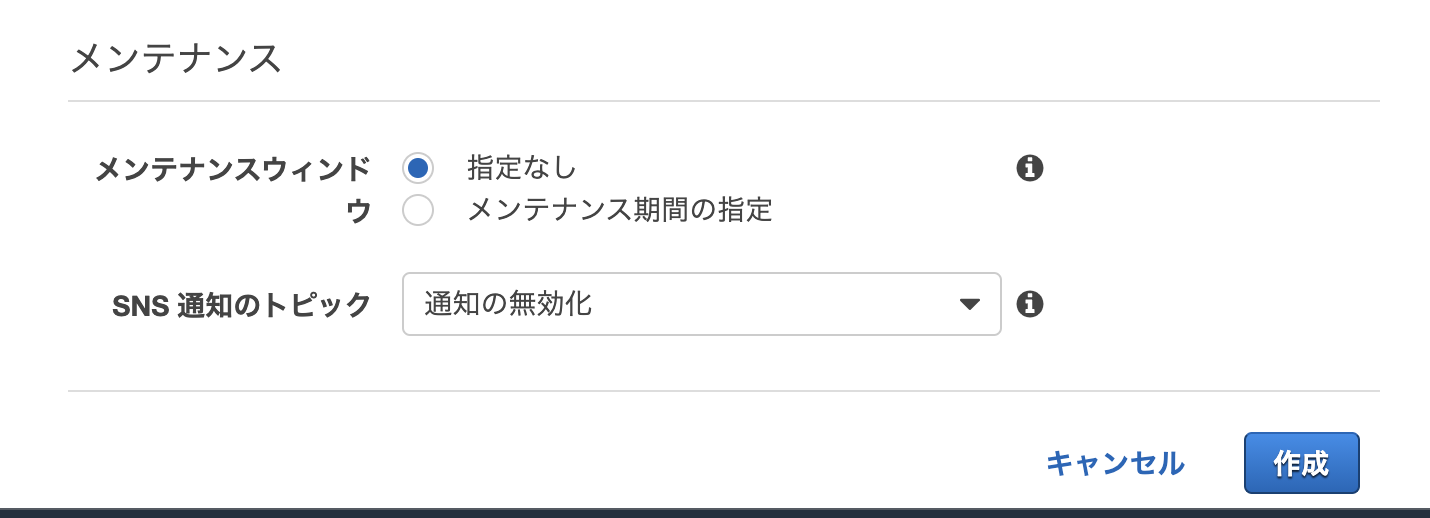
接続テスト
対象のEC2インスタンスに入り、ping
EC2
ping your-elastic-cache-host
環境変数設定
.env
REDIS_HOST=your-elastic-chache-host
REDIS_PASSWORD=null // 今回はAUTH設定していないため
REDIS_PORT=6379
laravelから接続テスト
適当なコマンドを作成して、操作可能かチェック
EC2
cd to/your/dir
php artisan make:command RedisConnectionSample
RedisConnectionSample.php
namespace App\Console\Commands;

use Illuminate\Console\Command;
use Illuminate\Support\Facades\Redis;
class RedisConnectionSample extends Command
{
    /**
     * The name and signature of the console command.
     *
     * @var string
     */
    protected $signature = 'connect:redis';

    /**
     * The console command description.
     *
     * @var string
     */
    protected $description = 'Command description';

    /**
     * Create a new command instance.
     *
     * @return void
     */
    public function __construct()
    {
        parent::__construct();
    }

    /**
     * Execute the console command.
     *
     * @return mixed
     */
    public function handle()
    {
        Redis::set('key', 'value');
        $data = Redis::get('key');
        var_dump($data);
    }
}
EC2
php artisan connect:redis
うまくいかない時には、phpredisかpredisが入っていないケースがあるので、その場合には入れる。amazon linux 2の場合にはextrasから入手可能。