ニアです、こんにちはー!
今回は、Window.Chromeクラスを利用したカスタムウィンドウ用のキャプションボタン(最小化・最大化・閉じるボタン)を、WindowクラスにあるResizeModeプロパティと連動させる方法を紹介していきます。

1. Window.ResizeModeとは
WindowクラスにあるResizeModeプロパティは、ウィンドウのサイズ変更の可否を設定するものであり、4種類のオプションがあります。
| ResizeMode | ウィンドウのサイズ変更 | 最小化・最大化ボタン | |
|---|---|---|---|
| NoResize | 不可 | 非表示 |  |
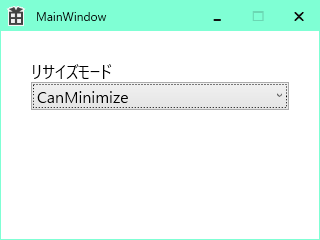
| CanMinimize | 不可 | 表示(但し、最大化ボタンは無効) | 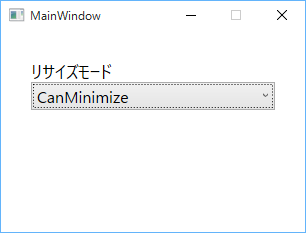 |
| CanResize | 可 | 表示 |  |
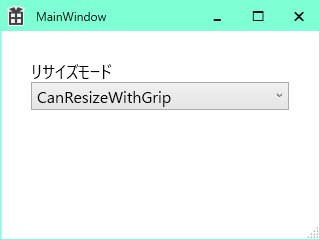
| CanResizeWithGrip | 可(右下にリサイズグリップが表示) | 表示 |  |
2. Window.ResizeModeとデータバインディング
ボタンの表示・非表示はVisibilityプロパティで、有効・無効はIsEnabledプロパティで設定することができます。すなわち、ResizeModeがNoResizeの時は、最小化・最大化ボタンのVisibilityをCollapsedに、CanMinimizeの時は、最大化ボタンのIsEnabledをfalseにすればよいのです。
ということで、ボタンのVisibility及びIsEnabledをウィンドウのResizeModeとデータバインディングをする方法で実装していきます。

2.1. Converterクラスの作成
まず、ResizeModeの値からVisibility及びIsEnabledの値に変換するConverterクラスを作成します。
| Converterクラス名 | ターゲット | 変換後の値 |
|---|---|---|
| ResizeCaptionButtonVisibilityConverter | Button.Visibility | ResizeModeがNoResizeの時はCollapsed、それ以外の時はVisible |
| MaximizeCaptionButtonEnableConverter | Button.IsEnabled | ResizeModeがCanMinimizeの時はfalse、それ以外の時はtrue |
using System;
using System.Windows;
using System.Windows.Data;
using System.Globalization;

namespace CustomCaption {

    /// <summary>
    ///     ウィンドウのリサイズモードに応じて最大化・最小化ボタンの表示・非表示を設定します。
    /// </summary>
    public sealed class ResizeCaptionButtonVisibilityConverter : IValueConverter {
        public object Convert( object value, Type targetType, object parameter, CultureInfo culture ) =>
            // ResizeModeがNoResizeの時はVisibility.Collapsedに、それ以外の時はVisibility.Visibleにします。
            value is ResizeMode && ( ResizeMode )value != ResizeMode.NoResize ? Visibility.Visible : Visibility.Collapsed;

        public object ConvertBack( object value, Type targetType, object parameter, CultureInfo culture ) => null;
    }

    /// <summary>
    ///     ウィンドウのリサイズモードに応じて最大化ボタンの有効・無効を設定します。
    /// </summary>
    public sealed class MaximizeCaptionButtonEnableConverter : IValueConverter {
        public object Convert( object value, Type targetType, object parameter, CultureInfo culture ) =>
            // ResizeModeがCanMinimizeの時はfalseに、それ以外の時はtrueにします。
            value is ResizeMode && ( ResizeMode )value != ResizeMode.CanMinimize;

        public object ConvertBack( object value, Type targetType, object parameter, CultureInfo culture ) => null;
    }

    // ...

}
※ボタンからWindow.ResizeModeへの設定はしないので、ConvertBackは使用しません。
2.2. 最小化・最大化ボタンにデータバインディング
次に、XAMLで最小化・最大化ボタンとWindow.ResizeModeを先ほど作成したConverterクラスを使ってバインディングします。
先ほど作成したConverterクラスをWindow.Resoursesに登録します。
<!-- Windowに名前空間 xmlns:local="clr-namespace:CustomCaption" が定義されているとします。 -->
<Window.Resources>
        <!-- Converter -->
        <local:MaximizeCaptionButtonEnableConverter x:Key="MaximizeCaptionButtonEnableConverterKey"/>
        <local:ResizeCaptionButtonVisibilityConverter x:Key="ResizeCaptionButtonVisibilityConverterKey"/>
</Window.Resources>
最小化ボタンのVisibilityをResizeModeとバインディングし、ConverterにはResizeCaptionButtonVisibilityConverterを、ElementNameにはウィンドウの名前(MainWindow1)を設定します。
<!-- Windowの名前(x:Name)が MainWindow1 であるとします。 -->
<Button Content="0"
        Style="{StaticResource CustomCaptionButtonKey}"
        Visibility="{Binding ResizeMode, Converter={StaticResource ResizeCaptionButtonVisibilityConverterKey}, ElementName=MainWindow1}"
        ToolTip="最小化"
        Command="{x:Static SystemCommands.MinimizeWindowCommand}" />
最小化ボタンでは、Visibility及びResizeModeとバインディングし、ElementNameにはウィンドウの名前(MainWindow1)を設定します。Converterには、Visibility側はResizeCaptionButtonVisibilityConverterを、IsEnabled側はMaximizeCaptionButtonEnableConverterを設定します。
<!-- Windowの名前(x:Name)が MainWindow1 であるとします。 -->
<Button Content="{Binding WindowState,Converter={StaticResource MaximizeCaptionButtonContentConverterKey}, ElementName=MainWindow1}"
        Style="{StaticResource CustomCaptionButtonKey}"
        IsEnabled="{Binding ResizeMode, Converter={StaticResource MaximizeCaptionButtonEnableConverterKey}, ElementName=MainWindow1}"
        Visibility="{Binding ResizeMode, Converter={StaticResource ResizeCaptionButtonVisibilityConverterKey}, ElementName=MainWindow1}"
        ToolTip="{Binding WindowState, Converter={StaticResource MaximizeCaptionButtonTooltipConverter}, ElementName=MainWindow1}"
        Command="{x:Static SystemCommands.MaximizeWindowCommand}"/>
これで、Window.ResizeModeと連動するキャプションボタンの出来上がりです。
| Window.ResizeMode | 通常のウィンドウ | カスタムウィンドウ |
|---|---|---|
| NoResize | |
 |
| CanMinimize | |
 |
| CanResize | |
 |
| CanResizeWithGrip | |
 |
3. おわりに
今回作成したカスタムウィンドウのプログラムは、Gistにアップしておきます。
https://gist.github.com/Nia-TN1012/e9207e7fe02d046b3d4d
そのプログラムでは、今回扱った「キャプションボタンをWindow.ResizeModeと連動させる方法」の他に、最大化ボタンの表示文字列とツールチップをウィンドウの最大化状態と連動させたり、タイトルバーの色をウィンドウのアクティブ状態と連動させたりしています。いずれも、Converterクラスを使ったデータバインディングで実装することができます。
それでは、See you next time!
追記(2016/03/25)
Gistにアップしていたプログラムですが、キャプションボタンのスタイルを設定しているリソースディクショナリーのファイルをアップし忘れていましたので、追加しました。
ご不便をおかけしたことをお詫び申し上げます。