はじめに
TableViewにCellを追加する際、アニメーションをつけて挿入したかったので、そのやり方をメモ。
実行環境
swift 5.1
xcode 11.1
ポイント
以下のコードをCellを追加する際に記述します
self.tableView.beginUpdates()
self.tableView.insertRows(at: [IndexPath(row: 0, section: 0)],
                          with: .automatic)
self.tableView.endUpdates()
beginUpdatesメソッド, endUpdatesメソッド
Apple Developerのサイトを見る限り、アニメーションをつけてCellを挿入、削除をする場合に必要なメソッドだそうです。
[beginUpdates() - UITableView | Apple Developer Documentation] (https://developer.apple.com/documentation/uikit/uitableview/1614908-beginupdates "beginUpdates() - UITableView | Apple Developer Documentation")
endUpdates() - UITableView | Apple Developer Documentation
この2つのメソッドの間に、Cellを追加するためのinsertRows()メソッドを記述します。
insertRows()メソッドの第一引数には追加するセルのIndexPathを配列形式で渡します。
第二引数には、アニメーションの種類を入れます。
以下のサイトが参考になるかと思います。
https://developer.apple.com/documentation/uikit/uitableview/rowanimation
これで、Cell追加時にアニメーション付きで挿入されます。
実行結果
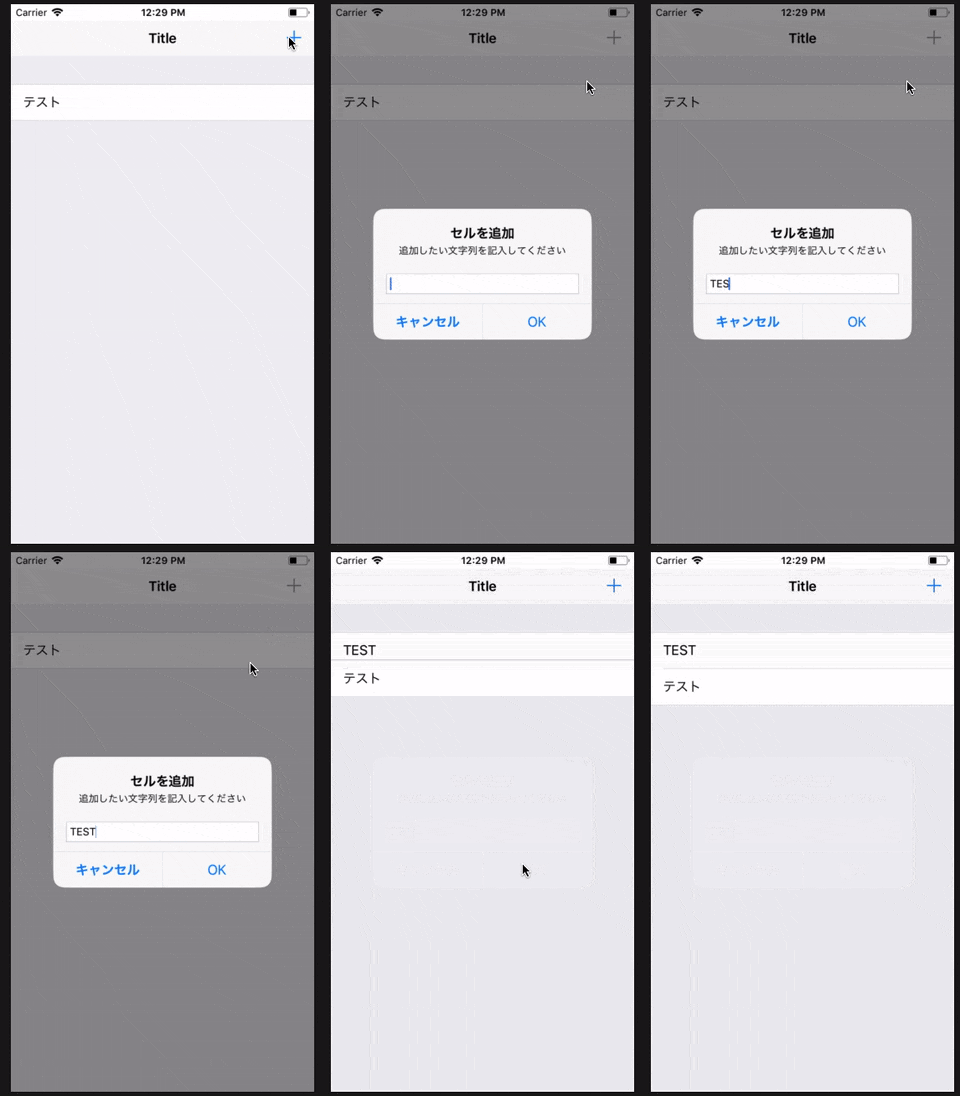
実際に、先ほどのコードを使ってTableViewにCellを追加してみます。
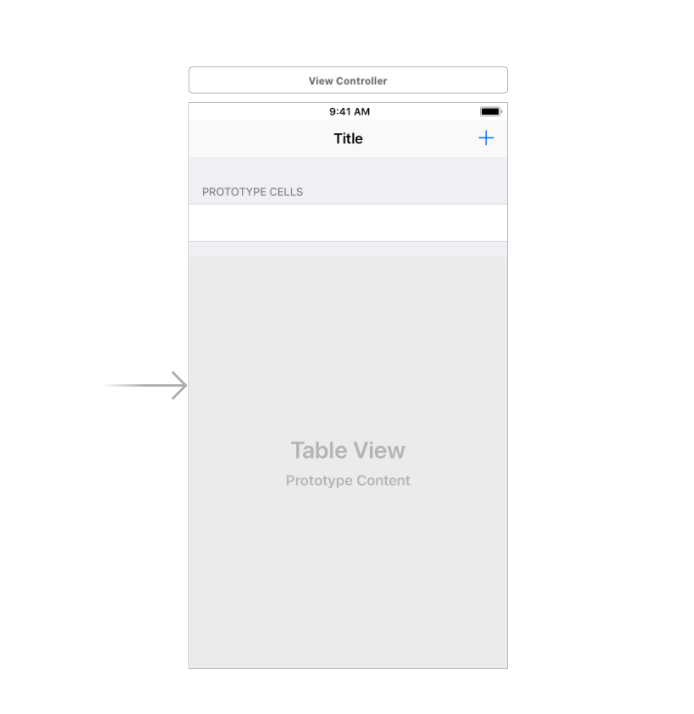
全体のコードと画面配置はこのような感じです。
全体コード
import UIKit

class ViewController: UIViewController, UITableViewDataSource, UITableViewDelegate {

    // テーブルビュー
    @IBOutlet weak var tableView: UITableView!
    // セルに表示する文字を格納する配列
    var data:[String] = []


    override func viewDidLoad() {
        super.viewDidLoad()
        // テーブルビューのdataSourceとdelegateを設定
        tableView.dataSource = self
        tableView.delegate = self

    }


    // テーブルビューのセル数を設定
    func tableView(_ tableView: UITableView, numberOfRowsInSection section: Int) -> Int {
        return data.count
    }

    // テーブルビューに表示するセルを設定
    func tableView(_ tableView: UITableView, cellForRowAt indexPath: IndexPath) -> UITableViewCell {
        let cell = tableView.dequeueReusableCell(withIdentifier: "cell")!
        cell.textLabel?.text = data[indexPath.row]
        return cell
    }


    // "+"ボタンイベント
    @IBAction func onAdd(_ sender: Any) {

        let alert: UIAlertController = UIAlertController(title: "セルを追加",
                                                         message: "追加したい文字列を記入してください",
                                                         preferredStyle: UIAlertController.Style.alert)
        alert.addTextField(configurationHandler: nil)
        let okAction = UIAlertAction(title: "OK",
                                     style: UIAlertAction.Style.default,
                                     handler:{
                                        (action: UIAlertAction) -> Void in
                                        self.data.insert(alert.textFields!.first!.text!, at: 0)
                                        // <ポイント>
                                        self.tableView.beginUpdates()
                                        self.tableView.insertRows(at: [IndexPath(row: 0, section: 0)],
                                                                  with: .automatic)
                                        self.tableView.endUpdates()
                                        // </ポイント>
                                        })
        let cancelAction = UIAlertAction(title: "キャンセル",
                                         style: UIAlertAction.Style.cancel,
                                         handler: nil)
        alert.addAction(okAction)
        alert.addAction(cancelAction)
        self.present(alert, animated: true, completion: nil)

    }
}
画面配置
gif形式なので少しカクついてますが、しっかりアニメーションが入ってるのが確認できます。
