概要
ReactとTailwind CSS環境の構築方法は割とネットに溢れてましたが、中々Tailwind CSSをリアルタイム(ホットリロード)で読み込む環境を構築するのに苦戦しましたのでこちらに投稿させていただきます。
開発環境
| 項目 | バージョン |
|---|---|
| OS | macOS Ventura 13.1 |
| プロセッサ | 1.6 GHz デュアルコアIntel Core i5 |
| Node.js | 18.13.0 |
| npm | 9.4.0 |
※Node.jsのインストール方法は省略します。
React(Typescript)&Tailwind CSS環境構築方法
React(Typescript)プロジェクトの作成
creat-react-appの実行
ターミナルで以下のコマンドをプロジェクトのディレクトリを作成したいディレクトリで実行してください。"sample_react_app"は作成したいプロジェクト名にしてください。
npx create-react-app sample_react_app --template typescript
Reactアプリの実行
正常にReactプロジェクトが作成されたらプロジェクトのディレクトリにcdし"npm start"を実行してください。
cd sample_react_app
npm start
正常に実行されれば以下がターミナルに表示されます。
Compiled successfully!

You can now view sample_react_app in the browser.

  Local:            http://localhost:3000
  On Your Network:  http://192.168.128.195:3000

Note that the development build is not optimized.
To create a production build, use npm run build.

webpack compiled successfully
No issues found.
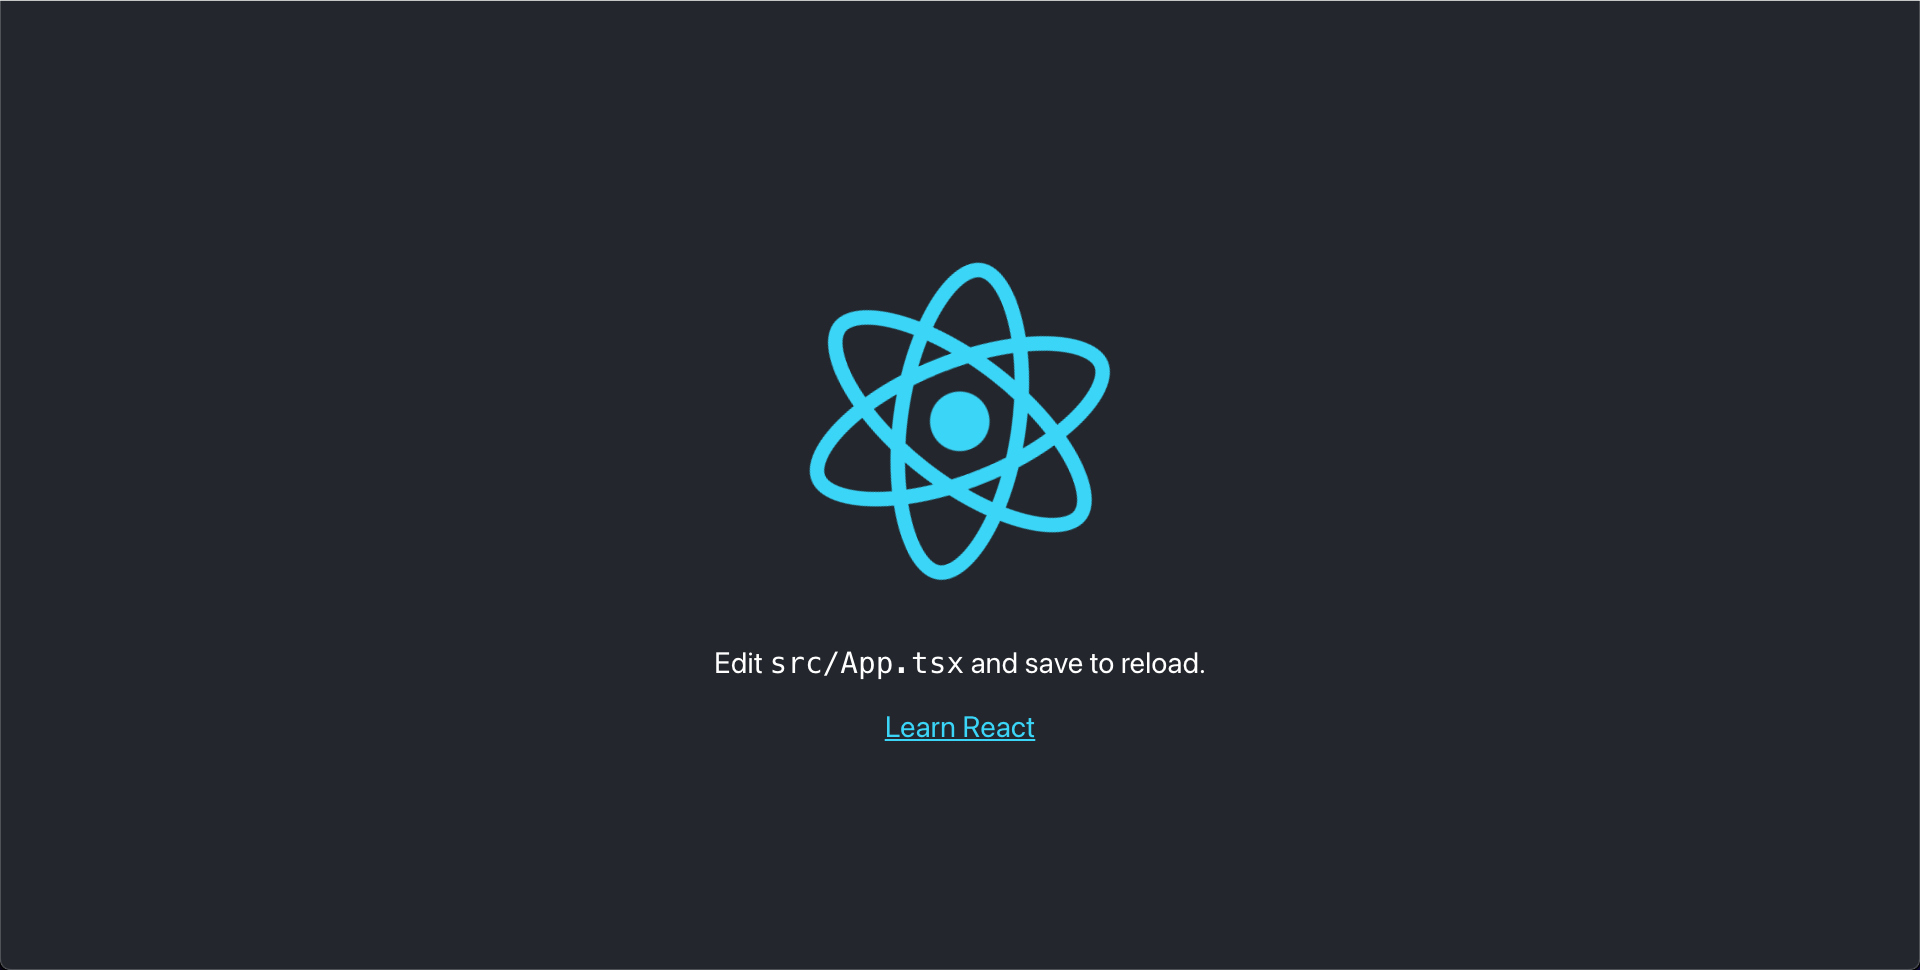
またブラウザで以下の画面が表示されるはずです。
表示されなければブラウザで
http://localhost:3000
にアクセスしてください。
確認が終わったら一旦Ctr + Cで開発環境を停止してください。
Tailwind CSS のインストール
Tailwind CSSのnpmインストール
以下のコマンドを実行してTailwind CSSと、Tailwind CSSを使用するために必要なライブラリをnpmインストールします。
npm install -D tailwindcss postcss postcss-cli autoprefixer
- postcss
CSSツールを作成するためのフレームワーク。 - postcss-cli
postcssのCLIツール - autoprefixer
自動でベンダープレフィックス(※)をつけてくれるライブラリ。
※ ベンダープレフィックス:ブラウザ間のCSS非互換を補完するための接頭辞。
Tailwind CSSの構成ファイルの作成
以下のコマンドを実行し、Tailwind CSSの構成ファイルを作成します。
npx tailwindcss init -p
Tailwind CSSの構成ファイルの編集
プロジェクトのルートディレクトリに"tailwind.config.js"というファイルと"postcss.config.js"というファイルが作成されるので、"tailwind.config.js"を以下のように編集します。
/** @type {import('tailwindcss').Config} */
module.exports = {
- content: [],
+ content: [
+     "./src/**/*.{js,jsx,ts,tsx}",
+ ],
  theme: {
    extend: {},
  },
  plugins: [],
}
index.cssの編集
index.cssを空にします。
- body {
-   margin: 0;
-   font-family: -apple-system, BlinkMacSystemFont, 'Segoe UI', 'Roboto', 'Oxygen',
-     'Ubuntu', 'Cantarell', 'Fira Sans', 'Droid Sans', 'Helvetica Neue',
-     sans-serif;
-   -webkit-font-smoothing: antialiased;
-   -moz-osx-font-smoothing: grayscale;
- }
-
- code {
-   font-family: source-code-pro, Menlo, Monaco, Consolas, 'Courier New',
-     monospace;
- }
index.tailwind.cssの作成
先程のindex.cssと同じディレクトリに"index.tailwind.css"というファイルを作成します。こちらのファイル名は後程のpackage.jsonの設定の中で出てくるのでその中で平仄を合わせていただければなんでも良いのですが、特にこだわりがなければこのファイル名にしてください。中身は以下を記載します。
@tailwind base;
@tailwind components;
@tailwind utilities;
ホットリロードするための準備
npm-run-allのnpmインストール
Reactの実行コマンドとpostcssのコマンドをパラレルで実行する必要があるため、npmコマンドをパラレルで実行できるnpm-run-allというライブラリをインストールします。
npm install -D npm-run-all
package.jsonの編集
package.jsonのスクリプトを以下のように編集します。
〜 省略 〜
  "scripts": {
+   "watch:tailwind": "postcss -w src/index.tailwind.css -o src/index.css",
    "start": "react-scripts start",
+   "dev": "run-p watch:tailwind start",
+   "build:tailwind": "postcss src/index.tailwind.css -o src/index.css",
+   "prebuild": "npm run build:tailwind",
    "build": "react-scripts build",
    "test": "react-scripts test",
    "eject": "react-scripts eject"
  },
〜 省略 〜
"watch:tailwind": "postcss -w src/index.tailwind.css -o src/index.css",により、src/index.tailwind.cssの変更をモニタリングして、随時src/index.cssに反映してくれます。そしてその"watch:tailwind"のコマンドと、通常のReact実行コマンドである"start"を"dev"の中でパラレルに実行することで、Tailwind CSSとReactアプリの両方がホットリロードな状態で開発することができます。
ビルドは"prebuild"でTailwind CSSをコンパイルして、その後"build"でReactアプリをコンパイルする流れで設定しています。
開発環境起動
Tailwind CSS構文の追加
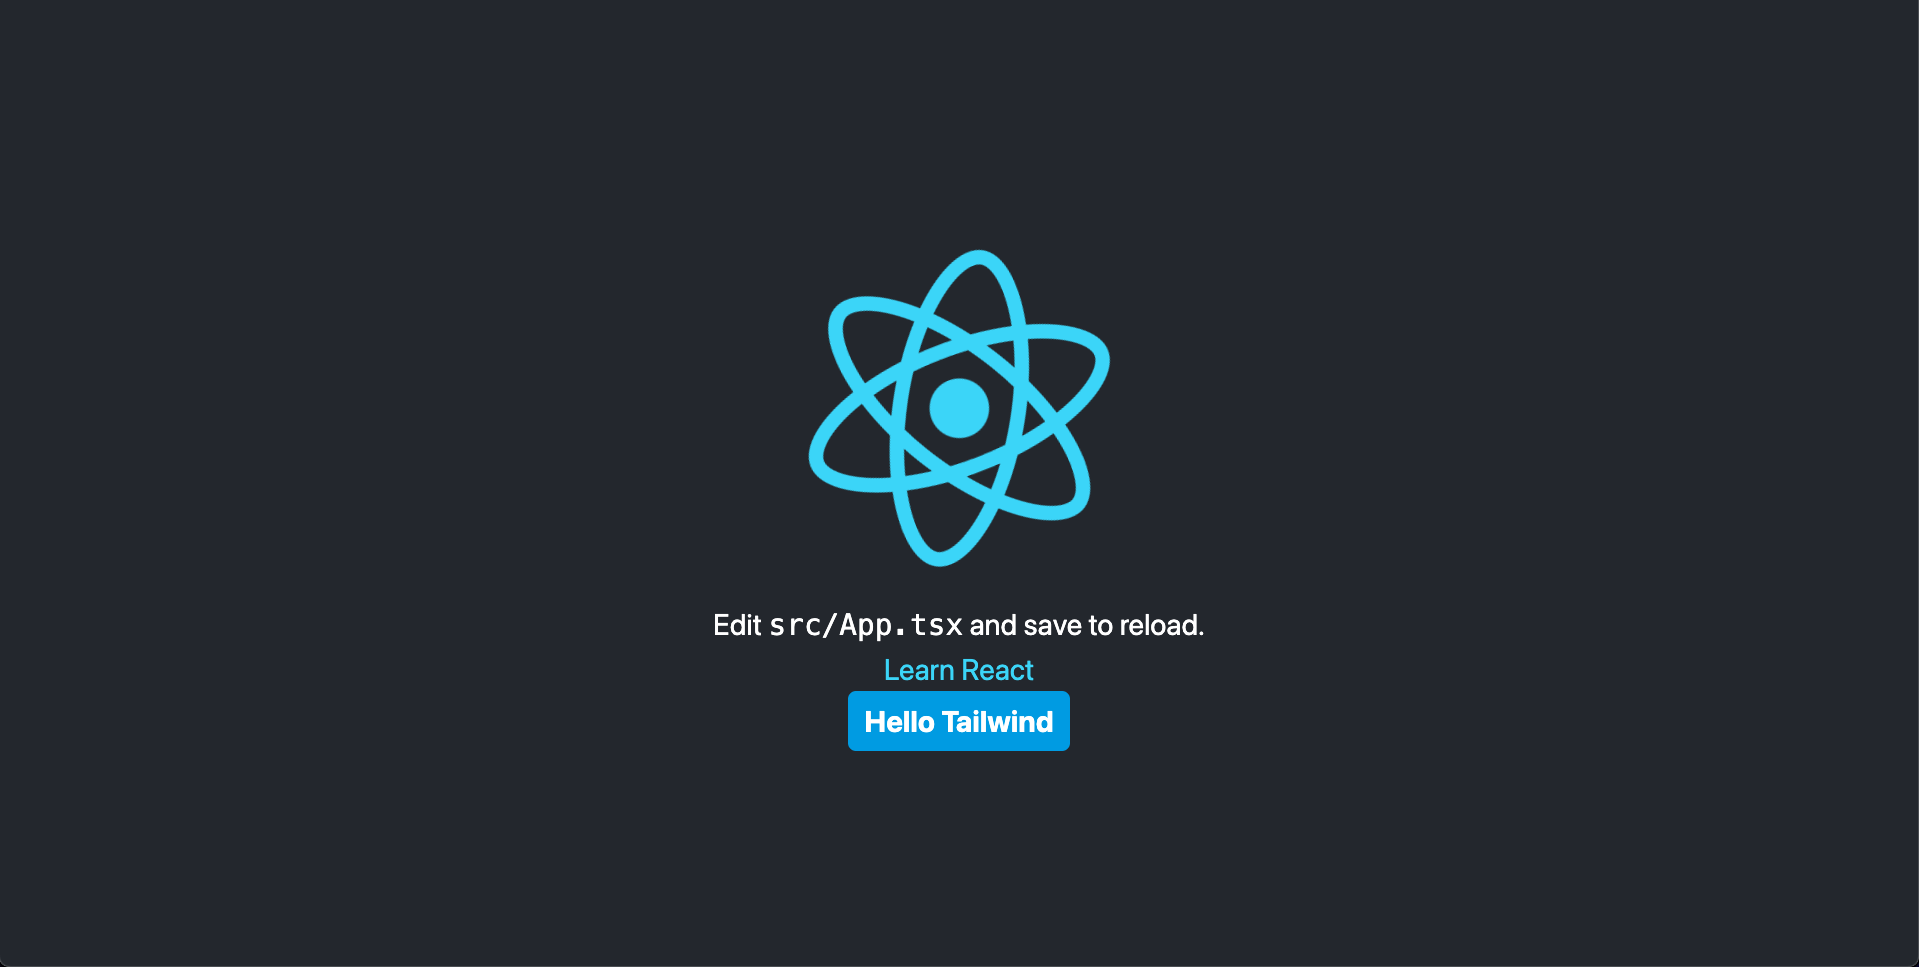
試しにtsxファイルにTailwind CSSの構文を入れて、Tailwind CSS環境ができているか確認します。
import React from 'react';
import logo from './logo.svg';
import './App.css';

function App() {
  return (
    <div className="App">
      <header className="App-header">
        <img src={logo} className="App-logo" alt="logo" />
        <p>
          Edit <code>src/App.tsx</code> and save to reload.
        </p>
        <a
          className="App-link"
          href="https://reactjs.org"
          target="_blank"
          rel="noopener noreferrer"
        >
          Learn React
        </a>
+       <div className="bg-sky-500 rounded-lg text-white font-bold py-2 px-4">
+         Hello Tailwind
+       </div>
      </header>
    </div>
  );
}

export default App;
className内の"bg-sky-500 rounded-lg text-white font-bold py-2 px-4"がTailwind CSS構文です。
開発環境起動コマンドの再実行
以下のコマンドを実行し、React+Tailwind CSSの開発環境起動を再実行します。
npm run dev
起動したブラウザを確認すると、App.tsxに追加したTailwind CSS構文が反映していることが確認できます。
Tailwind CSSの変更がホットリロードで反映するかの確認
Reactアプリを実行したまま、Tailwind CSSの構文を変更して、リアルタイムでブラウザに反映するかの確認を行います。
先程編集したApp.tsxに以下の変更を加えて保存し、ブラウザを確認します。
import React from 'react';
import logo from './logo.svg';
import './App.css';

function App() {
  return (
    <div className="App">
      <header className="App-header">
        <img src={logo} className="App-logo" alt="logo" />
        <p>
          Edit <code>src/App.tsx</code> and save to reload.
        </p>
        <a
          className="App-link"
          href="https://reactjs.org"
          target="_blank"
          rel="noopener noreferrer"
        >
          Learn React
        </a>
-       <div className="bg-sky-500 rounded-lg text-white font-bold py-2 px-4">
+       <div className="bg-yellow-500 rounded-lg text-white font-bold py-2 px-4">
          Hello Tailwind
        </div>
      </header>
    </div>
  );
}

export default App;
そうするとTailwind CSSの変更が即座に開発中のブラウザに反映していることが確認できます。

これでReact(Typescript)&Tailwind CSSをホットリロードで開発できる環境が構築できました。
Tailwind CSSの構文は公式リファレンスがあるので以下をご参照ください。
https://tailwindcss.com/docs/installation
サンプルリポジトリ
GitHubに公開してます。
sample_react_app
参考元
参考にさせていただきました。ありがとうございます。
【備忘録】React-typescriptとTailwindcssの環境構築方法
Tailwind CSS + Create React App の環境構築